Frigidaire FRWW2432AV User manual

Category
Drink coolers
Type
User manual

This manual is also suitable for

TABLE OF CONTENTS
www.frigidaire.com USA 1-800-374-4432 www.frigidaire.ca Canada 1-800-265-8352
All about the
Use & Care
of your Wine Cooler
A18967801 (November 2019)
Important Safety Information ......................2
Features ....................................................4
Installation ................................................5
Controls and Settings .................................6
Storage Features ........................................8
Energy Saving Tips .....................................9
Care and Cleaning ....................................10
Troubleshooting .......................................11
Limited Warranty ...................................... 14
2
IMPORTANT SAFETY INFORMATION
WARNING
WARNING indicates a potentially hazardous
situation which, if not avoided, could result
in death or serious injury.
IMPORTANT
IMPORTANT indicates installation, operation
or maintenance information which is
important but not hazard-related.
DANGER
DANGER indicates an imminently hazardous
situation which, if not avoided, will result in
death or serious injury.
CAUTION
CAUTION indicates a potentially hazardous
situation which, if not avoided, may result in
minor or moderate injury.
Denitions
This is the safety alert symbol. It is used to
alert you to potential personal injury hazards.
Obey all safety messages that follow this
symbol to avoid possible injury or death.
WARNING
Please read all instructions before using this
wine cooler.
Read and Save These Instructions
This Owner’s Guide provides specic operating
instructions for your model. Use your Wine Cooler
only as instructed in this guide. These instructions
are not meant to cover every possible condition
and situation that may occur. Common sense
and caution must be practiced when installing,
operating, and maintaining any appliance.
Record Your Model and Serial Numbers
Record the model and serial numbers in the
space provided below. The serial plate is
located on the upper left of the interior liner or
on the back of the unit.
Model Number:
Serial Number:
Purchase Date:
WARNING
For Your Safety
Do not store or use gasoline, or other
ammable vapors and liquids in the vicinity
of this or any other appliance. Read product
labels for ammability and other warnings.
DANGER
DANGER Risk of re or explosion.
Flammable refrigerant used. Do not use
mechanical devices to defrost refrigerator.
Do not puncture refrigerant tubing.
DANGER Risk of re or explosion.
Flammable refrigerant used. To be repaired
only by trained service personnel. Do not
puncture refrigerant tubing.
CAUTION
CAUTION Risk of re or explosion.
Flammable refrigerant used. Consult repair
manual/owner’s guide before attempting to
service this product. All safety precautions
must be followed.
CAUTION Risk of re or explosion. Dispose
of property in accordance with federal or
local regulations. Flammable refrigerant
used.
CAUTION Risk of re or explosion due
to puncture of refrigerant tubing. Follow
handling instructions carefully. Flammable
refrigerant used.
WARNING
WARNING! CALIFORNIA RESIDENTS
Cancer and Reproductive Harm
www.P65Warnings.ca.gov
3
IMPORTANT SAFETY INFORMATION
Grounding type wall receptacle
Power cord with
3-prong grounded plug
Do not, under
any circumstances,
cut, remove,
or bypass the
grounding prong.
Electrical Information
The wine cooler must be plugged into its
own dedicated 115 Volt, 60 Hz., 15 Amp,
AC only electrical outlet. The power cord of
the appliance is equipped with a three-
prong grounding plug for your protection
against electrical shock hazards. It must be
plugged directly into a properly grounded
three prong receptacle. The receptacle
must be installed in accordance with local
codes and ordinances. Consult a qualied
electrician. Avoid connecting refrigerator
to a Ground Fault Interruptor (GFI) circuit.
Do not use an extension cord or adapter
plug.
If the power cord is damaged, it should
be replaced by an authorized service
technician to prevent any risk.
Never unplug the wine cooler by pulling on
the power cord. Always grip the plug rmly,
and pull straight out from the receptacle to
prevent damaging the power cord.
Unplug the wine cooler before cleaning
and before replacing a light bulb to avoid
electrical shock.
Performance may be affected if the voltage
varies by 10% or more. Operating the wine
cooler with insufcient power can damage
the compressor. Such damage is not
covered under your warranty.
Do not plug the unit into an electrical outlet
controlled by a wall switch or pull cord to
prevent the wine cooler from being turned
off accidentally.
Child Safety
Destroy carton, plastic bags, and any
exterior wrapping material immediately
after the wine cooler is unpacked. Children
should never use these items to play.
Cartons covered with rugs, bedspreads,
plastic sheets or stretch wrap may become
airtight chambers, and can quickly cause
suffocation.
Remove all staples from the carton.
Staples can cause severe cuts, and destroy
nishes if they come in contact with other
appliances or furniture.
An empty, discarded wine cooler is a very
dangerous attraction to children.
Remove the door(s) of any appliance that
is not in use, even if it is being discarded.
Proper Disposal of your Wine
Cooler
Risk of child entrapment
Child entrapment and suffocation are not
problems of the past. Junked or abandoned
wine coolers are still dangerous – even if they
will sit for “just a few days”. If you are getting
rid of your old wine cooler, please follow the
instructions below to help prevent accidents.
We strongly encourage responsible appliance
recycling/disposal methods. Check with your
utility company or visit
www.recyclemyoldfridge.com for more
information on recycling your old wine cooler.
Before you throw away your old wine cooler:
Remove doors.
Leave shelves in place so children may not
easily climb inside.
Have refrigerant removed by a qualied
service technician.
4
FEATURES
Names of Components
Control Panel
Glass Door
Adjustment Leg
Height Adjustable 33 1/8” - 34”
(842-865mm)
18
7
/
8
"
(480mm)
15
3
/
8
"
(390mm)
25
1
/
4
"
(642mm)
33
1
/
8
"
(842mm)
18
7
/
8
"
(480mm)
15
3
/
8
"
(390mm)
IMPORTANT
Your model and features may vary slightly from illustrations shown here.
Height Adjustable 25 1/4” - 26
1/8” (642-665mm)
5
INSTALLATION
This Use & Care Guide provides general
operating instructions for your model. Use the
appliance only as instructed in this Use & Care
Guide. Before starting the wine cooler, follow
these important rst steps.
Location
Choose a place that is near a grounded
electrical outlet. Do Not use an extension
cord or an adapter plug.
For optimal performance, it is
recommended that you install the wine
cooler where the ambient temperature is
between 70 and 78 degrees Fahrenheit. Do
not install your Wine Cooler in any location
not properly insulated or heated, such as
in a garage, or poor cooling performance
and/or external condensation on the glass
may occur.
Leave a 2 inch space at the back of the
wine cooler for adequate air circulation.
Be sure the wine cooler stays in the upright
position during transport.
Keep the wine cooler from any hazardous
or combustible agents.
Leveling
The wine cooler must have all bottom corners
resting rmly on solid oor. The oor must be
strong enough to support a fully loaded wine
cooler. NOTE: It is Very Important for your
wine cooler to be level in order to function
properly. If the wine cooler is not leveled
during installation, the door may be misaligned
and not close or seal properly, causing cooling,
frost, or moisture problems.
To Level Your Wine Cooler:
After removing all interior and exterior
packaging materials, use a carpenter’s level to
level the wine cooler from front-to-back. Adjust
the leveling legs in front, ½ bubble higher, so
that the door closes easily when left halfway
open.
Cleaning
Wash any removable parts of the wine
cooler interior, and exterior with mild
detergent and warm water. Wipe dry. Do
not use harsh cleaners on these surfaces.
Do not use razor blades or other sharp
instruments, which can scratch the
appliance surface when removing adhesive
labels. Any glue left from the tape can be
removed with a mixture of warm water and
mild detergent, or touch the residue with
the sticky side of tape already removed. Do
not remove the serial plate.
Important Safeguards: Do not store food in
your wine cooler as interior temperature may
not get cool enough to prevent spoilage. In
summer months or areas of high humidity, the
glass door may build up moisture. To remove
the moisture, wipe it away.
6
CONTROLS AND SETTINGS
IMPORTANT
To avoid damaging the compressor, please
do not turn on the appliance again within 5
minutes after turning it off.
Display
Lock/
Unlock
Lighting Temp.
Up
Display
Window
Temp.
Down
Temperature Display
The temperature is displayed digitally. The
digital display shows the set temperature.
If the temperature probe is out of order
or some other error occurs, the display
window may show a code such as “E1”, “L
or “H” instead of the actual temperature
and a continuous beeping sound will be
heard. In case this happens, the appliance
is designed to keep periodical running
of compressor and fans which helps to
maintain an adequate temperature inside
cabinet to protect your stored wines, but
it is recommended that you have your unit
serviced as soon as possible.
Power ON/OFF
When the appliance is plugged into a
power outlet, it powers on automatically.
After initial startup the display will default
to 54°F (12°C).
Lock/Unlock the Display
Press and hold lock button for
3 seconds to lock display. All
features will be locked except
Lock/Unlock button. If any other
button is pressed, the display will beep 3
times.
To unlock the display, press and hold lock
button for 3 seconds.
Interior Lighting ON/OFF
Touch the light button to turn ON/
OFF the interior LED lighting.
The light will stay on until it is
manually turned off or the door is
closed.
Display Mode
Press the light button once and wait
until light turns off, then press the same
button a second time. The light now stays
on, even with the door closed, until it is
manually turned off.
7
NOTE
When the highest/lowest temperature is reached, display will beep. Touch again to increase/
decrease the temperature to desired setting.
Temperature Setting
The temperature setting range is as below.
Directly touch the + or – button to set the wine cooler temperature.
The rst touch on the + or – button will recall the previous set temperature displayed.
Touch the + button to increase the set temperature by 1°F (or by 1°C). On the contrary,
touch the – button to decrease the set temperature by 1°F (or by 1°C).
The digital display will change to show the set temperature of the inside cabinet after 3
seconds without being touched.
Door Ajar
An audible alarm will sound if the door is left open for more than 2 minutes. The door ajar alarm
conditions are indicated by and audible buzzer. When normal conditions are restored (door
closed), the alarm will stop. During the alarm, the buzzer can be switched off by pressing any
button.
41°F 42°F 43°F 44°F 45°F 62°F 63°F 64°F......
5°C 6°C 7°C 8°C 9°C 16°C...... 17°C 18°C
CONTROLS AND SETTINGS
8
NOTE
Convertible shelf can only be used in the
second position from the top.
The arrangement of Bottles
Do not let bottles touch the rear panel in
order to maintain good air circulation in the
cooler.
The amount of bottle storage listed will
vary depending on bottle shape and size.
The capacity for bottle storage in the wine
cooler is based on the following marked
bottle size. Oversized bottles may impact
the number of bottles that can be stored
on some of the shelves.
Φ30mm
Φ7
5mm
215mm
300mm
STORAGE FEATURES
Full Depth Shelves - will support 6 bottles of
wine.
9
Install the wine cooler in the coolest part of a
dry and ventilated room, out of direct sunlight
and away from heating ducts or registers.
Do not place the wine cooler next to heat-
producing appliances such as a range, oven or
dishwasher.
Level the wine cooler so the door close tightly.
Do not over crowd the wine cooler or block
cold air vents. Doing so causes the wine
cooler to run longer and use more energy.
Shelves should not be lined with aluminum
foil, wax paper or paper toweling. Liners
interfere with cold air circulation, making
the wine cooler less efcient.
Wipe containers dry before placing them
in the wine cooler. This cuts down on
moisture build-up inside the unit.
Organize the wine cooler to reduce door
openings. Remove as many items as
needed at one time and close the door as
soon as possible.
ENERGY SAVING TIPS
10
Cleaning the wine cooler
Before cleaning, turn the temperature
control to OFF, unplug the wine cooler
and remove the bottles.
Clean your wine cooler once a year as
needed.
Inside: Wash inside surfaces of the wine cooler
with a solution of two tablespoons of baking
soda in one quart (1.136 liters) warm water.
Rinse and dry. Wring excess water out of the
sponge or cloth when cleaning in the area of
the controls, or any electrical parts.
Wash the removable parts with the baking
soda solution mentioned above, or mild
detergent and warm water. Rinse and dry.
Never use metallic scouring pads, brushes,
abrasive cleaners, or alkaline solutions on any
surface. Do not wash removable parts in a
dishwasher.
Outside: Wash the cabinet with warm water
and mild liquid detergent. Rinse well and wipe
dry with a clean soft cloth.
Care of plastic parts
Be sure and protect the door gasket. It
should be kept clean at all times.
If the plastic parts in the wine cooler
remain contaminated by oil (animal or
vegetable) for a long period of time, they
will age and crack easily. Please clean them
on a regular basis.
Vacation and Moving Tips
Vacations:
If the wine cooler will not be used for several
months:
Remove all wine bottles and unplug the
power cord.
Clean and dry the interior thoroughly.
Leave the wine cooler door open slightly,
blocking it open if necessary, to prevent
odor and mold growth.
Moving: When moving the wine cooler, follow
these guidelines to prevent damage:
Disconnect the power cord plug from the
wall outlet.
Remove wine bottles and clean the wine
cooler.
Secure all loose items by taping them
securely in place to prevent damage.
WARNING
If leaving the wine cooler door open while
on vacation, make certain that children
cannot climb inside and become entrapped.
CARE AND CLEANING
In a moving vehicle, secure the wine
cooler in an upright position to prevent
movement. Also, protect the outside of the
wine cooler with a blanket or similar item.
11
PROBLEM CAUSE CORRECTION
WINE COOLER OPERATION
Wine Cooler does
not run.
Wine cooler is plugged
into a circuit that has a
ground fault interrupt.
Temperature control is in
the OFF position.
Wine cooler may not be
plugged in, or plug may
be loose.
House fuse blown or
tripped circuit breaker.
Power outage.
Use another circuit. If you are
unsure about the outlet, have it
checked by a certied technician.
See Setting the Temperature Control
section.
Ensure plug is tightly pushed into
outlet.
Check/replace fuse with a 15
amp time-delay fuse. Reset circuit
breaker.
Check house lights. Call local Electric
Company.
Wine Cooler runs
too much or too
long.
Room or outside weather
is hot.
Wine Cooler has recently
been disconnected for a
period of time.
Door is opened too
frequently or too long.
Wine Cooler door may be
slightly open.
Temperature control is
set too low.
Wine Cooler gasket is
dirty, worn, cracked, or
poorly tted.
It’s normal for the Wine Cooler to
work harder under these conditions.
It takes 4 hours for the Wine Cooler
to cool down completely.
Warm air entering the Wine Cooler
causes it to run more. Open doors
less often.
Make sure door is completely closed
and properly aligned.
Adjust control to a warmer
setting. Allow several hours for the
temperature to stabilize.
Clean or change gasket. Leaks in
the door seal will cause Wine Cooler
to run longer in order to maintain
desired temperature.
Interior Wine
Cooler temperature
is too cold.
Temperature control is
set too low.
Turn the control to a warmer
setting. Allow several hours for the
temperature to stabilize.
TROUBLESHOOTING
Visit our web site at
www.frigidaire.com
1-800-374-4432 (United States)
1-800-265-8352 (Canada)
12
TROUBLESHOOTING
PROBLEM CAUSE CORRECTION
WINE COOLER OPERATION (cont’d)
Interior Wine
Cooler temperature
is too warm.
Temperature control is
set too warm.
Door is opened too
frequently or too long.
Door may not be seating
properly.
Wine Cooler has recently
been disconnected for a
period of time.
Turn control to a colder setting.
Allow several hours for the
temperature to stabilize.
Warm air entering the Wine Cooler
causes it to run more. Open doors
less often.
Check for proper alignment of door
and gasket.
It takes 4 hours for the Wine Cooler
to cool down completely.
SOUND AND NOISE
Louder sound levels
when wine cooler
is on.
Modern wine coolers
have increased storage
capacity and more stable
temperatures. They
require a high efciency
compressor
This is normal. When the
surrounding noise level is low, you
might hear the compressor running
while it cools the interior.
Longer sound levels
when compressor
comes on.
Wine Cooler operates at
higher pressures during
the start of the ON cycle.
This is normal. Sound will level off or
disappear as refrigerator continues
to run.
Popping or cracking
sound when
compressor comes
on.
Metal parts undergo
expansion and
contraction, as in hot
water pipes.
This is normal. Sound will level off or
disappear as Wine Cooler continues
to run.
Boiling or gurgling
sound, like water
boiling.
Refrigerant (used to
cool Wine Cooler) is
circulating throughout
the system.
This is normal.
Vibrating or rattling
noise.
Wine Cooler is not level.
It rocks on the oor
when it is moved slightly.
Level the unit. Refer to leveling
instructions in the “Installation”
section.
Snapping sound. Cold control turning the
Wine Cooler OFF and
ON.
This is normal.
WATER/MOISTURE/FROST INSIDE WINE COOLER
Moisture forms
on inside of Wine
Cooler walls.
Weather is hot and
humid.
Door may not be seating
properly.
Door is kept open too
long, or opened too
frequently.
This is normal.
Check for proper alignment of door
and gasket.
Open the door less often.
13
TROUBLESHOOTING
PROBLEM CAUSE CORRECTION
WATER/MOISTURE/FROST OUTSIDE WINE COOLER
Moisture forms on
outside of Wine
Cooler.
Door may not be seating
properly, causing the
cold air from inside the
wine cooler to meet
warm moist air from
outside.
Check for proper alignment of door
and gasket.
ODOR IN WINE COOLER
Odors in Wine
Cooler.
Interior needs to be
cleaned.
Clean interior with sponge, warm
water, and baking soda.
DOOR PROBLEMS
Door will not close. Wine Cooler is not level.
It rocks on the oor
when it is moved slightly.
This condition may force the cabinet
out of square and misalign the
door. Refer to “Leveling’ in the
“Installation” section.
LIGHT BULB IS NOT ON
Light bulb is not
on.
No electric current
is reaching the Wine
Cooler.
Ensure plug is tightly pushed into
electrical outlet.
Check/replace fuse with a 15
amp time-delay fuse. Reset circuit
breaker.
14
LIMITED WARRANTY
1
MAJOR APPLIANCE WARRANTY
Your appliance is covered by a one year limited warranty. For one year from your original date of
purchase, Electrolux will pay all costs for repairing or replacing any parts of this appliance that prove
to be defective in materials or workmanship when such appliance is installed, used and maintained in
accordance with the provided instructions.
Exclusions
If You Need Service
This warranty does not cover the following:
1. Products with original serial numbers that have been removed, altered or cannot be readily determined.
2. Product that has been transferred from its original owner to another party or removed outside
the USA or Canada.
3. Rust on the interior or exterior of the unit.
4. Products purchased “as-is” are not covered by this warranty.
5. Food loss due to any refrigerator or freezer failures.
6. Products used in a commercial setting.
7. Service calls which do not involve malfunction or defects in materials or workmanship, or for appliances
not in ordinary household use or used other than in accordance with the provided instructions.
8. Service calls to correct the installation of your appliance or to instruct you how to use your appliance.
9. Expenses for making the appliance accessible for servicing, such as removal of trim, cupboards,
shelves, etc., which are not a part of the appliance when it is shipped from the factory.
10. Servicecallstorepairorreplaceappliancelightbulbs,airlters,waterlters,other
consumables, or knobs, handles, or other cosmetic parts.
11. Surcharges including, but not limited to, any after hour, weekend, or holiday service calls, tolls, ferry
trip charges, or mileage expense for service calls to remote areas, including the state of Alaska.
12.Damagestothenishofapplianceorhomeincurredduringinstallation,includingbutnot
limitedtooors,cabinets,walls,etc.
13. Damages caused by: services performed by unauthorized service companies; use of parts other than
genuine Electrolux parts or parts obtained from persons other than authorized service companies; or
externalcausessuchasabuse,misuse,inadequatepowersupply,accidents,res,oractsofGod.
DISCLAIMER OF IMPLIED WARRANTIES; LIMITATION OF REMEDIES
CUSTOMER’S SOLE AND EXCLUSIVE REMEDY UNDER THIS LIMITED WARRANTY SHALL BE PRODUCT
REPAIR OR REPLACEMENT AS PROVIDED HEREIN. CLAIMS BASED ON IMPLIED WARRANTIES,
INCLUDINGWARRANTIESOFMERCHANTABILITYORFITNESSFORAPARTICULARPURPOSE,ARE
LIMITED TO ONE YEAR OR THE SHORTEST PERIOD ALLOWED BY LAW, BUT NOT LESS THAN ONE
YEAR.ELECTROLUXSHALLNOTBELIABLEFORCONSEQUENTIALORINCIDENTALDAMAGESSUCH
ASPROPERTYDAMAGEANDINCIDENTALEXPENSESRESULTINGFROMANYBREACHOFTHIS
WRITTEN LIMITED WARRANTY OR ANY IMPLIED WARRANTY. SOME STATES AND PROVINCES DO
NOTALLOWTHEEXCLUSIONORLIMITATIONOFINCIDENTALORCONSEQUENTIALDAMAGES,
OR LIMITATIONS ON THE DURATION OF IMPLIED WARRANTIES, SO THESE LIMITATIONS OR
EXCLUSIONSMAYNOTAPPLYTOYOU.THISWRITTENWARRANTYGIVESYOUSPECIFICLEGAL
RIGHTS.YOUMAYALSOHAVEOTHERRIGHTSTHATVARYFROMSTATETOSTATE.
This warranty only applies in the USA and Canada. In the USA, your appliance is warranted by
Electrolux Major Appliances North America, a division of Electrolux Home Products, Inc. In Canada,
your appliance is warranted by Electrolux Canada Corp. Electrolux authorizes no person to change
or add to any obligations under this warranty. Obligations for service and parts under this warranty
mustbeperformedbyElectroluxoranauthorizedservicecompany.Productfeaturesorspecications
as described or illustrated are subject to change without notice.
Keep your receipt, delivery slip, or some other appropriate payment record to establish the warranty
period should service be required. If service is performed, it is in your best interest to obtain and
keep all receipts. Service under this warranty must be obtained by contacting Electrolux at the
addresses or phone numbers below.
USA
1.800.374.4432
Frigidaire
10200 David Taylor Drive
Charlotte, NC 28262
Canada
1.800.265.8352
Electrolux Canada Corp.
5855 Terry Fox Way
Mississauga, Ontario, Canada
L5V 3E4
ÍNDICE DE CONTENIDO
www.frigidaire.com EE.UU. 1-800-374-4432 www.frigidaire.ca Canadá 1-800-265-8352
Todo sobre el
Uso y & Cuidado
de su Enfriador de vino
A18967801 (noviembre de 2019)
Instrucciones importantes
para la seguridad .......................................2
Características ............................................4
Instalación .................................................5
Controles y Conguraciones ........................6
Características de almacenamiento ..............8
Consejos para ahorrar energía .....................9
Cuidado y limpieza ...................................10
Antes de llamar al servicio técnico .............11
Garantía para grandes
electrodomésticos ....................................14
2
INSTRUCCIONES IMPORTANTES
PARA LA SEGURIDAD
ADVERTENCIA
ADVERTENCIA indica una posible situación de riesgo
que, si no se evita, podría resultar en lesiones graves
o la muerte.
IMPORTANTE
IMPORTANTE indica información de instalación,
funcionamiento o mantenimiento importante pero
no relacionada con riesgos.
PELIGRO
PELIGRO indica una situación de riesgo inminente que,
si no se evita, resultará en lesiones graves o la muerte.
PRECAUCIÓN
PRECAUCIÓN indica una posible situación de riesgo
que, si no se evita, podría resultar en lesiones leves
o moderadas.
Deniciones
Este es el símbolo de las alertas de
seguridad. Se utiliza para alertarle sobre
posibles riesgos de lesiones. Obedezca todos los
mensajes de seguridad que lleven este símbolo
para evitar posibles lesiones o la muerte.
ADVERTENCIA
Lea todas las instrucciones antes de poner
en funcionamiento el enfriador de vino.
ADVERTENCIA
Por su seguridad
No guarde ni use gasolina u otros líquidos
o productos inamables cerca de este o de
cualquier otro aparato. Lea las etiquetas
del producto sobre inamabilidad y otras
advertencias.
PELIGRO
PELIGRO Riesgo de incendido o explosión.
Se ha utilizado un refrigerante inamable.
No utilice dispositivos mecánicos para
descongelar el refrigerador. No perfore
el tubo de refrigerante.
PELIGRO Riesgo de incendido o explosión.
Se ha utilizado un refrigerante inamable.
Debe ser reparado exclusivamente por
personal de servicio técnico autorizado.
No perfore el tubo de refrigerante.
PRECAUCIÓN
PRECAUCION Riesgo de incendio o explosión.
Se ha utilizado un refrigerante inamable.
Consulte el manual de reparación/guía
del usuario antes de intentar realizar una
operación de servicio en este producto.
Se deben seguir todas las precauciones
de seguridad.
PRECAUCION Riesgo de incendio o
explosión. Realice el vertido del aparato de
acuerdo con la normativa nacional o local.
Se ha utilizado un refrigerante inamable.
PRECAUCIÓN Riesgo de incendio o explosión
por perforación de la tubería de refrigerante.
Siga minuciosamente las instrucciones de
manipulación. Se ha utilizado un refrigerante
inamable.
Lea y guarde estas instrucciones
Esta guía del usuario facilita instrucciones de
funcionamiento especícas para su modelo. Utilice el
enfriador de vino exclusivamente como se indica en esta
guía. Estas instrucciones no pretenden abarcar todas
las condiciones y situaciones que se pueden producir. Al
instalar, hacer funcionar y mantener cualquier aparato
es necesario tener sentido común y precaución.
Registre el número de modelo
y de serie
Registre el número de modelo y de serie en el espacio
que se facilita más abajo. La placa del número de
serie está situada en la parte superior izquierda del
revestimiento interior o en la parte trasera de la unidad.
Número de modelo:
Número de serie:
Fecha de compra:
ADVERTENCIA
¡ADVERTENCIA! RESIDENTES DE CALIFORNIA
Cáncer y daño reproductivo
www.P65Warnings.ca.gov
3
INSTRUCCIONES IMPORTANTES
PARA LA SEGURIDAD
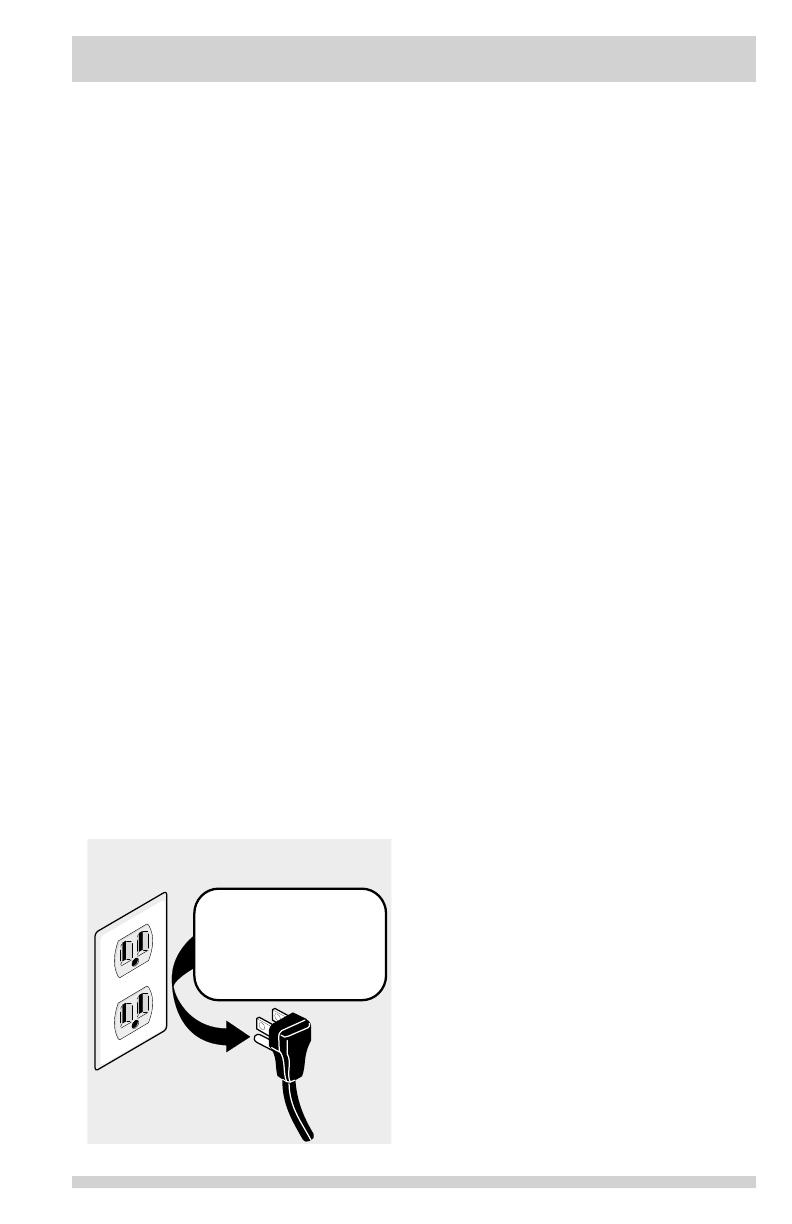
Receptáculo de pared con
derivación a tierra
Cable de alimentación
con enchufe de 3 patillas
con toma de tierra
Bajo ninguna
corte, desmonte
ni puentee la
patilla de toma
de tierra.
Información eléctrica
El enfriador de vino se debe enchufar
exclusivamente en una toma eléctrica de
115 voltios CA, 60 hertzios, 15 amperios.
El cable de alimentación del aparato está
provisto de un enchufe de tres clavijas
con toma de tierra para ofrecer protección
contra riesgos de descarga eléctrica.
Se debe enchufar directamente en un
receptáculo correspondiente debidamente
conectado a tierra. El receptáculo se debe
instalar de conformidad con la normativa
y ordenanzas locales. Consulte a un
electricista cualicado. El aparato no se
debe conectar a un circuito con interruptor
de conexión a tierra (GFI). No utilice cable
de prolongación ni enchufe adaptador.
Si el cable de alimentación está dañado,
para evitar riesgos debe ser sustituido por
un técnico de servicio autorizado.
No desenchufe nunca el enfriador tirando
del cable de alimentación. Para no dañar el
cable, agarre rmemente el enchufe y tire
recto hacia fuera del receptáculo.
Para evitar descargas eléctricas,
desenchufe el enfriador antes de limpiarla y
de sustituir la bombilla.
El rendimiento puede verse afectado si
la tensión eléctrica varía un 10% o más.
Hacer funcionar el enfriador de vino con
potencia insuciente puede dañar el
compresor. Este daño no está cubierto
por la garantía.
No enchufe la unidad en una toma eléctrica
que esté controlada por un interruptor de
pared o un cable para evitar que se apague
accidentalmente.
Seguridad de los niños
Destruya la caja de cartón, las bolsas
de plástico y cualquier material exterior
de envoltura inmediatamente después
de desempaquetar el enfriador. Los niños
no deben jugar nunca con estos elementos.
Una caja de cartón cubierta con una
alfombra, colcha, lámina de plástico o
envoltura extensible puede convertirse en
una cámara hermética y provocar asxia
rápidamente.
Retire todas las grapas de la caja de
cartón. Las grapas pueden causar cortes
graves o dañar acabados si entran en
contacto con aparatos o muebles.
Un enfriador de vino abandonado y vacío
es muy peligroso para los niños,
Desmonte la(s) puerta(s) de todo aparato
fuera de uso, incluso si va a deshacerse
de él.
Vertido correcto del enfriador de
vino
Riesgo de atrapamiento de niños
El atrapamiento y asxia de niños no son
problemas del pasado. Un enfriador de vino
abandonado o destrozado todavía puede
ser peligroso, incluso si solo es durante unos
días. Si se va a deshacer de su enfriador
de vino usado, siga estas instrucciones para
ayudar a evitar accidentes.
Alentamos encarecidamente el uso de
métodos responsables de reciclaje/vertido
del aparato. Póngase en contacto con la
empresa de servicio público o visite www.
recyclemyoldfridge.com para obtener más
información sobre el reciclaje de su enfriador
de vino viejo.
Antes de tirar su enfriador de vino viejo:
Desmonte la puerta.
Deje colocados los estantes para que los
niños no puedan meterse fácilmente en el
interior.
Pida a un técnico cualicado de servicio
que extraiga el refrigerante.
4
CARACTERÍSTICAS
IMPORTANTE
Su modelo y las características pueden variar ligeramente de las ilustraciones mostradas.
Nombre de los componentes
18
7
/
8
"
(480mm)
15
3
/
8
"
(390mm)
25
1
/
4
"
(642mm)
33
1
/
8
"
(842mm)
18
7
/
8
"
(480mm)
15
3
/
8
"
(390mm)
Altura regulable 33 1/8” - 34”
(842-865mm)
Altura regulable 25 1/4” - 26
1/8” (642-665mm)
Panel de
mandos
Puerta de
vidrio
Pata de ajuste
5
INSTALACIÓN
Esta Guía de Uso y Cuidado facilita instrucciones
generales de funcionamiento para su modelo.
Utilice el aparato solo como se indica en la guía.
Antes de poner en marcha el enfriador de vino,
siga estos importantes primeros pasos.
Ubicación
Elija un lugar cerca de una toma eléctrica
con derivación a tierra. No utilice cable
prolongador ni enchufe adaptador.
Para conseguir un rendimiento óptimo se
recomienda instalar el enfriador de vino en
un lugar donde la temperatura ambiente se
encuentre entre 70 y 78 °F (21 a 25 °C).
No instale su vinoteca en ningún lugar que
no esté bien aislado o calentado, como
en un garaje, ya que puede provocar un
bajo rendimiento de enfriamiento y/o
condensación externa en el cristal.
Deje un espacio de 5 cm en la parte trasera
del enfriador para facilitar una circulación
de aire adecuada.
Asegúrese de que el enfriador permanezca
en posición vertical durante su traslado.
Mantenga el enfriador alejado de agentes
peligrosos o combustibles.
Nivelación
Las esquinas inferiores de enfriador de vino
deben apoyarse con rmeza sobre un suelo
sólido. El suelo debe tener la solidez suciente
para soportar el enfriador de vino a plena
carga. NOTA: Para que el enfriador de vino
funcione correctamente es muy importante
que esté nivelado. Si el enfriador no se nivela
durante su instalación, la puerta puede quedar
desalineada y no cerrarse o aislar de forma
apropiada, lo que provocará problemas de
enfriamiento, escarcha o humedad.
Para nivelar el enfriador de vino:
Después de retirar todos los materiales de
embalaje interiores y exteriores, utilice un
nivel de carpintero para nivelar el enfriador
de delante atrás. Ajuste las patas de nivelación
de la parte delantera 1/2 burbuja más altas
para que la puerta se cierre fácilmente cuando
quede medio abierta.
Limpieza
Lave todas las piezas desmontables del
interior y exterior del enfriador con un
detergente suave y agua caliente. Limpie
y seque. No utilice limpiadores ásperos en
estas supercies.
No utilice cuchillas de afeitar ni otros
instrumentos cortantes para quitar las
etiquetas adhesivas, pues pueden rayar
la supercie del aparato. Los restos
de pegamento de la cinta se pueden
eliminar con una mezcla de agua caliente
y detergente suave, o pegándolos con
el lado adhesivo de la cinta ya retirada.
No retire la placa del número de serie.
Precauciones importantes: No guarde
alimentos en el enfriador de vino, pues la
temperatura interior podría no ser lo
sucientemente fría para impedir que se
corrompan. En los meses de verano y en
zonas muy húmedas la puerta de vidrio podría
acumular humedad. Para eliminar la humedad,
séquela.
6
CONTROLES Y CONFIGURACIONES
IMPORTANTE
Para evitar daños en el compresor, no
encienda de nuevo el aparato hasta 5
minutos después de haberlo apagado.
Panel de mandos
Bloqueo y
desbloqueo
Iluminación Temp.
Más
Ventana de
visualización
Temp.
Menos
Modo de visualización
Presione el botón de luz una vez y espere
hasta que la luz se apague, luego presione
el mismo botón una segunda vez. La luz
permanece encendida, incluso con la puerta
cerrada, hasta que se apague manualmente.
Ventana de visualización de
temperatura
La temperatura se muestra con dígitos.
La pantalla digital muestra la temperatura
ajustada.
Si la sonda de temperatura funciona mal o
se produce otro error, en la pantalla puede
aparecer un código “E1”, “L” o “H” en lugar
de la temperatura real y emitirse un pitido
continuo. Si así sucede, el aparato se ha
diseñado para mantener un funcionamiento
periódico del compresor y los ventiladores
y conservar una temperatura adecuada
dentro del armario con el n de proteger
los vinos almacenados en él, pero se
recomienda hacer reparar la unidad lo
antes posible.
Control de alimentación
ENCENDIDO/APAGADO
Cuando el aparato se enchufa a una toma
eléctrica, se enciende automáticamente.
Después de la puesta en marcha inicial, el
indicador estará predeterminado a 54°F
(12°C).
Bloquear / desbloquear la
pantalla
Mantenga presionado el botón
de bloqueo durante 3 segundos
para bloquear la pantalla. Todas
las funciones estarán bloqueadas,
excepto el botón Bloquear / Desbloquear.
Si se presiona cualquier otro botón, la
pantalla emitirá un pitido 3 veces.
Para desbloquear la pantalla, mantenga
presionado el botón de bloqueo durante 3
segundos.
Control de iluminación interior
ON/OFF
Pulse el botón de iluminación para
encender/apagar el LED interior.
La luz permanece encendida hasta
que se apaga manualmente o se cierra la
puerta.
1 / 1

Frigidaire FRWW2432AV User manual

Category
Drink coolers
Type
User manual
This manual is also suitable for

Ask a question and I''ll find the answer in the document

Finding information in a document is now easier with AI

Ask the document