Page is loading ...

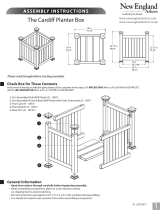
Check Box for These Contents
In the event of missing or defective parts please call our customer service dept. at
1 800 282 9346
(Mon. to Fri. 8:00 AM to 4:00 PM EST).
(UK Tel: (44) 2038 687160 - Mon. to Fri. 1:00 PM to 10:00 PM GMT).
1. Pergola Filter end caps (14) - 14007
2. Pergola Filters
(7)
- 14011
3. Pergola Beam end caps (4) - 14012
4. Post insert caps (4) - 14015
5. Post trim (4) - 14014
6. Brace Bracket (4) - 14013
7. Side Panel Horizontal Rails (4) - 14016
8. Braces (2) - 14018
9. Side Panel Horizontal Mid-Rails (14) - 14017
10. Side Panel Vertical Spindles (4) - 14019
11. Right Posts (2) - 14020
12. Left Posts (2) - 14021
13. Beams (2) - 14010
14. Mounting Stakes (4) - 14023
15. Hardware (in plastic bag)
a. 5/8” (1.6 cm) Self-Auguring Screws (8) - 20030
b. 3” (7.6 cm) Self-Auguring Screws (66) - 20033
c. Tube of Vinyl Glue (1)
Tools You Will Need
• Cordless Drill
• Hammer
• Tape Measure
General Information
• Read
Ins
truction
s
th
roug
h
carefully before beginning assembly.
• When assembling components, place on a non-abrasive surface (i.e. shipping box)
to avoid scratching.
• We recommend an area approx 10’x 8’ (3 m x 2.4 m) for unobstructed assembling.
• You should not need to use excessive force when assembling components.
The Carolina Arbor / Arch
Please read through before starting assembly.
ASSEMBLY INST RUCTIONS
10
9
8
7
12
1
2
1
15
a
b
Not to Scale
• Level
• Stool or Short Ladder
• Shovel
5
14
4
3
IMPORTANT: CHECK THE INSIDE OF YOUR POSTS FOR ALL MATERIALS.
Ver 2.2/041818
11
6
13
c
www.newenglandarbors.com
www.newenglandarbors.co.uk
81.75 in
208 cm
50 in
127 cm
57 in
145 cm
78.3 in
199 cm
87.75 in
223 cm
10 in
25.4 cm
24 in
61 cm
20 in
50.8 cm

STEP ONE
2
Layout the horizontal bottom rail and insert the two long vertical
spindles followed by seven of the middle rails. The spacing should be
roughly 5 1/2” (14 cm) apart. Subsequently, place the horizontal top
rail over the two long vertical spindles as shown aside.
Set out one post and slide side panel into place as shown.
Note the L and R on the posts.
Lay out the second post with holes facing upwards and insert
the completed panel and connected post. Please note the locations
of the screw holes to ensure proper installation.
With 3” (7.6 cm) screws provided, secure bottom and top rails into
the post through the pre-drilled holes as shown aside.
Slide the post trim cap over each of the posts. Allow the post trims to
slide down the post as they will be loose at this point.
Glue and attach the post cap insert over the posts as shown.
T
he Carolina Composite Arbor / Arch
Assemble the Side Panels
1
3
2
2
3
4
4
1
5
6
6
5
www.newenglandarbors.com
www.newenglandarbors.co.uk
Repeat points 1 to 6 to assemble the second side panel
7

STEP T W O
3
Place the two side panels with 50 in (127 cm) between the posts.
Place and fasten a beam to the outside of the posts as shown
below. The beam should extend 3.5 in (8.9 cm) beyond the
outside face of the posts.
Note: Make sure that the predrilled holes in the beams are
facing upwards.
While ensuring that the top of the beam is flush to the top of
the posts, fasten the beam in place with the provided 3” (7.6 cm)
screws. Each beam will use 8 screws as shown.
1
T
he Carolina Composite Arbor / Arch
Connect Beams to Side Panels
2
1
3
5
Temporarily place the bracket and brace between the post as
shown. ensure that the three top surfaces (beam, post insert
cap and brace) are flush to each other.
Mark the location of the bracket with a pencil and remove
the brace. Fasten the bracket into place using two 3” (7.6
cm) screws as shown. Repeat for all four brackets.
Once all brackets are in place, insert the braces in place and
secure using two - 5/8” (1.6 cm) screws for each bracket.
Screw each side of the bracket as shown.
3
4
2
Flush
5
4
Note: Ensure that
pedrilled holes are
facing upwards.
www.newenglandarbors.com
www.newenglandarbors.co.uk
3.5 in
8.9 cm
50 in
127 cm

STEP THRE E
4
Fasten the seven filters with the screws provided, aligning
them to the pre-drilled holes on top of the beams as shown.
Apply a small amount of glue to the pergola ends for both
the filters and beams as shown. ensure proper orientation of
the pergola ends. Allow a few minutes for vinyl glue to cure.
1
The Carolina Com
posite Arbor / Arch
Connect Filters and Pergola Ends
2
1
3
5
For adde
d stability, fasten two-3” (7.6 cm) screws on top of
each end filters into the braces as shown.
To secure post trim into place, apply a generous amount of
vinyl weld onto the perimeter of the posts as shown.
Proceed to slide the post trim up the post to the desired
location and allow a few minutes for the vinyl glue to set
and cure.
3
4
2
5
4
www.newenglandarbors.com
www.newenglandarbors.co.uk

5
1
S
TEP FOUR
Arch Installation
Move the arch to its final location (you will need a helper).
When you are satisfied with the location, mark the positions of
the posts, then move the arch aside and lay it carefully on it’s side.
Excavate 4 holes approx 12” (30.5 cm) deep. Carefully move the
arch back into position and level it both vertically and horizontally.
Backfill the holes with the excavated soil to cover the anchors.
2
1
Complete A #1 above, with the exception of excavating the holes at
least 6” (15 cm)wide x 18” (46 cm) deep. Fill holes with wet concrete
within 3” (7.6 cm) of your grade (you will need 2 bags of pre-mix conc-
rete - purchase separately). Carefully move the arch back into position
Support the arch plumb and level over the holes with bricks,
stones or blocks of wood under the bottom rail of the side panel.
The post bottoms should insert themselves approx 1/2” (1.3 cm)
into the concrete.
2
Archs must be well secured to prevent tipping over from wind load etc.
We have provided four ground anchors for securing the arch either
into the ground or a concrete footing. In some cases it may be acceptable
to secure the arch to an existing structure such as a fence post. if you
are installing your arch on concrete or a deck, see your hardware
store for the appropriate galvanized bracketing hardware.
A
Into Earth With Concrete Footing
B
Into Earth Without Concrete Footing
Optional
If you plan on attaching a fence or bench to the arbor, or in the
event of extreme wind conditions we would not recommend
using the ground anchors provided. Consider purchasing pressure
treated 2x4 (5 cm x 10 cm) lumber and trimming it down to 3 1/4
wide (8.3 cm) and cutting
it into 36” (91 cm) lengths. Insert into the
bottom of all four posts until
they hit the bottom horizontal rail
on the side panel. Fasten
accordingly with screws and install either
directly into the ground
or into a
concrete footing.
North America Toll Free Phone: 1 800 282 9346
United Kingdom Tel: (44) 2038 687160
2
www.newenglandarbors.com
www.newenglandarbors.co.uk
A
1
1
B
Slide the four ground anchoring stakes into the bottom of
each posts approximately 4 in (10 cm) and secure with two
3” (7.6 cm) screws provided as shown.
1
Ground Stakes Installation
12”
30.5 cm
2“ x 4” (5 cm x 10 cm)
Wood Insert
(Purchase Separately)
Optional
Dirt
18”
46cm
6”
15 cm
Concrete
6”
15 cm
/