Page is loading ...

ENGLISH
Introduction
Congratulations on your purchase and welcome to Philips! To fully benet from the
support that Philips offers, register your product at www.philips.com/welcome.
General description (Fig. 1)
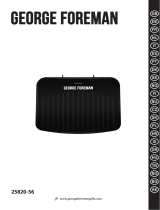
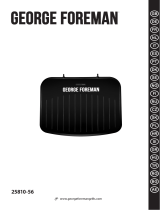
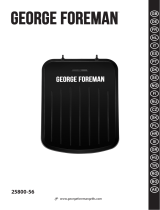
A Grill (HD4468/HD4467/HD4407 only)
1 Red temperature light
2 Temperature control
3 Grilling plates
4 Fixing clips of grilling plates
5 Cool-touch handgrips
6 Drainage groove
7 Cord storage facility
8 Wafe plate foot mounting hole
9 Wafe plate foot (HD4468 only)
10 Wafe plates (HD4468 only)
B Grill (HD4469/HD4408 only)
1 Red power-on light
2 Green ready-to-cook light
3 Temperature control
4 Grilling plates
5 Fixing clips of grilling plates
6 Cool-touch bracket
7 Cool-touch handgrip
8 Drainage groove
9 Timer button
10 Timer display
11 Cord storage facility
Important
Read this user manual carefully before you use the
appliance and save it for future reference.
Danger
- Do not immerse the appliance or the mains cord in
water or any other liquid.
Warning
- Check if the voltage indicated on the appliance
corresponds to the local mains voltage before you
connect the appliance. Check the type plate on the
appliance for information on voltage and wattage.
- If the mains cord is damaged, you must have it replaced
by Philips, a service centre authorised by Philips or
similarly qualied persons in order to avoid a hazard.
- This appliance can be used by children aged from
8 years and above and persons with reduced physical,
sensory or mental capabilities or lack of experience
and knowledge if they have been given supervision or
instruction concerning use of the appliance in a safe
way and understand the hazards involved. Children
shall not play with the appliance. Cleaning and user
maintenance shall not be made by children unless
they are older than 8 and supervised.
- Keep the mains cord away from hot surfaces.
- Do not let the appliance operate unattended.
Caution
- Only connect the appliance to an earthed wall socket.
- Put the appliance on a at, stable surface with
sufcient free space around it.
- Always preheat the plates before you put any food
between them.
- The accessible surfaces may become hot when the
appliance is operating (Fig. 2).
- Be careful of spattering fat when you grill fatty meat
or sausages.
- Always turn the temperature control to 0 before you
unplug the appliance.
- Always unplug the appliance after use.
- Always clean the appliance after use.
- Let the appliance cool down completely before you
remove the plates, clean the appliance or put it away.
- Never touch the plates with sharp or abrasive items,
as this damages the non-stick surface.
- Make sure you reassemble the plates properly after
you have removed them.
- This appliance is intended for normal household
use only. It is not intended for use in environments
such as staff kitchens of shops, ofces, farms or other
work environments. Nor is it intended to be used by
clients in hotels, motels, bed and breakfasts and other
residential environments.
- This appliance is not intended to be operated by
means of an external timer or a separate remote-
control system.
- If the appliance is used improperly or for professional
or semi-professional purposes or if it is not used
according to the instructions in the user manual,
the guarantee becomes invalid and Philips refuses any
liability for damage caused.
Electromagnetic eld (EMF)
This Philips appliance complies with all applicable standards and regulations regarding
exposure to electromagnetic elds.
Before first use
1 Remove the insert between the plates and remove any stickers.
2 Wipe the outside of the appliance with a damp cloth.
3 Clean the plates thoroughly (see chapter ‘Cleaning’).
Note: The appliance may produce some smoke when you use it for the rst time.
This is normal.
Using the appliance
Three grilling positions
- Contact grill position (Fig. 3)
This position is especially suitable for quick high-temperature grilling on both sides
(rump steaks, hamburgers etc.), for making toasted sandwiches or paninis
and making wafes (HD4468 only).
Note: Both plates are in contact with the food.
- Oven grill position (Fig. 4)
This is the ideal position to grill and cook au gratin at the same time. The oven grill
position is also suitable for the preparation of all kinds of ‘open’ toasts, e.g. with egg,
tomato, peppers and/or onion rings, covered with cheese.
Note: The upper grilling plate must not touch the food.
- Barbecue grill position (Fig. 5)
In this position, the grill offers a large grilling surface for the preparation of all kinds of
snacks, such as shashlik, satay, vegetables, fruits etc.
Grilling
1 Fully unwind the mains cord from the storage facility in the hinges of
the appliance (Fig. 6).
2 Make sure the grill is closed. Then put the plug in the wall socket (Fig. 7).
, HD4408/HD4469 only: The red power-on light goes on to indicate that
the grill is connected to the mains.
3 Turn the temperature control to the temperature setting that is appropriate
for the ingredients to be grilled. See the food table.
, The red light indicates that the grill is heating up.
Never let the appliance operate unattended.
4 Let the appliance heat up.
- HD4408/HD4469 only: Wait until the green ready-to-cook light goes on.
- HD4407/HD4467 only: Wait until the red temperature light goes out.
5 Open the grill to put the ingredients on the grilling plate or plates.
Be careful: the grilling plates are hot.
- Contact grill and oven grill positions: open the grill halfway (Fig. 8).
- Barbecue grill position: open the grill halfway and pull the upper grilling plate up
to its highest position (1). Then put the grill in open position (2) (Fig. 9).

2 Keep the button pressed to put the minutes forward quickly.
Release the button once the required grilling time has been reached.
The maximum time that can be set is 99 minutes.
, Three seconds after you have set the grilling time, the timer starts to count
down.
, While the timer counts down, the remaining grilling time ashes on the display.
The last minute is displayed in seconds.
Note: You can erase the timer setting by pressing the timer button for 3 seconds
(at the moment the time ashes) until ‘00’ appears.
3 When the preset time has elapsed, you hear an audible signal.
After 10 seconds, the audible signal is repeated. Press the timer button
to stop the audible signal.
Grilling times
At the end of this user manual, you nd a food table with ingredients you can prepare
with the grill. The table gives indications of which temperature to select, how long the
food has to be grilled and the appropriate position of the grill. The time necessary to
preheat the appliance is not included in the indicated grilling time.
The actual grilling time and temperature depend on the type of food that is prepared
(e.g. meat), its thickness and its temperature and also on your own taste. See also the
indications on the grill.
Tips
- Lightly grease the food to be grilled (instead of the grilling plates) with a little
butter or oil.This prevents excess butter or oil from smoking.
- The grill is unsuitable for grilling breadcrumbed food.
- Sausages tend to burst when you grill them. To prevent this, punch a few holes in
them with a fork.
- For the best result, make sure the pieces of meat you use are not too thick
(approx. 1.5cm).
- Fresh meat gives better grilling results than frozen or defrosted meat.
- When you prepare satay, chicken, pork or veal, rst sear the meat at a high
temperature (setting 5). Then set the temperature control one position lower
and grill the food until it is done.
- If you want to defrost frozen food, put the appliance in the oven grill position and
wrap the frozen food in aluminium foil. Set the temperature control to setting
1 or 2. The defrosting time depends on the weight of the food.
Cleaning
Never use abrasive cleaning agents and materials, as this damages the non-stick
coating of the plates.
Never immerse the appliance in water.
1 Unplug the appliance and let it cool down.
2 Remove excess oil from the plates with a piece of kitchen paper before you
remove the plates.
3 Remove the plates (Fig. 15).
To remove the plates, press on the xing clips on the appliance and then lift the plates
out of the appliance.
4 Clean the plates with a soft cloth or sponge in hot water with some
washing-up liquid or in the dishwasher (Fig. 18).
Soak the plates in hot water for ve minutes with some washing-up liquid to remove
residues. This loosens any caked food or grease.
5 Dry the plates and reassemble them (Fig. 19).
- Put the appliance in the barbecue grill position.
- Place the rear edge of the plates on the appliance (1). Lower the plates onto the
appliance and press them down under the xing clip (2).
6 Clean the outside of the appliance with a damp cloth.
Replacement
Replacing the timer battery (HD4408/HD4469 only)
The battery lasts approximately two years in case of normal domestic use. This timer
runs on 1 button-type L1131 (1.55V) lithium battery, which is generally available.
1 Put the appliance in barbecue grill position and remove the screw from
the hinge (Fig. 20).
2 Close the appliance, turn it around and put it in upright position (1).
Remove the top screw (2) and bottom screw (3) from the hinge (Fig. 21).
3 Remove the hinge cover from the hinge and take the timer out of the hinge
cover (Fig. 22).
4 Open the battery compartment cover of the timer with a coin and remove
the old battery. Dispose of the old battery (see chapter ‘Recycling’) (Fig. 23).
5 Place the new battery in the battery compartment with the + pole facing
the battery compartment cover (Fig. 24).
6 Place a bowl or plate under the drainage groove to collect fat or juice.
7 Place the ingredients on the grilling plate or plates (Fig. 10).
For an optimal result, place the ingredients in the centre of the grilling plate or plates.
The grilling time depends on the type of ingredients, their thickness and your personal
taste. See the food table at the end of this user manual for recommended grilling times.
Note for HD4408/HD4469: During the grilling process, the green ready-to-cook light
goes out.
Note for HD4407/HD4467: During the grilling process, the temperature light goes
on from time to time. This indicates that the grill is heating up to keep the grilling
temperature at the preset level .
- Contact grill position and oven grill position: put the food in the middle of
the lower grilling plate.
- Barbecue grill position: spread the food on top of the grilling surface.
Turn the food from time to time with a wooden or plastic spatula.
8 Close the grill (only for contact grill and oven grill positions).
- Contact grill position: lower the upper grilling plate carefully onto the ingredients.
The upper grilling plate now rests on the food. In this way, the food is grilled
evenly on both sides (Fig. 11).
- Oven grill position: pull the upper grilling plate up to its highest position (1)
and then put it in horizontal position (2). The upper grilling plate must not touch
the food (Fig. 12).
9 Open the appliance when the required grilling time has elapsed
(only for contact grill and oven grill positions).
10 Remove the food with a wooden or plastic spatula.
Do not use metal, sharp or abrasive kitchen utensils.
11 If you want to grill another batch of food, remove excess oil from the plates
with a piece of kitchen paper.
12 Wait until the green ready-to-cook light goes on (HD4408/HD4469 only)
or the temperature light goes out (HD4407/HD4467 only) before you put
the food on the grilling plate or plates.
Baking wafes (HD4468 only)
Attach the wafe plate foot and the wafe plates before switching on the appliance.
1 Insert the connecting pin of the wafe plate foot into the wafe plate foot
mounting hole (‘click’) (Fig. 13).
2 Prepare the wafe batter.
3 Fold out the wafe plate foot (1) to let the grill rest on the wafe plate foot (2)
(Fig. 14).
4 Open the grill and remove the grilling plates (Fig. 15).
To remove the grilling plates, press on the xing clips on the appliance and then lift
the plates out of the appliance.
5 Place the rear edge of the wafe plates on the appliance (1). Lower the wafe
plates onto the appliance and press them down under the xing clip (2) (Fig. 16).
Tip: Grease the plates with some oil to prevent the wafes from sticking to the plates.
6 Make sure the grill is closed. Then put the plug in the wall socket (Fig. 7).
, The red power-on light goes on to indicate that the grill is connected to
the mains.
7 Turn the temperature control to setting 3-4.
, The red light indicates that the grill is heating up.
Never let the appliance operate unattended.
8 Wait until the red temperature light goes out.
9 Open the grill and pour a half scoop to 1 scoop (about 200g) of batter in
the centre of each wafe shape on the lower wafe plate.
Be careful: the plates are hot.
10 Close the upper plate and let the batter distribute by itself.
11 Open the grill after 4-5 minutes to check the status. The wafes are ready
when they are golden brown.
12 Remove the wafes with a spatula and let them cool down on a rack.
Note: Do not stack the wafes, otherwise they will lose their crispiness.
Timer (HD4469/HD4408 only)
The timer indicates the end of the grilling time, but does NOT switch off the appliance.
Note: You can also use the grill without setting the timer.
1 Press the timer button to set the grilling time in minutes (Fig. 17).
, The set time becomes visible on the display.

Warnung
- Bevor Sie das Gerät in Betrieb nehmen, prüfen Sie, ob
die Spannungsangabe auf dem Gerät mit der örtlichen
Netzspannung übereinstimmt. Das Typenschild auf
Ihrem Gerät gibt Auskunft über Spannung und
elektrische Leistung.
- Um Gefährdungen zu vermeiden, darf ein defektes
Netzkabel nur von einem Philips Service-Center, einer
von Philips autorisierten Werkstatt oder einer ähnlich
qualizierten Person durch ein Original-Ersatzkabel
ersetzt werden.
- Dieses Gerät kann von Kindern ab 8 Jahren und
Personen mit verringerten physischen, sensorischen
oder psychischen Fähigkeiten oder Mangel an
Erfahrung und Kenntnis verwendet werden, wenn
sie dabei beaufsichtigt werden oder Anweisung zum
sicheren Gebrauch des Geräts erhalten und die
Gefahren verstanden haben. Kinder dürfen nicht mit
dem Gerät spielen. Reinigung und Pege des Geräts
darf nur von Kindern über 8 Jahre und unter Aufsicht
durchgeführt werden.
- Achten Sie darauf, dass das Netzkabel nicht in der
Nähe heißer Flächen verläuft.
- Lassen Sie das eingeschaltete Gerät nicht unbeaufsichtigt.
Achtung
- Schließen Sie das Gerät nur an eine geerdete
Steckdose an.
- Stellen Sie das Gerät auf eine ebene und feste
Oberäche, und halten Sie rund um das Gerät
ausreichend Platz frei.
- Heizen Sie die Platten immer vor, bevor Sie Grillgut
darauf legen.
- Die zugänglichen Oberächen können bei
eingeschaltetem Gerät heiß werden! (Abb. 2)
- Vorsicht vor Fettspritzern beim Grillen von fettem
Fleisch und Würstchen!
- Drehen Sie den Temperaturregler immer auf 0, bevor
Sie den Netzstecker aus der Steckdose ziehen.
- Ziehen Sie nach jedem Gebrauch den Netzstecker
aus der Steckdose.
- Reinigen Sie das Gerät nach jedem Gebrauch.
- Lassen Sie das Gerät vollständig abkühlen, bevor
Sie die Platten entfernen, das Gerät reinigen und
wegstellen.
- Berühren Sie die Platten nicht mit spitzen oder
scheuernden Gegenständen, um Beschädigungen der
Antihaft-Beschichtung zu vermeiden.
- Stellen Sie sicher, dass Sie die Grillplatten wieder korrekt
einsetzen, nachdem Sie sie abgenommen haben.
- Dieses Gerät ist nur für den Gebrauch im privaten
Haushalt bestimmt. Es ist z. B. nicht für die
Verwendung in Personalküchen von Geschäften,
Büros, landwirtschaftlichen Betrieben oder anderen
Arbeitsbereichen vorgesehen. Auch ist es nicht für
den Gebrauch in Hotels, Motels, Pensionen oder
anderen Gastgewerben bestimmt.
- Dieses Gerät ist nicht dafür geeignet, über
einen externen Timer oder ein separates
Fernbedienungssystem gesteuert zu werden.
6 Place the battery compartment cover back onto the timer. Use a coin to
fasten it again.
7 Insert the timer into the hinge cover and reattach the hinge cover to
the hinge.
8 Insert and tighten the screws in reverse order. Start with the appliance in
upright position and then put it in barbecue grill position.
Recycling
- This symbol on a product means that the product is covered by European
Directive 2012/19/EU (Fig. 25).
- This symbol means that the product contains batteries covered by European
Directive 2006/66/EC which cannot be disposed of with normal household
waste (Fig. 26).
- Inform yourself about the local separate collection system for electrical and
electronic products and batteries. Follow local rules and never dispose of the
product and batteries with normal household waste. Correct disposal of old
products and batteries helps prevent negative consequences for the environment
and human health.
Removing the disposable battery (HD4408/HD4469 only)
To remove the disposable batteries, see chapter ‘Replacement’, section ‘Replacing the
timer battery (HD4408/HD4469 only)’.
Storage
1 Wind the mains cord around the storage facility in the hinges of the
appliance (Fig. 27).
2 Store the appliance in upright position in a safe and dry place.
Guarantee and support
If you need information or support, please visit www.philips.com/support or read
the separate worldwide guarantee leaet.
Food table (Fig. 28)
DEUTSCH
Einführung
Herzlichen Glückwunsch zu Ihrem Kauf und willkommen bei Philips! Um die
Unterstützung von Philips optimal nutzen zu können, registrieren Sie Ihr Produkt bitte
unter www.philips.com/welcome.
Allgemeine Beschreibung (Abb. 1)
A Grill (nur HD4468/HD4467/HD4407)
1 Rote Temperaturanzeige
2 Temperaturregler
3 Grillplatten
4 Befestigungsclips der Grillplatten
5 Cool-Touch-Handgriffe
6 Fettablaufrille
7 Kabelaufwicklung
8 Montageöffnung für Fuß der Waffelplatte
9 Fuß der Waffelplatte (nur HD4468)
10 Waffelplatten (nur HD4468)
B Grill (nur HD4469/HD4408)
1 Rote Betriebsanzeige
2 Grüne Bereitschaftsanzeige
3 Temperaturregler
4 Grillplatten
5 Befestigungsclips der Grillplatten
6 Cool-Touch-Halterung
7 Cool-Touch-Handgriff
8 Fettablaufrille
9 Timer-Taste
10 Anzeige Zeitschaltuhr
11 Kabelaufwicklung
Wichtig
Lesen Sie diese Bedienungsanleitung vor dem Gebrauch
des Geräts aufmerksam durch,
und bewahren Sie sie für eine spätere Verwendung auf.
Gefahr
- Tauchen Sie das Gerät und das Netzkabel nicht in
Wasser oder andere Flüssigkeiten.
/