Page is loading ...

I www.georgeforemangrills.com
25810-56
C
GB
DE
FR
NL
IT
ES
PT
DK
SE
NO
FI
RU
CZ
SK
PL
HR
SI
GR
HU
TR
RO
BG
AE

3
Read the instructions, keep them safe, pass them on if you pass the grill on.
Remove all packaging before use.
IMPORTANT SAFEGUARDS
Follow basic safety precautions, including:
This appliance can be used by children aged from 8 years and above and
persons with reduced physical, sensory or mental capabilities or lack of
experience and knowledge if they have been given supervision or
instruction concerning use of the appliance in a safe way and understand
the hazards involved. Children shall not play with the appliance. Cleaning
and user maintenance shall not be made by children unless they are older
than 8 and supervised.
Keep the appliance and cable out of reach of children under 8.
Don’t connect the appliance via a timer or remote control system.
¬ The surfaces of the appliance will get hot during use.
If the cable is damaged, return the appliance, to avoid hazard.
b Do not use this appliance near bathtubs, showers, basins or other vessels containing water.
• Don’t wrap food in plastic lm, polythene bags, or metal foil. This will damage your grill and you may
cause a re hazard.
• Don’t use your grill for any purpose other than cooking food.
• Don’t use your grill if it is damaged or malfunctions.
• Wear oven gloves or similar protection.
HOUSEHOLD USE ONLY
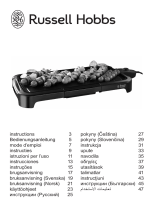
PARTS
1. Power light (red)
2. Thermostat light (green)
3. Grill plates
4. Drip tray
5. Foot (underneath)
6. Cord storage hooks (on foot)
7. On/o switch
BEFORE USING FOR THE FIRST TIME
• Wipe the grill plates with a damp cloth.
• Your grill may smoke a little the rst time you use it. This is normal and will soon disappear.
TILTING/LEVELLING THE GRILL
You can tilt your grill so that fat and juices run into the drip tray when cooking things like burgers, meat,
etc. Alternatively, you can use your grill level for cooking things like panini, sandwiches, etc.
To tilt your grill extend the foot upwards below your grill (FIG A). Fold the foot at again to level your grill.
USING YOUR GRILL
• Sit your grill on a stable, level, heat-resistant surface.
• Slide the drip tray between the two runners underneath the front of your grill. Slide the tray all the
way in. The drip tray will collect any fat or juices that run o the plates
during cooking.
GB
DE
FR
NL
IT
ES
PT
DK
SE
NO
FI
RU
CZ
SK
PL
HR
SI
GR
HU
TR
RO
BG
AE

4
1. Put the plug into the power socket. Move the switch to I. The power light will come on.
2. The thermostat light will come on, then cycle on and o as the thermostat maintains the
temperature.
3. Wait till the light goes out before cooking.
4. Lay the food on the bottom grill plate with a spatula or tongs, not ngers.
5. Don’t use anything metal or sharp, you’ll damage the non-stick surfaces.
6. Close the grill.
7. Wait till the food has cooked.
• Check it’s cooked. If you’re in doubt, cook it a bit more.
• Remove the cooked food with wooden or plastic tools.
• The hinge is articulated to cope with thick or oddly shaped foods.
• The grill plates should be roughly parallel, to avoid uneven cooking.
CARE AND MAINTENANCE
General cleaning
1. Wipe the outside surfaces of the appliance with a clean damp cloth.
2. Wash the drip tray in warm soapy water or in the top rack of the dishwasher.
Grill plates
• Don’t use harsh or abrasive cleaners, solvents, scourers, wire wool, or soap pads.
• Where the top and bottom plates make contact, the non-stick surfaces may show signs of wear. This
is purely cosmetic, and will not aect the operation of the grill.
There are two ways you can clean the grill plates:
While the plates are still hot
• Wear appropriate protection such as a oven gloves or similar, and use extreme care while wiping the
hot plates (note that oven gloves are not shown in gure B for clarity).
1. Unplug your grill.
2. Using a piece of folded kitchen paper or damp cloth, wipe the plates in one continuous motion from
the back to the front. Always support the top plate when wiping either the top or the bottom plate
(Fig. B) to avoid the unit tipping over.
When the plates are cold
1. Unplug your grill and let it cool completely.
2. Wipe the plates with a damp cloth or sponge. Use a paper towel with a dab of cooking oil to remove
stubborn stains.
STORING
The unit may be stood vertically (on the hinged side) for storage.
COOKING TIMES AND FOOD SAFETY
• The following times should be used purely as a guide.
• They are for fresh or fully defrosted food.
MEAT NOTES TIME (MIN)
Steak
For best results, cook steaks when they are at room
temperature.
Rest for 3-6 mins after cooking.
Medium rare 2
Medium 3
Well done 5 +
Chicken breast Cook until juices run clear. 8-10
Lamb chops
Pink 4
Medium 5-6
Well done 8
Pork chops Cook until juices run clear. Approx. 1-2 cm thick. 5-8

5
MEAT NOTES TIME (MIN)
Sausages 6-10
Burgers 6-10
Bacon 3-5
Gammon 5-6
FISH
Salmon 130-140 g 3-5
Prawns 1-2
Flat sh Plaice, Sole, etc. 120-130 g 2-6
Round sh Haddock, Cod, etc. 130-140 g 3-8
Tuna / swordsh 130-140 g 5-10
VEGETABLES
Peppers 4-6
Aubergine Sliced 6-8
Asparagus 3-4
Courgette Sliced 1-3
Tomatoes Halved 2-3
Onions Cut into wedges 5-6
Mushrooms Whole, at mushrooms 3-6
OTHER
Haloumi 2-4
• When cooking frozen foods, add 2-3 minutes for seafood and 3-6 minutes for meat and poultry
(depending on the thickness and density of the food).
• Check food is cooked through before serving. If in doubt, cook it a bit more.
• Cook poultry, pork, burgers, etc., until the juices run clear. Cook sh, prawns, etc., until the esh is
opaque throughout.
RECYCLING
W
To avoid environmental and health problems due to hazardous substances, appliances
and rechargeable and non-rechargeable batteries marked with one of these symbols
must not be disposed of with unsorted municipal waste. Always dispose of electrical
and electronic products and, where applicable, rechargeable and non-rechargeable
batteries, at an appropriate ocial recycling/collection point.
GB
DE
FR
NL
IT
ES
PT
DK
SE
NO
FI
RU
CZ
SK
PL
HR
SI
GR
HU
TR
RO
BG
AE

83
GB
DE
FR
NL
IT
ES
PT
DK
SE
NO
FI
RU
CZ
SK
PL
HR
SI
GR
HU
TR
RO
BG
AE
/