Page is loading ...


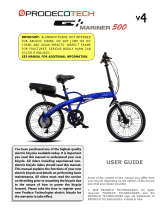
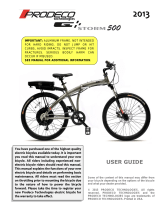
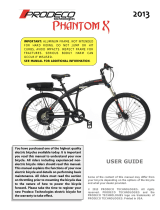
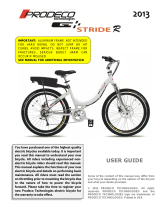
Congratulations! You have in your possession one of
the finest bicycle products in the world. The following
pages will provide you with the information you need
to properly use, adjust, maintain, and service your new
bike, so you can get the most out of every ride!
It is essential that you read this owner’s manual
thoroughly before riding your bicycle. We know you’re anx-
ious to ride, but trust us, it will only take a few minutes, and
then you can unleash the full potential of your bicycle.
In order to prevent serious injury, please pay close attention
to the safety and caution information located in this manual.
If you encounter any issues with your bicycle that aren’t cov-
ered in this guide, please contact your nearest authorized
dealer. Consider Golden Cycles as your number one dealer to
answer questions, perform required maintenance, and recom-
mend the best equipment and gear to compliment your ride.
Please contact us to see which available
Authorized Dealer is in your area (pg.6)
Thank You for buying Golden Cycles! We are
proud to be your brand of choice
SERIAL # ____________________
Now Go Ride!
1
...
ALWAYS
HIGH SPEED
’
NIGHT
DILIGENTLY

. 1
. 3
. 4
&
. 7
. 6
. 5
. 8-9
. 9
. 10
. 13-21
. 12
. 11
2
Unit Setting Set Time
Allows you to change the units
from Metric (KMH) to Imperial
(MPH) or vice versa
Allows you to change the real time
clock which will be displayed in
the Home Screen. e default time
is 12:00
Maintenance Backlight
is will allow you to change the
maintenance reminder
Will change the light levers on the
display screen to level 1, 2, or 3
Auto Sleep Password
Allows you to change the time-
frame in which the display will
shut o aer no operation.
Allows you to set a 4 digit
password.
DO NOT forget the password, we
have not way of recovering it for
you.
Display Info Battery Info
READ ONLY. is will show you
the display information.
READ ONLY. is will only give
you information on the controller
Controller Info Advanced Settings
READ ONLY. is will give you
information on the controller
is includes settings that only the
dealer should change.
DO NOT attempt changing these
settings yourself, these settings
were set in order to provide you
with the best riding experience.
If you NEED to change these
settings please reach out to your
dealer for assistance,
Reset to Factory Setting
All original factory settings will be
restored
Setting Interface
21

Please Read Carefully.
Biycle riding is a hazardous sport and/or activity.
This bicycle bought from Innovative Sports
Distribution and Zyclefix Bicycles Inc. or any of its
authorized bicycle dealers and/or
distributors is understood to be the
consumer’s sole responsability and legal liability.
I, the consumer, purchaser, and/or rider of this
Golden Cycles branded bicycle and/or product
understand and acknowledge that bicycle
riding may cause injury or death due to normal
use, abuse, poorly maintained equipment, stunt
riding, road terrain and/or accidents. I hearby
release Innovative Sports Distribution and
Zyclefix Bicycles Inc., its owners, affliliates and
employees from any and all legal liability from
injury, property damage, and death to myself, or
my minor children and anyone that rides this
bicycle. The rider assumes full reponibility and
liability resulting from assembly, maintenance, or
use (as stated above) of any such
equipment. I agree to defend, indemnify and hold
harmless Innovative Sports Distribution and
Zyclefix Bicycles Inc. for and from any
injury to other person(s) or property which I may
cause as a result of engaging in the
activity of riding a bicycle from this distributor.
3
Error Code Definitions
Setting Interface
- After having turned on the display, long press the M button.
This will take you to the setting interface. Once you are there
you will use the “�” and “V” arrows to navigate through the
menu and the M button to enter the editing state. The blue
mark as well as the white font with gray background indicated
which setting you are selecting.
- When editing the parameters use the “�” “V” buttons to adjust
the setting, and then long press the M button once you are
done.
- Above is an image of how your screen should look, and in
page 19 is a descripion of the dierent paremeter interfaces.
20

Like any sport, bicycling involves risk of injury and damage.
By choosing to ride a bicycle you assume the responsability for
that risk; so you need to know and practice the rules of safe
and responsible riding and proper use and maintenance, as
this can reduce risk of injury.
This guide contains many warnings and cautions, failure to fol-
low these guidelines can lead to serious injury. Our inability to
anticipate every situation or condition which can occur while
riding makes this guide no representation about the safe use of
the bicycle under all conditions. There are risks associated with
the use of any bicycle which cannot be predicted or avoided
and which are the sole responsibility of the rider.
We recommend this bicycle for adults, if you choose to have
your child ride it please be aware it is at your sole
responsibility, and personal liability. IF you allow your child to
ride make sure they wear an approved DOT bicyle helmet at
all times. A bicycling helmet is inteded for bicycling only, failure
to follow this warning may result in serious injury or death.
As a parent/guardian you are responsible for the activities and
safety of your child. This includes making sure the bicycle is
properly fitted to the child, that is it in good repair and safe op-
erating condition; that your child has learned and understands
the safe operation of a bicycle, that your child has learned,
understands, and obeys local motor vehicle laws, bicycle and
trac laws, and the common sense rules of safe and responsi-
ble cycling. You should read this manual carefully before allow-
ing your child to ride the bicycle.
4
Error Code Definitions
- When there is an error code, the home screen area will display
a detailed error code that will indicate any faults doing with
the electrical system. Your screen should look something like
the pictures below.
19

Important
This manual contains important safety, perfor-
mance and service information. Read it before you
take the first ride, and keep it somewhere safe for ref-
erence. For your own safety and the safety of the
bike we recommend you have this bicycle assembled
by an experienced professional bicycle mechanic.
Additional safety, performance and service infor-
mation for specific components such as suspension or
pedals on your bicycle, or for accessories such as hel-
mets or lights that you purchase may also be available.
Make sure your dealer has given you all the manufactur-
ers’ literature that was included with your bicycle. In case
of a conflict between the instructions in this manual and
information provided by a component manufacturer, al-
ways follow the component manufacturer’s instructions.
If you have any questions or concerns,
consult with the dealer of the bicycle’s manufacturer.
Note
This manual is not intended for comprehensive use,
nor as a service, repair or maintenance manual. Please see
your dealer for all service repairs or maintenance. Your
dealer may also be able to refer you to classes, clinics,
or books on bicycle use, service repair or maintenance.
Address:
1935 Santa Anita Ave. South El Monte, CA 91773
Phone:
(866)968-4642
Email:
Web:
goldenbicycles.com
Instagram:
@goldenbicycles
5
Maintenance Reminder Interface
Battery Levels
- The maintenance reminder is auto-
matically set on. However this can
be changed in settings (pg. 21).
- When the maintenance reminder
is on it will remind the user to give
the bike a maintenance check once
you’ve reached 5000km
- The maintenance reminder will
show up every time you turn on the
bike but can be temporarily re-
moved by pressig the M button
- When you see this alert make sure to go to a certified dealer
to have a maintenance check. If you have any questions reach
out to your dealer, or contact us with the information provided
at the beginning of this manual.
- The battery power information is shown bleow acording to the
battery levels
- When the battery level is at 5% or lower, it will enter the low
voltage mode which will show the battery lever as 0 and blink.
This will also disable the asssist level switch and will display
the assist mode as o or 0
18

1. Open the box by removing any white straps with the cable
cutters. Then remove the bike from the box as well as any
other packages included in the box. (Note: Please be care-
ful when doing this, as eBikes are heavier than standard
bikes and there is many staples sticking out of the box.)
2. Remove all the packaging from the bike. (Be careful not
to scratch the bike when cutting o the packaging, as this
WILL NOT be covered by warranty.)
First Steps
Tools You’ll Need
What’s in the Box?
• Cable Cutters
• Tool Kit
• Bike
• Reflectors
• Touch up Paint
• Tool Kit
• Battery and
Wires
6
We reccommend you get your bike professionally built.
However if you prefer to build it yourself here are the steps...
Interface 5
Walk Assistance Interface
- Candence Info
- Support of the torque sensor
and other system parts and the
data source is provided by the
controller
- Health info
- Heart Rate
- Calorie Consumption
It should look something like the
picture on the left.
It should look something like the picture
on the right.
To get to the Walk Assitance Mode you
need to press hold the down arrow or
press the walk assist button on the bot-
tom (refer to page 11 for more help). This
should be done when the speed is at 0.
To exit walk assit mode you just need to
press any other button.
17
If the bike does not have the necessary date it will not dis-
play the information up above. Heart rate requres peripheral
bluetooth or ANT+ equipment. Caloriei consumption is calcu-
lated by the controller.

1. Push the two ends of the bike on the opposite direction to
unfold the bike completely. (eBikes are heavy so please
ask for assistance if needed.) When unfolding the bike be
careful not to smash the wire between the two pieces of
the bike (it WILL NOT be covered by warranty), tuck it in if
necessary
2. Once you have completely opened the bike, close the latch
found at the bottom on the partition of the bike and make
sure it clicks, this will secure the bike in place.
3. With a firm hand, unfold the pedals, and make sure they
lock in place. This will help you ride more smoothly and
reduce the chances of injury or death.
4. Push the stand brake down so that the bike can stand by
itself. This will make it a lot easier for you to continue build-
ing the bike.
7
Interface 3
Interface 4
- Digital Gears
It should look something
like the picture on the left.
- Output Analysis
- Average power output by
motor
- Max output by motor
- Power output shared
between the rider and
motor
It should look something
like the picture on the right.
16

1. Once you have opened the bike, you need to snap the han-
dlebar in place. To do this you first need to grab the handle-
bar and push it up
2. Now push the latch found on the left side of the handlebar
pole and press it down until secured.
3. With a 5mm Allen Key (found in the tool kit), loosen the
brake lever enough for it to wiggle around. Then adjust to
your liking.
4. Now grab the gear shifter and push it back so that it touch-
es the handbrake, then tighten it with a 5mm Allen Key.
8
Interface 1
Interface 2
- Speed information
- Average Speed
- Max Speed
- Subtotal Mileages
It should look something
like the picture on the left.
- Battery Information
- Voltage
- Capacity Percentage
- Accumulated charging
cycles
- Range/endurance mile-
age
It should look something
like the picture on the right.
15
The followign ingormation will explain
what information is in each interface
when you press the M button.

1. Open the lever below the handlebar.
2. Adjust the Handlebar to your desired height.
3. Close the lever (if the lever is too loose, tighten the screw
on the lever with a 4mm Allen Key to make it stay on tight.)
9
1. Open the lever below the seat.
2. Adjust the seat to your desired height (WE RECOMMEND
that the seat is at hip height of the rider.)
3. Close the lever back up. (If the lever is too loose, tighten the
screw on the lever with a 4mm Allen Key to make it stay on
tight.)
Home Screen
14
The first screen you are going to see is the Home Screen. Here it will
give you a lot of basic information. The picture Below give you an idea
of what all these numbers and words mean.
To switch from one interface to another you need to press the M but-
ton. If the assist mode is higher than 0 and you are not in the Home
Screen, the display will switch back to the Home Screen after 5 sec-
onds of no operation. The followign information will help you under-
stand the ifnormation given in each interface.
To change the assist mode you need to short press the “�” button to
increase the assist mode and the “V” button to decrease the assist
mode. Your screen should look something like the screen above de-
pending on the assis mode you have set. When the assist mode is at 0
this means that there sin no assisting.

1. Using the keys that come attatched to the bike unlock the
battery holder of the bike by turning the key counterclock-
wise. (Reminder: DO NOT loose the keys that come with the
bike. We do not have any copies.)
2. Insert the Battery. Make sure that the on button is facing the
front, as shown in the pictures below.
3. Push the battery down into the entry until you hear a click.
This will mean that the battery is secured. Use the keys to
lock the abttey into place by turning the key lcockwise.
4. To remove the battery all you have to do is insert and turn
the key clockwise.
Before going out to ride. Double check all the screws and
bolts to make sure they are on tightly. This will decrease the
chances of an accident that could result in serious injury or
death.
10
Reminder
Product Details
• Model: DM02
• Tempered Glass Screen
• Beveled Adge
• Great sunlight and outdoor readability
• Water Resistant lever, exelent for outdoor use
• Bluetooth function compatible with CAN-BUS adn UART
• Easy Maintenance
• Power Button: Long press to turn on/o display
• Arrow Buttons: this will adjust the assist mode while rid-
ing. Also allows you to navigate throught the options on
screen
• Mode Button: Switches the interface and allows you to
enter the setting interface
• Walk Assist Button: When long pressed it will take you to
walk assist mode.
• Display Screen: If the rider does not make any changes to
the display screen and the assist mode is on 0 the display
will automatically shut down after five minutes. This shut
down time can be changed in the settings (this will be
covered in page 21)
Buttons
13

11
1. Starting with the Handlebar. Push up the slider on the
latch on the lower left side of the handlebar this will allow
you to unlock the latch and fold the handlebar down.
2. Closing the Pedals. To close the pedals all you have to do
is push the edge down and the push the pedal up so that it
folds.
3. Releasing the Bike. First start o with pushing the kick-
stand up, then push down the red switch on the latch near
the partition of the two pieces. This will release the latch.
Open the latch.
4. Folding the Bike. Pull or push the two extremities of the
bike toward eachother. It may be easier to do this from the
left side of the bike. (PLEASE ask for help if needed)
5. Once the bike is completely folded you can lean it on the
little stand that is at the bottom of the bike. This will keep it
from falling to the side.
12
/