Page is loading ...

USER’S MANUAL
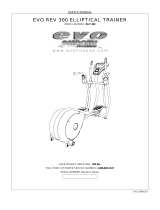
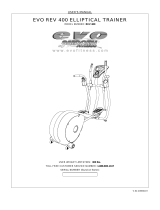
EVO XCEL ELLIPTICAL TRAINER
MODEL NUMBER: XCEL
USER WEIGHT LIMITATION: 275lbs.
TOLL FREE CUSTOMER SERVICE NUMBER: 1.888.800.1167
SERIAL NUMBER (found on frame):

EVO XCEL ELLIPTICAL TRAINER
Visit us at: www.evofitness.com
2
PREASSEMBLY
For future service or related questions:
Please staple your receipt and/or write in the name and phone number of the retail store where you purchased your EVO
Fitness Elliptical Trainer.
Name: ______________________________ Phone Number: ___________________ Receipt: ______________________
Open the boxes:
You are now ready to open the boxes of your new equipment. Make sure to inventory all of the parts that are included in the
boxes. Check the Parts List for a full count of the number of parts included for this product to be assembled properly. If you
are missing any parts or have any assembly questions call your local EVO dealer or contact us directly at 888-800-1167.
Gather your tools:
Before starting the assembly of your unit, make sure that you have gathered all the necessary tools you may require to
assemble the unit properly. Having all of the necessary equipment at hand will save time and make the assembly quick and
hassle-free.
Clear your work area:
Make sure that you have cleared away a large enough space to properly assemble the unit. Make sure the space is free
from anything that may cause injury during assembly. After the unit is fully assembled, make sure there is a comfortable
amount of free area around the unit for unobstructed operation.
Invite a friend:
Some of the assembly steps may require heavy lifting. It is recommended that you obtain the assistance of another person
when assembling this product.
User Weight Limitation:
Please note that there is a weight limitation for this product. If you weigh more than 275lbs. it is not recommended that
you use this product. Serious injury may occur if the user’s weight exceeds the limit shown here. This product is not
intended to support users whose weight exceeds this limit.

EVO XCEL ELLIPTICAL TRAINER
Visit us at: www.evofitness.com
3
HARDWARE COMPARISON CHART
Hardware chart:
For your convenience, we have identified the hardware used in the assembly of this product. This chart is provided to help
you identify those items that may be unfamiliar to you.
NO. DESCRIPTION QTY.
44 M8 Nylon Nut 4
45 Curved Washer 4
50 M8 x 48mm Carriage Bolt 4
63 Nut Cover 38mm 2
66 M10 x 88mm Carriage Bolt 2
70 M8 x 22mm Allen Head Bolt 4
84 Spring Washer 4
85 M10 x 20mm Washer 2
86 M8 x 16mm Washer 4
87 Nut Cover 13mm 4
88 M10 Nylon Nut 2
MILLIMETERS

EVO XCEL ELLIPTICAL TRAINER
Visit us at: www.evofitness.com
4
PARTS LIST
No. Description Qty. Order No.
No. Description Qty. Order No.
1 M10 Nut 2 XCEL-01 30 Crank Disk 2 XCEL-30
2 M6 x 8mm Screw 4 XCEL-02 31 Crank Frame 2 XCEL-31
3 Flywheel Axle Holder 2 XCEL-03 32 #8 x 15mm Screw 8 XCEL-32
4 Jockey Wheel Bracket 1 XCEL-04 33 C - Holder Buckle 2 XCEL-33
5 Washer 1 XCEL-05 34 Bearing (6004zz) 2 XCEL-34
6 E - Holder Buckle 1 XCEL-06 35 Crank Shaft 1 XCEL-35
7 Flywheel Axle 1 XCEL-07 36 Dual Action Cap 2 XCEL-36
8 Bearing (6000zz) 2 XCEL-08 37 Rubber Grip 2 XCEL-37
9 Small Belt Pulley 1 XCEL-09 38 Left Dual Action Handle 1 XCEL-38
10 M8 x 15 CAP Screw 4 XCEL-10 39 Right Dual Action Handle 1 XCEL-39
11 Spring Washer 4 XCEL-11 40 Computer 1 XCEL-40
12 Aluminum Disk 1 XCEL-12 41 Fixed Handle Rubber Grip 2 XCEL-41
13 Flywheel 1 XCEL-13 42 Hand Pulse Sensor 2 XCEL-42
14 M10 x 16mm Washer 1 XCEL-14 43 M6 x 15mm Screw 4 XCEL-43
15 M8 Nut 1 XCEL-15 44 M8 Nylon Nut 4 XCEL-44
16 M6 x 15mm Screw 2 XCEL-16 45 Curved Washer 8 XCEL-45
17 Bearing (6300zz) 2 XCEL-17 46 Nut Cover - 50mm 2 XCEL-46
18 M6 x 12mm Screw 1 XCEL-18 47
M8 x 15mm Hex Head
Sc
r
ew
4 XCEL-47
19 Jockey Wheel Spring 1 XCEL-19 48 M8 x 30mm Washer 2 XCEL-48
20 Magnet Bracket Spring 1 XCEL-20 49 Bushing - 50mm 6 XCEL-49
21 M10 x 22mm Washer 2 XCEL-21 50 M8 x 48mm Carriage Bolt 4 XCEL-50
22 Spring 1 XCEL-22 51 Left Dual Action Arm 1 XCEL-51
23 Magnet Bracket Shaft 1 XCEL-23 52 Upright Support 1 XCEL-52
24 Magnet Bracket 1 XCEL-24 53 Right Dual Action Arm 1 XCEL-53
25 #3 x 8mm Screw 2 XCEL-25 54 Bushing - 38mm 4 XCEL-54
26 Speed Box 1 XCEL-26 55 Action Arm Shaft 2 XCEL-55
27 Main Frame 1 XCEL-27 56 M8 x 32mm Washer 2 XCEL-56
28 Belt 1 XCEL-28 57 Bushing - 32mm 4 XCEL-57
29 Crank Disk Insert 2 XCEL-29 58 M8 x 60mm Carriage Bolt 4 XCEL-58

EVO XCEL ELLIPTICAL TRAINER
Visit us at: www.evofitness.com
5
PARTS LIST
No. Description Qty. Order No.
No. Description Qty. Order No.
59 Left Foot Pedal 1 XCEL-59
60 Left Foot Pedal Tube 1 XCEL-60
61 M6 x 13mm Washer 4 XCEL-61
62 Foot Pedal Knob 4 XCEL-62
63 Nut Cover - 38mm 2 XCEL-63
64 #8 x 15mm Screw 8 XCEL-64
65 Safety Spacer 2 XCEL-65
66 M10 x 88mm Carriage Bolt 2 XCEL-66
67 Oval Head Plug 2 XCEL-67
68 Right Cover 1 XCEL-68
69 Left Cover 1 XCEL-69
70 M8 x 22mm Allen Head Bolt 8 XCEL-70
71 Rear Cap w/ Height Adjustment 2 XCEL-71
72 Rear Stabilizer 1 XCEL-72
73 Front Foot Cap with Wheel (L) 1 XCEL-73
74 Front Stabilizer 1 XCEL-74
75 Front Foot Cap with Wheel (R) 1 XCEL-75
76 Gear Box 1 XCEL-76
77 Right Foot Pedal Tube 1 XCEL-77
78 Right Foot Pedal 1 XCEL-78
79 Nut Cover - 32mm 2 XCEL-79
80 Adaptor 1 XCEL-80
81 Upper Computer Wire 1 XCEL-81
82 Lower Computer Wire 1 XCEL-82
83 Hand Pulse Sensor Wire 2 XCEL-83
84 Spring Washer 8 XCEL-84
85 M10 x 20mm Washer 2 XCEL-85
86 M8 x 16mm Washer 4 XCEL-86
87 Nut Cover – 13mm 4 XCEL-87
88 M10 Nylon Nut 2 XCEL-88

EVO XCEL ELLIPTICAL TRAINER
Visit us at: www.evofitness.com
6
PARTS DIAGRAM
A MAJORITY OF THE PARTS SHOWN HERE HAVE BEEN PREASSEMBLED AT THE FACTORY.

EVO XCEL ELLIPTICAL TRAINER
Visit us at: www.evofitness.com
7
PARTS DIAGRAM
A MAJORITY OF THE PARTS SHOWN HERE HAVE BEEN PREASSEMBLED AT THE FACTORY.

EVO XCEL ELLIPTICAL TRAINER
Visit us at: www.evofitness.com
8
PARTS DIAGRAM
A MAJORITY OF THE PARTS SHOWN HERE HAVE BEEN PREASSEMBLED AT THE FACTORY.

EVO XCEL ELLIPTICAL TRAINER
Visit us at: www.evofitness.com
9
ASSEMBLY
STEP 1:
Attach the Front and Rear Stabilizers (74 and 72) to the Main Frame (27) using four M8 x 22mm Allen Head Bolts (70),
Spring Washers (84) and Curved Washers (45) as shown. Make sure the screws are tightly fastened.

EVO XCEL ELLIPTICAL TRAINER
Visit us at: www.evofitness.com
10
ASSEMBLY
STEP 2:
Attach the Right Foot Pedal (78) onto the Right Foot Pedal Tube (77) using two M8 x 60mm Carriage Bolts (58), M6 x 13mm
Washers (61) and Foot Pedal Knobs (62) as shown. Repeat this procedure to attach the Left Foot Pedal (59) to the Left Foot
Pedal Tube (60). The pedal position is adjustable and can be changed after the unit is fully assembled.

EVO XCEL ELLIPTICAL TRAINER
Visit us at: www.evofitness.com
11
ASSEMBLY
STEP 3:
Attach the Right Dual Action Handle (39) to the Right Dual Action Arm (53) using two M8 x 48mm Carriage Bolts (50), M8 x
16mm Washers (86), M8 Nylon Nuts (44) and 13mm Nut Covers (87) as shown. Repeat this procedure to attach the Left
Dual Action Handle (38) to the Left Dual Action Arm (51).

EVO XCEL ELLIPTICAL TRAINER
Visit us at: www.evofitness.com
12
ASSEMBLY
STEP 4:
NOTE: Before attaching the Upright Post Assembly plug the Upper Computer Wire (81) into the Lower Computer Wire (82)
as shown.
Attach upright post assembly. Insert the Upright Support (52) into the Main Frame (27). Insert and slightly tighten the four
M8 x 22mm Allen Head Bolts (70), Spring Washers (84) and Curved Washers (45). Align the Upright Support (52) so that the
crossbar is parallel with the Front Stabilizer (74) then fully tighten the M8 x 22mm Allen Head Bolts (70).
Insert one Action Arm Shaft (55) into the Right Dual Action Arm (53) as shown. Attach the Right Dual Action Arm (53) to the
Right Foot Pedal Tube (77) using one M10 x 88mm Carriage Bolt (66), M10 x 20mm Washer (85) and M8 Nylon Nut (44). Do
not over tighten the nut, as this joint needs to pivot freely. Insert one 38mm Nut Cover (63) over the M8 Nylon Nut (44).
Repeat this procedure to attach the Left Dual Action Arm (51) to the Left Foot Pedal Tube (60).

EVO XCEL ELLIPTICAL TRAINER
Visit us at: www.evofitness.com
13
ASSEMBLY
STEP 5:
Connect the Upper Computer Wires (81) and Hand Pulse Sensor Wires (83) as shown. Insert excess cable into the hole in
the mounting plate. Make sure the cables remain undamaged. Attach the Computer (40) to the mounting plate on the
Upright Support (52) using four M6 x 15mm Screws (43) as shown.

EVO XCEL ELLIPTICAL TRAINER
Visit us at: www.evofitness.com
14
LEVEL AND PEDAL ADJUSTMENT
LEVEL ADJUSTMENT:
To adjust the levelers so the rear stabilizer is level to the floor, simply turn the adjustment knobs on the ends of the rear foot
caps.
PEDAL ADJUSTMENT:
To adjust the pedals, simply remove the two knobs under the pedal and lift the pedal up off of the pedal rail. Place the pedal
in the desired location and secure in place by reattaching the knobs.

EVO XCEL ELLIPTICAL TRAINER
Visit us at: www.evofitness.com
15
TRANSPORT INSTRUCTIONS
TRANSPORT INSTRUCTIONS:
The transportation wheels on the front foot caps allow for easy maneuvering. Simply pull back on the fixed handlebars until
the wheels touch the floor. Then roll the unit to a desired location.

EVO XCEL ELLIPTICAL TRAINER
Visit us at: www.evofitness.com
16
COMPUTER INSTRUCTIONS
START Button A B RESET Button
DOWN Button C D Display Screen
UP Button E F ENTER Button
STOP Button G

EVO XCEL ELLIPTICAL TRAINER
Visit us at: www.evofitness.com
17
COMPUTER INSTRUCTIONS
FUNCTIONS AND BUTTONS
SPEED:
Displays current exercise speed.
CALORIES:
Count up: This measures total calories burned during exercise.
Count down: If you have set the number of calories, the computer will count down from that preset number down to zero.
This data is a guide and should not be used for medical assessment.
RESISTANCE:
Displays the current resistance level from 1 to 16.
DISTANCE:
Count up: This measures the total distance from 0 to 99.5ML/KM.
Count down: If you have set the target distance, the computer will count down from that preset distance down to zero as
soon as you start exercising.
TIME:
Count up: The computer measures total exercise time from 16:00 up to 99:00.
Count down: If you have set the target time, the computer will count down from that preset time down to 0:00.
PULSE:
This displays your current pulse rate when the handgrip sensors are held. This data is a guide to be used as a comparison of
different exercise sessions. It should not be used for medical assessment. Pulse is displayed in Beats Per Minute (BPM).
BATTERY MARK:
When the battery symbol appears on the display, this means the batteries are low.
RESET:
Press STOP to pause the functions during your exercise program. Then press RESET to reset the computer.
STOP:
Press STOP to pause the functions during your exercise program. All the data on the display will freeze. Press
START to resume the program and all the data displayed will continue until the program has finished. If you press STOP
twice, then all data will return to 0.
START:
Press START to start your exercise.
ENTER:
Press ENTER to confirm the setting of a program.
MANUAL PROGRAM:
When the console is in the POWER ON status, press the START button to activate the MANUAL program. While exercising
you can press the UP/DOWN button to increase or decrease the resistance. The TIME, DISTANCE and CALORIES will
count up after you start exercising.
USER PROGRAMS:
To select one of the user programs, you will first need to select either male or female. To change from male to female use
the UP/DOWN buttons and then press ENTER. To input new information please follow the procedure below.
AGE set up – Press the UP/DOWN button to adjust the user age information then, press ENTER to confirm. A default setting
of 20 will flash.
HEIGHT set up – Press the UP/DOWN button to adjust the user height information, then press ENTER to confirm. A default
setting of 63in/160cm will flash.

EVO XCEL ELLIPTICAL TRAINER
Visit us at: www.evofitness.com
18
COMPUTER INSTRUCTIONS
WEIGHT set up – Press the UP/DOWN button to adjust the user weight information, then press ENTER to confirm. A default
setting of 120lbs/54kg will flash.
P1 - MANUAL PROGRAM
After you have entered P1 MANUAL PROGRAM, just press START to start exercising. The TIME, DISTANCE and
CALORIES will count after you start exercising. While exercising you can press the UP/DOWN button to increase or
decrease the resistance.
P2 - TARGET TIME
After you have selected P2 TARGET TIME, the TIME display will show the time setting of 16:00 minutes. Press the UP
button to adjust target time then press ENTER to confirm. Press START to begin the exercise program. To increase or
decrease the resistance while exercising, press the UP/DOWN button.
To pause the program while exercising, press the STOP button. To resume exercising, press the START button.
If the RESET button is pressed after pausing the program, the computer returns to program select status. If the RESET
button is pressed and held for 4 to 5 seconds then all data returns to zero and power on status.
P3 - TARGET DISTANCE
After you have selected P3 TARGET DISTANCE, the DISTANCE display will show the distance setting of 5.0ML/KM. Press
the UP/DOWN button to adjust the target distance then press ENTER to confirm. Press START to begin the exercise
program. To increase or decrease the resistance while exercising, press the UP/DOWN button.
To pause the program while exercising, press the STOP button. To resume exercising, press the START button.
If the RESET button is pressed after pausing the program, the computer returns to program select status. If the RESET
button is pressed and held for 4 to 5 seconds then all data returns to zero and power on status.
P4 - TARGET CALORIES
After you have selected P4 TARGET CALORIES, the CALORIES display will show the calories setting 50. Press the
UP/DOWN button to adjust target calories then press ENTER to confirm. Press START to begin the exercise program. To
increase or decrease the resistance while exercising, press the UP/DOWN button.
To pause the program while exercising, press the STOP button. To resume exercising, press the START button.
If the RESET button is pressed after pausing the program, the computer returns to program select status. If the RESET
button is pressed and held for 4 to 5 seconds then all data returns to zero and power on status.
P5 - RANDOM
After you have selected P5 RANDOM, the TIME display will show the workout time setting of 16:00 minutes. Press the UP
button to adjust the workout time then press ENTER to confirm. Press START to begin the exercise program.
The RANDOM program has 50 different RESISTANCE based programs. If while exercising, you find the level of
RESISTANCE too intense you can press the UP/DOWN button to increase/decrease the resistance.
To pause the program while exercising, press the STOP button. To resume exercising, press the START button.
If the RESET button is pressed after pausing the program, the computer returns to program select status. If the RESET
button is pressed and held for 4 to 5 Seconds then all data returns to zero and power on status.
P6 - FAT BURNING
After you have selected P6 FAT BURNING, the TIME display will show the workout time setting of 16:00 minutes. Press the
UP button to adjust workout time then press ENTER to confirm. Press START to begin the exercise program.
The aim of a FAT BURNING program is to exercise for a longer period of time at a reduced level of intensity. This will allow
you to burn more calories than if you were using a program that has higher levels of resistance over a shorter period of time.
To pause the program while exercising, press the STOP button. To resume exercising, press the START button.
If the RESET button is pressed after pausing the program, the computer returns to program select status. If the RESET
button is pressed and held for 4 to 5 seconds then all data returns to zero and power on status.
Fat Burning Profile:
One complete cycle lasts 16 minutes, two cycles last 32 minutes and so on.
Resistance
1 3 7 10 10 10 10 10 10 10 10 10 10 7 3 1

EVO XCEL ELLIPTICAL TRAINER
Visit us at: www.evofitness.com
19
COMPUTER INSTRUCTIONS
P7 - INTERVAL
After you have selected P7 INTERVAL, the DISTANCE display will show the setting of L1. To select your desired level, from
L1 to L8, press the UO/DOWN Buttons. To confirm press ENTER.
Press the UP/DOWN button to adjust workout time then press ENTER to confirm. Press START to begin the exercise
program.
The aim of an INTERVAL program is to exercise at levels of LOW and HIGH intensity for short periods of time. There is one
profile with 8 different levels of intensity. The resistance will be changed automatically while exercising, according to the
following profile.
To increase or decrease the resistance while exercising, press the UP/DOWN button.
To pause the program while exercising, press the STOP button. To resume exercising, press the START button.
If the RESET button is pressed after pausing the program, the computer returns to program select status. If the RESET
button is pressed and held for 4 to 5 seconds then all data returns to zero and power on status.
Interval Profile:
One complete cycle lasts 16 minutes, two cycles last 32 minutes and so on.
Levels Resistance
1 1 9 9 1 1 9 9 1 1 9 9 1 1 9 9 1
2 2 10 10 2 2 10 10 2 2 10 10 2 2 10 10 2
3 3 11 11 3 3 11 11 3 3 11 11 3 3 11 11 3
4 4 12 12 4 4 12 12 4 4 12 12 4 4 12 12 4
5 5 13 13 5 5 13 13 5 5 13 13 5 5 13 13 5
6 6 14 14 6 6 14 14 6 6 14 14 6 6 14 14 6
7 7 15 15 7 7 15 15 7 7 15 15 7 7 15 15 7
8 8 16 16 8 8 16 16 8 8 16 16 8 8 16 16 8
P8 - ENDURANCE
After you have selected P8 ENDURANCE, the DISTANCE display will show the setting of L1. To select your desired level,
from L1 to L8, press the UP/DOWN Buttons. To confirm press ENTER. Press the UP/DOWN button to adjust workout time
then press ENTER to confirm. Press START to begin the exercise.
The aim of an ENDURANCE program is to start at a low level of resistance and then at increasingly higher levels of
resistance so that the body exercises at higher levels of intensity. The profile ends with a lower level of intensity to reduce
the heart rate. There is one profile with 8 levels of intensity. The resistance will be changed automatically while exercising,
according to the following profile.
To increase or decrease the resistance while exercising, press the UP/DOWN button.
To pause the program while exercising, press the STOP button. To resume exercising, press the START button. If the
RESET button is pressed after pausing the program, the computer returns to program select status. If the RESET button is
pressed and held for 4 to 5 seconds then all data returns to zero and power on status.

EVO XCEL ELLIPTICAL TRAINER
Visit us at: www.evofitness.com
20
COMPUTER INSTRUCTIONS
Endurance Profile:
One complete cycle lasts 16 minutes, two cycles last 32 minutes and so on.
Levels Resistance
1 1 1 3 3 4 4 5 5 6 6 7 7 9 9 1 1
2 2 2 4 4 5 5 6 6 7 7 8 8 10 10 2 2
3 3 3 5 5 6 6 7 7 8 8 9 9 11 11 3 3
4 4 4 6 6 7 7 8 8 9 9 10 10 12 12 4 4
5 5 5 7 7 8 8 9 9 10 10 11 11 13 13 5 5
6 6 6 8 8 9 9 10 10 11 11 12 12 14 14 6 6
7 7 7 9 9 10 10 11 11 12 12 13 13 15 15 7 7
8 8 8 10 10 11 11 12 12 13 13 14 14 16 16 8 8
ENGLISH TO METRIC CONVERSION:
The computer display can show both ENGLISH and METRIC information. If you want to change from ENGLISH to METRIC,
please follow the procedure below.
When the computer is in the power on status, press and hold the ENTER and STOP buttons. The LCD on the computer will
flash ML or KM. Press the UP or DOWN buttons to switch between ENGLISH/METRIC, then press the ENTER button to
confirm the selection and return to POWER ON status.
/