Panasonic NVHV50EP User manual

Category
Cassette players
Type
User manual
Video Cassette Recorder
Operating Instructions
NV-HV60 Series (Hi-Fi)
NV-HV50
NV-MV15
Series (Hi-Fi)
Series (Mono)
NV-SV120 Series (S-VHS, Hi-Fi)
PAL
VHS
625
NV-SV120
CH
EJECT
PULL-OPEN
VPS / PDC
VHS
PAL
625
3D DNR
PROG PLAY
INTELLIGENT TIMER
TIMER REC
TIMER CHECK
REC
S-VHSET
Hi-Fi STEREO
.
SUPER LP
Super VHS
N2QAHB000031
N2QAKB000043
2
Dear customer
Thank you for purchasing this product. For optimum performance and safety, please read
these instructions carefully. Please keep this manual for future reference.
Precautions
Accessories Included (Remote control unit depends on the model)
Remote Control
AC Mains Lead
RF Coaxial Cable
N2QAKB000043/ N2QAHB000031
RJA0043-1C
Remote Control Batteries
Operating Instructions
AA, UM3 or R6
RQTD0080-Y
Contents page
Precautions 2
Warning 3
Remote control functions 4- 5
Front 6
Connectors 7
Settings 8
Auto Setup 9
Recording 10
Timer recording
11
11
Timer recording 12-13
ShowView 14
INTELLIGENT TIMER 15
19
20
20
21
21
Decoder 24
Amplifier,
26
Batteries, 27
Before requesting service
Specifications 30-31
Index 32
Automatic SP/LP selection
VPS/PDC function
Setting a new Channel
Changing the name of TV stations
Changing the order of TV stations
Creating a new station table
, factory defaults
NTSC playback
Cassette erasure protection
General functions 16-17
Menu Overview 18
Manual Setup
Menu Others 22-23
External recording control 25
26
28-29
Shipping condition
NICAM sound system
Voltage:
AC mains lead protection:
Service:
Only use power sources complying with the specifications
Ensure the AC mains lead is connected correctly and not
damaged. Poor connection and lead damage can cause fire or electric shock.
Do not attempt to repair this unit by yourself. If the sound fails, the display is off,
smoke escapes from the unit or any other problem occurs that is not described in these
operating instructions, disconnect the power supply and contact your dealer or an authorised
aftersales service centre.
(220-240 VAC, 50/60 Hz).
You may otherwise overload the unit and cause fire. Do not use DC power sources. Check
the source carefully when setting up the unit on a ship or other place where DC is used.
3
Warning
WARNING:
TO REDUCE THE RISK OF FIRE, ELECTRIC SHOCK OR PRODUCT DAMAGE, DO NOT
EXPOSE THIS APPARATUS TO RAIN, MOISTURE, DRIPPING OR SPLASHING AND ENSURE
THAT NO OBJECTS FILLED WITH LIQUIDS, SUCH AS VASES, SHALL BE PLACED ON THE
APPARATUS.
CAUTION!
!
!
!
!
DO NOT INSTALL, OR PLACE THIS UNIT, IN A BOOKCASE, BUILT-IN CABINET OR IN
ANOTHER CONFINED SPACE. ENSURE THE UNIT IS WELL VENTILATED. TO PREVENT
RISK OF ELECTRIC SHOCK OR FIRE HAZARD DUE TO OVERHEATING, ENSURE THAT
CURTAINS AND ANY OTHER MATERIALS DO NOT OBSTRUCT THE VENTILATION VENTS.
DO NOT OBSTRUCT THE UNIT’S VENTILATION OPENINGS WITH NEWSPAPERS,
TABLECLOTHS, CURTAINS, AND SIMILAR ITEMS.
DISPOSE OF BATTERIES IN AN ENVIRONMENTALLY FRIENDLY MANNER.
DO NOT PLACE SOURCES OF NAKED FLAMES, SUCH AS LIGHTED CANDLES, ON THE
UNIT.
THIS UNIT IS INTENDED FOR USE IN MODERATE CLIMATES.
This product may receive radio interference caused by mobile telephones during
use. If such interference is apparent, please increase separation between the
product and the mobile telephone.
4
Remote control functions
VOLUME
CH
AV
TV
VCR
OSD/DISPLAY
RESET/CANCEL
TRACKING/V-LOCK
CH
PROG PLAY AV LINK AUDIO
INDEX
REC
CH
DATE
ON
OFF
A
B
1 2 3
4
PROG/CHECK
MENU
I-TIMER
OFF TIMER
EXT LINK
SP/LP/EP
TIMER
EXIT
ENTER
Selects or saves a setting.
Playback functions
Control menu
OSD menu selection buttons.
Displays the menu.
Quits a menu.
MENU
Playback
Fast winding / Forward and backward search
!
!
!
Goes from Stop into Fast Forward or Fast Rewind mode.
Starts the search for a frame during playback. Press button
twice to increase the speed of search (JET SEARCH).
Press the Playback button to quit the Search mode.
The unit keeps searching while the button is pressed.
Press to stop recording, playing back or winding.
Press button for more than 3 seconds.
Stop
To eject a cassette:
Still Playback:
Slow Playback:
In Playback mode.
Press button again or press the Playback button to quit.
Press for more than 2 seconds while in Playback
mode. Press the Playback button to quit.
Some Panasonic TV sets accept control signals from the video recorder's
remote control unit. In the table, the TV buttons are marked with ' ', the
video recorder buttons with ' '.
TV
VCR
ENTER
P. 1 7
VCR
VCR
VCR
VCR
VCR
VCR
P. 1 7
VCR
VCR
EXIT
EXT LINK
TV ASPECT
TV/TEXT
TRACKING/V-LOCK
VOLUME
INPUT SELECT
INDEX
ShowView
PROG PLAYPROG PLAY
AUDIO
REC
VPS/PDC
SP/LP/EP
PROG./CHECK
TIMER
OFF TIMER
OSD/DISPLAY
RESET/CANCEL
CH
CH
I-TIMER
AV LINKAV LINK
ENTER
Stand-by/on switch /I
Press to switch the unit from on to stand-by mode or vice
versa. In stand-by mode, the unit is still consuming a small
amount of power.
5
EXT LINK
Volume control.
RESET/CANCEL
OSD/DISPLAY
OFF TIMER
VPS/PDC
SP/LP/EP
Channel selector
Displays the Timer menu.
Sets the tape speed.
Activates the recording timer.
Press the button repeatedly to display the time,
tape counter or remaining tape.
AV LINK
TV/TEXT
AUDIO
PROG PLAY
Selects the TV set's AV port.
Changes the screen format.
Selects a programme memory location and inputs
the ShowView number. Example:
18=
RESET :
CANCEL:
Resets the counter to 0:00.00.
Clears an entry you made.
Defines programmes transmitted to the same
programme memory location at the same time.
Finds the start of a programme.
Displays the ShowView menu.
Controls the beginning and end of a recording
session by a special signal.
Record
Activates the recording timer for externally
controlled recording.
Toggles between TV reception and video playback
channel.
INPUT SELECT
I-TIMER
REC
PROG/CHECK
Audio mode
Toggles between AV inputs A1, A2 and A3.
ShowView
Plays back programmed recordings.
TV :
VCR:
Selects the AV input and navigates in
the menu.
Menu entries.
teletext
TRACKING/V-LOCK
TV ASPECT
CH
CH
TIMER
CH
TV
TV
TV
TV
Toggles between TV reception and video text
reception.
TV
VCR
TV
TV
VCR
P. 2 5
VCR
TV
P. 1 4
VCR
VCR
VCR
VCR
VCR
VCR
VCR
VCR
VCR
VCR
VCR
VCR
VCR
VCR
P. 1 3
P. 1 0
P. 1 7
P. 1 5
P. 1 2
P. 1 0
P. 11
P. 1 2
P. 1 0
P. 1 6
VCR
VCR
P. 1 6
VCR
TV
VCR
Tracking control of disturbed VCR image.
Switches the unit into stand-by mode after the
set time of recording, playback or in Stop mode.
VCR / TV switch
6
CVC Super
The CVC function provides
a picture of perfect quality.
The picture is automatically
rendered as clear and sharp
as possible.
Front
Stand-by/on switch /I
3-Dimensional Digital Noise Reduction
(S-VHS only )
INTELLIGENT TIMER
TIMER CHECK
REC
EJECT
CH
PROG PLAY
3D DNR
TIMER REC
EXT LINK
Defines timer programmes.
Plays back programmed recordings.
Activates the recording timer for
externally controlled recording.
Activates the recording timer.
Displays the timer programme for verification.
Record button
Fast winding / jet search
Playback button
Stop button
Erases a cassette.
Selects a channel.
Ejects the cassette.
QUICK
ERASE
3D DNR
To ensure high playback
picture quality with less noise.
NV-SV120
NV-HV60, NV-HV50, NV-MV15
QUICK
ERASE
EXT LINK
NV-SV120
3D DNR
PROG PLAY
INTELLIGENT TIMER
EXT LINK
QUICK
ERASE
AV3 I N
S-VIDEO
VIDEO
L-MONO-AUDIO-R
NV-SV120
CH
Hi-Fi STEREO
.
SUPER LP
EJECT
PULL-OPEN
VPS / PDC
VHS
PAL
625
3D DNR
PROG PLAY
INTELLIGENT TIMER
TIMER REC
TIMER CHECK
REC
S-VHSET
Super VHS
CH
EJECT
PROG PLAY
INTELLIGENT TIMER
TIMER REC
TIMER CHECK
REC
QUICK
ERASE
EXT LINK
NV-SV120
NV-HV60
NV-HV50
7
IN/
ENT
OUT/
SORTIE
AC
IN~
SECTEUR~
AV2 (DECODER/DECODEUR/EXT)
AV1 (TV)
RF/
ANT
L/G
R/D
AUDIO
OUT/SORTIE
IN/
ENT
OUT/
SORTIE
AC
IN~
SECTEUR~
AV2 (DECODER/DECODEUR/EXT)
AV1 (TV)
RF/
ANT
AV OUT SORTIE/
L/G
R/D
AUDIO
VIDEO
S-VIDEO
OUT/SORTIE
IN/
ENT
OUT/
SORTIE
AC
IN~
SECTEUR~
AV1 (TV)
RF/
ANT
Connectors
AC IN~
VIDEO
L/G
R/D
IN/
ENT
OUT/
SORTIE
=
= AUDIO output left channel
= AUDIO right channel
= Antenna input
= Antenna output
Power supply
= S-VIDEO output
= VIDEO output
output
SECTEUR~
AV2 (DECODER/DECODEUR/EXT)
AV1 (TV)
S-VIDEO
OUT/SORTIE
NV-MV15
Settings
8
TV
Aerial
RF-Coaxial cable
21-pin Scart cable
VCR
If you decide to just use the RF-Coaxial cable to connect the TV set you must
adjust the video output channel with the TV set's input channel.
!
!
!
!
!
!
Switch on the video recorder
Press the button for approx. 7 seconds. The preset channel appears
on the display.
Tune the TV set until the test pattern appears.
If there is any interference select another channel for the TV set and
video recorder.
Press the button to change the channel (e.g. to 38).
Tune the TV set until the test pattern appears.
Press to confirm.
MENU
CH
ENTER
CH
Connect all the cables as shown in the illustration, then connect the AC Mains
lead (part of the package) to an AC wall outlet.
To be able to receive TV programmes it is mandatory to connect the RF-Coaxial
cable even if the video recorder is connected by a 21-pin Scart cable.
Auto Setup
9
Datum / Zeit
::
::
wählen anwählen
zurück abbrechen
ENTER
MENU EXIT
AUTO : AUS
Zeit : 12 : 00 : 00
Datum : 11. 6. 02
Datum / Zeit
::
::
wählen
zurück abbrechen
speichern
ENTER
MENU EXIT
Zeit : 12 : 00 : 00
Datum : 11. 6. 02
Clock set
::
::
select access
return exit
ENTER
MENU EXIT
AUTO
Time :12:00:00
Date : 11. 6. 03
Clock set
Time :12:00:00
Date : 11. 6. 03
::
:
select
exit
store
ENTER
EXIT
!
!
!
ENTER
Switch on the video recorder.
Select a country
The Country menu will be displayed.
!
!
!
Set time and date
Press to return to the Menu screen.
AUTO - MANUAL
ENTER
ENTER
!
!
,
MENU
If the enu does not appear after switching on you can restart Automatic
Tuning (Page 21). You can afterwards set date and time either automatically or
manually.
Country m
If you choose Russia from the Country menu, the 2nd screen for setting
date and time will be shown when automatic tuning has finished.
Manually setting Time / Date
!
,
!
ENTER
Set time and date
D
Mind that a wrong date or time will influence the programmed recording of TV
programmes (don't forget to change ).
summer- and wintertime
After running the automatic tuning, you must manually set the date and time.
SV120 HV60 HV50 MV15
Country
::
:
select access
exit
ENTER
EXIT
Deutschland
eskČ á Rep.
Magyarország
Polska
Pocc
others (OIRT)
others (CCIR)
èÿ
SV120 HV60 HV50 MV15
The VCR starts the automatic tuning.
(The search will take approx. 5 minutes to be completed.)
Recording
REC
OSD/DISPLAY
SP/LP/EP
Set the TV set to the video channel and insert a cassette into the video recorder;
make sure that the cassette's protection tab is still in.
Select a channel to record from.
Select the AV channel if you are recording via the 21-pin scart cable.
Press to start recording.
To pause recording:
The function will switch itself off after approx. 5 minutes to protect the video heads.
To resume recording:
!
!
!
!
!
Press the Stop button to stop recording.
REC
SP :
LP :
EP :
normal recording time - optimal picture quality
double recording time - simple picture quality
triple recording time - reduced picture quality
The display of the video recorder shows: time - counter - tape remain
The start of a cassette is indicated as .
Press until ' is displayed.
-----
!
OSD/DISPLAY RE'
D
When you play back LP or EP recordings, some cassettes (e.g. type)
may produce interference. This is not indicative of a malfunction.
E-300
Tape remain counter
!
Prior to starting the recording session, press to set the tape speed.SP/LP/EP
VCR
SP
VCR
SP
SV120 HV60 HV50 MV15
D
Recordings in the S-VHS or S-VHS ET REC mode are supported by the PAL
TV system only. (Only SV120, page 23)
10
VPS/PDC
Timer recording
ON :
---:
The station transmits VPS/PDC signals. You must set the timer to the
time specified in the TV magazines. Use the special VPS time the TV
magazine may indicate.
The station does not transmit VPS/PDC signals. Try to set the start and
stop time such that the entire film can be recorded even if a programme
begins or ends earlier or later than planned.
This setting defines how a special signal controls the beginning and end of
a recording session. If a TV programme begins or ends earlier or later than
planned, this function synchronises the beginning and end of the recording
session with the actual beginning and end of the TV programme.
VPS/PDC function
SV120 HV60 HV50 MV15
Automatic selectionSP/LP
If, at the beginning of a timer programme, there is not enough tape remain
to complete it, the SP/LP function will automatically run the tape at LP speed.
This ensures that the entire programme will be recorded. If the LP mode is
not enough to 'stretch' the remaining tape to fit you will not be able to record
all of the TV programmes.
It is not possible to automatically activate the EP mode.
D
A:
11
!
PROG/CHECK
ENTER
CH
DATE
ON
OFF
A SPLPEP
VPS/PDC
ENTER
TIMER
,
!
!
!
!
!
!
!
!
!
!
Use the cursor keys or
to make the next entries.
Select a station or press
Set the date, week or day of week , or press
Enter the start time: , or press
Enter the stop time: , or press
Keep the buttons pressed to change the time in 30-minute steps.
Set the tape speed: (Automatic), , , ,
Press or the button to change the VPS/PDC setting
Press to save the timer programme.
Repeat these steps for further recordings you may wish to programme.
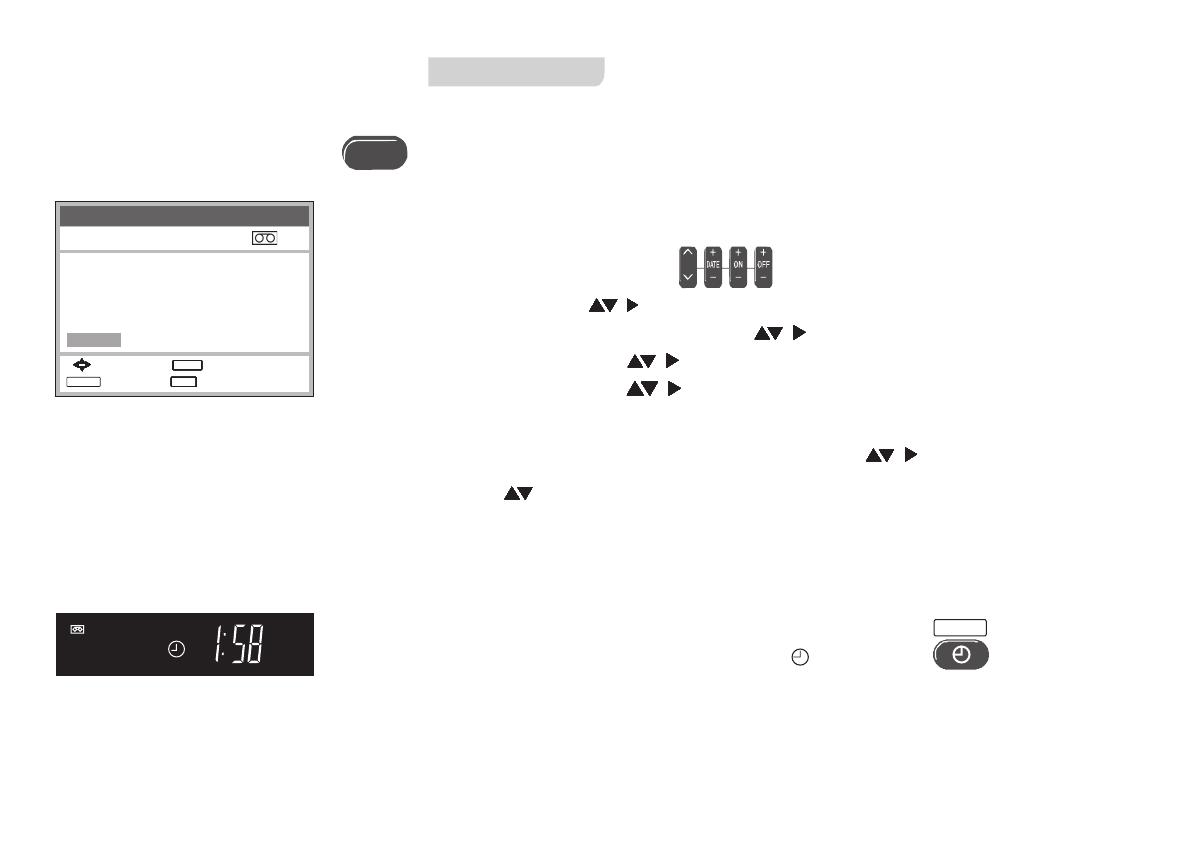
Press to activate the recorder's timer mode
Ensure that the video recorder symbol is displayed.
Do not forget to verify that there is enough tape remain. The length of the
(does not apply to HV50, MV15).
D
recording must not exceed the time remain on the video cassette.
Timer recording
Timer recording 1 / 3
Pos Date Start Stop
VPS
PDC
1 ARD 31/12 10:30 11:30 SP ON
1 ARD 31/12 11:30 12:30 SP ON
2 ZDF 31/12 12:30 13:30 SP ON
4 RTL 31/12 13:30 14:30 SP ON
6 VOX 31/12 14:30 15:30 SP ON
-- ---- --/-- --:-- --:-- SP ---
:select : store
: delete : exit
ENTERENTERENTERENTERENTERENTERENTERENTERENTERENTERENTERENTERENTERENTERENTERENTERENTER
CANCEL
EXITEXITEXITEXITEXITEXITEXITEXITEXITEXITEXITEXITEXITEXITEXITEXITEXIT
The Timer recording allows you to programme the recording time of TV programmes
up to 1 month in advance. Use the on-screen menu to programme a maximum
of 16 recordings.
CH
TIMER
PROG/CHECK
SV120 HV60 HV50 MV15
12
Timer recording
PROG/CHECK
PROG PLAY
TIMER
TIMER CHECK
Quitting the timer mode
!
programme you entered previously.
Press ; the video recorder symbol turns off.
You can now play back a cassette or make a manual recording.
Press again to reactivate the timer
TIMER
TIMER
Changing or cancelling a timer programme
!
Press to display the Timer Recording menu.
Press to select the entry you wish to edit.
To change the entries:
Press to cancel the timer programme.
PROG/CHECK
ENTER
ENTER
RESET/CANCEL
!
!
!
!
!
Checking the timer programme
!
Press , the Timer Recording menu will appear.
Press again or to quit the menu.
PROG/CHECK
PROG/CHECK EXIT
!
Playing back programmed recordings
The unit will rewind to the beginning of the programmed recording and
automatically start playing it back.
Displays the timer programmes for verifications (buttons on the unit only)
Repeatedly press the button to view the details of the timer programmes on the
video recorder's display panel.
SV120 HV60 HV50 MV15
D You can also play back programmed recordings manually.
13
ShowView
0-9
:enter : access
: correct : exit
ENTER
EXIT
83542----
Timer recording 1/3
Pos Date Start Stop
VPS
PDC
:select : access
:delete : exit
ENTERENTERENTERENTERENTERENTERENTERENTERENTERENTERENTERENTERENTERENTERENTERENTERENTER
CANCELCANCELCANCELCANCELCANCELCANCELCANCELCANCELCANCELCANCELCANCELCANCELCANCELCANCELCANCELCANCELCANCEL
EXIT
1 ARD 31/12 10:30 11:30 SP ON
1 ARD 31/12 11:30 12:30 SP ON
2 ZDF 31/12 12:30 13:30 SP OFF
-- ---- --/-- --:-- --:-- - ---
-- ---- --/-- --:-- --:-- - ---
-- ---- --/-- --:-- --:-- - ---
!
!
!
Press the ShowView button.
Enter the ShowView number (press to correct any mistakes)
ENTER
If the unit fails to automatically detect the station press or enter it
manually. The video recorder will store the information so that you will not
have to enter it again later.
CH to
!
!
!
!
!
!
!
!
Select a station
Set the date, week or day of week , or press
Enter the start time: , or press
Enter the stop time: , or press
Set the tape speed: (Automatic), , ,
Press to activate the timer mode.
ENTER
CH
DATE
ON
OFF
ASPLPEP,
ENTER
TIMER
, or press
The Timer Recording screen is displayed.
Press to activate the timer mode.
Ensure that the video recorder symbol is displayed.
!
TIMER
TIMER
TIMER
SV120 HV60 HV50 MV15
ShowView
ShowView
D
ShowView
ShowView
is a trademark of Gemstar Development Corporation.
The system is manufactured under licence from Gemstar Development
Corporation.
Erditing the Timer ecording data
14
INTELLIGENT TIMER
: edit : unlock : lock
: delete : exit
ENTER
CANCEL
EXIT
: select : store
I-TIMER
TIMER
Pos Date Start Stop
VPS
PDC
1 ARD 25/10 10:30 11:30 SP ON
1 ARD 25/10 18:3019:30 SP OFF
2 ZDF 25/10 12:3013:30 A ON
INTELLIGENT TIMER 25/10/03
Timer recording 1 / 3
Pos Date Start Stop
VPS
PDC
:select : store
: delete : exit
ENTERENTERENTERENTERENTERENTERENTERENTERENTERENTERENTERENTERENTERENTERENTERENTERENTER
CANCELCANCELCANCELCANCELCANCELCANCELCANCELCANCELCANCELCANCELCANCELCANCELCANCELCANCELCANCELCANCELCANCEL
EXIT
I-TIMER
1 ARD 26/10 10:30 11:30 SP ON
1 ARD 26/10 18:30 19:30 SP OFF
-- ---- -- / -- --:-- --:-- - ---
-- ---- -- / -- --:-- --:-- - ---
-- ---- -- / -- --:-- --:-- - ---
-- ---- -- / -- --:-- --:-- - ---
!
!
.
Press .
Press or to select a programme.
Press to activate the timer mode.
The oldest programmes will be cancelled automatically.
Press to cancel a programme.
To protect the data press the symbol is displayed.
I-TIMER
I-TIMER
TIMER
RESET/CANCEL
!
!
!
!
,
To unprotect the data press
Editing a programme
.
!
!
!
!
!
!
Press .
Press or to select a programme.
Press to display the Timer recording screen.
To change any of the data press
Press to store a change.
Press to activate the timer mode.
I-TIMER
I-TIMER
ENTER
ENTER
TIMER
SV120 HV60 HV50 MV15
This function makes it easier for you to time the recording of programmes
transmitted by the same station at the same time but on different days. You
can fully modify the programmes once they have been transferred to the Timer
Recording menu. The INTELLIGENT TIMER menu lists the information of the
last 5 timer programmes.
To use the INTELLIGENT TIMER function you must first programme at least
one normal timer programme.
15
General functions
AUDIO
At each press of the AUDIO button, the selected sound output is indicated with
L (Left) and R(Right).
Stereo : Display: LR
Left channel : Display: L -
Right channel : Display: - R
Mono : Display: - -
AUDIO settings
VCR
SP
R
Finding the start of a recording
Quickly finds the start of a recording during playback or in Stop mode.
Fast forward ewind
Every time you press the button (max. 20 times) the video recorder will find
the start of the next recording. Playback will start automatically.
Press Stop to exit the Search function.
!
!
/R
SV120 HV60 HV50 MV15
Repeat playback
The video recorder repeats playback from beginning to the end of the recording.
In Stop or Playback mode, press the Playback button for longer than 5 seconds.
The video recorder displays an 'R'.
Press Stop to stop playing back.
!
!
16
OFF TIMER
General functions
Forward/backward search, jet search, still playback, slow playback
To protect the video heads, the unit automatically quits the Forward/Backward
search, JET SEARCH, Still Playback, Slow Playback functions after 5-10 minutes.
Interference and motor noise are not indicative of a malfunction.
Press the button on the unit to remove all recordings from a cassette.
It takes approx. 30 minutes to erase an E-180 cassette.
QUICK ERASE
Erasing avoids problems that may occur at the beginning and end of a recording
taken straight over an existing one.
Switches the unit into stand-by mode after the set time of recording, playback
or in Stop mode. Press the button repeatedly to extend the switch-off time from
30 to 60, 120, 180 or 240 minutes. The timer setting appears on the display of
the video recorder.
Limiting the recording and playback time
3D DNR, 3-Dimensional Digital Noise Reduction
Press the button on the unit to activate the function.3D DNR The setting of this
function is displayed on the TV screen.
Erasing a cassette
VCR
SP
SV120 HV60 HV50 MV15
17
Menu
Timer recording
Tuning
Clock set
Others
Language : English
:select : access
: exit
ENTER
EXIT
Tuning
Manual
Auto Setup
Shipping condition
::select access
: return : exit
ENTER
MENU EXIT
The cursor keys of the remote control unit allow you to move between
menus and to change settings.
!
Press to display the Menu screen.
Select an entry by pressing .
MENU
ENTER
!
!
!
uit the menu.
Select the item you wish to edit .
Make the changes as appropriate. Follow the on-screen instructions.
Press to return to the previous menu.
Press to q
!
!
!
!
ENTER
MENU
EXIT
The selected menu is displayed.
Menu Overview
18
Tuning
:
select
access
: return : exit
ENTER
MENU EXIT
Pos Name Ch Pos Name Ch
: delete : move
A B
6VOX 8
7PRO795
8RTL285
9 KABE 97
10 S-RT 98
1ARD 7
2ZDF 4
3N3 2
4RTL 12
5SAT1 13
Pos
Name
Channel
Fine tuning
Decoder
Video system
Mono
Audio mode
: 7
: ----
:
: AUTO
:OFF
: AUTO
: OFF
:DK
----
Setting a new Channel
!
!
!
!
!
!
Tuning
Manual
ENTER
ENTER
ENTER
Select a free line down the list:
!
!
Press or the numeric keys to enter the channel number.
Channel tuning will start. Wait until the desired station has been set.
'Fine tuning' may help to minimise any interference.
'Mono' may rid you of audio problems.
Press to return to the Tuning screen.MENU
BG/I/DK
Audio mode
Audio system set-up
Pos
Name
Channel
Fine tuning
Decoder
Video System
Mono
AUTO / MAN.
ON / OFF
AUTO / PAL / MESECAM
ON / OFF
If a decoder is attached.
Station position setting.
Station name setting.
Channel setting.
Fine-tuning of disturbed picture.
Stereo-to-mono toggle.
TV system set-up.
Options available for fine-tuning the channels
(Not every model supports all of the functions.)
Manual Setup
19
Tuning
:
select
access
: return : exit
ENTER
MENU EXIT
Pos Name Ch Pos Name Ch
: delete : move
A B
6VOX 8
7PRO795
8RTL285
9 KABE 97
10 S-RT 98
1ARD 7
2ZDF 4
3N3 2
4RTL 12
5SAT1 13
Tuning
:
move
store
: return : exit
ENTER
MENU EXIT
Pos Name Ch Pos Name Ch
: delete : move
A B
6VOX 8
7PRO795
8RTL285
9 KABE 97
10 S-RT 98
1ARD 7
2ZDF 4
3N3 2
4RTL 12
5SAT1 13
Pos
Name
Channel
Fine tuning
Decoder
Video system
Mono
Audio mode
: 1
:
:7
: AUTO
:OFF
: AUTO
: OFF
:DK
ARD
: select
: return : exit
MENU
EXIT
Changing the name of TV stations
!
!
!
!
!
!
Tuning
Manual
ENTER
ENTER
ENTER
Select a TV station
Changing the order of TV stations or deleting a station
!
!
!
!
!
!
!
Tuning
Manual
, an arrow at the left edge indicates which field has been selected.
You can now move the station to any other location .
ENTER
ENTER
/Green
ENTER
BBBBBBBBBBBBBBBBBBB
!
!
!
!
.
,
Select
.
MENU
the Name entry
The cursor will mark the first letter
Change that letter
Next letter
The new name will be stored in the station table.
ARD
ADR
!
/Red to delete the station.
A
Manual Setup
20
  • Page 1 1
  • Page 2 2
  • Page 3 3
  • Page 4 4
  • Page 5 5
  • Page 6 6
  • Page 7 7
  • Page 8 8
  • Page 9 9
  • Page 10 10
  • Page 11 11
  • Page 12 12
  • Page 13 13
  • Page 14 14
  • Page 15 15
  • Page 16 16
  • Page 17 17
  • Page 18 18
  • Page 19 19
  • Page 20 20
  • Page 21 21
  • Page 22 22
  • Page 23 23
  • Page 24 24
  • Page 25 25
  • Page 26 26
  • Page 27 27
  • Page 28 28
  • Page 29 29
  • Page 30 30
  • Page 31 31
  • Page 32 32

Panasonic NVHV50EP User manual

Category
Cassette players
Type
User manual

Ask a question and I''ll find the answer in the document

Finding information in a document is now easier with AI