Page is loading ...

ETH OUTPUT OPTION
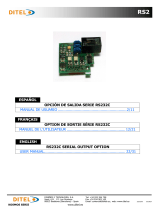
KOSMOS SERIES www.ditel.es
USER MANUAL
ETH
FOR MICRA-M
ETHERNET OUTPUT OPTION

ETH OUTPUT OPTION
KOSMOS SERIES www.ditel.es 2
INDEX
GENERAL INFORMATION
Package contents ........................................................................................................... 3
Recycling instructions ..................................................................................................... 3
Warranty ....................................................................................................................... 3
Product description ......................................................................................................... 4
Connections ................................................................................................................... 4
CONFIGURATION
Configuration menu ........................................................................................................ 6
SOFTWARE
Indicator programming ................................................................................................... 7
Acces to embedded web server ....................................................................................... 7
INSTALLATION
Output card installation ................................................................................................. 11

ETH OUTPUT OPTION
KOSMOS SERIES www.ditel.es 3
GENERAL INFORMATION
With the output option it is also supplied:
User manual that is complementary to the one delivered with MICRA indicator.
Adhesive label with detailed pin description.
(Ethernet cable is not supplied).
Package contents
This manual does not constitute a contract or a commitment on the part of Diseños y Tecnología, S.A.
All information contained in this document is subject to change without prior notice.
MANUAL VALID FOR OUTPUT OPTIONS INSTALLED IN INSTRUMENTS WITH 2.00 SOFT VERSION OR
HIGHER
This electronic instrument is covered by the 2002/96/CE European Directive so, it is properly marked
with the crossed-out wheeled bin symbol that makes reference to the selective collection for electrical and
electronic equipment which indicates that at the end of its lifetime, the final user cannot dispose of it as
unsorted municipal waste.
In order to protect the environment and in agreement with the European legislation regarding waste of
electrical and electronic equipments from products put on the market after 13 August 2005, the user can
give it back, without any cost, to the place where it was acquired to proceed to its controlled treatment and
recycling.
Recycling instructions
All products are warranted against defective material and workmanship for a period of three years from
acquisition date.
If a product appears to have a defect or fails during the normal use within warranty period, please
contact the distributor from whom you purchased the product to be given proper instructions.
This warranty does not apply to defects resulting from action of the customer such as mishandling or
improper interfacing.
The liability under this warranty shall extend only to the repair of the instrument; no responsability is
asumed by the manufacturer for any damage which may result from its use.
All DITEL products benefit from an unlimited and inconditional warranty of three (3) years from the date
of their purchase. Now you can extend this period up to five (5) years from the product commissioning,
only by fulfilling the corresponding form.
Fill up the form in our website at:
http://www.ditel.es/warranty
Warranty

ETH OUTPUT OPTION
KOSMOS SERIES www.ditel.es 4
All information contained in this manual is valid only for ETH output options installed in MICRA indicators with
2.00 soft version or higher.
This optional output card allows connection to a Ethernet network via switch, hub or directly to a PC.
Compatible with most commonly used Ethernet standards; 100BASET-T and 10BASE-T which are automatically
detected or transmission mode, full-duplex or half-duplex.
The protocol used for data transmission or reading/writting in memory is Modbus TCP/IP.
ETH output card must be installed in the slot corresponding to RS232 / RS485 / Ethernet serial interfaces so,
only one of them can be running at the same time inside the indicator.
Internal software automatically recognizes output card once it is installed, showing related menu within
configurating routines.
Product description

ETH OUTPUT OPTION
KOSMOS SERIES www.ditel.es 5
Connections
When ETH option is installed, CN5 connector comes out through rear part of the indicator. See its location in the
figure below.
To connect the indicator to a Ethernet network, simply plug RJ45 male connector to CN5 until click is heard. For
disconnecting it, just press the tab and move backwards the connector until it is released.
Location of ETH option rear connector (CN5)
CN5: RJ45 100BASE-T / 10BASE-T
PIN NAME DESCRIPTION
1 +Tx + Data transmission
2 -Tx - Data transmission
3 +Rx + Data reception
4 N.C. Not connected
5 N.C. Not connected
6 -Rx - Data reception
7 N.C. Not connected
8 N.C. Not connected
CN3
CN2 CN1
CN5
1
8
ETH card rear view
Green LED flashing: Network activity
Amber LED permanent: Network linked
Connector for installing ETH in the indicator
(see output card installation later on in this manual).
RJ45
NOTE:
For direct connection between dispositives use
crossover Ethernet cable.
For connection to a '
Hub'
or a '
Switch'
use
standard Ethernet cable.

ETH OUTPUT OPTION
KOSMOS SERIES www.ditel.es 6
CONFIGURATION
When connecting instrument to Power supply, display test begins automatically to check the good function of LED's
and digits, once this test is finished, display shows internal software version and then the unit goes to RUN mode.
Current MICRA user manual is perfectly valid except for the two following considerations:
The only necessary configuration for ETH output option is the IP address, which identifies the MICRA inside the
network. Once IP address is defined, all the rest of running parameters of the instrument can be modified using
available software MICRASOFTTCP that can be free downloaded from our website (see later on this manual).
Configuration menu
EtnEt
IPAdr
010
000
000
040
IP assignement “IP address”, for example: (10.0.0.40)
Enter “10”
“0”
“0”
Enter “40”
ETHERNET output configuration menu
It is possible to visualize MAC address of the MICRA, while "EtnEt" is
shown on display and ENTER is pressed for at least 3s until two first
numbers XX.XX appear. Pressing again two times, the next pair of
numbers will then secuentially shown (see right figure).
After pressing ENTER again, display shows "IPAdr" followed by IP
address configuration according to the figure above.
3s
Pro
EtnEt
XX.XX.
XX.XX.
XX.XX.
IPAdr

ETH OUTPUT OPTION
KOSMOS SERIES www.ditel.es 7
SOFTWARE
Initial screen after executing MICRASOFTTCP.exe aplication:
Indicator programming
After selecting 'with connection' the following screen is displayed:
When 'clicking' on the image appears
the window for selecting working
mode: 'with connection' or 'without
connection' for a demo mode.
To configure the working protocol,
in the menu 'Communication'
select 'Protocol' and then
'Modbus TCP'.

ETH OUTPUT OPTION
KOSMOS SERIES www.ditel.es 8
IP address configuration 'IP' (ID) in the 'Comunication' menu:
Visualization of the parameters configuration display:
Enter desired working IP address of the
indicator
To establish connection with the
indicator 'click' on 'CONNECT'.
At the bottom of the screen appears a
green progress bar. Once it is finished,
the message 'CONNECTED' is
displayed.
Depending on working mode defined
before, after 'clicking' on one of the 9
available configuration menus, it will be
displayed related information on the
right screen.
If it is necessary to change working mode, 'click' on one of the 3 upper available menus to set new mode. After
that, select again the configuration menu to display the information of available parameters.

ETH OUTPUT OPTION
KOSMOS SERIES www.ditel.es 9
Example of parameters visualization related to input configuration menu:
Data visualization:
Once all desired changes are made
'click' on 'Save Configuration'.
Otherwise the aplication will show a
message of confirmation.
Repeat the same procedure for the rest
of configuration menus. To transfer all
the configured parameters to the
ind icat or 'cli ck' o n ' S e n d
Configuration'.
To visualize data using 'Visualization'
menu, select 'Static' or 'Dynamic'.
'Static, visualization allows to see display, Offset and Setpoints values. These values are updated each time that
desired option is 'clicked' on.
With 'Dynamic' visualization is only possible to see display values and they are automatically updated from 1 to 6
times per second depending on how this parameter had been configured.

ETH OUTPUT OPTION
KOSMOS SERIES www.ditel.es 10
Example of 'Static' and 'Dynamic' visualization:
To connect with other indicator 'click' on 'DISCONNECT' and repeat all steps from the begining.
NOTE:
If an aplication different from MICRASOFTTCP is used, refer to memory addresses indicated in the MICRA
MODBUS user manual (also available in our website).
Access to embedded web server
Available data in this case is: Display value, SetPoints status and value, Input signal and process variables "Tare",
"Gross", "Max value" (Peak) and "Min value" (valley).
The indicator has also an embedded web server. Entering IP address of the instrument from any browser, it is
possible to visualize different variables of the process if you are connected to the network.
For an instrument configured for 0-10V input signal and 4 output relays, data will be displayed as it is shown in the
image below:

ETH OUTPUT OPTION
KOSMOS SERIES www.ditel.es 11
INSTALLATION
Output card installation
Front panel cover
Install and fix ETH output card by plugging connector in
the main circuit (RS232/RS485/Ethernet interface).
Display circuit.
Maiin circuit
Fix here
connections label
WARNING:
Disconnect all power and rest of input signals
connected to the indicator before installing or
extracting the output option card.
To physically install the output option, the electronics assembly should be first lifted out from the case. Use a
screwdriver or similar to slightly press both side tabs until the rear case is released. Then broke the junctions from
the corresponding polycarbonate cover in order to obtain the required orifice in the case. This orifice will allow
output card connectors come out through instrument rear part once it is installed.
Install ETH option on the indicated location pushing slightly down until both connectors get perfectly together. For
best installation, it is recommended to solder this card to the main circuit making use of the copper pads on both
sides of its insertion pin and those surrounding the circuit hole where it is inserted in.
Once ETH is installed, carefully put the circuitry again inside the case verifying that circuits slide properly without
much effort through rear case internal guides.
Each output card is supplied with an adhesive label that indicates wiring connections. To help identifying terminals,
this label should be placed in the upper side of the unit case.

ETH OUTPUT OPTION
KOSMOS SERIES www.ditel.es 12
DISEÑOS Y TECNOLOGÍA, S.A.
Xarol, 8-C P.I. Les Guixeres
08915 Badalona (Barcelona) - Spain.
Tel. +34 933 394 758
Fax +34 934 903 145
Email: dtl@ditel.es ; web: www.ditel.es 13.09.16 30727445
/