Page is loading ...

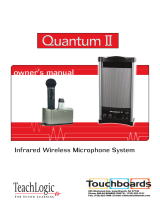
QUANTUM II
Infrared Sound Field System
User Guide

FORWARD
Congratulations on the purchase of your new QUANTUM II sound field system
produced by TeachLogic. Be assured that the Quantum has met all
manufacturers’ specifications and it will fulfill all your expectations. TeachLogic
incorporates state of the art technology, employs the most advanced
manufacturing methodology and uses only premium quality components to
assure you many years of reliable performance. Thank you for your confidence in
selecting TeachLogic products and we intend to support our products to your
complete satisfaction.
We hope you will take some time to review this manual to familiarize yourself with
the product features and help you understand its performance. We are confident
that the manual will help you gain the maximum use and benefit of the Quantum
II sound field system.
The manual provides a basic explanation on Infrared transmission and its
benefits. Then there are some guidelines to help with unit location and
installation instruction.
The manual continues with product description, followed by operational and use
instructions. The manual concludes with maintenance procedures and trouble
shooting analysis.
If you should encounter any difficulty or need further assistance, contact
TeachLogic customer service department.
Tel: 800-588-0018
Email: [email protected]
Brian Van Waay
President

A Brief Explanation of Infrared
Infrared is a light ray that is below the visible light spectrum (you can’t see it),
just like the sound spectrum extends beyond your hearing ability. The same as;
infrared transmission is used in the remote control of your TV set. A beam of
infrared light is emitted by a Light Emitting Diode (LED) from the remote control
and it is detected by a receiving diode in your TV set. When you push a certain
command on your control, the internal electronics causes the infrared light to
flicker in a programmed sequential pattern (called modulating the light beam).
That pattern is detected by the receiving diode and is electronically decoded to
send a command to the TV set to perform the command you have programmed
into your TV set.
So how does this apply to the infrared communication system which you are
about to start using? Well, the body-pack transmitter or handheld microphone
has several Light Emitting Diodes (LED) that emit infrared light beams to a sensor
located on the top of your Quantum II (that dark shining trim atop the Quantum
II). Now, when you talk into the microphone, the internal electronics in the
handheld or body-pack transmitter causes the light beam to flicker at the same
sequence as your breath varies from your voice when you speak into the
microphone. That sequential signal is detected by the sensor and a coded
electronic signal is sent to the receiver in the Quantum II. The receiver decodes
the electronic signal and converts it into electronic signal. The signal is routed to
the amplifier. The amplifier strengthens (amplifies) the electronic signal and
makes it strong enough to cause the speaker to move back and forth at the same
variation as your breath varied into the microphone. Now the replicate of your
voice is reproduced by the speaker, creating an audible sound level so all can
hear with ease.
Due to the number and strength of the diodes in the transmitter and sensitivity of
the Quantum II sensor, the IR signal will bounce off of walls, ceiling and floor and
be received by the sensor without interruption. However, infrared will not
penetrate solid surfaces, therefore; transmission will not go outside of the room.
Some words of caution and limitations of infrared:
Be sure that the path of transmission between the emitter and sensor is not
obstructed.
The body-pack transmitter will not function if placed in pocket
Infrared will not work outdoors in sunlight
Dark soft surfaces do not reflect infrared very well and can cause some limitation
to distance of transmission (drop outs).
Rooms larger than 2500 Sq. Ft. or have high ceiling can begin to exceed the
ultimate performance of the Quantum II.
If you should experience drop outs in certain areas, you could install an
additional sensor (IWS-50) to extend the system performance.

ASSEMBLY and INSTALLATION
Installing the Quantum II
A. The Quantum II can be operated as a free stance system on a speaker
stand. To use in this mode of operation:
• Locate the system off to one side in the front of the room. Point the front
of the unit toward the center of the listening area. Find an AC outlet
and plug the system in.
• Side wall location is also acceptable. Locate unit on either side about ¼
from front of room. Point the front diagonally across the listening area.
Locate an AC outlet and plug it in.
Optional: Folding Tripod Stand SS-300
B. Mounting the Quantum II on the wall, please review the following guidelines.
1. Selecting the most appropriate location for the Quantum can be the most
challenging. Every room is a little different, but in general the most
functional location is installing it on the front wall off to one side or the
other approximately ⅓ from either side wall.
An alternate choice would be on either side wall, located approximately ¼ -
⅓ the distance from the front of the room.
NOTE: Be conscious of an AC outlet requirement for power.
2. Once you’ve decided where to mount the Quantum II, hold the ‘U’ bracket
straight up and down against the wall with bottom of the bracket
approximately 5 -6 feet above the floor. Using a level to assure true vertical
orientation, mark the two mounting holes.
If installing onto a drywall, drill two ¼” holes and insert a molley bolt
provided. With a #2 Phillips head screwdriver, mount the wall bracket.
If installing into a wood or like material, use two sheet metal screws with
washers to mount the bracket to the wall.
For concrete wall, you’ll need to acquire and install a plastic insert for a # 8
sheet metal screw and install accordingly.
3. With the bracket mounted, route the plastic wire tie through the two tab
holes. Hold the power supply onto the two raised tabs with the AC plug end
toward the floor. With the power supply resting on the pegs, tighten the
wire tie thus securing the power supply to the bracket.
4. Insert the DC plug into the power input jack and place the Quantum II into
the bracket, secure each end with the ” bolt and washer provided.
5. Orient the Quantum with center pointing diagonally across the listening
area.
6. Plug the power cord into an AC outlet

THE QUANTUM II CONTROLS
• Channel A turns power “on/off” (red LED indicator) and adjusts the volume
of the IR microphone assigned to it. Normally the body-pack transmitter is
assigned to channel A. When the transmitter is turned “on” a green LED
will light, indicating that an IR signal is being received from the transmitter.
• Channel B also turns power “on/off” and adjusts the volume of the
microphone assigned to it. Normally the handheld microphone is assigned
to channel B. When the transmitter is turned “on” an amber LED will light
indicating an IR signal is being received from the transmitter.
• Tone control adjusts the tonal quality of the sound. You will feel a center
indent, turn CCW will boost the bass and turning CW will extenuate the
high frequencies.
• Line input jack (3.5mm) facilitates connecting the output of a DVD, Video
Projector, ipod, computer and amplifying its signal through the Quantum.
The volume can be controlled with the adjacent knob.
• Line output jack (3.5 mm) provides a composite line level output; it can be
used to connect to a personal FM assistive listening system or as an output
to a recording device. The small knob adjusts the output level to match
input of the device connected.
• External speaker output connector is located adjacent to the power plug.
An unpowered external speaker can be connected to the Quantum for
additional coverage. A companion unpowered Quantum would be the
speaker of choice.

Quantum Controls
1. Threaded insert for wall mount
bracket.
2. External sensor inputs.
3. Internal sensors.
4. Internal speaker.
5. Power switch & Channel A Control.
6. Power switch & Channel B Control.
7. Power indicator LED.
8. Infrared wireless transmission LED.
9. Tone control.
10. Line input volume control.
11. Line output gain control.

Sapphire (IRT-55)
The Sapphire’s vocal clarity is unsurpassed. Its high
level output is achieved by the unidirectional
(Cardioid) microphone and a unique free air
suspension system. With a built-in breath filter, the
Sapphire can function as a pass around hand mic.
The strategic alignment of the emitting diodes
assures reliable connectivity throughout the room
without static or drop out. With a tap on the power
button, the microphone is muted for private
conversation—tap again to restore to normal
operation. The auxiliary input allows wireless
playback of your iPod™ through the Sapphire. A three-position slide
switch provides selection of low, med, or high microphone sensitivity.
Crescent (IRT-30)
The Crescent is a lightweight
microphone/transmitter designed
to be worn under the chin
suspended by an adjustable
lanyard. The Crescent shape was
designed for efficient performance
and user comfort. The dual
internal microphones render
optimum voice pick up and quality reproduction. The Crescent
provides an auxiliary input (3.5mm) to accommodate the insertion of
an iPod™ or similar device for supplementary program material.
A soft touch mute button cuts the microphone “off” for private
conversation (the power LED will flash in the mute position). A
volume control allows adjustment of the microphone volume. The
external battery contacts accommodate the convenient use of a drop-
in charger.

Pendant Transmitter (IRT-89) with built-in
microphone. The pendant transmitter is the
smallest transmitter and is usually worn around
the neck. Two lanyards are provided: one with a
safety breakaway clasp and a longer adjustable
over the head style. The transmitting diodes are in
the top portion and the rechargeable NiMH
batteries are housed below. The power switch is
accompanied by a battery level LED
(Green=Useable, Red=Needs Charge). The A-B
switch selects the transmission channel. The
pendant can be placed in either the BRC-101 or
BRC-202 charger.
An optional Plug-in microphone (PM-505) can be
plugged into the top of the pendant for enhanced performance. Although
the built-in microphone gives satisfactory performance, the plug-in
microphone is a unidirectional element resulting in better vocal quality
and much more gain (more volume) before feedback.
Body-Pack Transmitter (IRB-30), usually
worn on the waistband, is the component that
transmits the IR signal to the sensor. The IRB-
30 has 10 emitting diodes on its front panel
and is powered by two rechargeable NiMH
batteries. Controls include a power “on/off”
switch and a mic gain control. Battery level
indicator LED: Green = useable charge, Red =
low battery.
It is required to plug in an external
microphone. There are several optional
microphones available and they plug into the
top of the IRB-30. The IRB-30 is equipped with
belt clip for waist attachment.
Caution: The body-pack cannot be placed in pocket and the red window
cannot be obstructed, those are the emitting diodes.

Plug-in Microphone (PM-505) is a small capsule size
microphone that plugs directly into the top of the IRB-30
body-pack. A lanyard cord is provided to accommodate
wearing the body-pack transmitter around the neck and
utilizing it as a pendant microphone. A windscreen is
included to prevent breath pops when used in close
proximity to the mouth.
Ultra Lite Microphone (ULM-835) is a miniature boom
style microphone supported by a wire around the left ear. The mic
boom extends along side of face and has a unidirectional microphone
with windscreen. The small ring on the boom prevents perspiration
from entering the mic element. Aside from
comfort, the boom style mic renders the best
performance in terms of sound quality and is
not prone to feedback.
Caution: The boom can be formed to fit but it is
not a flexible boom, do not bend back and
forth. IT WILL BREAK !
Collar Microphone (CM-838) is a flexible rod that is formed around
the neck. The end with the microphone and windscreen is then
contoured up toward the mouth. The cord
exits the rod in the center in back, out of the
way, and is plugged into the body-pack. The
collar mic utilizes a unidirectional mic
element to minimize feedback and renders
quality voice reproduction.

Lapel Microphone (LP-835) is a small capsule microphone with a
spring clip for securing on to a clothing edge. The lapel microphone is
well suited for out of sight application.
However; as a result of the microphone being farther away from the
mouth, more gain is required for adequate
volume. An omni-directional microphone
element is used to pick up from all directions.
These two factors make the lapel microphone
most prone to feedback when used near or
under a speaker.
Handheld Microphone Transmitter (IRH-35) is most
applicable for student use or direct presentation. It has
an “on/off” switch and a battery level indicator LED;
Green=useable charge, Red=low battery. The transmitter
has 10 emitting diodes around the bottom of the handle.
The metal housing provides low handling noise and insures
durable longevity.

You are now ready to test the system
To test the system, we are going to use a wireless body-pack transmitter
with microphone, handheld microphone and an auxiliary audio source
(DVD, CD Player, etc.)
Turn the Quantum “on”, using either large knob
• Red LED will light to indicate power
• Set the Ch. A and Ch. B controls to 12 0’clock
Using the Body – Pack Transmitter and Microphone
• Set the body-pack gain control (black knob on top) to minimum, fully
CCW
• Turn the body-pack “on” via the slide switch on the side of the body-
pack.
• Observe the Green LED on top of body-pack transmitter. (If Red,
batteries must be charged or replaced).
• Observe the Green LED adjacent to Ch. A volume control, it indicates
that an IR signal is being received from the body-pack.
• If the Ch. B LED turns “on”, remove the battery cover of the body-
pack and slide the channel selector switch to Ch. A.
• Speak into the microphone and adjust the volume using the gain
control on top of the body-pack
• If additional volume is required, turn Ch. A control clockwise
• While talking, walk around the perimeter of the room to verify 100%
reception of the signal.
• Upon completion of the test, put the belt-pack in the charger for
recharging
Handheld Microphone Transmitter and its Features
• Turn “on” the microphone with slide switch and observe the Green
LED (If Red, batteries will require a charge or be replaced)
• Observe the amber LED next to Ch. B volume control, it indicates
that an IR signal is being received from the microphone.
• If the Ch. A LED turns “on”, unscrew the bottom half of the handheld
and slide the channel selector switch to Ch. B.
• Speak into the microphone and adjust the volume using Ch. B
control on Quantum.
• While talking, venture around the room, you should experience 100%
reception throughout the area.
• Upon completion of test, put the microphone in the charger for
recharging

Check the Auxiliary Line Input
• Connect a DVD player, computer audio output, or iPod using a 3.5
mm patch cable to the line input.
Caution: Be sure you are connecting to a line level output
• With the quantum turned “on”, turn “on” or engage your auxiliary
source.
• Adjust the volume on the Quantum to about mid scale and then
adjust the output (if its not a fixed line output) of the auxiliary
source.
• Verify quality of sound and adjust to desired volume.
Line Output / Control
• The line output delivers a composite audio signal to be fed into
another device i.e. a recorder, iPod, or the input of an assisted
listening system.
• The adjacent knob adjusts the level of the output signal.
Drop-in Battery Chargers
The battery chargers were specifically designed to recharge NiMH
batteries at an optimum rate to maximize their use. The chargers
feature a recycle function, which
is used to restore the battery
charge capacity and extend their
service life.
BRC-50 charger recharges the
Crescent (IRT-30) and Body-Pack
transmitter (IRB-30). You merely
place the Crescent or body-pack
in their respective slot.
Connection will be made and
charging will commence. Charger
will automatically control the rate
and maintain the charge.

BRC-101 and BRC-202 drop-in chargers are for the handheld (IRH-
30) and pendant transmitter (IRT-89). The single slot (BRC-101) can
charge either or the dual (BRC-202) can charge both simultaneously.
In addition, both have a tray to insert two “AA” batteries for
recharging.

Trouble Shooting
• System does not work
o Verify AC power; the LED lights when turned “on”.
o System has power but no sound
Verify charged batteries in body-pack (Green LED when
turned “on”).
With body-pack turned “on”, check for signal presence
(LED adjacent to the volume control).
LED is lit but there is no sound, check microphone
plugged into body-pack.
Replace microphone.
Try with handheld microphone or another body-pack
Still inoperative and LED on Quantum is lit, send
Quantum in for evaluation.
• When using the microphone, the voice is distorted and / or signal
drop out occurs
o Check the charge on your batteries
Recycle the batteries by placing the transmitter in the
charger and press the grey button and hold for 3-5
seconds
The yellow LED will light and the charger will
automatically discharge the batteries and then recharge
to full charge. (Time required 4 -6 hours)
Recheck the system after cycling the batteries
If the problem persists, replace the batteries
• When using the body-pack transmitter and microphone, the voice
is intermittent and / or has a static like sound
o Try moving the cable back and forth at the plug-in connector
or where it is connects to the microphone
If the noise and intermittent connection is associated
with the movement of the cable, the cable connection
needs to be repaired.
• When plugging a CD player output into the auxiliary input, I get
distorted sound
o You may have connected to the earphone output of the CD
player rather than the line level output and its volume is too
high.
o The earphone output can be used but the volume level of
the CD player is very critical and must be held to a very low
level.

IRC-320 Quantum II General Specifications ________________________________
Receiver Input
Modulation
Reception Frequencies
Infrared
Wavelength
Tone Signal
De-emphasis
Frequency Response
S/N Ratio
THD
Nominal Deviation
Maximum Deviation
External Sensor Input
Connectivity Coverage
Line Input
Line Output
Equalization
Output Power
External Speaker Output
External Speaker
Connection
Power Supply
Dimensions
Weight
Infrared FM
FM Wide-band
Ch. A: 2.08 MHz
Ch. B: 2.54 MHz
850 nm
Ch. A: 32.768 KHz
50 µs
50 Hz, -15KHz, ± 3dB
›65 dB
‹1% @1KHz
± 10 KHz
± 25 KHz
Two, RCA
60 Ft. Line of Sight
3.5mm with Gain Control, Front
Panel
3.5mm with Gain Control, Front
Panel
Tone Control, ±6dB
30 Watts (RMS)
10 Watt / 4Ω
Two Terminal Phoenix Connector
15VDC / 2.3A / 34.5W
CE, CSA and UL Listed
6¼" W x 14" H x 4¾ " D
4.2 lbs.
GENERAL TRANSMITTER SPECIFICATIONS
Transmission Carrier Infrared
Transmission Frequencies 2.08 MHz & 2.54 MHz
Channel Switchable A or B Field Switchable
Transmitting Diodes Ten
Modulation FM Wide-Band
Pilot Tone Frequency 32.768 KHz
Peak Deviation ± 25KHz
Operating Range 2500 Ft². 60 Ft.
Power Switch (Slide) On/Off
Battery Charge Level (LED) Green, (Useable Charge)
Red, (Needs Charging)
Battery Life Approx. 7 Hr./Charge
External Battery Contact Charger Connection

IRT-55 SAPPHIRE TRANSMITTER
Transmitting Diodes 6
Operating Range 1,500 Ft ². 60 Ft. Line of Sight
Battery Discharge Indicator
Blue Full
Purple Medium
Red Low
Flashing Red Very Low Battery
Battery Used Lithium-ion (3.7V / 620mAh)
Battery Life Approx. 8-9 Hrs/Charge
External Power Charger DC +5V, Micro USB Connector
Transmission Angle 180° Conical
User Controls
Power Switch (push) On/Off
Mute Switch (push) On/Off
Mic Switch (3 position) +6db, Normal, -3db
Aux. Vol./Gain Increase, Decrease
Channel Select (A or B) in battery compartment
External Aux. Input 3.5mm Stereo Line Level
Dimensions 3 ⅝” H x 1¼” W x ¾” D
Weight 1.4 oz. Including battery
IRT-89 PENDANT TRANSMITTER
Adjustable Lanyard Safety Breakaway Clasp
Transmission Angle 180°
Input Top/Center
Microphone Input 3.5mm Jack, Lo-z
Waist Band Clip Tension Wire
Dimensions 5.25" H x 1.5" W x 1" D
Weight 4.8 oz. w/ Batteries
LM-300 Plug-In Microphone
Mic Type Electret/Condenser
Pick-Up Pattern Unidirectional
Connector Male, 3.5 mm
Frequency Response 100 Hz–16 kHz
Windscreen Pop Filter

IRB–30 BODY-PACK TRANSMITTER
Transmission Angle 180°
User Controls User Controls
Power Output Mic. Volume
Power On/Off
IR Power Output: (Hi/Lo)
CH. Select (A or B)
External Mic. Input Lo-z, 3.5mm
Waist Band Clip Heavy Spring Wire
Dimensions 4¾" H x 2¾" W x ¾" D
Weight 4.8 oz. w/ Batteries
IRH–30 HANDHELD TRANSMITTER
Compander Circuit Yes
Pre-emphasis 50µS
IR Emitter Location Built-in
Transmission Angle 360º
Current Consumption 330ma
Microphone Element Unidirectional, Dynamic
Battery Two Rechargeable NiMH, 1.2v / 2300mAH
Battery Life Approximately 6 Hours
Housing Aluminum
Dimensions 10” L x 1½” Dia.
Weight 11.4 oz. (with batteries)
IRT-30 CRESCENT TRANSMITTER
Shape Crescent, Under Chin
Lanyard Attachment Snap-In, Top (Safety)
Transmission Angle 180°, Conical
Emitting Diodes Six
Mute Switch Momentary, On/Off
Aux. Input (3.5mm) Switchable, Mic. or Line Level
Volume Control Thumb, Rotary
Two Microphone Elements Condenser Type, Unidirectional
Battery Single “AA” NiMH, Rechargeable
Battery Life 6–7 Hours
Battery LED Green—Useable
Red—Needs Charging
Dimensions 4¾" W x 1" D x 1¾" H
Weight 3.0 oz. w/ Battery

BRC-50 DROP-IN BATTERY CHARGER
Charging Slots Two Handheld, Slots A & C
One Crescent, Slot B
One Body-Pack, Slot D
Charging Mode Switching
Charging Current 1700ma ±10%
Discharge Rate 350ma
Red LED Indicator Batteries being Charged
Green LED Indicator Batteries Fully Charged
Yellow LED Indicator Batteries being Discharged
Audible Alert Intermittent Buzz - Batteries Fully Charged
Recycle Button (Grey) Press for Full Discharge and Auto Recharge
Auto Switching Switch from Discharge to Charge Mode
Charging Time 1.5Hr./Slot
Power Supply 12VDC/1.5A (Fuse protected)
Dimensions 6½” L x 3 3/8” W x 1 1/8” H
Weight 12.2 oz.
SINGLE-INSERT CHARGER (BRC-101)
Charging Port (Single)
Flashing Red LED
Solid Green LED
Dimensions
Weight
Pendant or Handheld
Batteries being charged
Batteries fully charged
5” W x 3¾” D x 1½” H
7.4 oz.
DUAL DROP-IN CHARGER (BRC-202)
Charging Ports (Two)
Flashing Red LED
Solid Green LED
Dimensions
Weight
Pendant or Handheld
Batteries being charged
Batteries fully charged
7½” W x 3¾” D x 1½” H
14.8 oz.

Five Year Limited Warranty
TeachLogic Infrared products are guaranteed to be free of defects in workmanship or
material for a period of five (5) years from date of original purchase, subject to the
following conditions:
1. Warranty excludes defects caused by normal use and wear, any abuse,
or failure to use the product in accordance per instructions.
2. Warranty is void if damage occurred because of misuse, or attempted
repair or modification by unauthorized personnel.
3. Warranty on batteries, cables, and cable connections are limited to one (1)
year.
4. Warranty on microphones/microphone elements are limited to one (1) year.
5. Warranty does not extend to finish or appearance past ninety (90) days.
6. All warranty service will be provided by TeachLogic or authorized service
center
7. Warranty is made to the original purchaser and may not be transferred
another user.
8. Warranty service rendered will be on a repair basis or replacement, which
ever TeachLogic deems to be most prudent for customer satisfaction and
economic feasibility.
TeachLogic will only accept warranty shipments accompanied by Return
Authorization Number previously assigned by TeachLogic personnel. Advance
warranty replacements will be made per the discretion of TeachLogic personnel.
TeachLogic will pay return shipping cost on all warranty repairs or replacements.
For Warranty Service: TeachLogic, Inc.
Tel: (800) 588-0018 or (760) 631-7800
Customer Service Department
1688 Ord Way
Oceanside, CA 92056
/