Installation Guide
Bath Filler with Handshower
M product numbers are for Mexico (i.e. K-12345M)
Los números de productos seguidos de
M corresponden a México (Ej.
K-12345M)
Français, page “Français-1”
Español, página “Español-1”
K-18486 K-18492
1054455-2-C

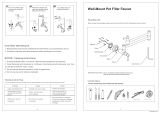
Tools and Materials
Thank You For Choosing Kohler Company
We appreciate your commitment to Kohler quality. Please take a few
minutes to review this manual before you start installation. If you
encounter any installation or performance problems, please don’t
hesitate to contact us. Our phone numbers and website are listed on
the back cover. Thanks again for choosing Kohler Company.
Before You Begin
IMPORTANT! For freestanding installations: Discard the following
hardware provided with the K-18486 bath filler: support plate (1),
threaded brass tubes (2), nuts (4), fiber washers (4), and screws (8).
IMPORTANT! For freestanding installations: Do not remove the
protective wrap from the riser tubes until instructed to do so.
This product may be installed as freestanding (installed onto riser
tubes) or deck-mount (installed onto the bath deck). Follow the
sections that pertain to your particular installation.
Please read all instructions before you begin.
Shut off the water supply.
Observe all local plumbing and building codes.
IMPORTANT! For proper drainage of the spout, install the bath
filler to a level surface.
Before installation, unpack the new faucet trim and inspect it for
damage. Return it to the carton until installation.
Adjustable
Wrench
Strap
Wrench
Hacksaw or
Tubing Cutter
Propane
Torch
Plumbers
Putty
Assorted
Screwdrivers
Solder
1-1/2" Thin Wall
Socket Wrench
Hex
Wrenches
Drill and
Hole Saw
Thread
Sealant
Small
Level
Two 12" (30.5 cm)
Long, 1/2" Copper
Tubes
1054455-2-C 2 Kohler Co.

Before You Begin (cont.)
Kohler Co. reserves the right to make revisions in the design of
faucets without notice, as specified in the Price Book.
Kohler Co. 3 1054455-2-C

Rough-In - Freestanding Installation
To properly plan for the installation, use the cut-out template provided
with your bath along with the roughing-in dimensions above.
2-15/16" (7.5 cm)
2-5/8"
(6.7 cm) D.
14-1/16"
(35.7 cm)
5-3/4"
(14.6 cm)
11-1/4"
(28.6 cm)
22-1/4"
(56.5 cm)
No change in measurements if connected
with drain illustrated. (K-11344)
8" (20.3 cm)
5-9/16" (14.1 cm)
22" (55.9 cm)
1054455-2-C 4 Kohler Co.

Rough-In - Deck-Mount Installation
NOTE: If the bath filler is installed with the K-11343 drop-in bath,
ensure the distance between the centerline of each marked hole and
the flange contacting the bath deck is maximum of 4″ (10.2 cm).
To ensure that water will not drip outside of the bath, properly
position the faucet on the deck so the outlet will be located inside the
bath.
To properly plan for the installation, use the cut-out template provided
with your bath along with the roughing-in dimensions above.
2-15/16" (7.5 cm)
2-5/8"
(6.7 cm) D.
14-1/16"
(35.7 cm)
5-3/4"
(14.6 cm)
11-1/4"
(28.6 cm)
8" (20.3 cm)
5-9/16" (14.1 cm)
Kohler Co. 5 1054455-2-C

1. Assemble the Bath Filler - All Installations
NOTE: The arms included with the bath filler are NOT identical.
The screw hole on each arm should face toward the bath filler body.
Determine the left and right-side arms. The setscrew hole for each
arm should face the bath filler body.
Apply lubricant (provided) to the O-rings on the bath filler body.
Insert the short side of the arms into the bath filler body.
Secure each arm to the bath filler body with a large setscrew.
Orient the handshower bracket with the large side of the taper
facing up.
NOTE: The handshower bracket should be assembled perpendicular
to the arm to ensure the handshower hangs over the bath.
Slide the handshower bracket onto the arm for the hot water
supply, then secure with the small setscrews at the desired height
on the arm.
Arm
Arm
Large Setscrew
Small Setscrew
Small Setscrew
Handshower Bracket (large side up)
Bath Filler Body
1054455-2-C 6 Kohler Co.

2. Prepare the Site - Freestanding Installation
Mark the location of the water supply lines from the bath drain.
Use the template provided with the riser tubes to assist you.
Verify the distance between the centerline of the marked holes is
5-29/32” (15 cm) and the distance between the centerline of each
marked hole to the centerline of the drain outlet is 22” (55.9 cm).
Drill the marked holes using a 1-5/8” spade drill bit or hole saw.
Insert the riser support through the drilled holes.
Secure the riser support to the subfloor with eight wood screws
(provided).
NOTE: To protect the riser support from debris when installing the
finished floor, position the supplied thread protectors in the holes of
the riser support.
Install the 1/2″ OD water supply tubing.
Install the finished floor material.
Measure and mark 20-11/16″ (52.5 cm) up from the surface of the
finished floor onto the water supply tubes. Cut the water supplies
tubes to this height.
IMPORTANT! The dimensions reference a nominal height of
22-1/4″ (56.5 cm) from the finished floor to the center of the
predrilled pilot hole in the freestanding bath (see ″Construct the Tee
Subfloor
Riser
Support
Drain
Outlet
Wood Screw
5-29/32
(15 cm)
22"
(55.9 cm)
Finished
Floor
21-9/16"
(54.8 cm)
20-11/16"
(52.5 cm)
Water Supply
Tubing
Male Copper
Connections
Kohler Co. 7 1054455-2-C

Prepare the Site - Freestanding Installation (cont.)
Assembly - Freestanding Installation″ section). Variations of ±5/16″
(8 mm) must be added/subtracted from the supply tube connection
and coupling assembly heights.
Solder 1/2″ male copper connections to the water supply lines.
The measurement to the top of these connections should be
approximately 21-9/16″ (54.8 cm) from the surface of the finished
floor.
Apply thread sealant to the male copper connections on each
water supply tube.
1054455-2-C 8 Kohler Co.

3. Install the Riser Tubes - Freestanding Installation
Thread the riser tubes down into the riser support until the riser
tubes almost bottom out. Do not completely tighten the riser
tubes into the riser support.
NOTE: The distance from the surface of the finished floor to the top
of the installed coupling assemblies must be approximately 24-7/16″
(62.1 cm).
Thread a coupling assembly onto each water supply connection,
then tighten with a wrench.
Install the plastic pipe plugs (provided) into each coupling
assembly.
Turn on the main water supply.
Check for leaks. Adjust as needed.
Turn off the main water supply.
Remove and discard the plastic pipe plugs.
Thread the riser tubes out of the riser support, then thread the
riser tubes up onto the coupling assemblies until hand-tight.
Slide an escutcheon with gasket (supplied in the bath filler
hardware pack) over each riser tube and against the surface of the
finished floor. The setscrew holes on each escutcheon should face
toward the bath.
Secure each escutcheon in place with a small setscrew.
Escutcheon
Riser Tube
Plastic Pipe Plug
Finished Floor
Finished Floor Level
Gasket
Water Supply
Tubing
Coupling
Assembly
Riser
Tube
24-7/16"
(62.1 cm)
Small Setscrew
Kohler Co. 9 1054455-2-C

4. Construct the Tee Assembly - Freestanding Installation
Thread the fastener support into the side of the bath with a 1/4″
hex wrench. Do not overtighten.
Ensure the distance from the head of the fastener support to the
bath surface is approximately 1/2″ (1.3 cm).
Thread the fastener rod into the fastener support.
Thread a bracket onto one end of tee rod until hand-tight.
Slide the tee rod through the center hole of the tee.
Hand tighten the remaining bracket onto the other end of the tee
rod to construct the tee assembly.
Ensure the center-to-center distance between the brackets aligns
with the center-to-center distance of the installed riser tubes.
Slide the tee assembly down onto the installed riser tubes. Do not
secure the tee assembly at this time.
Tee
Tee Rod
Bath
Bracket
Fastener Support
Fastener
Rod
Fastener
Support
Fastener
Rod
1/2"
(1.3 cm)
1054455-2-C 10 Kohler Co.

5. Complete the Freestanding Bath Filler Install
Apply lubricant (supplied) to the O-rings on the coupling
assemblies.
Insert the arms of the bath filler onto the coupling assemblies.
Ensure the arms are flush against the top of the riser tubes.
Secure the arms to the coupling assemblies with the large
setscrews.
Slide the tee assembly up to cover the seam between the arms
and the top of the riser tubes.
Insert the fastener rod to the center of the tee assembly, as shown.
Secure the tee assembly, with two small setscrews, below the
center of the tee assembly.
Remove the protective wrap from the riser tubes.
Secure the brackets at this location with small setscrews.
Proceed to the ″Install the Handshower - All Installations″ section.
Bracket
Arms
Riser Tube
Fastener Support
Coupling Assembly
Coupling Assembly
Small Setscrew
Small Setscrew
Small Setscrew
Large Setscrew
Kohler Co. 11 1054455-2-C

6. Prepare the Site - Deck-Mount Installation
NOTE: Provide an access panel under the bath deck for water
supply connections.
NOTE: Reference the ″Rough-In - Deck-Mount Installation″ section
of this guide before proceeding.
Place the support plate onto the bath deck where the water
supply tubing will be located. (1)
Trace the holes of the support plate at this location to set the
centerline distances for the water supply tubing.
Verify that the location of the support plate will allow the spout
of the bath filler to reach over the bath deck and into the bath. (2)
Verify that the distance between the centerline of the holes on the
support plate will be 5-29/32” (15 cm) ±0. (3)
NOTE: If a hole saw will be used to drill the holes, drill outside the
line of the marked holes.
Drill the marked holes on the bath deck using a 1-9/16” spade
drill bit or 1-1/2″ hole saw. Remove any debris from the drilling
process.
Verify the diameter of the drilled holes will accommodate the
diameter of the tubes. Adjust the hole diameter slightly, if needed.
Secure the support plate to the unfinished bath deck with the
eight (provided) wood screws. (4)
Check the
reach.
Bath Deck
Support
Plate
Screw
5-29/32" (15 cm) ±0
1-1/2" D.
1) 2)
3) 4)
1054455-2-C 12 Kohler Co.

7. Install Spout
Thread the tubes into the support plate.
Place a fiber washer and nut over the tubes, both above and
below the deck.
Hand tighten the nuts.
Verify the top of the tube is flush with the surface of the intended
finished deck height.
Securely tighten the nuts with a wrench.
Solder a 1/2″ male copper connection (not supplied) to the
outside of a 12″ (30.5 cm) section of each water supply line.
Apply thread sealant to each male copper connection.
Securely tighten the coupling assemblies to each male copper
connection.
Connect the supply lines under the deck to the main water
supply.
Insert the plastic pipe plugs into the coupling assemblies.
Turn on the water supply.
Check all connections for leaks. Adjust as needed.
Turn off the water supply, then remove and discard the plastic
pipe plugs.
Finish the bath deck and surround.
Solder together.
Apply thread
sealant.
Nut
12"
(30.5 cm)
Fiber
Washer
Plug
Coupling Assembly
Male Copper Connection
Water Supply
Tubing
Kohler Co. 13 1054455-2-C

8. Install the Bath Filler - Deck-Mount Installation
Place a gasket and escutcheon over each coupling assembly.
Face the setscrew hole on each escutcheon toward the outside of
the bath.
Apply lubricant (supplied) to the O-rings on the coupling
assemblies.
Slide the arms of the bath filler over the coupling assemblies.
Secure the arms to the coupling assemblies with the large
setscrews.
Secure each escutcheon in place with a small setscrew.
Proceed to the ″Install the Handshower - All Installations″ section.
Bath Filler
Gasket
Escutcheon
Arm
Coupling
Assembly
Large Setscrews
Small Setscrew
Small Setscrew
1054455-2-C 14 Kohler Co.

9. Install the Handshower - All Installations
Thread the 45° elbow with the screen washer to the handshower.
Thread the hose end with O-ring and washer to the 45° elbow.
Thread the hose end with nut and washer to the diverter outlet
on the underside of the bath filler body.
Securely tighten both ends of the hose with a wrench.
Slide the handshower into the handshower bracket.
Handshower
Screen Washer
Washer
Handshower
Bracket
Hose End
with O-Ring
Hose End
with Nut
45˚ Elbow
Washer
Diverter
Outlet
Kohler Co. 15 1054455-2-C

10. Complete the Installation - All Installations
Ensure all connections are tight.
Remove the aerator from the spout with the key (provided).
Turn on the main water supply.
Lift and rotate the faucet handle to the full hot position. Run hot
water through the spout for about one minute to remove any
debris.
Rotate the faucet handle to the full cold position. Run cold water
through the spout for about one minute to remove any debris.
Check for leaks. Adjust as needed.
Lift the handshower out of the handshower bracket.
Push the diverter button to activate the handshower.
Check for leaks at each end of the handshower hose. Adjust as
needed.
Push the faucet handle down to turn the water off.
Place the handshower back into the handshower bracket.
Reinstall the aerator.
Handshower
Spout
Aerator
Key
Handshower Hose
Handshower
Bracket
Diverter
Button
Faucet
Handle
1054455-2-C 16 Kohler Co.
Page is loading ...
Page is loading ...
Page is loading ...
Page is loading ...
Page is loading ...
Page is loading ...
Page is loading ...
Page is loading ...
Page is loading ...
Page is loading ...
Page is loading ...
Page is loading ...
Page is loading ...
Page is loading ...
Page is loading ...
Page is loading ...
Page is loading ...
Page is loading ...
Page is loading ...
Page is loading ...
Page is loading ...
Page is loading ...
Page is loading ...
Page is loading ...
Page is loading ...
Page is loading ...
Page is loading ...
Page is loading ...
Page is loading ...
Page is loading ...
Page is loading ...
Page is loading ...
Page is loading ...
Page is loading ...
Page is loading ...
Page is loading ...
/