Page is loading ...

1-800-547-5740 • Fax: (503) 643-6322
www.ueitest.com
email: [email protected]
om
AGENT
: Refrigerant Leak Detector
INSTRUCTION MANUAL
L
ow
B
attery
LO NORM HI
Certified J2791
Mute
Sens.
R
LD15
Display # Leak Size
(oz/yr)
1-3 < 0.1
4-6 0.1 to 0.5
7-9 > 0.5
8
L
E
A
K
S
I
Z
E
REFRIGERANT DETECTOR
™
RLD15
INTRODUCTION
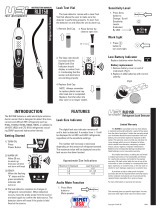
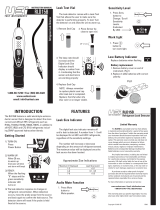
The AGENT RLD15 features a long life
heated sensor technology that is designed to
detect the more current and difficult HFC
refrigerants such as R134a, R410A, R404A,
R407C, in additiion to all HCFC (R22) and CFC
(R12) refrigerants including SNAP approved
hydrocarbon blends.
GETTING STARTED
LEAK SIZE INDICATOR
T
he digital leak size indicator remains off
until a leak is detected, a number from 1 - 9
will be displayed for all HFC and HCFC refriger-
ants.
Regardless of the sensitivity settings.
The number will increase or decrease
depending on the amount of refrigerant
sensed. The maximum value will be displayed
once the leak source has been located.
SENSITIVITY LEVEL
LOW BATTERY INDICATOR
Replace batteries when flashing
AUDIO MUTE FUNCTION
Maximum # Displayed
1-3
4-6
7-9
Leak Size (oz/yr)
< 0.1
0.1 - 0.5
> 0.5
LEAK TEST VIAL
The Leak detector comes with a Leak Test
Vial that allows the user to make sure the
detector is performing properly. To test: Turn
the detector on and allow the unit to warm-up.
NOTE: Always remember to
replace plastic seal cap after leak
test is completed. Replace Test
Vial when the blue color is no
longer visible.
3/8” or Less
1. Remove Seal Cap
4. Replace Seal Cap
3.
The beep rate should
increase and the Digital
Leak Size Indicator
should display a number
from 4 - 6 indicating that
the sensor and electron-
ics are working properly
2. Place Sensor tip close to
open vile.
FILTER REPLACEMENT
1. Replace Filter: Unscrew sensor tip as
s
hown to replace filter. Replace filter
whenever it becomes visibly dirty or every
2 to 3 months depending on use.
SENSOR REPLACEMENT
1.) Remove sensor by unscrewing sensor tip
a
nd pulling out the socket.
2.) Install the new sensor by aligning the mark
on the sensor cover with that on the probe and
pressing together.
WARNING
DO NOT
TWIST
OR
FORCE
THE
SENSOR INTO THE SOCKET.
Misalignment can damage the sensor pins.
AA
AA
AA
AA
FEATURES
SPECIFICATIONS
Model #
Name
Sensitivity
Sensor Life
Response Time
Power Supply
Battery Life
W
arm-Up T
ime
Probe Length
Numerical Display
W
eight, lbs
W
arranty
RLD15
AGENT 1
.05 oz/yr R134a
.025 oz/yr R22
> 300 Hours
≤ 1sec
4 AA Alkaline
8 Hrs. Continuous
<20 Seconds
17 inches
7 Segment Digital (1-9)
1.5 Lbs
3yr (Includes Sensor)
Cross Sensitivity to Automotive Chemicals
Some Automotive solvents and chemicals
have similar hydrocarbon properties as R134a
and may elicit a positive response (< 30 seconds)
from the AGENT. Before leak detecting, clean
up any chemicals in the list below that elicit a
response.
Dextron Transmission Fluid heated to 160˚F
Quaker State motor oil heated to 160˚F
Rain-X Windshield wash fluid
Ford silicone lubricant
Ford Gasket adhesive (when wet)
Ford rust inhibitor (when wet)
Loctite Natural Blue Degreaser (undiluted)
Ford brake parts cleaner (when wet)
Ford silicone rubber (when uncured)
Motorcraft antifreeze heated to 160˚F
Gunk liquid wrench (when wet)
Ford spot remover (when wet)
Ford pumice lotion (with mineral solvent)
Ford motorcraft brake fluid
Ford carburetor cleaner (when wet)
L
ow
B
attery
LO NORM HI
Certified J2791
Mute
Sens.
RLD15
Display # Leak Size
(oz/yr)
1-3 < 0.1
4-6 0.1 to 0.5
7-9 > 0.5
8
L
E
A
K
S
I
Z
E
REFRIGERANT DETECTOR
™
Low
Battery
LO NORM HI
Certified J2791
M
ute
Sens.
RLD15
Display # Leak Size
(oz/yr)
1-3 < 0.1
4-6 0.1 to 0.5
7-9 > 0.5
8
L
E
A
K
S
I
Z
E
REFRIGERANT DETECTOR
™
Mute
Sens.
Display # Leak Size
(oz/yr)
1-3 < 0.1
4-6 0.1 to 0.5
7-9 > 0.5
8
L
E
A
K
S
I
Z
E
Mute
Sens.
Display # Leak Size
(oz/yr)
1-3 < 0.1
4-6 0.1 to 0.5
7-9 > 0.5
8
L
E
A
K
S
I
Z
E
LO NORM HI
PLEASE
RECYCLE
LIMITED WARRANTY
RLD15
The AGENT is warranted to be free from defects in
materials and workmanship for a period of three years
from the date of purchase. If within the warranty period
your instrument should become inoperative from such
defects, the unit will be repaired or replaced at UEi’s
option. This warranty covers normal use and does not
cover damage which occurs in shipment or failure which
results from alteration, tampering, accident, misuse,
abuse, neglect or improper maintenance. Batteries and
consequential damage resulting from failed batteries are
not covered by warranty.
Any implied warranties, including but not limited
to implied warranties of merchantability and fitness for
a particular purpose, are limited to the express
warranty
. UEi shall not be liable for loss of use of the
instrument or other incidental or consequential dam
-
ages, expenses, or economic loss, or for any claim or
claims for such damage, expenses or economic loss.
A purchase receipt or other proof of original purchase
date will be required before warranty repairs will be
rendered. Instruments out of warranty will be repaired
(when repairable) for a service charge. Return the unit
postage paid and insured to:
UEi
8030 SW Nimbus A
ve.
Beaverton, OR 97008
Copyright © 2009 UEi RLD15-MAN 3/09
Mute
Sens.
D
isplay # Leak Size
(oz/yr)
1-3 < 0.1
4-6 0.1 to 0.5
7-9 > 0.5
8
L
E
A
K
S
I
Z
E
L
E
A
K
S
I
Z
E
1. TURN ON:
Press
Power Button
1
.
P
ress Mute
Button to
Mute Speaker.
1. Press Sens.
B
utton to
Change / Scroll
Sensitivity
Levels.
(Indicated
By LED)
2. WARM UP:
Allow 20 sec.
to warm up.
(Indicator will
blink and alarm
will beep)
LO NORM HI
3. READY:
When the flashing
“8” stops and the
green sensitivity
indicator LED
turns on
L
E
A
K
S
I
Z
E
Approximate Size Indications
BATTERY REPLACEMENT:
1. Remove battery cover on back of
instrument. (Fig1)
2. Replace batteries (4 AA) with correct
polarity.
(Fig1)
Replace w/
New Filter
Remove
O
ld (Dirty) Filter
U
nscrew
Sensor Tip
Unscrew
Sensor Tip
F
ilter
P
ull Straight Apart
DO NOT TWIST!
1.)
2.)
S
crew On
S
ensor Tip
Filter
Push Straight Together
DO NOT TWIST!
DO NOT
T
W
IST
!
A
lign New Sensor With Tip
And Push Straight On.
/


