Wall Register Installation Instructions
WALL REGISTER INSTALLATION
INSTRUCTIONS
TOOLS AND MATERIALS:
Unpack and inspect the product for any
shipping damages. If you find damages, do
not install. Contact Customer Relations at
1.866.855.2284. If you need assistance or
have questions while installing your wall
register, contact Customer Relations.
We recommend consulting a professional if
you are unfamiliar with installing hardware.
Signature Hardware accepts no liability for
any damage to the wall, or for personal injury
during installation.
BEFORE INSTALLING
INSTALLATION
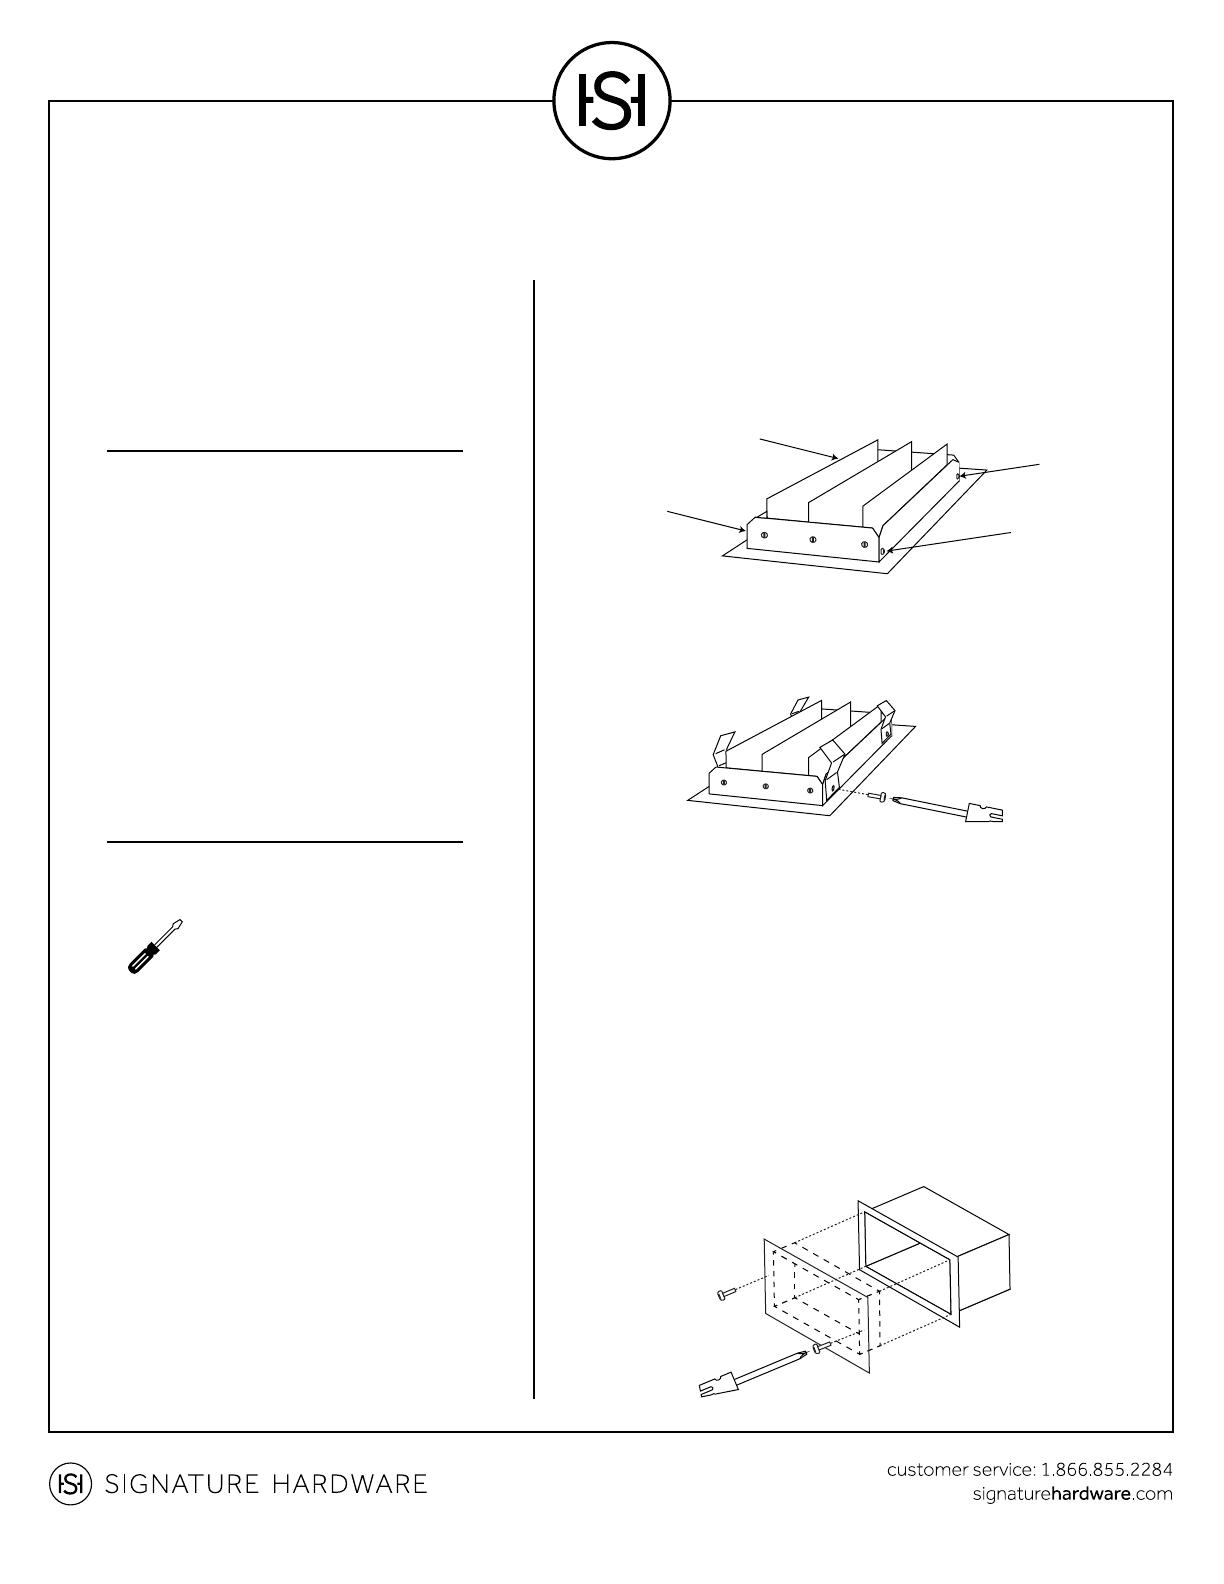
1. Remove the old wall register. If the existing register is
screwed to the wall, use a screwdriver to remove the screws
that hold the register in place.
2. Insert the new wall register. The louver frame will fit into the
air duct opening, while the lip of the register will sit flush against
the wall surface. If your register came with tension spring clips,
attach them to the register before inserting (see below). The
clips will snap into place once the register is pressed into the
duct. If your register came with mounting screws, use them to
secure the register to the wall.
Before you begin, read the installation
instructions below. Observe all local building
and safety codes.
Screwdriver
2. Using the removed screws, attach the spring clips to the
register as shown.
1. Remove four screws from the new wall register, as shown.
Do not discard the screws.
SPRING CLIP INSTALLATION


