Page is loading ...

ISSUE-1 11/8/2017 1
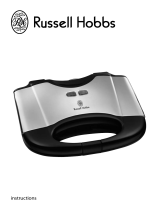
2 Slice Sandwich Toaster
Model No. S6191H
Care & Instruction Manual
For household and indoor use only
Please read these instructions before use and retain for
future reference

ISSUE-1 11/8/2017 2
Electrical safety
You should only plug the appliance into a 220V‐240V AC, 50Hz
supply. Connecting it to other power sources may damage the
appliance and will invalidate the guarantee.
Switch off and unplug when not in use and before cleaning the
appliance.
Keep the appliance and its cord out of reach of children less than
8 years.
Do not allow children to use the appliance without supervision.
This appliance can be used by children aged from 8 years and
above and persons with reduced physical, sensory or mental
capabilities or lack of experience and knowledge if they have
been given supervision or instruction concerning use of the
appliance in a safe way and understand the hazards involved.
Children shall not play with the appliance. Cleaning and user
maintenance shall not be made by children unless they are older
than 8 and supervised.
Keep cable, plug and appliance dry and away from areas where it
is likely to get splashed. Never immerse in water.
Do not pull on the cable to disconnect from mains supply.
Do not operate the appliance if damaged or after it malfunctions.
In the event the supply cord is damaged, in order to avoid a
hazard it must only be replaced by a qualified service engineer,
with a suitably approved part.
This appliance must be positioned so that the plug is accessible
and the plug socket is within easy reach of the power cord.
This appliance must be plugged in to an earthed socket outlet.

ISSUE-1 11/8/2017 3
Warning!
This appliance is intended exclusively for use in domestic
households. It is not suitable for commercial use.
Do not leave unattended during use.
Do not cover and allow the sandwich toaster to cool fully before
storing.
Do not operate the sandwich toaster using a timer or separate
remote control.
The surfaces of the sandwich toaster are liable to become
hot during and immediately after use; wear oven gloves
when handling the appliance. Note the hotplates are
subject to residual heat after use.
Bread may burn, do not use the sandwich toaster on, near or
under flammable materials (e.g. curtains) or heat sensitive
surfaces.
Do not place foil wrapped food in this sandwich toaster and
remove all wrappings from food before toasting.
The filling of a toasted sandwich will be hot, allow it to cool to a
comfortable temperature before eating.
Ensure that there is adequate ventilation. A minimum of 5cm
around all sides of the sandwich toaster is recommended.

ISSUE-1 11/8/2017 4
Parts

ISSUE-1 11/8/2017 5
To use
1. Place the sandwich toaster on a stable, flat heat resistant surface
and clean thoroughly before use.
2. Close the lid, plug in and switch the power on at the mains. The
red ‘power’ light will illuminate.
3. Whilst waiting for the sandwich toaster to reach the correct
working temperature prepare the sandwiches, placing the butter
or spread on the OUTSIDE of the sandwich.
4. When the hotplate has reached the correct temperature (after
approximately 3 minutes) the green ‘temperature control’ light
will illuminate.
5. Open the lid and taking care not to touch the hotplates, place the
sandwiches onto the hotplate.
6. Check that the sandwich edges cover the edges of the mould.
Close the lid slowly by pressing down on the handle until the
catch closes.
7. After approximately 3-4 minutes check to see if the sandwiches
have reached the required level of browning.
8. If satisfactory, remove the sandwiches using heat resistant
plastic or wooden implements. Do not use sharp or metal
implements, as this will damage the coating on the hotplates.
9. If more browning is required, close the lid and recheck after a
short interval.
10. The sandwich toaster can be stopped at any time by removing
the plug.
Notes:
Before using the sandwich toaster for the first time, wipe internal
surfaces with a damp cloth and then coat the hotplates with
some oil or butter. Follow the directions above.
The thickness of each slice of bread should be a maximum of
1cm.
Position fillings (such as cheese) toward the center of each
sandwich to minimize leakage.
A teaspoon of sugar sprinkled on the outside of sandwiches with
fruit fillings (before browning) will make them crisper.
If difficulty is experienced when closing the lid, remove some of
the filling or use thinner bread to prevent damaging the sandwich
toaster.

ISSUE-1 11/8/2017 6
Cleaning
Clean the sandwich toaster after each use.
1. Switch off and unplug the sandwich toaster from the mains and
allow the grill to cool before cleaning.
2. Wipe the cool hotplates with paper kitchen towel to remove
grease before wiping with a damp (not wet) dishcloth soaked in
washing up water.
3. Wipe again with a damp dishcloth, this time soaked in clean
water and dry thoroughly with paper kitchen towel.
4. If any filling is difficult to remove, pour a little cooking oil onto
the hotplate and wipe off after 5 minutes when the filling has
softened.
5. Wipe outside surfaces with a soft damp cloth and ensure that no
moisture or oil enters the cooling slots. Do not use detergents or
abrasives as these may scratch the surface and never immerse in
water.
6. Allow all surfaces to fully dry before using the sandwich toaster
again.
Technical specification
Rated voltage 220-240V AC 50/60Hz
Power consumption 680-820W
Class rating I (Earthed)
BS 1362 fuse 13A
Capacity 2 Slice

ISSUE-1 11/8/2017 7
Plug / Wiring advice
The wires in this mains lead are coloured in accordance with the
following UK electrical code: BLUE = NEUTRAL
BROWN = LIVE
GREEN + YELLOW = EARTH
Non-rewireable plug
This appliance may be fitted with a “non‐rewireable” plug. If you
need to change the fuse in a “non‐rewireable” plug, the fuse cover
must be refitted. If the fuse cover is lost or damaged, the appliance
must not be used.
Rewireable plug
The colours of the wires in the mains lead of this appliance may not
correspond with the coloured markings identifying the terminals in a
rewireable plug. Rewireable plugs should only be replaced by a
suitably competent person. If in doubt, consult a qualified
electrician.
The BLUE wire must be connected to the
terminal marked with the letter N
The BROWN wire must be connected to the
terminal marked with the letter L
The GREEN & YELLOW wire must be
connecting to the terminal marked with the
letter E or the earth symbol .
Recycling electrical products
This marking indicates that this product should not be
disposed with other household wastes throughout the EU. To
prevent possible harm to the environment or human health
from uncontrolled waste disposal, recycle it responsibly to
promote the sustainable reuse of material resources. To return
your used device, please use the return and collection systems
or contact the retailer where the product was purchased. They
can take this product for environmental safe recycling.
If you encounter any problems
with this product please call our
customer care team on
0345 640 30 30
Produced in China for
Argos Limited,
489 – 499 Avebury Boulevard
Central Milton Keynes
MK9 2NW. UK.

ISSUE-1 11/8/2017 8
/


