Technika MC-109 User manual
- Category
- Car media receivers
- Type
- User manual
This manual is also suitable for
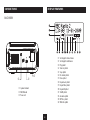
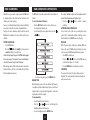
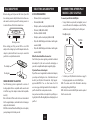
Technika MC-109 MP3 Docking Station, the key features include: DAB/FM radio, CD player, MP3/WMA compatible, iPod dock, and headphone jack. This compact system is packed with features, making it a great choice for any music lover. With its stylish design and easy-to-use controls, the MC-109 will look great in any home.
Technika MC-109 MP3 Docking Station, the key features include: DAB/FM radio, CD player, MP3/WMA compatible, iPod dock, and headphone jack. This compact system is packed with features, making it a great choice for any music lover. With its stylish design and easy-to-use controls, the MC-109 will look great in any home.


-
 1
1
-
 2
2
-
 3
3
-
 4
4
-
 5
5
-
 6
6
-
 7
7
-
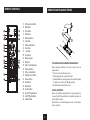 8
8
-
 9
9
-
 10
10
-
 11
11
-
 12
12
-
 13
13
-
 14
14
-
 15
15
-
 16
16
-
 17
17
-
 18
18
-
 19
19
-
 20
20


Technika MC-109 User manual
- Category
- Car media receivers
- Type
- User manual
- This manual is also suitable for
Technika MC-109 MP3 Docking Station, the key features include: DAB/FM radio, CD player, MP3/WMA compatible, iPod dock, and headphone jack. This compact system is packed with features, making it a great choice for any music lover. With its stylish design and easy-to-use controls, the MC-109 will look great in any home.
Ask a question and I''ll find the answer in the document
Finding information in a document is now easier with AI
Related papers
-
Technika MC-229I User manual
-
-
-
-
-
-
-
-
-