Page is loading ...

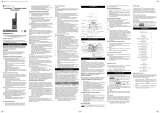
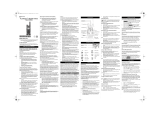
Motorola T5500 User Guide
FCC Licensing Information
GMRS radios require FCC licenses. www.fcc.gov
Installing batteries
1. Install 3 “AA” batteries (may be rechargeable or recyclable batteries)
2. Install the batteries according to the Positive (+) or Negative side of the
battery. (The top of the AA battery is positive).
3. Replace the battery cover and turn the radio on by turning the knob on
the top of the radio to the right.
• Batteries should be removed if storing the radios for an extended period
Optional NiMH battery chargers can be purchased from Motorla
Talking and Listening
1. When talking, press the Push to Talk (PTT) black button on the left
side of radio
2. When finished talking, release the PTT button
3. When the PTT button is released, a unique tone is transmitted to
announce someone is finished transmitting or has released the PTT
button.
4. When talking, hold the radio 2-3 inches from your mouth and speak
directly into the radio.
Tips for talking on the radio during disasters
1. Call the person or group first and announce your name
I.E. Roble Leader, Roble Medical Group
I.E. Hey Susie, Mike calling
2. Keep the messages as short and specific as possible
a. Too much chatter takes up air time
3. Acknowledge the message received
a. Roble Leader, Roble Medical Group calling
b. Roble Medical Group, go to Roble Leader
c. Roble Leader, Roble Medical Group, we have 2 vicitms with leg
injuries
d. Roble Medical Group, Roble Leader copies you have 2 victims
with leg injuries

Selecting or Changing Channels
1. Press the Menu key once to select a channel
2. The big numbers in the center of the screen will flash
3. Press the + button to move to a higher channel; Press the – button to
move down to a lower channel
4. When finished selecting a channel press the Menu five (5) more times
until the screen stops flashing or wait 8 seconds without pressing the
Menu button.
Note: Better transmission and reception will be on GMRS Radio Channels
1-7 or 15-22; GMRS channels transmit with 1 watt of power.
Family Radio Service channels (8-14) transmit with 0.5 watts of power
Selecting or Changing Private Line (P.L.) Codes
1. Press the Menu key twice to select a PL code
2. The little numbers in the top right corner will flash
3. Press the + button to move to a higher PL code; Press the – button to
move down to a lower code
4. When finished selecting a PL code, press the Menu button four (4)
more times until the screen stops flashing or wait 8 seconds without
pressing the menu button.

GENERATOR INFORMATION
Set-Up
1. READ the INSTRUCTIONS First as supplied by the manufacturer
2. Set up the wheels, the handle, and the ground wire
3. Add Synthetic 10-30W (30W oil can be used, but not below 40 degrees
F.) oil to the engine (21 oz) – the yellow dipstick at the top of the
crankcase locates the fill spout.
4. Add 5 gallons of fuel with a fuel stabilizer (stabilizer can be purchased at a
local hardware store. Tell the store clerk you are using the fuel for a
generator that will be stored long-term.
Starting
1. Check the fuel shut-off valve and turn to the on position
2. Move choke control to the CHOKE position
3. Move the throttle control to FAST position
4. Move the STOP control to the ON position
5. Make sure no appliances are plugged in (under a load)
6. Pull rope handle rapidly until engine starts or turnovers
7. If necessary, move CHOKE position to the RUN position
8. Run the generator for 2-3 hours as a break-in period for the engine
Shutting Down
1. Unplug all appliances before shutting down
2. Move the throttle to IDLE or SLOW position
3. Move stop control to OFF position
Storing
1. Before storing, close the fuel shut-off valve.
2. Run the engine to use residual gasoline in the fuel line and carburetor
3. It is recommended not to store the generator long-term with fuel in the
line, because to prevent gum from forming on the carburetor or fuel
system.
4. Keep gasoline in an approved safety can

POP-UP CANOPY
It is best to set-up with two people. Take the canopy out of the bag or box. Take
corners and walk out expanding the accordion folds as much as possible.
Look for the black plastic bracket in the top corner that the corner bars will slide
up. Slide the bar down until the bracket clicks over a silver button. This will lock
the bracket in place. Repeat until all four corners are locked in place. Place the
tarp over the corners and fasten with the Velcro in each corner. Extend the legs
of the corner supports by extending the lower leg out until it clicks over a silver
button.
To take down, push the silver buttons in the mid section of each support to
shorten the supports. Push the silver button in the top part of each black bracket
and pull down over the button. (Be careful – fingers/skin get caught here). Do
one corner at a time and repeat until all four corners have been completed.
Once down – push all four corners into the center and pack into the carrying bag
with the feet towards the bottom.

November 30 Exercise
A radio test will be conducted on Channel 16-10 at 10:45 AM. We will start with
a roll call of Council Districts 4, 3, 2, 1, 5, 6, 7, and 8.
1. The first test is to evaluate direct radio-to-radio capabilities from each
cache group to the top of City Hall.
2. The second test is to relay information from the opposite ends of the City
and to see if each group can receive from the different locations.
3. If communications are poor or nil, OES staff will contact each person via
phone to confirm radio reception.
/


