Page is loading ...

Quick Start Guide
KiStudio Lab
Type 2910B
2910B_012-040e-06.23
Foreword
Thank you for choosing KiStudio Lab for your measurement
tasks. Please read these instructions carefully to get ready for
your first measurements.
The information in this document is subject to change at any time
without prior notice. Kistler reserves the right to improve and
modify the product in accordance with technical progress without
the obligation to inform persons and organizations based on
these changes.
© 2023 Kistler Group. All rights reserved.
Content
1. General Information
2. Compatible Devices
3. System Requirements
4. Software/Firmware Download and Installation
5. Connect device and install KiStudio Lab
6. Setting up a Simple Measurement
7. Expert Tips
8. Troubleshooting
1 General Information
The intuitive KiStudio Lab software is used to configure and oper-
ate the KiDAQ device as well other Kistler data acquisition devic-
es like LabAmp. The data export in binary MDF format enables
the easy further processing of the acquired signals in analysis
software jBEAM.
This Quick Start Guide is intended for quick commissioning of the
instrument. Further information can be found in the KiDAQ and
KiStudio Lab manual.
2 Compatible Devices
2.1 KiDAQ Data Acquisition System Type 5500
KiDAQ is a modular data acquisition system that is flexible and
can be extended with additional measurement modules. It can be
used for various applications and applications thanks to the wide
selection of modules for different sensor types and the housing
options Rack, Portable and DIN Rail.
2.2 LabAmp Types 5165A, 5166A* and 5167A
The products of the Kistler laboratory amplifier family are de-
signed as high-quality charge amplifiers and data acquisition
devices. The inputs cover dynamic and quasi-static charge, dif-
ferential* charge as well as voltage and IEPE.
*) planned for future
3 System Requirements and Recommendations
The system requirements using the KiStudio Lab for data acquisi-
tion much depends on your measurement need. Please check the
data sheet “KiStudio Lab, Type 2910B” for recommendations.
Requirements:
• Windows 10
• 8 GB RAM (minimum)
• SSD (recommended)
> 1.2 GB for installation + space for measurement data
• Spare Ethernet port (RJ45 or via USB-to-Gigabit-Ethernet
adapter
• Display resolution 1920 x 1080 / full HD (recommended)
4 Software/Firmware Download and Installation
4.1 KiStudio Software
The latest KiStudio software version can be downloaded with this
link: www.kistler.com/downloadKiStudio
Start the installation by executing KiStudioInstallation.exe with
administrator rights. At the end of the installation, it is required to
allow the change of the firewall settings.
4.2 Device Firmware
The measurement devices should be delivered with the most
current firmware already installed. In case you need to update the
firmware, you can find the files on the corresponding product
page on the Kistler website www.kistler.com » just enter the
device type number into the search field (i.e., 5551A for KiDAQ
Controller or 5165A/5166A/5167A for the LabAmp devices). The
firmware update procedure is described in the respective manual.
Required device firmware:
• LabAmp Types 5165A/5166A/5167A: v2.2.0 or higher
• KiDAQ Controller Type 5551A: v7.3.0 or higher
5 Device Connection
5.1 Ethernet Interface Configuration
Connect the device via Ethernet and configure the network inter-
face of your PC with a static IP address: in Windows go to »
Network Settings » Change adapter options » right click on the
interface » Properties » select Internet Protocol, version 4 »
Properties
The KiDAQ device uses the IP address 192.168.103.30 (fix,
unless DHCP is used), so the PC interface needs to be config-
ured with an address from the same range, i.e., 192.168.103.10.
Set the subnet mask to 255.255.255.0 (gateway may be left
empty).
LabAmp devices have a configurable IP address; we recommend
using a static address from the private range 192.168.x.x for the
network interface of the measurement PC and the devices. (Use
192.168.103.x in mixed setups with KiDAQ). Subnet mask
255.255.255.0 (and empty gateway). Use the Network Setup
Wizard from www.kistler.com to find and configure the IP settings
of connected LabAmp devices.
Using a VPN connection in parallel might influence a proper
communication from your PC to the devices.
5.2 Select the Preferred Network Adapter
In the KiStudio application you need to select the network adapter
which shall be used: go to » Configuration » Miscellaneous and
pick the configured adapter from the list.
6 Setting-up a Simple Measurement
6.1 Introduction to KiStudio workflow
The KiStudio software follows the logical steps to SETUP up a
measurement, MEASURE (and record) and REVIEW (and ex-
port). Click on the corresponding buttons to cycle through the
workflow:
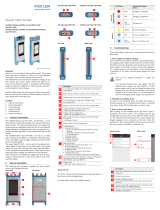
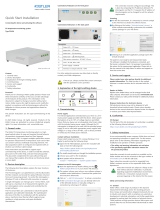
6.2 Adding a Device to the Setup
Click on “Add KiDAQ/LabAmp” to search for connected devices
(1). Use “Refresh” if the device does not yet appear in list. Click
on “Connect” to add the device to your setup (2) and start a new
project by clicking on the application tile (3).
6.3 Setup the Measurement
Configure all your input channels (1), don’t forget to select suita-
ble filters (2) and apply the settings (3) before changing to meas-
ure state (required for KiDAQ devices only; LabAmp settings are
applied automatically)
Please remark: the project setup is not saved automatically, if you
want to keep the settings for future measurements, you need to
export it with “Save as” in the toolbar to the right.
6.4 Measure and Record
After switching to measure state, you can add diagrams (1) with
the required signals with clicking on [+] in the top right corner (2).
For y/t diagrams just double-click in the middle for autoscaling.
Start and stop a manual recording with or create a snapshot
with (3).
6.5 Review and Export
The recordings and snapshots from the previous measuring
session are represented as horizontal bars in the timeline at the
bottom of the screen. Click on the bar to reopen the recording and
analyse (1). You may export the data of selected recording for
further analysis in jBEAM with “Save as” in the toolbar (2).

Kistler Group
Eulachstrasse 22
8408 Winterthur, Switzerland
Tel. +41 52 224 11 11
info@kistler.com
www.kistler.com
7 Expert Tips
7.1 Working with X/Y Graphs
General:
• Right-click in graph for options
• Hover over axis numbers to change visible range
In MEASURE mode (live view):
• Click on label ‘Time’ to switch from rolling to accumulating
mode
• Double-click on data area for autoscaling in y-axis
• Use mouse scroll wheel within data area to scale y-axis
• Click and drag on data area to shift y-axis up/down
In REVIEW mode:
• Double-click on data area for autoscaling in y-axis
• Click and drag on data area to shift x- and y-axis left/right and
up/down
• Right-click and draw rectangle to zoom in
7.2 Using Triggers
Triggers can only be configured in SETUP mode.
• ‘Manuel Record’ and ‘Manual Capture’ (snapshot) are
defining the pre- and post-data of the always present manual
triggers
• Select ‘Create Trigger’ to define a customized start-and stop-
triggers (based on a signal, date and time or duration)
o Double click on the name to rename your trigger
o Select principal behavior ‘Record’ or ‘Snapshot’
o Use the operation = (equal sign) only for digital inputs (0/1
or counter values), for analog use > or >= instead
8 Troubleshooting
8.1 Streaming Inactivity detected
If you face such a message, you might try following steps:
• Check if all connectivity settings are correct (according to
chapter 5), close and start KiStudio again.
• Do a ‘Factory Reset and Remove” of the affected device and
add again.
• Make sure that your firewall allows incoming TCP/UDP traffic
on port 5555 for the configured Ethernet interface and net-
work category (Private/Domain/Public)
8.2 Clear User Settings
If you want to start like with a fresh, clean installation, delete the
file which can be found under following path:
%appdata%\Kistler\KiBox2\%userdomain%\%username%\user
Settings.xml
/


