Page is loading ...

Manual
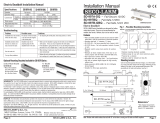
SD-962H-6LB
Note: Products with model numbers that end with “Q” or that have a round green “Q” sticker are RoHS compliant.
Compatible with the ENFORCER Grade 1 Rim-Type Exit Device (SD-962AR-36G)
Lever handle can be set for right-handed or left-handed operation
Includes high-security lock with two keys
Actuating shaft telescopes to the proper length to fit almost any door size
Attractive and durable finish for long-term operation
Escutcheon Lever Trim

ENFORCER Escutcheon Lever Trim
2 SECO-LARM U.S.A., Inc.
2
3
/
4
”
(70mm)
2
15
/
16
”
(75mm)
Parts List:
Specifications:
1x Escutcheon lever trim
1x Square handing pin
4x Mounting screws
1x Manual
1x Mounting template
2x Keys
Front
Back
Setting the Trim Handing:
1. Remove the square handing pin
as indicated in the diagram.
2. Turn the lever handle to the left
or right, depending on the
desired position.
3. When the position is set, return
the square handing pin to its
original location.
Square
handing pin
Type
Escutcheon lever trim
Construction
Zinc, US26D finish
Door type
1
3
/
4
” (44.5mm), 2” (51mm), 2
1
/
4
” (57mm), 2
1
/
2
”
(63.5mm), or 3” (76mm) thick, wood or metal
Handing
Left or right (reversible)
Weight
4-lb (1.8kg)
Dimensions
10
1
/
16
”x2
15
/
16
”x2
3
/
4
” (255x75x70 mm)
Overview:
15
/
16
” (24mm)
For the distance and
dimensions of the
mounting holes,
please see the
included mounting
template.
Telescopic
actuating shaft
Cylinder cam
Square handing pin
10
1
/
16
”
(255mm)
Cylinder collar
Lever handle
Mortise cylinder
Handle sleeve
Included for protection
during shipping.
Remove before use.
Cylinder nut

ENFORCER Escutcheon Lever Trim
SECO-LARM U.S.A., Inc. 3 SECO-LARM U.S.A., Inc. 33 3
Marking and Drilling the Mounting Holes:
Adjusting the Telescopic Actuating Shaft Length:
1. The telescopic actuating shaft comes preset
for 1
3
/
4
” door thickness.
2. To adjust the length, use a screwdriver to
remove the screw on the side of the shaft.
3. Pull the center of the shaft out until it is at the
desired length (see below).
4. Replace the screw using a screwdriver.
1
3
/
4
”
(44.5mm)
2”
(51mm)
2
1
/
4
”
(57mm)
2
1
/
2
”
(63.5mm)
3”
(76mm)
Corresponding door thickness
1. Use the included mounting template.
2. Mark the horizontal and vertical centerlines by
matching the template to the rim-type exit device.
3. Mark and drill
1
/
2
” holes for the mounting posts and a
5
/
8
” hole for the actuating shaft, as shown on the
included template.
Five positions for
varying door thickness.
Use the included
mounting template
Installing the Mortise Cylinder:
1. Pass the mortise cylinder
through the cylinder spacer,
cylinder collar, and escutcheon
lever trim (see diagram).
2. Tighten the cylinder nut by
hand, making sure the cylinder
cam is facing up, then tighten
the nut again with pliers while
pushing in on the mortise
cylinder.
3. Test the mortise cylinder with
the key to ensure proper
lock/unlock operation.
Cylinder nut
Cylinder collar
Cylinder spacer
Mortise cylinder

ENFORCER Escutcheon Lever Trim
4 SECO-LARM U.S.A., Inc.
MiSD-962H_6LB_1306.docx
PIKSR1
WARRANTY: This SECO-LARM product is warranted against defects in material and workmanship while used in normal service for
a period of one (1) year from the date of sale to the original consumer customer. SECO-LARM’s obligation is limited to the repair or
replacement of any defective part if the unit is returned, transportation prepaid, to SECO-LARM.
This Warranty is void if damage is caused by or attributed to acts of God, physical or electrical misuse or abuse, neglect, repair or
alteration, improper or abnormal usage, or faulty installation, or if for any other reason SECO-LARM determines that such equipment
is not operating properly as a result of causes other than defects in material and workmanship.
The sole obligation of SECO-LARM, and the purchaser’s exclusive remedy, shall be limited to replacement or repair only, at
SECO-LARM’s option. In no event shall SECO-LARM be liable for any special, collateral, incidental, or consequential personal or
property damages of any kind to the purchaser or anyone else.
NOTICE
The information and specifications printed in this manual are current at the time of publication. However, the SECO-LARM policy is
one of continual development and improvement. For this reason, SECO-LARM reserves the right to change specifications without
notice. SECO-LARM is also not responsible for misprints or typographical errors.
Copyright © 2013 SECO-LARM U.S.A., Inc. All rights reserved. This material may not be reproduced or copied, in whole or in part,
without the written permission of SECO-LARM.
U.S.A., Inc.
16842 Millikan Avenue, Irvine, CA 92606
Tel: 800-662-0800 / 949-261-2999
Website: www.seco-larm.com
E-mail: sales@seco-larm.com
Installing the Escutcheon Lever Trim:
1. Attach the lever trim to the door by sliding the mounting posts and telescopic
actuating shaft through the mounting holes (see page 2 for instructions on how
to drill the mounting holes).
2. Connect the actuating shaft to the cam on the back of the rim-type exit device.
3. Mount the rim-type exit device to the mounting posts using the included
mounting screws.
/