Page is loading ...

Questions, problems, missing parts? Before returning to the store call Everbilt Customer Service
8 a.m. - 6 p.m., EST, Monday-Friday
1-844-241-5521
HOMEDEPOT.COM

2 For Professional Technical Support call 1-844-241-5521
Table of Contents .......................................................................2
Performance ...............................................................................2
Warranty .....................................................................................2
Safety Information ......................................................................3
Pre-Installation ..........................................................................5
Installation ................................................................................. 6
Operation& Storage .................................................................. 10
Maintenance............................................................................. 11
Troubleshooting ....................................................................... 13
Model
HP
GPH of Water @ Total Feet Of Lift
Max. Lift
0 ft
10 ft.
20 ft.
30 ft.
40 ft.
50 ft.
SPP15002
1 1/2
5300
5000
3920
3720
2700
1800
66
The manufacturer warrants the products to be free from defects in materials and workmanship for a period of one year from date of purchase. This
warranty applies only to the original consumer purchaser and only to products used in normal use and service. If within one year this product is found
upon examination by the manufacturer to be defective in materials or workmanship, the manufacturer’s only obligation, and your exclusive remedy,
is the repair or replacement of the product at the manufacturer’s discretion, provided that the product has not been damaged through misuse, abuse,
accident, modifications, alterations, neglect or mishandling. Your original receipt of purchase is required to determine warranty eligibility.
The purchaser must pay all labor and shipping charges necessary to replace the product covered by this warranty.
This Limited Warranty does not cover products which have been damaged as a result of an accident, misuse, abuse, negligence, alteration, improper
installation or maintenance, or failure to operate in accordance with the instructions supplied with the products, or operational failures caused by
corrosion, rust, or other foreign materials in the system.
Requests for service under this warranty shall be made by returning the defective product to the manufacturer as soon as possible after the discovery
of any alleged defect. The manufacturer will subsequently take corrective action as promptly as reasonably possible.
The manufacturer does not warrant and especially disclaims any warranty, whether express or implied, of fitness for a particular purpose, other than
the warranty contained herein. This is the exclusive remedy and any liability for any and all indirect or consequential damages or expenses
whatsoever is excluded.
Some states do not allow the exclusion or limitation of incidental or consequential damages or limitations on how long an implied warranty lasts, so
the above limitations or exclusions may not apply to you. This warranty gives you specific legal rights and you may also have other rights which vary
from state to state.
For Professional Technical Support call 1-844-241-5521 or visit HOMEDEPOT.COM.

3 For Professional Technical Support call 1-844-241-5521
:Risk of suction entrapment. Always turn off
all power to the pool pump before installing the cover or
working on any suction outlet.
This pump produces high levels of suction and creates a
strong vacuum at the main drain at the bottom of your pool or
spa. This suction is so strong that it can trap adults or
children under water if they come in close proximity to a pool
or spa drain or a loose or broken drain cover or grate.
Stay off the main drain and away from all suction outlets!
:Risk of hazardous pressure. Stand clear of
pump and filter during start-up. Pool and spa circulation
systems operate under high pressure. When any part of the
circulating system (i.e. locking ring, pump, filter, valves,
etc.) is serviced, air can enter the system and become
pressurized.
Pressurized air can cause the pump housing cover filter
lid and valves to violently separate which can result in
severe personal injury or death.
Filter tank lid and strainer cover must be properly
secured to prevent violent separation.
Stand clear of all circulation system equipment when
turning on or starting up pump.
Before servicing pool and spa equipment, make note of
the filter pressure. Be sure that all controls are set to
ensure the system cannot inadvertently start during
service. Turn off all power to the pump.
Place filter manual air relief valve in the open position
and wait for all pressure in the system to be relieved.
Before starting the system, fully open the manual air
relief valve and place all system valves in the “open”
position to allow water to flow freely from the pool and
spa back to the pool or spa. Stand clear of all pool and
spa equipment and start the pump.
Do not close filter manual air relief valve until all
pressure has been discharged from the valve and a
steady stream of water appears. Observe filter pressure
gauge and be sure it is not higher than the pre-service
condition.
:Risk of suction entrapment. The use of
unapproved covers or allowing use of the pool or spa when
covers are missing, cracked or broken can result in body or
limb entrapment, hair entanglement, body entrapment,
evisceration and/or death.
Limb Entrapment: When a limb is sucked or inserted
into an opening resulting in a mechanical bind or
swelling. This hazard is present when a drain cover is
missing, broken, loose, cracked or not properly secured.
Hair Entanglement: When the hair tangles or knots in
the drain cover, trapping the swimmer underwater. This
hazard is present when the flow rating of the cover is too
small for the pump or pumps.
Body Entrapment: When a portion of the body is held
against the drain cover trapping the swimmer
underwater. This hazard is present when the drain cover
is missing, broken or the cover flow rating is not high
enough for the pump or pumps.
Evisceration/Disembowelment: When a person sits on
an open pool (particularly a child wading pool) or spa
outlet and suction is applied directly to the intestines,
causing severe intestinal damage. This hazard is present
when the drain cover is missing, loose, cracked, or not
properly secured.
Mechanical Entrapment: When jewelry, swimsuit, hair
decorations, finger, toe or knuckle is caught in an
opening of an outlet or drain cover. This hazard is present
when the drain cover is missing, broken, loose, cracked,
or not properly secured.
NOTICE: All suction plumbing must be installed in
accordance with the latest national and local codes for
swimming pools, spas and hot tubs, including NSPI
standards and CPSC guidelines.
ALWAYS disconnect the power to the pump
before servicing.
:Risk of harm. A clearly labeled emergency
shut-off switch for the pool pump and spa jet pump must
be in an easily accessible, obvious place near the pool or
spa. Make sure bathers know where it is and how to use it in
case of emergency.
:Risk of harm. To reduce the risk of injury, do
not permit children to use this product unless they are
closely supervised at all times.
:Risk of hazardous pressure. Pool and spa
circulation systems operate under high pressure.
Incorrectly installed or tested equipment may fail, causing
severe injury or property damage. Read and follow
instructions in owner’s manual when installing and
operating equipment. Have a trained pool professional
perform all pressure tests.
Do not connect system to a high pressure or city water
system.
Use equipment only in a pool or spa installation.
Trapped air in system can cause explosion. BE SURE all
air is out of system before operating or testing
equipment. See hazardous pressure warning below. Do
not use compressed air to clean, test, or purge
equipment for winter.
:Risk of electric shock. Can shock, burn or kill.
Connect only to a branch circuit protected by a ground-fault
circuit-interrupter (GFCI). Contact a qualified electrician if
you cannot verify that the circuit is protected by a GFCI. This
unit must be connected only to a supply circuit that is
protected by a ground fault circuit-interrupter (GFCI). Such a
GFCI should be provided by the installer and should be tested
on a routine basis. To test the GFCI, push the test button. The
GFCI should interrupt power. Push the reset button. Power
should be restored. If the GFCI fails to operate in this manner,
the GFCI is defective. If the GFCI interrupts power to the
pump without the test button being pushed, a ground current
is flowing, indicating the possibility of an electric shock. Do
not use this pump. Disconnect the pump and have the
problem corrected by a qualified service representative
before using.

4 For Professional Technical Support call 1-844-241-5521
:All work must be performed by a qualified
pool professional, and must conform to all national, state,
and local codes.
Follow all local electrical and safety codes,
along with the National Electrical Code (NEC). In addition, all
Occupational Safety and Health Administration (OSHA)
guidelines must be followed.
:Risk of harm. Pumps improperly sized or
installed or used in applications other than for which the
pump was intended can result in severe personal injury or
death. These risks may include but not be limited to electric
shock, fire, flooding, suction entrapment or severe injury or
property damage caused by a structural failure of the pump
or other system component.
:To minimize the risk of injury due to
suction entrapment hazard:
Pools and spas should utilize a minimum of two drains
per pump.
A properly installed and secured ANSI/ASMEA112.19.8
approved anti-entrapment suction cover must be used
for each drain.
Each suction cover must be installed at least three (3’)
feet apart, as measured from the nearest point to nearest
point.
Regularly inspect all covers for cracks, damage and
advanced weathering.
If a cover becomes loose, cracked, damaged, broken or is
missing, close the pool or spa immediately, shut off the
pump, post a notice and keep the pool or spa closed until
an appropriate certified cover is properly installed.
Replace drain covers as necessary. Drain covers
deteriorate over time due to exposure to sunlight, pool
chemicals and weather.
Avoid getting hair, limbs or body in close proximity to any
suction cover, pool drain or outlet.
Disable suction outlets or reconfigure into return inlets.
:Install to provide drainage of compartment for
electrical components.
:These instructions contain information for a
variety of pump models and therefore some instructions
may not apply to a specific model. All models are intended
for use in swimming pool applications. The pump will
function correctly only if it is properly sized to the specific
application and properly installed.
:Electrical controls such as on/off switches,
timers, and control systems, etc. should be properly
installed to allow the operation (start-up, shut-down, or
servicing) of any pump or filter without requiring the user to
place any portion of his/her body over or near the pump
strainer lid or filter lid. Such installation should allow the
user to stand clear of the filter and pump during system
start-up, shut down or servicing of the system.
Never open the inside of the drive motor enclosure.
There is a capacitor bank that holds a 230 VAC charge
even when there is no power to the unit.
The pump is not submersible. The pump is designed for
use with chlorinated pools only. For use with other
applications, contact customer service.
The pump is capable of high flow rates; use caution
when installing and programming to limit pumps
performance potential with old or questionable
equipment.
This appliance is not intended for use by persons
(including children) of reduced physical, sensory or
mental capabilities, or lack of experience and
knowledge, unless they have been given supervision or
instruction concerning the use of the appliance by a
person responsible for their safety.
:Before pressure testing, make the
following safety checks:
Check all clamps, bolts, lids, and system accessories
before testing.
Release all air in system before testing.
Tighten pump trap lids to 30 ft. lbs. (4.1 kg-m) torque for
testing.
Water pressure for test must be less than 25 PSI (7.5
kg/cm
2
).
Water temperature for test must be less than 100° F
(38 ° C).
Limit test to 24 hours. After test, visually check system to
be sure it is ready for operation. Remove trap lid and
retighten hand tight only.
NOTICE: These testing parameters apply only to the models
described here in. For other equipment, consult the
manufacturer.

5 For Professional Technical Support call 1-844-241-5521
APPLICATION
This pump is for use with permanently installed pools and may also be used with hot tubs and spas if so marked. Do not use with storable pools. A
permanently installed pool is constructed in or on the ground or in a building such that it cannot be readily disassembled for storage. A storable pool
is constructed so that it may be readily disassembled for storage and reassembled to its original integrity.
TOOLS REQUIRED
Phillips
Screwdriver
Flathead
Screwdriver
Wrench
Safety
Goggles
Pipe wrench
Hacksaw
Tape Measure
Thread Tape
PVC glue

6 For Professional Technical Support call 1-844-241-5521
MATERIALS REQUIRED (NOT INCLUDED)
SPECIFICATIONS
Power supply
SPP15002: 115V/230V, 60 HZ., 20 Amp Circuit
Liquid temp. range
32 to 100° F (0- 38° C)
Discharge size
1 -1/2 in. NPT
: For quick disconnect pipe connections, use the 1-1/2 in. Slip Half Union Kit included with the pump. Only qualified, licensed
personnel should install pump and wiring.
Pump mount must:
Be located away from corrosive or flammable liquids.
Have enough ventilation to maintain air temperature at less than the maximum ambient temperature rating (Max. Amb.) listed on the motor
model plate. If this pump is installed in an enclosure/pump house, the enclosure must have adequate ventilation and air circulation to keep the
temperature in the enclosure at or below the motor’s rated ambient temperature whenever the pump is running.
Be solid - Level - Rigid - Vibration free. (To reduce vibration and pipe stress, bolt pump to mount.)
Allow pump suction inlet height to be as close to water level as possible. Pump will not lift water more than 10 ft. (3 m).
Allow use of short, direct suction pipe (To reduce friction losses).
Allow for gate valves in suction and discharge piping.
Have adequate floor drainage to prevent flooding.
Be protected from excess moisture.
Allow adequate access for servicing pump and piping.
Risk of fire and burns. Can cause severe injury, property damage or death. Motors run at high temperatures. To reduce the risk of fire, do not allow
leaves, debris, or foreign matter to collect around the pump motor. To avoid burns when handling the motor, let it cool for 20 minutes before trying
to work on it.
: When connecting pipe to pump with union half, use PTFE tape between pipe and union adapter. Union collar to pump should
be assembled dry and hand-tight.

7 For Professional Technical Support call 1-844-241-5521
Thread sealant tape instructions:
Use only new or clean PVC pipe fittings.
Wrap male pipe threads with one to two layers of PTFE tape. Cover entire threaded
portion of pipe.
Do not over tighten or tighten past thread stop in pump port!
If leaks occur, remove pipe, clean off old tape, rewrap with one to two additional layers
of tape and remake the connection.
: Support all piping connected to pump!
Piping
Use at least 1-1/2 in. (38 mm) pipe (use 2 in. (51 mm) pipe if possible). Increase size if a long run is needed.
To avoid strains on the pump, support both suction and discharge pipes independently. Place these supports near the pump.
To avoid a strain left by a gap at the last connection, start all piping at the pump and run pipe away from the pump.
To avoid air locking, slope suction pipe slightly upward toward the pump.
: To prevent flooding when removing pump for service, all flooded suction systems must have gate valves in suction and
discharge pipes.
Pool Pump Suction Requirements
Pump suction is hazardous and can trap and drown or disembowel bathers. Do not use or operate swimming pools, spas, or hot tubs if a suction
outlet cover is missing, broken, or loose. Follow the guidelines below for a pump installation which minimizes risk to users of pools, spas, and hot
tubs.
Entrapment Protection
The pump suction system must provide protection against the hazard of suction entrapment or hair entrapment/ entanglement.
Suction Outlet Covers
All suction outlet covers must be maintained. They must be replaced if cracked, broken, or missing.
See Testing and Certification for outlet cover certification requirements.
All suction outlets must have correctly installed, screw fastened covers in place.
Suction Outlets per Pump
Provide at least two hydraulically balanced main drains, with covers, as suction outlets for each circulating pump suction line. The centers of the
main drains (suction outlets) on any one suction line must be at least 3 ft. apart.
The system must be built so that it cannot operate with the pump drawing water from only one main drain. There must be at least two main drains
connected to the pump whenever it is running.
However, if two main drains run into a single suction line, the single suction line may be equipped with a valve which will shut off both main drains
from the pump.
More than one pump can be connected to a single suction line as long as the requirements listed above are met.

8 For Professional Technical Support call 1-844-241-5521
Water Velocity
The maximum water velocity through the suction fitting or cover for any suction outlet must be 1.5 ft. per second unless the outlet complies with the
latest ASME/ANSI Specification for Suction Fittings For Use in Swimming Pools, Spas, Hot Tubs, and Whirlpool Bathtub Applications. In any case, do
not exceed the suction fitting’s maximum designed flow rate.
If 100% of the pump’s flow comes from the main drain system, the maximum water velocity in the pump suction hydraulic system must be 6 ft. per
second or less even if one main drain (suction outlet) is completely blocked. The flow through the remaining main drain(s) must comply with the
latest ASME/ANSI Specification for Suction Fittings For Use in Swimming Pools, Spas, Hot Tubs, and Whirlpool Bathtub Applications.
Testing and Certification
Suction outlet covers must have been tested by anationally recognized testing laboratory and found to comply with the latest ASME/ANSI
Specifications for Suction Fittings For Use in Swimming Pools, Spas, Hot Tubs, and Whirl pool Bath tub Applications.
Fittings
Fittings restrict flow; for best efficiency use fewest possible fittings (but at least two suction outlets). Avoid fittings which could cause an air trap. Pool
fittings must conform to International Association of Plumbing and Mechanical Officials (IAPMO) standards. Use only non-entrapping suction fitting
or double suction.
Electrical
: Risk of electric shock. Can shock, burn or kill. Ground pump before connecting to power supply.
Ground motor before connecting to electrical power supply. Failure to ground motor can cause severe or fatal electrical shock hazard.
To avoid dangerous or fatal electrical shock, turn OFF power to motor before working on electrical connections.
Ground Fault Circuit Interrupter (GFCI) tripping indicates an electrical problem. If GFCI trips and will not re-set, have a qualified electrician
inspect and repair electrical system.
Exactly match supply voltage to name plate voltage. Incorrect voltage can cause fire or seriously damage motor and voids warranty. If in doubt
consult alicensed electrician.
: Risk of explosion. Do not ground to a gas supply line.

9 For Professional Technical Support call 1-844-241-5521
Voltage
Voltage at motor must be not more than 10% above or below motor name plate rated voltage or motor may overheat, causing over load tripping and
reduced component life. If voltage is less than 90% or more than 10% of rated voltage when motor is running at full load, consult power-company.
Grounding/Bonding
Install, ground, bond and wire motor according to local or National Electrical Code requirements. Permanently ground motor. Use ground terminal “G”
provided under motor canopy or access plate; use size and type wire required by code. Connect motor ground terminal to electrical service ground.
Connect a No. 8 AWG (8.4 sq.mm) solid copper bonding wire to the bonding lug provided on the motor housing and to all metal parts of the swimming
pool, spa, or hot tub and to all electrical equipment, metal piping or conduit within 5 ft. (1.5 m) of the inside walls of swimming pool, spa, or hot tub.
Voltage Setting and Wiring
: Be sure power is off.
The motor is 115/230 Volt single phase and pre-wired at 230 volts.
If the power source is 115 volts, remove the motor end cover
Flip the switch to 115 Volt.
Re-install the motor end cover.
Pump must be permanently connected to circuit. Table I gives correct wire and circuit breaker sizes for the pump alone. If other lights or appliances
are also on the same circuit, be sure to add their amp loads to pump amp load before figuring wire and circuit breaker sizes. ( If unsure how to do this
or if this is confusing, consult a licensed electrician.) Use the load circuit breaker as the master on-off switch.
Install a Ground Fault Circuit Interrupter (GFCI) in circuit; it will sense a short circuit to ground and disconnect power before it becomes dangerous to
pool users. For size of GFCI required and test procedures, see GFCI manufacturer’s instruction.
In case of power outage, check GFCI for tripping (which will prevent normal pump operation). Reset if necessary.
: If you do not use conduit when wiring motor, be sure to seal wire opening on end of motor to prevent dirt, bugs, etc., from
entering.
Table l- Recommended Fusing Data
Model #
Motor
HP
Branch Fuse
Rating Amps*
Max Load Amps
Voltage/Hz/Phase
Service to Motor – Distance in Ft. (m)
0-100’
(0-30)
101-200’
(30-60)
201-300’
(60-90)
AWG Wire Size (mm
2
)
SPP15002
1-1/2
20
17/8
115,230/60/1
12 (3)
8 (8.4)
6 (14)
* Time delay fuses are recommended instead of standard fuses in any motor circuit.

10 For Professional Technical Support call 1-844-241-5521
: Risk of explosion. Before removing trap cover:
: NEVER run pump dry. Running pump dry may damage seals, causing leakage and flooding. Fill pump with water before
starting motor.
1. Stop pump before proceeding.
2. Close gate valves in suction and discharge pipes.
3. Release all pressure from pump and piping system.
4. If pump is being pressure tested, be sure pressure has been released before removing trap cover.
: Risk of fire and burns. Motors run at high temperatures. To reduce the risk of fire, do not allow leaves, debris, or
foreign matter to collect around the pump motor. To avoid burns when handling the motor, let it cool for 20 minutes before trying to
work on it. An automatic internal cut off switch protects the motor from heat damage during operation.
Priming Pump
Release all pressure from filter, pump, and piping
system; see the filter owner’s manual.
In a flooded suction system (water source higher than
pump), pump will prime itself when suction and
discharge valves are opened.
If pump is not in a flooded suction system, unscrew and remove trap cover; fill trap and pump with
water. Do not lubricate the trap cover O-ring. The original equipment O-ring contains a permanent
internal lubricant.
: If you replace the O-ring with a non-internally lubricated O-ring, you may need to apply a silicone based lubricant.
Clean and inspect O-ring; reinstall on trap cover. Replace trap cover on trap; turn clockwise to tighten cover.
: Tighten trap cover by hand only (no wrenches)! Pump should prime now. Priming time will depend on vertical length of
suction lift and horizontal length of suction piping.
If pump does not prime within three minutes, make sure that all valves are open, suction pipe end is under water, pump is not trying to lift water more
than 10 ft. (3 m), and that there are no leaks in suction pipe. If necessary, see Troubleshooting.
Storage/Winterizing:
: Allowing pump to freeze will damage pump and void warranty!
: Do not use anti-freeze solutions (except propylene glycol) in your pool/spa system. Propylene glycol, or “RV antifreeze”, is
non-toxic and will not damage plastic system components; other anti-freeze formulas are highly toxic and may damage plastic
components in the system.
Drain all water from pump and piping when expecting freezing temperatures or when storing pump for a long time (see Draining Pump).
Keep motor dry and covered during storage.
To avoid condensation/corrosion problems, do not cover pump with plastic.
For outdoor/unprotected installations:
1. Enclose entire system in a weather proof enclosure.
2. To avoid condensation/corrosion damage, allow ventilation; do not wrap system in plastic.
3. Use a 40% propylene glycol/60% water solution to protect pump to -50° F (-46° C).

11 For Professional Technical Support call 1-844-241-5521
Draining Pump
: Risk of electric shock. Can shock, burn or
kill. Disconnect power before working on pump or motor.
1. Pump down water level below all inlets to the pool.
: Risk of electric shock. Can shock, burn or
kill. To avoid dangerous or fatal electrical shock hazard,
turn OFF power to motor before draining pump.
2. Remove trap cover and use low pressure air to blow accumulated water from the piping system. Never use high pressure air to purge system.
3. Cap inlet piping after draining to keep water out of the pipes.
4. To prevent pump from freezing, remove trap cover and drain the tank body through the two drain plugs provided. Clean pump thoroughly;
replace trap cover.
: Tighten trap cover by hand only (no wrenches)! If pump is not anchored, use caution to avoid breaking attached piping!
5. Be sure motor is kept dry and covered.
Startup For Winterized Equipment
1. Remove any temporary weather protection placed around system for shut down.
2. Follow filter manufacturer’s instructions for reactivation of the filter.
3. Inspect all electrical wiring for damage or deterioration over the shut-down period. Have a qualified service man repair wiring as needed.
4. Inspect and tighten all water tight connections.
5. Open all valves in suction and return piping.
6. Remove any winterizing plugs in piping system.
7. Drain all anti-freeze from system.
8. Close all drain valves and replace all drain plugs in piping system.
9. Prime pump according to instructions in Priming Pump.
Pump should only be serviced by qualified personnel. For best results, use only genuine factory parts. Be sure to prime pump before starting.
: Risk of explosion. Before beginning pump service: 1. Stop pump before proceeding. 2. Close gate valves in suction and
discharge pipes. 3. Release all pressure from pump and piping system.
: Risk of electric shock. Can shock, burn or kill. Disconnect power before working on pump or motor.
When using factory authorized parts, no lubrication or regular maintenance is needed beyond reasonable care and periodic cleaning of the strainer
basket.
If shaft seal is worn or damaged, repair as follows:

12 For Professional Technical Support call 1-844-241-5521
Pump Disassembly/Removing Old Seal
Before disassembly, disconnect power to pump motor. Be sure gate valves on suction and return piping are closed. Release all pressure by opening
all vents.
1. Drain pump by removing drain plugs on bottom of pump body and trap body.
2. Be sure there is no pressure in trap body; remove cover (unscrew by turning counterclockwise).
3. Remove eight bolts, lock washers and flat washers holding seal plate to pump body. Pull seal plate and motor away from pump body. You may
have to CAREFULLY use a screw driver to separate body from seal plate.
4. Remove two screws holding diffuser to seal plate. Remove diffuser.
: Hazardous voltage. Capacitor voltage may be hazardous. To discharge motor capacitor, hold insulated handle screw driver BY THE
HANDLE and short capacitor terminals together. Do not touch metal screw driver blade or capacitor terminals. If in doubt, consult a qualified
electrician.
5. Remove motor end cover. Being careful not to touch capacitor terminals, loosen capacitor clamp and move capacitor to one side.
6. Hold shaft with 7/16 in. open-end wrench on motor shaft flats.
7. Unscrew impeller from shaft (turn counterclockwise when facing it).
8. Remove four screws holding seal plate to motor.
9. Place seal plate face down on flat surface and tap out ceramic seat.
10. Clean seal cavity in seal plate and clean motor shaft.
Pump Reassembly/Installing New Seal
1. Ceramic seat must be clean and free of dirt, grease, dust, etc. Wet outer edge with small
amount of liquid detergent; press ceramic seat into seal plate cavity firmly and squarely with
finger pressure.
2. If ceramic seat will not locate properly, remove it, place face up on bench and reclean cavity.
Ceramic seat should now locate.
Mechanical seal
ceramic seat

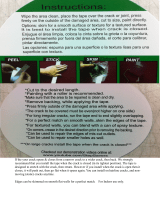
13 For Professional Technical Support call 1-844-241-5521
3. If seat still will not locate properly, place a cardboard washer over the polished face and use a piece of 3/4 in. (19 mm) standard pipe for
pressing purposes.
: Be sure not to scratch or mar polished surface or seal will leak.
4. Replace slinger on end of motor shaft so that impeller sleeve will push it into position. If slinger shows signs of wear or damage, replace it.
5. Remount seal plate on motor. Tighten bolts to 60-80 inch-lbs. (69-92 kg/cm) torque.
6. Apply a small amount of liquid detergent to inside diameter of rotating half of seal.
7. Slide rotating seal member, polished carbon face out, over impeller sleeve until rubber drive ring hits back of impeller.
: Be sure not to nick or scratch polished seal face; seal will leak if face is damaged.
8. Screw impeller onto shaft (clockwise); this will automatically locate seal in seal plate.
9. Mount diffuser on seal plate; tighten screws to 10-14 inch-lbs. (11.2-16.1 kg/cm) torque.
10. Assemble motor and seal plate to pump body with nuts, flat washers and lock washers. Torque nuts to 120-130 in-lbs. (138-150 kg/cm).
11. Prime pump according to instructions in Priming Pump.
: Risk of electric shock. Can shock, burn or kill.
Disconnect power before working on pump or motor.
Read and understand safety and operating instructions in this manual before doing any work on pump!
Only qualified personnel should electrically test pump motor!
Problem
Possible Cause
Corrective Action
Pump will not prime.
The suction piping leaks or there is no
prime.
Pump must be primed; make sure that pump volute and trap are
full of water. See Priming Pump.
Make sure there are no leaks in suction piping.
Make sure suction pipe inlet is well below the water level to
prevent pump from sucking air.
If suction trap gasket is defective, replace it.
The water level is below the suction pipe
inlet.
Make sure pump is not trying to lift water more than 10 ft. (3 m).
Make sure suction pipe is at least 1-1/2 in. (38 mm) in diameter.
Pump operates but pumps little
or no water.
There is a clogged pipe, trap, impeller, or
there is a worn impeller.
Make sure suction trap is not clogged; if it is, clean trap and
strainer.
Make sure impeller is not clogged (follow instructions in
Removing Old Seal; check impeller for clogging; follow
instructions in Installing New Seal for reassembly).
Impeller and diffuser may be worn. If so, order replacement
parts by calling customer service.

14 For Professional Technical Support call 1-844-241-5521
Problem
Possible Cause
Corrective Action
The pump may be running too
slow.
There is an error in the wiring or the
voltage is not set correctly.
Check voltage at motor terminals and at meter while pump is
running. If low, see wiring instructions or consult power
company. Check for loose connections.
The pump suddenly stops
working.
There is a blown fuse or tripped breaker.
Replace the fuse or reset the circuit breaker.
The pump may be too hot.
Check line voltage; if less than 90% or more than 110% of
rated voltage consult a licensed electrician.
Increase ventilation.
Reduce ambient temperature.
Tighten any loose connections.
The pump is experiencing
mechanical troubles and noise.
The pipe assembly is incorrect.
If suction and discharge piping are not adequately supported,
pump assembly will be strained. See Installation.
The pump is not mounted correctly.
Do not mount pump on a wooden platform! Securely mount on
concrete platform for quietest performance.


1-844-241-5521
HOMEDEPOT.COM
/