Page is loading ...

For detailed handling procedures and functions, refer to separate COM-JC
[For SRZ] Instruction Manual (IMR01Y34-E).
The manual can be downloaded from the official RKC website:
http://www.rkcinst.com/english/manual_load.htm.
CC-Link Communication Converter
IMR01Y26-E2
In order to achieve maximum performance and ensure proper operation of your new
instrument, carefully read all the instructions in the manual. Please place this manual
in a convenient location for easy reference.
This manual describes the basic operation only.
1. HANDLING PROCEDURES
To avoid error at operation start-up, COM-JC must be powered on LAST
(after the Controller, PLC, etc.).
2. COMMUNICATION SETTING
Do not separate the mainframe from the terminal base with the power turned
on. If so, instrument failure may result.
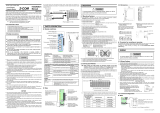
2.1 Station Number Setting
Set the station number of CC-Link using a small blade screwdriver.
Setting range:
1 to 61 ( 4 stations occupied 1 time,
4 stations occupied 2 times,
4 stations occupied 4 times)
1 to 64 (1 station occupied 1 time)
Factory set value: 0
Station number
setting switch
High-order digit
setting
(Set value
×
10)
Low-order digit
setting
(Set value × 1)
When set to any value out of the setting range, the COM-JC becomes the
FAIL state.
2.2 Communication Speed Setting
Set the communication speed of CC-Link using a small blade screwdriver.
Left side
Communication speed
setting switch
Setting range: 0 to 4
Factory set value: 0 (156 kbps)
When set to any value out of the setting range, the COM-JC becomes the
FAIL state.
Communication speed and maximum transmitter distance
[Use the CC-Link dedicated cable Ver. 1.10]
Communication speed
setting
Communication speed
Maximum transmitter
distance
0 156 kbps 1200 m
1 625 kbps 900 m
2 2.5 Mbps 400 m
3 5 Mbps 160 m
4 10 Mbps 100 m
2.3 Occupied Stations/Extended Cyclic and
Controller Communication Speed Setting
Set the number of occupied stations/extended cyclic and controller communication speed.
Left side
Dip switch
ON
OFF
1 2 3 4 5 6 7 8
ON
1 2 3 4 5 6 7 8
ON
1 2 Controller communication speed
OFF OFF 38400 bps
ON OFF 9600 bps
OFF ON 19200 bps
ON ON 38400 bps
Factory set value: 19200 bps
3 4 5 Number of occupied stations/extended cyclic setting
OFF OFF OFF 4 stations occupied 1 time (8 channels assignment)
ON OFF OFF 4 stations occupied 1 time (16 channels assignment)
OFF ON OFF 4 stations occupied 2 times (16 channels assignment)
ON ON OFF 4 stations occupied 2 times (32 channels assignment)
OFF OFF ON 1 station occupied 1 time (1 channel assignment)
ON OFF ON 1 station occupied 1 time (2 channels assignment)
OFF ON ON 4 stations occupied 4 times (32 channels assignment)
ON ON ON 4 stations occupied 4 times (64 channels assignment)
Factory set value: 4 stations occupied 1 time (8 channels assignment)
6 7 8
OFF OFF OFF Fixed
3. CC-Link FLAG OPERATION
Remote input/output and remote register flag operations are as follows.
[Example] When the occupied station/extended cyclic of COM-JC is set to 4 stations
occupied 1 time.
Initialize request processing at power on
z Initialize processing request from remote device station (COM-JC)
If the COM-JC is initialized at power on, the initialize data processing request flag [RX(n+7)8]
is turned on. Thus, turn on the initialize data processing completion flag [RY(n+7)8].
When COM-JC becomes a ready state, a remote ready [RX(n+7)B] is turned on.
ON
OFF
ON
OFF
ON
OFF
Initialize data processing
request flag [RX(n+7)8]
Initialize data processing
completion flag [RY(n+7)8]
Remote ready [RX(n+7)B]
z Initialize processing request from master station (PLC)
This is a COM-JC initialize setting request. As there is no initialize data specifically, no
processing is required.
ON
OFF
ON
OFF
ON
OFF
Initialize data setting
request flag [RY(n+7)9]
Initialize data setting
completion flag [RX(n+7)9]
Remote ready [RX(n+7)B]
Error flag/error reset processing
If the Error reset request flag [RY(n+7)A] is turned on while the Error status flag [RX(n+7)A]
is turned on, the Error status flag history is cleared and the flag [RX(n+7)A] turns off.
Error status flag
[RX(n+7)A]
Error reset
request flag
[RY(n+7)A]
Remote ready
[RX(n+7)B]
ON
OFF
ON
OFF
ON
OFF
Extension number for display selection processing
After the extension number for display [RYn0 to RYn5, RY(n+1)0 to RY(n+1)2] is set, turn
on the extended display flag [RYnC]. After the data in the remote register [RWrn to
RWrn+F] is displayed, check that extended display completion [RXnC] is turned on and
then turn off the extended display flag [RYnC]. If the extended display flag is turned off, the
extended display completion is turned off.
ON
OFF
ON
OFF
ON
OFF
ON
OFF
Extension number
for display
[RYn0 to RYn5,
RY(n+1)0 to RY(n+1)2]
Extended display flag
[RYnC]
Extended display
completion
[RXnC]
Remote register
[RWrn to RWrn+F]
(R/O data: Automatically updated)
Extension number 0
Extension number 0
Extension number 1
Extension number 1
Extension number for setting selection processing
The content of the extended setting remote register is selected and the set value is changed.
After the extension number for setting [RYn6 to RYnB, RY(n+1)8 to RY(n+1)A] is set, turn
on the extended setting flag [RYnD]. After the content of the remote register [RWwm to
RWwm+F] is set, check that extended setting completion [RXnD] is turned on and then
turn off the extended setting flag [RYnD]. If the extended setting flag [RYnD] is turned off,
the extended setting completion [RXnD] is turned off.
ON
OFF
ON
OFF
ON
OFF
ON
OFF
Data usage
Data usage
Extension number
f
or setting
[RYn6 to RYnB,
RY
(
n+1
)
8 to RY
(
n+1
)A
]
Extended setting flag
(Setting update flag)
[RYnD]
Extended setting
completion
[RXnD]
Remote register
[RWwm to RWwm+F]
Regardless of the number of occupied stations and the extended cyclic, the
above processing is also necessary if the “Set value (SV)” assigned to the
remote register (RWw) as a fixed value is changed.
AT start procedure
Instructs AT execution.
Extended setting flag
(Setting update flag)
[RYnD]
ON
OFF
ON
OFF
ON
OFF
ON
OFF
Data = 1
Data = 0
Remote re
g
ister
[
RWwn
]
(Extension number 4:
PID/AT transfer)
Extended setting
completion
[RXnD]
A
T setting status
PID/AT transfer status
[RXn4]
For remote input/output and remote register, refer to COM-JC [For SRZ]
Communication Data List (IMR01Y30-E) or COM-JC [For SRZ]
Instruction Manual (IMR01Y34-E).
4. USAGE EXAMPLE
A usage example of CC-Link communication is described in the following.
4.1 System Configuration
In this usage example, described the following system configuration.
CC Link Ver. 1.10
Controller
communication
(RS-485: Modbus)
Controller
(Z-TIO module)
Module address *
(Controller address)
* The value obtained by
adding “1” to the set
address corresponds
to the address used
for
the actual program.
(Set value : 0 and 1 )
1 2
PLC (Mitsubishi Electric
MELSEC Q series)
CPU unit
Q02HCPU
CC-Link system Master local unit
QJ 61BT11N (Master station)
Station number: 0
Communication speed: 156 kbps
CC-Link communication
converter COM-JC
Remote device station
(Slave station)
Station number: 1
4 station occupied 1 time
Communication speed:
156 kbps
Use instruments
• CC-Link communication converter: COM-JC ............................................ 1
• Controller (SRZ): Z-TIO module (4 channels type) ....... 2
• Mitsubishi PLC MELSEC Q series
− CPU unit: Q02HCPU
− CC-Link system master local unit: QJ 61BT11N
• CC-Link dedicated cable Ver. 1.10
• COM-JC and controller connection cable
4.2 Setting the Instruments Used
Set the PLC, COM-JC and controller as the following.
PLC setting
For operation of the CC-Link system master local unit QJ61BT11N and MELSEC
sequencer programming software GX Developer, refer to Instruction Manual of PLC.
[CC-Link system master local unit QJ61BT11N setting]
Setting item Setting value
Station number 0
CC-Link communication speed 156 kbps
[Master station network parameter setting by GX Developer]
Setting item Setting value
Number of boards in module 1
Start I/O number 0000
Operational settings Parameter name: None
Data link disorder station setting: Clear
Case of CPU STOP setting: Refresh
Type Master station
CC-Link mode setting Remote net (Ver. 1 mode)
Total number of connected
modules
1
Number of retries 5
Number of automatic return
modules
1
Standby master station number Blank
Operation specification when
CPU is down
Stop
Scan mode specification Asynchronous
Delay time setting 10 (500
μ
s)
Station information
(Number of COM-JC
connection: 1
Station number: 1)
Station type: Remote device
station
Expanded cyclic setting: Single
Number of occupied stations: Occupies 4 stations
Remote station points: 128 points
Reserved/invalid station select: No setting
Intelligent buffer select (word): No setting
[Automatic refresh parameter setting by GX Developer]
Setting item Setting value
Remote input (RX) refresh device X1000
Remote output (RY) refresh device Y1000
Remote register (RWr) refresh device W0
Remote register (RWw) refresh device W100
Special relay (SB) refresh device SB0
Special register (SW) refresh device SW0
All Rights Reserved, Copyright © 2007, RKC INSTRUMENT INC.
CAUTION
Communication setting
Mounting and Wiring
Controller setting
Program creation
Refer to 2. COMMUNICATION SETTING
• Refer to COM-JC [For SR
Z
] Installation Manual
(IMR01Y22-E)
• For SRZ, refer to Z-TIO Instruction Manual (IMS01T01-E)
and Z-DIO Instruction Manual (IMS01T03-E).
Refer to 4.4 Sample Program
• Refer to 4.2 Setting the Instruments Used
• Refer to Z-TIO Host Communication Quick
Instruction Manual (IMS01T02-E) and Z-DIO
Instruction Manual (IMS01T03-E).
PLC setting
Refer to 4.2 Setting the Instruments Used
Device assignment
Refer to 4.3 Device Assignment Example
CO
M
-
J
C
[For SRZ]
Quick Instruction
Manual

®
RKC INSTRUMENT INC.
The first edition: JUL. 2007 [IMQ00]
The second edition: SEP. 2011 [IMQ00]
HEADQUARTERS: 16-6, KUGAHARA 5-CHOME, OHTA-KU TOKYO 146-8515 JAPAN
FAX: 03-3751-8585 (+81 3 3751 8585) Website: http://www.rkcinst.com/ SEP. 2011
CC-Link is a registered trademark of Mitsubishi Electric Co. Ltd.
Modbus is a registered trademark of Schneider Electric.
Company names and product names used in this manual are the trademarks or registered
trademarks of the respective companies.
COM-JC setting
[CC-Link communication conditions]
• Number of occupied station/extended cyclic:
4 station occupied 1 time (8 channels assignment)
• Station number: 1
• CC-Link communication speed: 156 kbps
• Controller communication speed: 19200 bps (Factory set value)
For setting method, refer to 2. COMMUNICATION SETTING.
Controller (Z-TIO module) setting
[Controller communication conditions]
• Protocol: Modbus
• Module address: 1 and 2 (Set value: 0 and 1)
• Communication speed: 19200 bps (Factory set value)
• Data bit configuration: Data 8-bit, Without parity bit, Stop 1-bit
For setting method, refer to Z-TIO Host Communication Quick Instruction
Manual (IMS01T02-E).
4.3 Device Assignment Example
According to the contents set by 4.2 Setting the Instrument Used, each device is assigned.
Assignment conditions
COM-JC station number: 1
Number of occupied station/extended cyclic:
4 stations occupied 1 time (8 channels assignment)
Automatic refresh device setting
Remote input (RX): X1000 Remote output (RY): Y1000
Remote register (RWr): W0 Remote register (RWw): W100
Special relay (SB): SB0 Special register (SW): SW0
Remote input (RX) and remote output (RY)
X100F to X1000 RX0F to RX00
X101F to X1010 RX1F to RX10
X102F to X1020 RX2F to RX20
X103F to X1030 RX3F to RX30
X104F to X1040 RX4F to RX40
X105F to X1050 RX5F to RX50
X106F to X1060 RX6F to RX60
X107F to X1070 RX7F to RX70
Y100F to Y1000 RY0F to RY00
Y101F to Y1010 RY1F to RY10
Y102F to Y1020 RY2F to RY20
Y103F to Y1030 RY3F to RY30
Y104F to Y1040 RY4F to RY40
Y105F to Y1050 RY5F to RY50
Y106F to Y1060 RY6F to RY60
Y107F to Y1070 RY7F to RY70
z Device assignment table of remote input (RX)
CPU device
number
Communication item
Remote input (RX)
address
X1000 CH1 Event 1 state RX00
X1001 Event 2 state RX01
X1002 Burnout state RX02
X1003 Heater break alarm (HBA) state RX03
X1004 PID/AT transfer RX04
X1005 to X1009 CH2 Same as CH1 RX05 to RX09
X100A, X100B Unused RX0A, RX0B
X100C Extended display completion RX0C
X100D Extended setting completion RX0D
X100E Unused RX0E
X100F Hardware error flag RX0F
X1010 to X101F Reserved RX10 to RX1F
X1020 to X1024 CH3 Same as CH1 RX20 to RX24
X1025 to X1029 CH4 Same as CH1 RX25 to RX29
X102A to X102E CH5 Same as CH1 RX2A to RX2E
X102F to X1033 CH6 Same as CH1 RX2F to RX33
X1034 to X1038 CH7 Same as CH1 RX34 to RX38
X1039 to X103D CH8 Same as CH1 RX39 to RX3D
X103E to X106F Unused RX3E to RX6F
X1070 to X1077 Reserved RX70 to RX77
X1078 Initialize data processing request flag RX78
X1079 Initialize data setting completion flag RX79
X107A Error status flag RX7A
X107B Remote ready RX7B
X107C to X107F Reserved RX7C to RX7F
z Device assignment table of remote output (RY)
CPU device
number
Communication item
Remote output (RY)
address
Y1000 to Y1005 Bit 0 to Bit 5 Extension number for display RY00 to RY05
Y1006 to Y100B Bit 0 to Bit 5 Extension number for setting RY06 to RY0B
Y100C Extended display flag RY0C
Y100D Extended setting flag RY0D
Y100E Unused RY0E
Y100F RUN/STOP transfer RY0F
CPU device
number
Communication item
Remote output
(RY) address
Y1010 to Y1017 Bit 6 to Bit 13 Extension number for display (Bit 9 to Bit 13: Unused) RY10 to RY17
Y1018 to Y101F Bit 6 to Bit 13 Extension number for setting (Bit 9 to Bit 13: Unused) RY18 to RY1F
Y1020 to Y1027 Bit 0 to Bit 7 Area number for display (Bit 4 to Bit 7: Unused) RY20 to RY27
Y1028 to Y102F Bit 0 to Bit 7 Area number for setting (Bit 4 to Bit 7: Unused) RY28 to RY2F
Y1030 to Y106F Unused RY30 to RY6F
Y1070 to Y1077 Reserved RY70 to RY77
Y1078 Initialize data processing completion flag RY78
Y1079 Initialize data setting request flag RY79
Y107A Error reset request flag RY7A
Y107B to Y107F Reserved RY7B to RY7F
Remote register (RWr, RWw)
For writes
W100 to W107 RWw0 to RWw7
W108 RWw8
W109 RWw9
W10A RWwA
W10B RWwB
W10C RWwC
W10D RWwD
W10E RWwE
W10F RWwF
For reads
W000 to W007 RWr0 to RWr7
W008 RWr8
W009 RWr9
W00A RWrA
W00B RWrB
W00C RWrC
W00D RWrD
W00E RWrE
W00F RWrF
z Device assignment table of remote register (RWw)
CPU device
number
Communication item
Remote register
(RWw) address
W100 to W107 Set value (SV) of CH1 to CH8 RWw0 to RWw7
W108 For extension area setting of CH1 (Module address 1) RWw8
W109 For extension area setting of CH2 (Module address 1) RWw9
W10A For extension area setting of CH3 (Module address 1) RWwA
W10B For extension area setting of CH4 (Module address 1) RWwB
W10C For extension area setting of CH5 (Module address 2) RWwC
W10D For extension area setting of CH6 (Module address 2) RWwD
W10E For extension area setting of CH7 (Module address 2) RWwE
W10F For extension area setting of CH8 (Module address 2) RWwF
z Device assignment table of remote register (RWr)
CPU device
number
Communication item
Remote register
(RWr) address
W000 to W007 Measured value (PV) of CH1 to CH8 RWr0 to RWr7
W008 For extension area display of CH1 (Module address 1) RWr8
W009 For extension area display of CH2 (Module address 1) RWr9
W00A For extension area display of CH3 (Module address 1) RWrA
W00B For extension area display of CH4 (Module address 1) RWrB
W00C For extension area display of CH5 (Module address 2) RWrC
W00D For extension area display of CH6 (Module address 2) RWrD
W00E For extension area display of CH7 (Module address 2) RWrE
W00F For extension area display of CH8 (Module address 2) RWrF
4.4 Sample Program
Program conditions
COM-JC station number: 1
Number of occupied station/extended cyclic:
4 stations occupied 1 time (8 channels assignment)
Automatic refresh device assignment:
Refer to 4.3 Device Assignment Example
Special relay (M) assignment: M0: Extension number setting flag for display
M1: Measured value (PV)/Manipulated output value (MV)
transfer
M2: Extension number setting flag for setting
Data register (D) assignment: D0 to D7:
Measured value (PV) storage of CH1 to CH8
D8 to D15
Manipulated output value (MV) storage of CH1 to CH8
Program operation
1. Store measured value (PV) and manipulated output value (MV) to a data register.
2. Write in set value (SV) of CH1 to CH8.
CH1 set value (SV): 150.0 °C CH5 set value (SV): 350.0 °C
CH2 set value (SV): 200.0 °C CH6 set value (SV): 400.0 °C
CH3 set value (SV): 250.0 °C CH7 set value (SV): 450.0 °C
CH4 set value (SV): 300.0 °C CH8 set value (SV): 500.0 °C
3. Change the controller to the control RUN.
Sample program
Data processing precautions
Numeric data values (Remote register) obtained via communication with the COM-JC and
processed by PLC include those with and without decimal points and also those with minus signs.
• For numeric data value without decimal point
If there is no decimal point the value is processed as it is.
• For numeric data value with decimal point
The decimal point is omitted.
[Example] When the measured value (PV) is 120.5 °C
Read value of remote register (RWrn) [Measured value (PV)]:
1205 (Hexadecimal number: 04B5H)
• For numeric data value with minus sign
The value is expressed as a 2’s complement value which is obtained by subtracting the
minus value from the hexadecimal number 10000H.
[Example] When the measured value (PV) is −2.5 °C
Read value of remote register (RWrn) [Measured value (PV)]:
Hexadecimal number: FFE7H
(10000H − 25 = 10000H − 19H = FFE7H)
When a Z-DIO module is connected, execute “Automatic acquisition of controller
address” initially. If “Address setting of connected controller” is left at the factory set
value, it may not be possible to use the data of the Z-DIO module.
CPU of PLC
COM
-
JC (Station number 1):
4 station occupied 1 time
: The device that a controller actually uses
CPU of PLC
: The device that a controller actually uses
COM-JC (Station number 1):
4 stations occupied 1 time
FF M1
Turn off the extension number setting flag
for display (M0).
RST M0
Set the extension number for setting.
Extension number 3: Turn on the
extension number setting Bit 0 (Y1006:
RY06) for set value (SV) setting.
Turn on the extension number setting
Bit 1 (Y1007: RY07).
When a set of setting extension numbers are not
processed yet.
Extension number setting flag for setting (M2) OFF
Set “150.0 °C” to set value (SV) of CH1.
Write “1500” for extension area setting
(W108: RWw8) of CH1.
Succeedingly, set the set value of CH2 to
CH8 in the following value.
CH2: 200.0 °C
CH3: 250.0 °C
CH4: 300.0 °C
CH5: 350.0 °C
CH6: 400.0 °C
CH7: 450.0 °C
CH8: 500.0 °C
Write “2000,” “2500,” “3000,” “3500,”
“4000,” “4500” and “5000” for extension
area setting
(W109 to W10F: RWw9 to
RWwF) of each channel.
Only the bits (Bit 0 and Bit 1) necessary
forsetting extension number “3” are
specified. Any unspecified bit is assumed
to be the register initial value, “0.”
Turn off the extended setting flag
(Y100D: RY0D).
Turn on the extended setting flag
(Y100D: RY0D).
Extension number setting end for setting.
Turn on the extension number setting flag
for setting (M2).
The extension setting completion flag
(X100D: RX0D) is turned OFF.
When the extension setting is finished and the setting
extension number has been set.
Extended setting completion flag (X100D: RX0D) ON
Extension number setting flag for setting (M2) ON
When control RUN/STOP (Y100F: RY0F) is transfe
r
r
ed
to control STOP.
Control “RUN” of controller.
Turn on the control RUN/STOP transfer
(Y100F: RY0F).
MOV K1500 W108
SET Y1007
MOV K2000 W109
RST Y100D
SET M2
SET Y100D
X100D
FEND
END
MOV K2500 W10A
MOV K3000 W10B
MOV K3500 W10C
MOV K4000 W10D
MOV K4500 W10E
MOV K5000 W10F
M2
SET Y1006
X107B
Control “STOP” of controller.
Turn off the control RUN/STOP transfer
(Y100F: RY0F).
When the PLC initial processing (PLC STOP → RUN).
Turn on the initialize data setting request
flag
(Y1079: RY79).
Turn off the extension number setting
flag for display (M0).
Turn on the Initialize data processing
completion flag
(Y1078: RY78).
When no initial data processing is finished with the initial data
processing requested.
Initialize data processing request flag (X1078: RX78) ON
Initialize data processing completion flag (Y1078: RY78) OFF
Turn off the Initialize data processing
completion flag
(Y1078: RY78).
When the initial data processing is finished with no initial data
processing requested.
Initialize data processing request flag (X1078: RX78) OFF
Initialize data processing completion flag (Y1078: RY78) ON
Turn off the Initialize data setting request
flag
(Y1079: RY79).
When the initial data processing is finished and the initial data
setting is being requested.
Initialize data setting completion flag (X1079: RX79) ON
Initialize data setting request flag (Y1079: RY79) ON
Turn on the error reset request flag
(Y107A: RY7A).
When the COM-JC is in the error state.
Error status flag (X107A: RX7A) ON
Turn off the error reset request flag
(Y107A: RY7A).
When the COM
-
JC is in the normal state and the error reset
action is being requested.
Error status flag (X107A: RX7A) OFF
Error reset request flag (Y107A: RY7A) ON
RST Y100F
SET Y1079
BKRST M0 K3
SET Y1078
X1078 Y1078
X1078 Y1078
RST Y1078
RST Y1079
X1079 Y1079
SET Y107A
X107A
RST Y107A
X107A Y107A
Set the extension number for display.
Extension number 0: Turn off the
extension number setting Bit 0
(Y1000: RY00) for measured value
(
PV
)
dis
p
la
y
.
When the COM
-
JC is in the remote ready state and no display
extension number setting is processed yet.
Remote ready (X107B: RX7B) ON
Extension number setting flag for display (M0) OFF
When Measured value (PV)/Manipulated
output value (MV) is transferred [M1] to
Manipulated output value (MV).
Set the extension number for display.
Extension number 1: Turn on the
extension number setting Bit 0
(Y1000: RY00) for manipulated output
value (MV) display.
When Measured value (PV)/Manipulated
output value (MV) is transferred [M1] to
Measured value (PV).
The extension display completion flag
(X100C: RX0C) is turned OFF.
RST Y100C
SET Y100C
X100C
Turn off the extension display flag
(Y100C: RY0C).
Turn on the extension display flag
(Y100C: RY0C).
SET M0
E
x
tension number setting end for
display.
Turn on the extension number
setting flag for display (M0).
When the extension display is finished and the display
extension number has been set.
Extended display completion flag (X100C: RX0C) ON
Extension number settin
g
fla
g
for dis
p
la
y
(
M0
)
ON
Only the bit (Bi
t
0) necessary for
setting display e
xtension number “0”
or “1” is specified. Any unspecified bit
is assumed to be the register initial
value, “0.”
X107B M0 M1
RST Y1000
SET Y1000
M1
When Measured value (PV)/Manipulated
output value (MV) is transferred [M1] to
Measured value (PV).
X100C M0 M1
MOV W8 D0
Store the measured value (PV) of CH1
into the data register D0.
Store the extension area for display
(W008: RWr8) of CH1 into the data
register D0.
Succeedingly, store the measured value
(PV) of CH2 to CH8 into the data
registers D1 to D7.
A
nd
s
tore the extension area for display
(W009 to W00F: RWr9 to RWrF) of CH2
to CH8 into the data registers D1 to D7.
MOV W9 D1
MOV WA D2
MOV WB D3
MOV WC D4
MOV WD D5
MOV WE D6
MOV WF D7
When Measured value (PV)/Manipulated
output value (MV) is transferred [M1] to
Manipulated output value (MV).
M1
MOV W8 D8
MOV W9 D9
MOV WA D10
MOV WB D11
MOV WC D12
MOV WD D13
MOV WE D14
MOV WF D15
Store the manipulated output value (MV)
of CH1 into the data register D8.
Store the extension area for display
(W008: RWr8) of CH1 into the data
register D8.
Succeedingly, store the manipulated
output value (MV) of CH2 to CH8 into
the data registers D9 to D15.
A
nd store the extension area for display
(W009 to W00F: RWr9 to RWrF) of CH2
to CH8 into the data register D9 to D15.
Measured value (PV)/Manipulated output
value (MV) is inversely transferred [M1].
Variables to be read are alternately
selected.
X100D M2 Y100F
SET Y100F
/