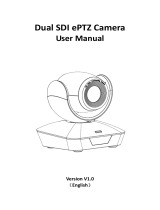
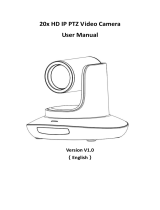
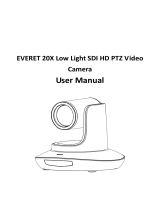
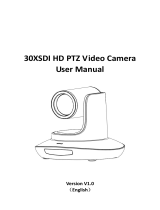
Avipas AV-1080 User manual

Category
Security cameras
Type
User manual

This manual is also suitable for

1
Model: AV-1080
HD Video Conferencing Camera (SDI)
Model: AV-1081
HD Video Conferencing Camera (HDMI)
User Manual
V1.0
Please Read this User Manual
throughout before using
www.avipas.com
2
Preface
Thanks for using this HD Video Conferencing Camera.
This manual introduces the functions, installation process and operation of the HD camera. Prior to
installation and usage, please read the manual thoroughly.
Precautions
This product should only be used under the specified conditions in order to avoid any damage to
the camera:
Do not subject the camera to rain or moisture.
Do not remove the cover. Otherwise, you may risk receiving an electric shock. In case of
unintended equipment operation, contact an authorized engineer.
Never operate under unspecified temperature, humidity or power supply.
Please use soft dry cloth to clean the camera. If the camera is very dirty, clean it with diluted
neuter detergent; do not use any type of solvents, which may damage the surface.
Note:
This is a class A production. Electromagnetic radiation at certain frequencies may affect the image
quality of TV in home environment.
3
Contents
Attentions ........................................................................................................... 4
Supplied Accessories ......................................................................................... 4
Quick Start ......................................................................................................... 5
Features .............................................................................................................. 8
Product Specifications ....................................................................................... 9
Main Units ....................................................................................................... 11
Dimensions ...................................................................................................... 12
IR Remote Control Menu ................................................................................. 13
RS-232 Interface .............................................................................................. 14
Serial Communication Control ........................................................................ 16
Menu Settings .................................................................................................. 17
Network Connection ........................................................................................ 23
Maintenance and Troubleshooting ................................................................... 36
Appendix .......................................................................................................... 38
4
Attentions
Electric Safety
Installation and operation must accord with electric safety standard.
Use caution to transport
Avoid stress, vibration or soakage in transport, storage and installation.
Polarity of power supply
The power supply of this product is +12V, the max electrical current is 2A. Polarity of the power
supply plug is shown in the drawing below.
Installation precautions
Do not grasp the camera lens when carrying it. Do not touch camera lens by hand. Mechanical
damage may result from doing so.
Do not use in corrosive liquid, gas or solid environment to avoid any cover (plastic material)
damage.
Make sure there is no obstacle within rotation range.
Do not power on before installation is completed.
Do not dismantle the camera
We are not responsible for any unauthorized modification or dismantling.
CAUTION!
Certain frequencies of electromagnetic field may affect the image of the camera!
Supplied Accessories
When unpacked, check if all supplied accessories are included:
Camera .............................................................................. 1PCS
AC power adaptor ............................................................. 1PCS
Power cord .......................................................................... 1PCS
RS232 cable ........................................................................ 1PCS
Remote control.................................................................... 1PCS
User manual ........................................................................ 1PCS
5
Quick Start
1. Camera Interface Illustration
Fig 1.1 Interface of AV-1080
Interface of SDI Model
1. Camera Lens
4. Locating Hole
7. SDI Interface
2. Remote Controller Receiver Light
5. RS232 Control Interface (input)
8. A-IN Interface
3. Tripod Screw Hole
6. LAN Interface
9. DC12V Power Supply Socket
Fig 1.2 Interface of AV-1081
Interface of HDMI Model
4. Locating Hole
7. HDMI Interface
5. RS232 Control Interface (input)
8. A-IN Interface
6. LAN Interface
9. DC12V Power Supply Socket
NoticeEach model comes with the corresponding interface. Users should read the manual
according to the particular model.
6
2. Bracket mount
Note: Bracket can only be wall mounted or ceiling mounted (upside down) on concrete wall, It
cannot be installed on plasterboard.
1) Wall mount
7
2) Ceiling mount
8
Features
AV-1080 series camera features advanced ISP processing algorithms to provide vivid images with a
strong sense of depth, high resolution and fantastic color rendition. It supports H.265/H.264 encoding
which makes motion video fluent and clear even under less than ideal bandwidth conditions.
Superb High-definition Image: It employs 1/2.8” high-quality CMOS sensor. Resolution is up
to 1920x1080 with frame rate up to 60 fps.
Optical Zoom Lens: 10X zoom lens is with 83.7° wide view angle without distortion.
Leading Auto Focus Technology: With innovative algorithm, auto-focusing is fast, accurate and
stable.
Low Noise and High SNR: Low-noise CMOS effectively ensures high SNR of video. Advanced
2D/3D noise reduction technology is also used to further reduce noise while ensuring image
sharpness.
Quiet PTZ Mechanism: By accurate step driving motor mechanism, the camera works extremely
quiet and moves smoothly.
Multi-Format Video Outputs: Support SDI, HDMI, USB2.0, HDBaseT and LAN interfaces.
Multiple Video compression: Support H.265/H.264 video compression.
Audio Input Interface: Support 16000, 32000, 44100, 48000 sampling rates, and AAC, MP3,
G.711A audio coding.
Multiple Network Protocol: Support ONVIF, RTSP, RTMP protocols, and RTMP push mode,
easy to link to streaming media server (Wowza, FMS).
Low-power sleep function: Support low-power sleep mode, and the consumption is lower than
400mW.
Multiple Communication Protocols: Support VISCA, Pelco-D, Pelco-P protocols.
RS-232 Cascade Function: Support RS-232 cascade function which is convenient for installing.
255 presets Positions: Up to 255 presets (10 presets by IR remote).
Wide Application: Tele-education, Lecture capture, Webcasting, Videoconferencing,
Tele-training, Tele-medicine, Interrogation and Emergency command systems.
9
Product Specifications
Name
AV-1080 Series HD Video Conference Camera
Camera
Sensor
1/2.8'', CMOS, 16:9, Effective Pixel: 2.07MP
Scanning Mode
Progressive
Lens
10x, f4.747mm, F1.6 ~ F3.0
Digital Zoom
5x
Minimal Illumination
0.5 Lux @ (F1.8, AGC ON)
Focus
Auto/Manual/ One Push
Aperture
Auto/Manual
Electronic Shutter
Auto/Manual
White Balance
Auto / Manual/ One Push/ 3000K/ 4000K/5000K/6500K
Backlight Compensation
On/Off
Digital Noise Reduction
2D&3D Digital Noise Reduction
Video SNR
55dB
Video Adjustment
Brightness/ Color/ Saturation/ Contrast/ Sharpness/ BW mode/ Gamma
curve
View Angle
6.43°(tele)--60.9°(wide)
Pan Rotation Range
±135°
Tilt Rotation Range
±30°
Pan Speed Range
0.1° ~ 60°/s
Tilt Speed Range
0.1° ~ 30°/s
Number of Preset
255
Preset Accuracy
0.1°
IPC Features
Video coding standard
H.265/H.264
Video Stream
First stream, Second stream
Video Format
HDMI/SDI: 1080P60/50/30/25/59.94/29.97; 1080I60/50/59.94;
720P60/50/30/25/59.94/29.97
Main stream: 1920x1080, 1280x720,640x480
10
Sub stream: 320x180,320x240,640x360,640x480,1280x720,1920x1080
Frame Rate
50Hz: 1fps ~ 25ps; 60Hz: 1fps ~ 30fps
Audio Standard
AAC/ MP3/ G.711A
Sampling Rate
16000/ 32000/ 44100/ 48000
Network Protocols
RTSP/RTMP, ONVIF, GBT28181
Input/Output Interface
Communication Interface
1xRS232: 8pin Min DIN; Max Distance: 30m
Protocol
Pelco-D/ Pelco-P/ VISCA
Baud Rate
115200/9600/4800/2400
Video Output Interface
AV-1080: SDI, LAN, RS232, A-IN
AV-1081: HDMI, LAN, RS232, A-IN
Audio Input
1-ch 3.5mm audio interface, Line In
Network interface
1xRJ45: 10/100/1000M Adaptive Ethernet ports
Power Jack
JEITA type (DC IN 12V)
Generic Specification
Input Voltage
DC 12V
Current Consumption
1.0A (Max)
Operating Temperature
20°F~80°F (-10°C~50°C)
Storage Temperature
20°F~95°F (-10°C~60°C)
Power Consumption
12W (Max)
Size
6”x6”x5” (151.2mmX152.5mmX126.7mm)
Net Weight
3lb (1.4kg)
11
Main Units
1) External interface of SDI models: RS232, LAN, SDI Output, Audio Input, DC12V Power
Interface.
2) External interface of HDMI model: RS232, LAN, HDMI Output, Audio Input, DC12V
Power Interface
12
Dimensions
13
IR Remote Control Menu
1. Standby Button
Press this button and hold it for 3 secs to enter standby mode. The
camera will do self-testing and return back to HOMEposition.
(Note: If Preset 0 is set, and with no operation for 12s, the camera will
automatically turn to Preset position 0.
2. Camera Address Selection
Press the camera address number to control the particular camera with
the address setting.
3. Number Keys
To set or call 0-9 presets.
4. *, #, Key Combination
To use as combination with F1-F4 to set camera address.
*+#+F1: Camera Address No.1
*+#+F2: Camera Address No. 2
*+#+F3: Camera Address No. 3
*+#+F4: Camera Address No. 4
5. Focus Control
AUTO: to enter auto focus mode.
MANUAL: to enter manual focus mode.
Switch the camera focus mode to manual by pressing FOCUS+ or
FOCUS-to adjust.
6. Zoom Control
ZOOM+: Lens near; ZOOM-: Lens far
7. Set/ Clear Presets
SET PRESET+0-9 number key: To set presets
CLEAR PRESET+0-9number key: To clear presets
8. Pan-Tilt Control Buttons
Press the Up, down, left and right buttons to adjust the camera position. Press HOME
to return to the center position.
9. BLC Control
BLC ON/OFF: To turn on/off the back light.
14
10. Menu Settings
MENU: to open/ close the OSD menu; to enter/ exit the OSD menu, or to return to the previous
submenu.
11. Key Combination Functions
1) #+#+#: Clear all presets
2) *+#+6: Restore factory defaults
3) *+#+9: Flip switch
4) *+#+AUTO: Enter the auto mode
5) *+#+3: Set language to Chinese
6) *+#+4: Set language to English
7) *+#+MANUAL: Restore the default
user name, PSW and IP address
8) #+#+0: Switch the video format
to 1080P60
9)#+#+1: Switch the video format to
1080P50
10)#+#+2: Switch the video format
to 1080I60
11)#+#+3: Switch the video format to
1080I50
12)#+#+4: Switch the video format
to 720P60
13)#+#+5: Switch the video format to
720P50
14)#+#+6: Switch the video format
to 1080P30
15)#+#+7: Switch the video format to
1080P25
16)#+#+8: Switch the video format
to 720P30
17)#+#+9: Switch the video format to
720P25
RS-232 Interface
Computer or keyboard o camera connection
Camera
WindowsDB-9
1.DTR
1.DCD
2.DSR
2.RXD
3.TXD
3.TXD
4.GND
4.DTR
5.RXD
5.GND
6.GND
6.DSR
7.IR OUT
7.RTS
8.NC
8.CTS
9.RI
15
1) RS-232 Mini-DIN 8-pin Port Definition
2) RS232 (DB9) Port Definition
NO.
Port
Definition
1
DTR
Data Terminal Ready
2
DSR
Data Set Ready
3
TXD
Transmit Data
4
GND
System Ground
5
RXD
Receive Data
6
GND
System Ground
7
IR OUT
IR Commander Signal
8
NC
No Connection
NO.
Port
Definition
1
DCD
Data Carrier Detect
2
RXD
Receive Data
3
TXD
Transmit Data
4
DTR
Data Terminal Ready
5
GND
System Ground
6
DSR
Data Set Ready
7
RTS
Request to Send
16
3) VISCA networking
Serial Communication Control
Under normal working condition, the camera could be controlled through RS232 interface. RS232C
serial parameters are as below:
Baud rate: 2400/4800/9600/115200bps;
Start bit: 1; data bits: 8; Stop bit: 1; Parity: None.
Pan-Tilt function rotates the camera to its maximum position of top left upon startup, then it returns to
the center, and the process of initialization is finished. (Note: if there is an entry for position preset 0,
the corresponding position preset 0 will be called up after initialization.) Then user can control the
camera with commands in the command list (See Appendix).
17
Menu Settings
1. Maun Menu
Press [MENU] to display the main menu on
the screen. Use the arrow buttons to move the
cursor. Press [HOME] to enter the corresponding
sub-menu.
LANGUAGE: Language setting, Chinese/English
SETUP: System settings
CAMERA: Camera settings
PTZ OPTION: Pan tilt settings
VERSON: View camera version
Restore Default: Reset settings
2. SETUP- System Settings
Move the cursor to [SETUP] in the main
menu and press [HOME], [SETUP] menu is
shown below.
PROTOCOL: VISCA/ Pelco-P/ Pelco-D/ Auto
Visca Addr: VISCA:1~7/ Pelco-P: 1~255/
Pelco-D: 1~255
Visca Address Fix: On/ Off
Baud rate: 2400/ 4800/ 9600/ 115200
3. CAMERA- Camera Settings
Move the cursor to [Camera] in the main
menu and press [HOME], [Camera] menu is
shown below.
SETUP
===============
Protocol Auto
Visca Address 1
Visca Address Fix OFF
PELCO-P Address 1
PELCO-D Address 1
Baudrate 9600
MENU
===============
Language English
(Setup)
(Camera)
(P/T/Z)
(Video Format)
(Version)
(Restore Default)
[↑↓] Select [← →] Change Value
[MENU] Back [HOME] OK
18
EXPOSURE: Enter Exposure settings
Move the cursor to [EXPOSURE] and press
[HOME], [EXPOSURE] menu is shown below.
Mode: Auto/ Manual/ Shutter priority/ Iris
priority/ Brightness priority
EV: On/ Off (only available in auto mode)
Compensation Level: -7~7 (only available in
auto mode & when EV is ON)
BLC: On/ Off (only available in auto mode)
Flicker: anti-flicker: OFF/ 50Hz/ 60Hz (only
available in Auto/ Iris priority/ Brightness priority
modes)
Gain Limit: 0~15 (only available in Auto/ Iris
priority /Brightness priority mode)
WDR: Off/ 1~8
Shutter Priority: 1/25, 1/30, 1/50, 1/60, 1/90,
1/100, 1/120, 1/180, 1/250, 1/350, 1/500, 1/1000,
1/2000, 1/3000, 1/4000, 1/6000, 1/10000 (only
available in Manual or Shutter priority mode)
IRIS Priority: OFF, F11.0, F9.6, F8.0, F6.8, F5.6,
F4.8, F4.0, F3.4, F2.8, F2.4, F2.0, F1.8 (only
available in Manual or Iris priority mode)
Brightness: 0~23 (only available in Brightness
priority mode)
COLOR: Enter color settings
Move the cursor to [COLOR] and press
[HOME], [COLOR] menu is shown below.
EXPOSURE
===============
Mode Auto
EV OFF
BLC OFF
Flicker 50Hz
G.Limit 4
DRC 4
CAMERA
===============
(Exposure)
(Color)
(Image)
(Focus)
(Noise Reduction)
Style Default
19
WB Mode: Auto/ 3000K/ 3500K/ 4000K/
4500K/ 5000K/ 5500K/ 6000K/ 6500K/ 7000K/
Manual/ One Push
RG Tuning: -10~10 (only available in Manual
mode)
BG Tuning: -10~10 (only available in Manual
mode)
Red Gain: 0~255 (only available in Manual
mode)
Blue Gain: 0~255 (only available in Manual
mode)
Saturation: 60%, 70%, 80%, 90%, 100%,
110%, 120%, 130%, 140%, 150%, 160%,
170%, 180%, 190%, 200%
Hue: 0~14
AWB Sensitivity: high/ middle/ low
IMAGE: Enter image settings
Move the cursor to [IMAGE] and press [HOME],
[IMAGE] menu is shown below.
Brightness: 0~14
Contrast: 0~14
Sharpness: 0~15
Flip-H: On/ Off
Flip-V: On/ Off
B&W Mode: color, black/white
Gamma: default/ 0.45/ 0.50/ 0.55/ 0.63
DZoom: digital zoom options: On/ Off
DCI: Dynamic Contrast: Off/ 18
FOCUS: Enter focus settings
Move the cursor to [FOCUS] and press [HOME],
IMAGE
===============
Brightness 7
Contrast 7
Sharpness 6
Flip-H OFF
Flip-V OFF
B&W-Mode Color
Gamma Default
DZoom OFF
DCI Close
COLOR
===============
WB Mode Auto
RG Tuning 0
BG Tuning 0
Saturation 100%
Hue 7
AWB Sensitivity High
20
[FOCUS] menu is shown below.
Focus Mode: Auto/ manual/ one-push
AF-Zone: Up, middle, down, overall
AF-Sensitivity: High, middle, low
Noise Reduction: Enter noise reduction
settings
Move the cursor to [NOISE REDUCTION] and
press [HOME], [NOISE REDUCTION] menu
is shown below.
2D Noise Reduction: Auto/ close/ 1~7
3D Noise Reduction: Close/ 1~8
Dynamic Hot Pixel: Close/ 1~5
4. P/T/Z
Move the cursor to [P/T/Z] in the main menu
and press [HOME], [P/T/Z] menu is shown below.
Speed by Zoom: Only effective for remote
controller. On/ Off (When zoom in, the P/T
control speed by remoter will become slow)
Zoom Speed: Set the zoom speed for remote
controller. 1~8
Image Freezing: On/ Off
Accelerating Curve: Fast/ Slow
5. Video Format
Move the cursor to [VIDEO FORMAT] in
the main menu and press [HOME], [VIDEO
FORMAT] menu is shown below.
P/T/Z
===============
Speed by Zoom ON
Zoom speed 8
Image Freezing OFF
Acc Curve Slow
NOISE REDUCTION
==============
NR-2D 3
NR-3D 3
Dynamic Hot Pixel OFF
FOCUS
================
Focus Mode Auto
AF-Zone Center
AF-Sensitivity Low
  • Page 1 1
  • Page 2 2
  • Page 3 3
  • Page 4 4
  • Page 5 5
  • Page 6 6
  • Page 7 7
  • Page 8 8
  • Page 9 9
  • Page 10 10
  • Page 11 11
  • Page 12 12
  • Page 13 13
  • Page 14 14
  • Page 15 15
  • Page 16 16
  • Page 17 17
  • Page 18 18
  • Page 19 19
  • Page 20 20
  • Page 21 21
  • Page 22 22
  • Page 23 23
  • Page 24 24
  • Page 25 25
  • Page 26 26
  • Page 27 27
  • Page 28 28
  • Page 29 29
  • Page 30 30
  • Page 31 31
  • Page 32 32
  • Page 33 33
  • Page 34 34
  • Page 35 35
  • Page 36 36
  • Page 37 37
  • Page 38 38
  • Page 39 39
  • Page 40 40
  • Page 41 41
  • Page 42 42
  • Page 43 43
  • Page 44 44
  • Page 45 45
  • Page 46 46
  • Page 47 47
  • Page 48 48
  • Page 49 49

Avipas AV-1080 User manual

Category
Security cameras
Type
User manual
This manual is also suitable for

Ask a question and I''ll find the answer in the document

Finding information in a document is now easier with AI