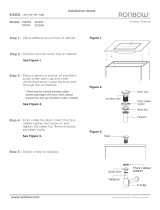
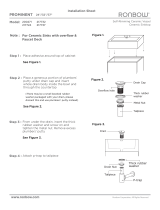
Page is loading ...

Tools and Materials
Before You Begin
Observe all local plumbing and building codes.
Shut off the main water supply.
Inspect the supply tubing for damage. Replace as necessary.
If possible, install this faucet to the lavatory before installing the
lavatory.
Kohler Co. reserves the right to make revisions in the design of
faucets without notice, as specified in the Price Book.
Adjustable
Wrench
Thread
Sealant
Plumbers
Putty
Hex
Wrench
1032026-2-D 2 Kohler Co.

1. Install the Faucet
Apply plumbers putty or other sealant to the underside of the
escutcheon according to the manufacturer’s instructions.
Feed the faucet supply inlets through the faucet hole of the
lavatory, then position the faucet. Slide the bracket and washer
over the stud and tighten the nut to secure.
Proceed to the installation instructions for your particular drain
style.
Nut
Bracket
Lavatory
Stud
Supply Inlet
Washer
Escutcheon
Nut
Bracket
Washer
Apply Plumbers
Putty.
Stud
Supply Inlet
Escutcheon
Apply Plumbers
Putty.
Kohler Co. 3 1032026-2-D

2. Install the Touch-Activated Drain
If present, remove the protective plastic cap from the drain and
discard.
Remove the nut, washer, and gasket from the drain body.
Apply a bead of plumbers putty or other sealant around the
underside of the flange according to the sealant manufacturer’s
instructions.
For drains with metal stoppers: Close the drain and rotate the
drain body until the logo is positioned horizontally.
Insert the drain into the drain hole and press into place.
Slide the gasket (tapered side up) onto the drain body.
Slide the washer over the threads on the drain body.
Thread the nut up the drain body until snug against the
underside of the lavatory. Use care not to rotate the drain while
tightening the nut.
Using a wrench, tighten the nut.
Remove any excess putty or sealant.
Connect the P-trap to the drain body.
Washer
Flange
Drain Body
Nut
Tapered Gasket
Thick Tapered Gasket
(for thin-walled vessel style
lavatory installations)
1032026-2-D 4 Kohler Co.

Install the Pop-Up Drain
Remove the protective cover from the flange.
Apply a ring of plumbers putty or other sealant to the underside
of the flange according to the putty manufacturer’s instructions.
Assemble the nut, flat washer, and tapered gasket (tapered side
up) fully onto the body.
From the underside of the fixture, insert the drain body up into
the drain hole.
From the top of the fixture, securely hand tighten the flange onto
the drain body.
Make sure the drain body seal hole is facing the back of the
fixture, and securely tighten the nut.
Remove any excess putty or sealant.
Apply plumbers putty.
Flange
Tapered Gasket
Washer
Nut
Drain Body
Fixture
Thick Tapered Gasket
(for thin-walled vessel style
lavatory installations)
Kohler Co. 5 1032026-2-D

Complete the Pop-Up Drain Installation
IMPORTANT! If the tailpiece has been removed, double check that
the plastic washer is installed inside the flange body or the drain
will leak.
Connect the P-trap to the tailpiece.
Press the seal into the lift rod hole on the body.
Insert the stopper into the flange.
For regular installations, insert the short end of the rod into the
lift rod hole and under the stopper rod. For vandal-resistant
installations, fit the rod through the hole in the stopper rod.
Hand tighten the rod nut.
Remove and adjust the stopper as needed so it lifts about 3/8″ (1
cm) when opened. To adjust, rotate the threaded stopper rod in or
out as needed. Retighten the stopper nut.
Slide one end of the clip onto the rod. Slide the link onto the lift
rod with the thumbscrew facing the back of the fixture.
Squeeze the other end of the clip, aligning the hole with the rod.
Move the link to the proper position by squeezing the clip and
sliding it along the rod.
Insert the lift rod into the hole in the body and then into the hole
in the link.
Tighten the thumbscrew onto the link so the lift rod knob extends
1/2″ (1.3 cm) above the lift rod hole.
Check for leaks.
Thumb
Screw
Body
Clip
Stopper
Flange
Seal
Rod Nut
Tailpiece
Rod
Plastic Washer
Stopper Rod
Link
1032026-2-D 6 Kohler Co.

3. Connect the Supplies
CAUTION: Risk of restricted water flow and product
damage. Use extreme care when bending the supplies to
avoid kinking.
CAUTION: Risk of product damage. Do not overtighten the
connections.
If the lavatory is not installed, install it at this time. Follow the
lavatory manufacturer’s instructions.
Connect the supply tubes to the supply stops. (Left is hot - right
is cold.)
Tighten the connections with an adjustable wrench.
Supply
Stop
Supply
Hose
Kohler Co. 7 1032026-2-D

4. Installation Checkout
Connect the drain tailpiece into the P-trap.
Ensure all connections are tight.
Remove the aerator and remove any debris.
Turn on the main water supply and check for leaks. Repair as
needed.
Lift and rotate the faucet handle to the full hot position, then the
full cold position. Run water through the spout for about one
minute to remove any debris. Check for leaks and repair as
needed.
Push the lever handle down to close the water supplies, then
reinstall the aerator.
Aerator
1032026-2-D 8 Kohler Co.

5. Optional Temperature Limiting Adjustment
Carefully pry the plug button off of the lever handle with a small
flat-blade screwdriver.
Loosen the setscrew with a hex wrench, then remove the lever
handle.
Note the position of the locking ring relative to the inner geared
ring.
NOTE: To avoid damage to the locking ring during removal, pry
each side of the locking ring off the inner geared ring with an equal
and even technique.
Gradually pry each side of the locking ring up off of the inner
geared ring and onto the valve stem with a flat-blade screwdriver.
Rotate the locking ring clockwise to increase temperature, or
counterclockwise to decrease temperature.
Align the geared teeth, then slide the locking ring down until
flush against the inner geared ring.
Reinstall the lever handle.
Test the temperature setting. Repeat the above steps, if needed.
Retighten the setscrew.
Press the plug button into place.
Setscrew
Handle
Inner Geared
Ring
Locking
Ring
Plug Button
Inner Geared
Ring
Locking
Ring
Kohler Co. 9 1032026-2-D
/


