Page is loading ...

Features
• Automatic or manual
operation. Push
ON/OFF
button to switch the
plugged in light(s) on or
off at any time.
• Program up to 14 on/off
time pairs per day
(maximum 98 automatic switch settings).
• Minimum setting interval 1 minute.
• A setting can be for a particular day of the week,
every day, only weekdays, only weekends, or every
day but Sunday.
• Random feature turns the times on/off within 15
minutes of each program setting.
• Batteries (AA alkaline) save the time and program
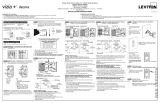
HB77 Programmable
Outdoor Timer
Installation and
Operating
Instructions
settings when the unit is
unplugged or there is a power
outage.
• Controls any 120VAC load up
to 15 amps.
Introduction
To activate batteries, remove battery
cover and pull plastic tab.
Simply plug the cord from the timer into
an electrical outlet (1), then plug your
incandescent lights into timer
(2).
The HB77 is then your programmable
timer
, random timer, countdown timer and
manual switch.
LOAD MAINTENANCE
WARNING DO NOT USE THE TIMER TO TURN OFF
POWER FOR MAINTENANCE (repairs, removing
broken bulbs, etc.). ALWAYS TURN POWER OFF AT
THE SERVICE PANEL BY REMOVING A FUSE OR
CIRCUIT BREAKER BEFORE DOING ANY CIRCUIT
REPAIRS.
Controls
1. Display - lcd display
(reset display shown).
2. On light - red led is lit
when the HB77 is on.
3. RESET button - push
the RESET button with a
ball point pen to clear all
programming and the
clock.
4. TIME SET button -
push and hold to set the clock in On, Auto or Off modes.
5. ON/OFF button - push and release to manually switch
on or off at any time.
6. DAY button - use during time set to set the day of the
week, use during programming to set the day, weekend,
etc. setting.
7. HOUR button - use during time set or programming to
set the hour.
8. MIN button - use during time set or programming to set
the minute.
9. DS button - push and hold for a couple of seconds to
switch to or from daylight savings time.
10. PROG button - push and release to set or change
programmed on and off times.
11. MODE button - push and release to choose the
mode.
1
3
4
5
2
6 7 8 9 10 11
HOUR MIN PROG MODE
RESET
TIME SET
DAY
MO TU WE TH FR SA SU
Auto On RandOff
AM PM
Prg
DS
ON/OFF
Displays
1. Daylight
savings symbol
indicates daylight
savings time
when present.
2. AM/PM
3. MO TU . . .
Day of the week.
4. 03:12 – Time.
5. On/Off display
On display. Usually displayed when On light is lit
and timer is on, during programming indicates an on
time is being programmed.
Of
f display (Usually
displayed when On light is off
and timer is off, during
programming indicates an off
time is being programmed.)
6. Program number – (1- 14)
7. Mode – Countdown Timer, Off, Auto, On, or Rand.
See Modes, next page, for specific mode displays.
PMAM
PM
MO TU WE TH FR SA SU
Auto
2
WE
1
3 4
5
AM
FR
Auto
Prg
6
7
PM
WE
Off
1
2
4
How to set the
clock:
1. The mode must be On, Auto, or Off.
2. The plugged in light(s) can be on or off.
Note: If it is daylight savings time, push and hold DS
for a couple of seconds so the daylight savings symbol
appears.
If it is not daylight savings time, push and hold DS for a
couple of seconds so the daylight savings symbol is
off.
3. Push and hold TIME SET.
4. The blinking colon stays on (stops blinking).
While holding TIME SET:
a. Push and release DAY to change the day of
week.
b. Push and release HOUR to change the hour and
AM/PM.
c. Push and release MIN to change the minute.
Notes:
if you push and hold DAY, HOUR or MIN the display
changes quickly.
Seconds are set to 0 when the TIME SET button is
released if either the HOUR or MIN have been set.
1
3
2
a b c
PM
W
E
Off
HOUR
MIN PROG MODE
RESET
TIME SET
DAY
DS
ON/OFF
Daylight Savings Time
In Off, Auto, or On mode,
push and hold DS for a
couple of seconds to switch
daylight savings time on or
off. The daylight savings
(S) symbol switches on or off and the time switches
one hour in the appropriate direction.
AM
TH
On
1
2
HB77 /ART589A 3/26/04 2:10 PM Page 1

MODE
Push and release MODE to
change the mode.
The modes are Countdown
timer, Off, Auto, On, and Rand.
Countdown timer mode
In countdown timer mode the
clock symbol is displayed (a).
When countdown timer mode is
entered the countdown time is set
to 75 minutes
(b).
And the plugged in light(s) are
tuned on (c).
The countdown timer can be set to turn the plugged in light(s)
on or off after 75, 60, 45, 30 or 15 minutes. That lets you, for
example, set the timer to turn the plugged in light(s) off an
hour after you have left the room. The flashing alarm clock
symbol indicates the HB77 is in countdown timer mode.
To set the countdown timer:
Push and release MODE until the countdown timer clock is
displayed. (75 minutes is selected.)
If desired, push and release MIN to switch change the
countdown to 60, 45, 30, 15 or 0 minutes.
If desired, push and release ON/OFF to switch the initial state
of the plugged in light(s).
Wait ten seconds or push and release TIME SET to start the
countdown.
While counting down the countdown
timer clock symbol flashes, and you
can push TIME SET to switch
between the countdown the current
time.
When the countdown reaches 00:00
the connected light(s) are switched
and the clock display remains 00:00
(d).
Off mode
In the Off mode the plugged in
light(s) are off. You can push
ON/OFF button to switch to ON
mode and turn the plugged in light(s)
on.
Auto mode
In auto mode the programmed on and
off times automatically switch the
plugged in light(s) on and off. See
how to program the timer, below for
how to enter or change the automatic
program times.
You can push
ON/OFF button while in Auto mode to
MODE
HOUR MIN PROG MODE
RESET
TIME SET
DAY DS
ON/OFF
a
b
c
d
AM
TH
Off
manually override the program and turn the plugged in light(s) on
or off. The programmed switching times remain. The timer stays in
auto mode.
On mode
In the On mode the plugged in light(s)
are on. Push ON/OFF button to turn the
plugged in light(s) off and switch the
mode to Off.
Rand mode
In Random mode the HB77 switches the
connected light(s) on and off within ±15
minutes of the set program times.
How to program the timer:
You can program the timer in Auto, On or Off modes. The
program is followed in Auto mode.
1. Push and release PROG to start
the programming. Prg 1 is displayed
and the display shows
– – : – – or the programmed time for
Prg 1. timer on (lit light bulb symbol
on).
– – : – – display means there is nothing programmed for
that Prg number and on / off time.
Note: You can push and
release ON/OFF button to
switch between the Prg # on
time and the Prg # off time.
The light bulb symbol
switches on or off but the
plugged in light(s) do not.
2. Push and release DAY to
choose the day*.
*Push and release DAY
several times to set: a single day MO, TU, WE, TH, FR,
SA, or SU; or all week (all days of week displayed); or
weekdays (MO TU WE TH FR displayed); or weekends
(SA SU displayed); or all days but sunday (MO TU WE TH
FR SA displayed).
3. Push and release HOUR to choose the hour.
4. Push and release MIN to choose the minute.
5. When correct, push ON/OFF button to switch between
programming on time and of
f time for that Prg number
.
6. Push PROG to Prg 2, Prg 3, ... up to Prg 14, to program
additional on and/or of
f times.
7. Push TIME SET or wait 15 seconds to exit
programming.
AM
TH
Auto
AM
TH
On
AM
TH
Rand
AM
Auto
Prg
ON/OFF
2 3 4 1, 6
5
HOUR
MIN PROG MODE
RESET
TIME SET
DAY
Auto
AM
Prg
DS
7
Note: In case of a conflict (for example you have
programmed the timer to be on at 4 pm every day of the
week and also programmed the timer to be off at 4 pm
on saturdays) the higher program number is followed. In
case of a conflict within a program number Off is
followed rather than On.
Battery replacement
Batteries retain the program
during power outages. Batteries
should last 3 years or more if the
timer is left plugged in. If the
display is dim, weak or unreadable when the timer is
unplugged from the outlet replace the batteries.
The HB77 uses two AA
alkaline batteries.
Purchase fresh batteries.
Unplug the HB77.
Open the battery cover.
Replace the batteries.
Replace the battery
cover.
Plug the cord into the
outlet.
Reprogram the HB77 if needed.
FULL ONE YEAR WARRANTY
If within one (1) year from date of purchase, this product fails due to a
defect in materials or workmanship, Intermatic Incorporated will repair or
replace it free of charge.
The warranty does not apply to: (a) damage caused by accident,
abuse, mishandling, dropping; (b) units which have been subject to
unauthorized repair, opened, taken apart; (c) units not used in
accordance with directions; (d) damages exceeding the cost of the
product. Some states do not allow a limitation of damages, so the
foregoing limitation may not apply to you. This warranty gives you
specific legal rights, and you may have other rights which vary from state
to state.
This warranty service is available by either: a) returning the product to
the dealer from whom the product was purchased or (b) mailing postage
prepaid to the authorized service station listed below. Be sure to wrap
the product securely when mailing to avoid shipping damage. This
warranty is made by Intermatic Incorporated, Spring Grove, Illinois,
60081-9698.
AUTHORIZED SER
VICE ST
A
TION
INTERMATIC INCORPORATED
INTERMATIC PLAZA
SPRING GROVE, ILLINOIS 60081-9698
AR
T
589A
Note: Without batteries the HB77 will save the program
for only 15 seconds. Plenty of time if new batteries are
already unwraped, and in + - polarity postion.
HB77 /ART589A 3/26/04 2:10 PM Page 2
/