Page is loading ...

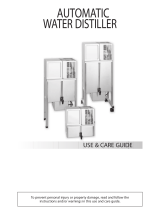
WATER DISTILLER
Use and Care Guide
Model / Series No. W 10000
DISTILLATEUR D’EAU
Guide d’utilisation
et d’entretien
Modèle / Numéro de série W 10000
WASSERDESTILLIERGERÄT
Bedienungsanleitung
Modell / Serienummer W 10000
DESTILADOR DE AGUA
Instrucciones de uso
Modelo / Número de serie W 10000
DISTILLATORE D’ACQUA
Istruzioni per l’uso
Modello / Numero di serie W 10000
www.scican.com
L8588 Rev 1.0

Use and Care Guide
TABLE OF CONTENTS
Introduction .....................................................1
Safety Precautions..........................................2
Preparing Your Aquastat .................................4
Clean the Water Bottle............................. 4
Sanitize the Water Bottle ......................... 4
Operating Instructions.................................... 5
Cleaning Instructions ..................................... 8
Boiling Chamber ...................................... 8
Water Bottle ............................................. 8
Outside Surfaces ..................................... 8
Tr oubleshooting Guide ................................... 9
Limited Warranty.......................................... 11
TABLE DES MATIÈRES
Introduction .....................................................1
Précautions de sécurité ................................13
Avant la première utilisation..........................15
Nettoyage de la bouteille d’eau ..............15
Désinfection de la bouteille d’eau...........15
Mode d’emploi...............................................16
Instructions de nettoyage..............................19
Chambre d’ébullition ...............................19
Bouteille d’eau ........................................19
Surfaces extérieures...............................19
Guide de dépannage ....................................21
Conditions de Garantie .................................23
INHALTSVERZEICHNIS
Einleitung ........................................................1
Sicherheitshinweise ......................................25
Vor dem ersten Gebrauch.............................28
Reinigen des Wasserbehälters...............28
Desinfektion des Wasserbehälters ........28
Betrieb des Geräts ........................................29
Reinigungsanleitung......................................33
Siedebehälter..........................................33
Wasserbehälter.......................................34
Außenflächen..........................................34
Störungssuche ..............................................35
Garantiebedingungen ...................................38
CONTENIDO
Introducción ....................................................1
Indicaciones de seguridad............................40
Antes del primer uso.....................................43
Limpieza de la botella de agua...............43
Desinfección de la botella de agua ........43
Uso del aparato.............................................44
Instrucciones de limpieza .............................47
Cámara de ebullición ..............................47
Botella de agua.......................................47
Superficies exteriores .............................48
Localización de fallos....................................49
Condiciones de Garantia ..............................52
SOMMARIO
Introduzione ....................................................1
Indicazioni di sicurezza.................................54
Prima dell’uso iniziale ...................................57
Pulizia del contenitore d‘acqua...............57
Disinfezione del contenitore d‘acqua......57
Uso dell’apparecchio.....................................58
Istruzioni di pulizia.........................................61
Camera di ebollizione .............................61
Contenitore d‘acqua................................61
Superfici esterne.....................................61
Guida per l’eliminazione dei guasti...............63
Garanzia e indirizzi dei
Servizi Assistenza Clienti..............................66
Aquastat is a trademark of SciCan.
For all service and repair inquiries:
In Canada 1-800-870-7777
United States: 1-800-572-1211
International: (416) 446-4500
Email: techservice.ca@scican.com
Manufactured by:
SciCan
1440 Don Mills Road,
To r onto ON M3B 3P9
CANADA
Phone: (416) 445-1600
Fax: (416) 445-2727
Toll free: 1-800-667-7733

Page 1
Use and Care Guide
Y
our Aquastat
TM
distiller will provide you with a durable appliance capable of reducing the many
impurities which can be found in tap water.
Aquastat
TM
reduces these impurities through the process of evaporation and condensation. As the
water is heated it turns into vapor which rises leaving most impurities behind in the boiling chamber or
discharged through the volatile gas vent. As the water vapor cools, it condenses into a liquid state.
With minimum maintenance, your Aquastat
TM
distiller will provide years of convenient trouble-free
operation.
V
otre distillateur Aquastat
TM
est un appareil qui élimine fiablement les impuretés se trouvant dans
l’eau du robinet et qui vous fera un long usage.
Aquastat
TM
fonctionne selon le principe de l’évaporation et de la condensation. L’eau chauffée se
transforme en vapeur et laisse derrière elle le plus gros des impuretés dans la chambre d’ébullition ou
s’échappe par l’ouverture de gaz volatils. En se refroidissant, la vapeur se condense et passe à l’état
liquide.
Votre distillateur Aquastat
TM
ne nécessite qu’un minimum d’entretien et vous donnera satisfaction
pendant de nombreuses années.
M
it dem Aquastat
TM
steht Ihnen ein robustes Gerät zur Verfügung, das Verunreinigungen,
die im Leitungswasser vorkommen, sicher beseitigt.
Dies geschieht mittels Verdampfung und Kondensation. Durch Erwärmen wird das Wasser in Dampf
umgewandelt. Dieser steigt auf und lässt dabei das Gros der Verunreinigungen in der Siedekammer
zurück oder er tritt durch die Dampf- und Gasöffnung aus. Beim Abkühlen kondensiert der Dampf,
geht also in den flüssigen Zustand über.
Mit dem Aquastat
TM
steht dem Nutzer ein äußerst wartungsarmes und leicht zu bedienendes Gerät zur
Verfügung, das viele Jahre störungsfrei eingesetzt werden kann.
C
on el Aquastat
TM
tiene Ud. a disposición un aparato duradero que le permitirá eliminar las
impurezas contenidas en el agua de cañería.
Para ello, Aquastat
TM
trabaja con los métodos de la evaporación y de la condensación. Al calentar, el
agua es transformada en vapor, el que al ascender deja la mayoría de las impurezas en la cámara de
ebullición o sale por la abertura para el vapor y gas. Al enfriar, el vapor se condensa, es decir, pasa
al estado líquido.
Como usuario del Aquastat
TM
tiene a su disposición un aparato que casi no requiere de
mantenimiento, de uso extremadamente fácil, que puede ser empleado por muchos años sin que
presente perturbaciones.
A
quastat
TM
è un distillatore di lunga durata di vita che elimina in modo affidabile le impurità
contenute nell’acqua del rubinetto.
Aquastat
TM
funziona secondo il principio dell’evaporazione e della condensazione. L’acqua
riscaldandosi si trasforma in vapore che sale lasciando dietro di sé la maggior parte di impurità nella
camera di ebollizione o esce dall’apertura dei gas volatili. Raffreddandosi il vapore si condensa e
passa quindi allo stato liquido.
Il distillatore Aquastat
TM
è un apparecchio che necessita solo un minimo di manutenzione e che potrà
essere utilizzato senza guasti per un gran numero di anni.
Introduction

Safety Precautions
Page 2
Use and Care Guide
Observe these safety precautions when using your water distiller.
•Read all instructions before using.
• Do not let the cord touch hot surfaces or hang over the edge of a
counter or table.
•Always allow the boiling chamber to cool before removing it from
the distiller.
•Make sure the water bottle is properly placed, with its cap removed, on
the base of the distiller chassis immediately after starting the machine.
• Do not run distiller without water in the boiling chamber. Permanent
damage to the boiling chamber could occur.
• Do not remove the water bottle or the boiling chamber while the
distiller is running.
•No part of the distiller should be moved while the distiller is in
operation.
• Do not immerse the distiller, boiling chamber, its cord or plug in any
liquid. Do not place any component near a hot gas, electric burner
or in a heated oven.
• Do not use the distiller outdoors.
•This appliance is not intended for use by young children.
•Use your distiller only for the uses described in these instructions.
•Avoid using extension cords.
• Do not use the distiller if it or its cord is damaged or not working
properly. Return the unit to your authorized distributor for examination
and/or repair.
WARNING: To prevent personal injury or property damage, read and follow the
instructions and warnings in this Use and Care Guide.
Save these instructions

Safety Precautions Continued
Page 3
Use and Care Guide
Your distiller requires no special care other than cleaning. If servicing becomes
necessary, please contact an authorized distributor. See the warranty on page
10 for service details. Do not attempt to repair the distiller yourself.
The distiller is designed and intended for household use only.
This system was tested in accordance with the WQA S-400 Series Standard
and has the product water production rate of 1 US gallon (4 L) per 4 hours and
has the product water storage capacity of 1 US gallon.
Model/Series #W10000. Production rate: 5.5 U.S. gallons per day
Electric Cord Statement
CAUTION: Your distiller has a short cord as a safety precaution to prevent
injury or property damage resulting from pulling, tripping or becoming entangled
with the cord. Do not allow children to be near this distiller without close adult
supervision. If you must use an extension cord with this distiller, the cord must
be arranged so that it will not drape or hang over the edge of a countertop or
tabletop where it can be pulled on or tripped over. To prevent electric shock,
injury or fire, the electrical rating of the extension cord you use must be the
same as or more than the wattage of the distiller (wattage is indicated on the
bottom of the distiller). Plug the distiller into a rated voltage AC grounded
electric outlet ONLY (rated voltage found on bottom of the product). The cord
has a three-prong plug which mates with a standard three-prong grounded wall
outlet. Do not cut or remove the third prong from the plug. If an adapter is
used, be sure the adapter wire and the wall outlet are grounded. If there is any
doubt as to whether the outlet is properly grounded, check with a qualified
electrician. Unplug the distiller when not in use.
CAUTION: To prevent personal injury or electric shock, do not immerse the
distiller, boiling chamber, its cord or plug in water or any other liquid.
Before using your distiller for the first time, please follow the steps below.
Volts Hertz Watts
North America 120 VAC 60 Hz 750W
Europe 230 VAC 50 Hz 750W
Latin America 230 VAC 50 Hz 750W
Southeast Asia 230 VAC 50 Hz 750W
Japan 100 VAC 50/60Hz 750W

Use and Care Guide
Preparing Your Aquastat
TM
Page 4
Water Bottle
Boiling Chamber
Distiller Chassis
To C l e a n the Water Bottle
First, make sure the dispensing valve is installed and tightened onto the water
bottle. Then fill the water bottle about
3
⁄
4
full with water. Add one or two drops
of dish washing detergent to the water. Seal the bottle’s top opening with the
cap supplied. Shake the bottle vigorously and then drain. Rinse the bottle
thoroughly to remove all of the detergent.
NOTE: Do not allow the soap / water mixture to remain in the water bottle for
long periods of time. Do not use the water bottle to store liquids other than
distilled water. Liquids other than distilled water may contaminate the water
bottle.
To Sanitize the Water Bottle
Add 5 ounces (150 ml) of 3% hydrogen peroxide solution (H
2
O
2
) to the water
bottle. Fill the bottle with hot (160˚F, 71˚C) distilled or tap water. Cap the water
bottle. Shake the water bottle vigorously. Let stand for twenty minutes then
drain thoroughly. Rinse with room temperature distilled or tap water, then drain.
Water bottle may be used immediately or allowed to air dry. Your distiller is now
ready for use.
NOTE: Be sure to place the distiller in a location that provides adequate
ventilation during operation, with at least 4 inches (10 cm) of clearance to the
sides and back and 3 inches (8 cm) to the top of the unit. Do not operate the
distiller in an enclosed area such as a cupboard or cabinet. The distiller must
be operated only in areas with ambient air temperature of 40˚F-110˚F
(5˚C-45˚C).
{
{
{
Dispensing
Valve
Cap
Baffle
Securing
Nut
Cord
Cooling
Vents
Cap

Use and Care Guide
1. Place the distiller on a dry, level surface in a well ventilated area.
Plug the cord into a properly grounded rated voltage AC electrical
outlet ONLY.
2. Remove the boiling chamber from the distiller by grasping its handle
and pulling it straight out of the distiller chassis. Do not lift up when
pulling the boiling chamber out of the chassis.
CAUTION: To prevent personal injury, burn, or scald injury,
do not remove the boiling chamber until it has cooled completely.
3. Remove the boiling chamber cap by turning it counterclockwise.
Note the four tabs at the base of the boiling chamber fill opening.
4. Fill the boiling chamber with cold tap water to the bottom of the four
tabs which equals 1 gallon (4 liters). Do not overfill the boiling
chamber. Overfilling the boiling chamber may result in leakage,
electrical failure, electrical hazard, or damage to the distiller.
5. Replace the boiling chamber cap by turning it clockwise.
6. Make sure the baffle is in place and its securing nut is tightened.
To d o t his, insert the long end of the baffle, flat side down into the
spout and secure with the nut. The hole on the flat side of the baffle
should be facing down. It is important that you tighten the securing
nut, with baffle properly in place, onto the boiling chamber
before each use. Failure to properly secure the baffle and nut may
result in leakage or early shut off of the distiller.
7. Wipe off any water on the outside and bottom of the boiling chamber
and around the electrical
connection.
Operating Instructions
Page 5
Use and Care Guide
Ta b s
Water
Fill
Level
Start
Button
Boiling
Chamber
Cap

Page 6
Use and Care Guide
8. Slide the boiling chamber into the distiller chassis and press firmly to
insure that it is properly placed. It is
important that the boiling chamber be
pressed firmly into the distiller chassis.
It is recommended that you place one
hand on the back of the distiller chassis
and push the boiling chamber into the
chassis with the other hand. To ensure
that a tight electrical connection is made,
press on the base of the boiling chamber
near the start button also.
CAUTION: To prevent personal injury or property
damage, the boiling chamber must be fully
engaged prior to start-up.
9. Press the “start” button at the base of the
boiling chamber.
NOTE: The button will glow when the boiling
chamber is heating, however, the light will go out
and the boiling chamber will stop heating if electrical
power to the boiling chamber is interrupted or
stopped. If this occurs, press the start button again
to restart the distillation cycle.
10. The cooling fan will not start immediately.
A delayed fan startup feature has been included
in your distiller. The fan will start once the boiling
chamber has reached a pre-determined
temperature, approximately 30-40 minutes after
starting the cycle.
NOTE: Do not install the cap onto the water bottle.
The bottle must be left uncapped to allow water to enter
it from the distiller.
11. Make sure that the dispensing valve is securely
tightened onto the water bottle.
Operating Instructions Continued
Flat edge
of baffle
Securing
Nut
Spout
Baffle
Dispensing Valve

Use and Care Guide
Operating Instructions Continued
Page 7
Use and Care Guide
12. Place the water bottle on the base of the distiller chassis. The base of
the distiller chassis has raised edges to assist in positioning the water
bottle properly.
NOTE: Do not remove the water bottle while the distiller is running.
13. At the end of the distillation cycle (about 4 to 4
1
⁄
2
hours), the distiller
will shut off automatically and the “start” light will go out. The fan will
continue to operate for several minutes. Let the distiller cool
completely before removing the boiling chamber from the chassis.
14. Unplug the cord from wall outlet when not in use.
NOTE: Approximately 8 ounces (240 ml) of water will remain in the boiling
chamber at the end of the distillation cycle. This feature reduces scale deposits
in the boiling chamber.
CAUTION: To prevent personal injury, burn, or scald injury, do not remove the
boiling chamber while the start button is illuminated or at any time when the
boiling chamber is hot. Always unplug the distiller from the wall outlet and allow
the boiling chamber to cool completely before removing it from the distiller.
NOTE: The water bottle has been designed to hold one gallon (4 liters) of
water. Therefore, the water bottle will not fill completely.
Once the distillation cycle is complete, secure the cap onto the water bottle to
avoid spilling. The cap must be opened slightly before dispensing water.

Use and Care Guide
Cleaning Instructions
Page 8
CAUTION: To prevent personal injury or electric shock, do not immerse the
distiller, its boiling chamber, cord, or plug in water or other liquid.
Boiling chamber
Rinse the boiling chamber after every distillation cycle once the unit has cooled
completely. Remove the baffle by unscrewing its securing nut. Inspect the
baffle for scale deposits. Any scale can be removed by soaking the baffle in
vinegar. Half fill the boiling chamber with tap water, agitate and discard the
water. The water may be drained through the spout. Securely reinstall the
baffle and securing nut.
It is important to wipe off all water deposits inside the distiller chassis, on the
base of the chassis, and on the outside bottom of the boiling chamber between
each distillation cycle. If this is not done, corrosion of the distiller or electrical
hazard may occur, or it may cause the distiller to shut off early before producing
a full gallon of water.
Heavy scale deposits should be removed from the boiling chamber whenever
they exceed
1
⁄
16
of an inch (0.16 cm). Add enough white distilled vinegar to the
boiling chamber so that the scale deposits are covered. Allow the vinegar to
stand for at least twenty minutes and then discard. Rinse the boiling chamber.
Repeat this process if necessary.
Do not heat vinegar in boiling chamber. A descaler, coffeemaker, or kettle
cleaner may also be used to clean the boiling chamber.
Water bottle
See page 4 under Preparing Your Aquastat
TM
for instructions on cleaning and
sanitizing the water bottle.
Outside surfaces
Use a common household glass or appliance cleaner or a damp soft cloth to
clean the distiller’s outside surfaces. Do not use abrasive or solvent based
cleaners. Do not spray cleaning products directly onto the distiller.
The distiller’s cooling system vents (see diagram on page 4) should be
vacuumed occasionally or cleaned with a soft brush to remove dust and debris.
Failure to do so may cause the distiller to overheat, shut off early,
or emit a foul odor.

Use and Care Guide
Problem
Start button does
not light up.
Distiller is not plugged in.
Plug the distiller into a
rated voltage outlet.
Start button lights up, but
fan does not start.
The fan’s delayed start
system has not activated.
Wait at least
1
⁄
2
hour for
the fan to start.
Boiling chamber is not
fully inserted.
Make sure the boiling
chamber is seated
properly.
Possible cause Solution
Distiller does not
operate.
Distiller is not plugged in. Plug the distiller into a
rated outlet.
Tr oubleshooting Guide
Page 9
Outlet is defective, or
fuse or circuit breaker
has tripped.
Check fuses or circuit
breakers or call an
electrician.
Electrical power has
been interrupted.
Press start button
to restart.
Steam appears near
the top of the boiling
chamber.
The baffle is missing or
is improperly installed.
Properly install the baffle.
See page 5.
Water leaks from top
of distiller.
The cap is on the water
bottle.
Remove the cap from the
water bottle during the
distillation cycle.
The distiller shuts off
before the cycle is
complete.
Loose baffle, missing
baffle, or baffle is not
secured properly in the
spout of the boiling
chamber.
The screwed fitting can
become loose during
cycles. Assure that this
fitting is tightened before
each use. The baffle
must be installed
with the flat side down
(this means that the hole
is down) and the narrow
end inserted into the
spout of the boiling
chamber. See page 5.
Boiling chamber cap is
missing or loose.
Securely install the
boiling chamber cap.

Use and Care Guide
Tr oubleshooting Guide Continued
Page 10
Problem
The distiller is not in a
well ventilated area.
Distiller must be
operated in a well
ventilated area for proper
heat dissipation.
See page 4.
There is excess scale
build-up in the boiling
chamber.
Clean the boiling
chamber. See page 7.
The distiller is leaking. The boiling chamber is
not properly installed.
Push the boiling
chamber into the distiller
chassis so that both the
electrical and the baffle
connection are tightly
joined. See pages
4 and 5.
The O-ring is damaged
or missing from the
baffle.
If damaged, replace
O-ring. Make sure the
O-ring is properly placed
on the baffle, fitting in
the circular groove.
Possible cause Solution

Use and Care Guide
Limited Warranty
Page 11
This certifies that your product is warranted by the manufacturer to be free
from defects in material, construction, and craftsmanship for 1 (one) full year
from the date of original purchase. If service should be necessary, send the
product with a description of the claimed defect to the distributor from whom
the product was purchased.
In the event you are unable to locate the distributor you may call 262-626-8623.
Any part or parts which, upon examination by the manufacturer, are found to be
defective will be repaired or replaced without charge during the warranty period.
This warranty does not apply to damage caused by accidents, misuse, abuse,
or alterations.
THE MANUFACTURE’S LIABILITY UNDER THIS WARRANTY IS LIMITED
TO THE REPAIR OR REPLACEMENT OF THE DEFECTIVE PRODUCT AT
THE MANUFACTURER’S SOLE OPTION. THE MANUFACTURER SHALL
NOT BE LIABLE FOR ANY INCIDENTAL OR CONSEQUENTIAL DAMAGES,
WHETHER DIRECT OR INDIRECT. THIS WARRANTY IS EXPRESSLY
GRANTED IN LIEU OF ALL OTHER WARRANTIES INCLUDING THE
IMPLIED WARRANTIES OF MERCHANTABILITY AND FITNESS FOR A
PA RTICULAR PURPOSE.
Date purchased:
Purchased from:
The w10000 series includes the following numbers: W10100#, W10120#, W10121#,
W10122#, W10123#, W10124#, W10125#, W10230# , W10231#, W10232#, W10239#,
W10240#, W10241#, W10242#, W10243#, W10244#, W10245#, W10246#, W10247#.
#These product numbers may or may not be followed by a letter suffix from A-Z.

Limited Warranty
Page 12
Use and Care Guide
www.scican.com
AQUASTAT
TM
is a trademark of SciCan.
SciCan, Division of Lux &
Zwingenberger Ltd.
1440 Don Mills Road,
To r onto, ON M3B 3P9
Phone : (416) 445-1600
Fax : (416) 445-2727
Toll Free : 1-800-667-7733
SciCan, Inc.
500 Business Center Drive,
Pittsburgh PA, 15205
Phone : (412) 494-0181
Fax : (412) 494-4794
Toll Free : 1-800-572-1211
SciCan Medtech AG,
Alpenstrasse 16, CH-6300 Zug,
Switzerland
Phone : 41-41-727-70-27
Fax : 41-41-727-70-29
EC Representative SciCan,
Messerschmittstrasse 11,
D-86368 Gersthofen,
Germany
/