Page is loading ...

P e r f e c t R a d i a t o r
Meltem
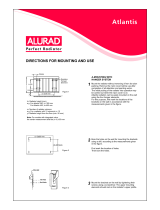
DIRECTIONS FOR MOUNTING AND USE
Figure 1
Figure 2
1. Left Bracket
2. Right Bracket
3. Clapper
4. Intermediate Supporting Element
e. Clapper Latch
f. Clapper Plastic Pin
The installation connections of Alurad Meltem
Radiators which are made of aluminum are made
in the same way as for other hot-water radiators.
Different from other radiators, however, Alurad
allows the making of " lower opposite end "
connection. Mount the radiator without removing
it from its nylon packing. Remove the protective
nylon cover by cutting it before use, after
completion of all alteration and painting works.
The initial putting of the radiator into operation may
be carried out while the nylon cover is on.
Alurad Meltem Radiators can be easily mounted
on the wall using the brackets (Figure 1).
The radiator valve connection is 1/2. Either
chromium or nickel plated radiator valves should
be used. All elements required for mounting are
included in the packing. The top side of the
radiator is the side with the profile shown in Figure 2.
Mounting Operation
If the installation branches are installed, check the
position of connection of the radiator. In doing this,
pay attention to the masurements given (Figure 3
and Figure 3 a). Place the plastic plugs into their
places before making the coupling connections,
and then make the required connections according
to the style of branching.
Mount the left bracket (Figure 1, No 1) onto the wall
using the holes bored with a drill, and a screwdriver.
(Take care that the bracket is positioned vertically.)
After passing the plastic pin of lower clapper
(Figure 1, No f) trough the circular hole provided
at the bottom of the bracket, fit the joining pin.
By taking into consideration the measurements
given in Figure 3 and Figure 3 a, determine the
location of right bracket. Fit the clapper latch onto
the right clapper by passing it through the circular
hole provided at the bottom, and then fit its joining
pin (Figure 1, No. e). The lenght of the clapper will
also allow you to check whether or not the location
of bracket holes and your measurements for
mounting the right bracket are correct.
After mounting the right bracket loosely in its place
too, move the clapper by means of the clapper latch
(Figure 4). When you are sure that it moves freely,
fix the right bracket securely by tightening its screws
firmly.
Screw Center Distance (mm)=
(40 x Number of Radiator Columns) – 65mm
(Figure 3)

*An inhibitor capsule unique to Alurad is fitted to all radiators during manufacture in order to provide protection against all kinds of corrosion. If the system as a whole
is desired to be protected against freezing as well as various kinds of corrosion, the use of ANTICOR 121 is recommended. Feniþ Teknik may not be held liable for
any problems that might arise from the use of another corrosion inhibitor or antifreeze.
Cause the radiator slide down the bracket slides
from top of the brackets (Figure 5). If the place of
mounting does not permit sliding down from the
top due to the presence of parapet, first fix the
radiator to one of the brackets from its side
(Figure 3 a), and then fit it into its place by
pushing in the other bracket.
Figure 3 a
Distance between the bracket slide ends (mm) =
(40x Number of Radiator Columns) – 5mm
Figure 7
Figure 6
Figure 5
Placement of Direction Plug
In making the lower opposite end connection,
the direction plug shell be placed at the following
locations as counted from the hot water inlet,
using the pusher supplied:
c)For radiators with up to 10 columns, between
columns 3 and 4
d)For radiators with more than 10 columns,
between columns 4 and 5
Lower Opposite End Connection
Alurad Radiators allow the making of lower
opposite end connection without causing any
reduction in yield. To meet this purpose, the
“ direction plug and pusher “ shown in Figure
7 will be put into the packing, if a request is
made for them in the purchase order.
Fit the screws into the plastic inserts provided
on the side brackets, and tighten them (Figure 6).
Note: Where the lenght of radiator exceeds
140 cm or the number of columns exceeds 18,
support the radiator with one supporting bracket,
and where the length exceeds 240 cm or the
number of columns exceeds 30, support it with
two supporting brackets (Figure 1, No 4). Place
said supporting brackets to the lower edge of
upper water channel as to face the slides and to
the middle section of the radiator.
Figure 4
Keeping the clapper closed while the
system is in operation will ensure
maximum heat efficiency.
/

