Page is loading ...

THANK YOU
We appreciate the trust and condence you have placed in Hampton Bay through the purchase of this 3 Light LED Vanity Fixture.
We strive to continually create quality products designed to enhance your home. Visit us online to see our full line of products available for your
home improvement needs. Thank you for choosing Hampton Bay!
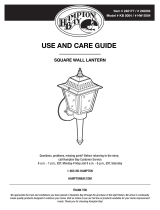
USE AND CARE GUIDE
3 LIGHT LED VANITY FIXTURE
Questions, problems, missing parts? Before returning to the store,
call Hampton Bay Customer Service
8 a.m. - 6 p.m., EST, Monday - Friday
1-855-HD-HAMPTON
HAMPTONBAY.COM
SKU #1000-488-936

2 HAMPTONBAY.COM
Please contact 1-855-HD-HAMPTON for further assistance.
Safety Information
IMPORTANT SAFETY INFORMATION
For your safety, always remember to:
□ Turn off the power supply at the fuse or circuit breaker box
before you install the xture.
□ Ground the xture to avoid potential electric shocks and to
ensure reliable starting.
□ Double-check all connections to be sure they are
tight and correct.
□ Wear rubber soled shoes and work on a sturdy
wooden ladder.
This xture is designed for use in a circuit protected by a fuse or
circuit breaker. It is also designed to be installed in accordance with
local electrical codes. If you are unsure about your wiring, consult a
qualied electrician or local electrical inspector, and check your local
electrical code.
Account for small parts and destroy packing material, as these may
be hazardous to children.
CAUTION: TURN OFF THE MAIN POWER AT
THE CIRCUIT BREAKER BEFORE INSTALLING
THE FIXTURE, IN ORDER TO PREVENT
POSSIBLE SHOCK.
GENERAL: All electrical connections must be in accordance with local
and National Electrical Code (N.E.C.) standards. If you are unfamiliar
with proper electrical wiring connections obtain
the services of a qualied electrician.
Remove the xture and the mounting package from the box and make
sure that no parts are missing by referencing the illustrations on the
installation instructions.
Warranty
LIMITED WARRANTY
This product is warranted to be free from defects in workmanship and materials for up to 5 years from date of purchase. If it fails to do so,
please contact our Customer Service Team at 1-855-HD-HAMPTON or visit www.hamptonbay.com.
QUESTIONS, PROBLEMS, MISSING PARTS
Before returning to your local Home Depot, please call our Customer Service team at 1-855-HD-HAMPTON or visit www.
hamptonbay.com. Please reference your SKU (1000-488-936 3 Light LED Vanity Fixture).
WARNING: RISK OF SHOCK House electric current
can cause painful shock or serious injury unless
handled properly.
WARNING: RISK OF CUTS Some metal parts in the
xture may have sharp edges. To prevent cuts and
scrapes, wear gloves when handling the parts.

3
HARDWARE INCLUDED (parts are not to scale):
AA
A B C
BB CC DD EE FF
PARTS INCLUDED FOR ASSEMBLY (parts are not to scale):
Phillips Screwdriver
TOOLS REQUIRED FOR INSTALLATION (not included):
Pre-Installation
Part Description Quantity
A Glass Shade 3
3
1
B Coupling Lens Fasteners
C Fixture Body
Part Description Quantity
AA Mounting Plate 1
2
3
3
3
3
BB Junction Box Mounting Screws
Fixture Mounting Screws and Nuts
CC
DD
EE
FF
Wire Nuts
Finials
Rubber Washers

4 HAMPTONBAY.COM
Please contact 1-855-HD-HAMPTON for further assistance.
C) Fixture Body
Holder
A) Glass Shade
B) Coupling Lens
Fastener
Assembly
1. Shut off power at the fuse box or circuit breaker box. If necessary. Remove the old xture
and all mounting hardware from the wall outlet box.
2. Carefully unpack your new xture and lay out all the parts on a clear area. Take care
not to lose any small parts necessary for installation.

5
FINIALS
Mounting Instructions
NOTE: Hand tighten finials only. Do not use
any tools as overtightening may occur causing
damage to the fixture housing.
Remove the mounting plate (AA) from the xture by
unscrewing the three nials (EE) and rubber washers
(FF) and carefully separate the mounting plate from
the xture.
Installing the Fixture
CC
GLASS
SHADE
GLASS
HOLDER
GROUND/GREEN
NEUTRAL
WHITE
BLACK
LIVE WIRE
MOUNTING PLATE
Connecting the Fixture
Installing the Glass Shades
Installing the Fixture
Installing the Mounting Plate
to the Junction Box
Attach the mounting plate (AA) to the junction box
by inserting the two junction box mounting screws
(BB) through slots in the mounting plate (AA).
Use the wire nuts (DD) provided to connect the
green wire from the fixture to the green or bare
copper ground (house) wire. If the junction box is
grounded, you may fasten the fixture ground wire
directly to the junction box. Connect the white
fixture wire(s) to the neutral supply wire. Connect
the black fixture wire(s) to the live wire.
Adjust the xture mounting screws (CC) so that the
nials tighten the xture against the wall. Tighten nuts
after adjustment has been made. Insert the xture
mounting screws (CC) through the fixture housing
holes and secure by hand tightening the nials (EE) to
the ends of the xture mounting screws (CC).
Slide the glass shade (A) into the glass holder
and secure by screwing the coupling lens
fastener (B) onto the glass holder. Repeat for the
remaining glass shades. Hand tighten only.
1
2
3
4
5
CAUTION: TURN OFF THE MAIN POWER AT THE
CIRCUIT BREAKER BEFORE INSTALLING THE
FIXTURE IN ORDER TO PREVENT POSSIBLE SHOCK.
JUNCTION BOX
EE
COUPLING LENS
FASTENERS
MOUNTING PLATE
BB
BB

Questions, problems, missing parts? Before returning to the store,
call Hampton Bay Customer Service
8 a.m.-6 p.m., EST, Monday-Friday
1-855-HD-HAMPTON
HAMPTONBAY.COM
Retain this manual for future use.
/