4 VELUX
®
ENGLISH: Important installation requirements
Roof pitch
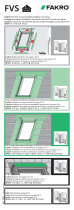
VS, VSE and VSS are is designed for roof pitches 14° - 85° (3:12 - 137:12). In
case of roof pitches below 14° (3:12), please contact your VELUX sales com-
pany for installation guidelines.
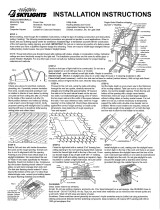
Importance of proper installation
Satisfactory product performance depends on proper installation.
Seller accepts no responsibility whatsoever for failure of an installer to install
VELUX
®
roof windows and skylights in accordance with these installation
instructions. Although VELUX roof windows and skylights are designed and
manufactured to the highest standards, severe climatic exposure as well as
adverse indoor conditions (ie high humidity) may produce temperature condi-
tions which exceed product performance standards. In these cases, special
preventive measures may be necessary.
Seller reserves the right to implement product changes for improvement with-
out prior notification.
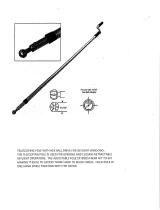
Caution: Removal of sash during installation of the skylight is not recom-
mended.
Please contact your VELUX sales company for further information.
Vapor barrier
Where a vapor barrier is part of the roof construction, this barrier must be
extended and connected to the skylight finish groove.
Treatment of wooden frame
Most VELUX skylights are pre-painted white but the option exists to order stain
grade skylights. These stain grade skylights received a temporary treatment
against mold and mildew. Further treatment with wood stain, paint etc is
necessary and can be done prior to installation or shortly after installation. Care
should be taken to ensure wood stain, paint etc is not applied to gaskets.
Consult local jurisdictions and authorities for recycling and proper dis-
posal of removed skylights and materials.
NOTICE
Skylights and interior surfaces in older homes may have been painted with
lead-based paint, and removal of the skylights may disturb this paint.
Take proper precautions to minimize exposure to dust and debris.
For more information on the proper removal of lead paint go to
www.epa.gov/lead.
Seller assumes no obligation whatsoever for failure of an architect,
installer or building owner to comply with all applicable laws, ordinances,
building codes and safety requirements.
NOTICE
In rare circumstances, all glass may be subject to unexpected and spontaneous
breakage due to imperfections in the glass that are undetectable during the
manufacturing and inspection process by the manufacturer of the glass and the
VELUX factory.
Your VELUX sales company oers the choice of laminated or tempered glass
skylights. Laminated glass is a combination of two or more glass sheets with
one or more interlayers of plastic (PVB) or resin. In case of breakage, the
interlayer is designed to hold the fragments together. Tempered glass does not
contain an interlayer to hold the fragments together. Instead, tempered glass is
designed to break into small, pebble-like pieces. When tempered glass breaks,
pieces of glass come loose and may strike an individual.
Consult local regulations and/or building material consultants to deter-
mine which type of glass is right for you or if laminated glass is required in
your application.
Important installation requirements for the USA
VELUX
®
series A21 skylights are designed and engineered to be installed with
VELUX flashing systems. VELUX flashing systems include VELUX adhesive
skylight underlayment in a quantity sucient to install one skylight of the size
for which the flashing system was designed.
The VELUX "No Leak" installation warranty is based upon installation strictly in
accordance with VELUX deck or curb mounted skylight and related deck or curb
mounted flashing installation instructions, which specify the use and proper
installation of the VELUX adhesive skylight underlayment packaged with the
flashing system.
If VELUX adhesive skylight underlayment is not used or is not properly installed
and a service issue occurs related to underlayment omission, failure, or its
proper installation as detailed in the VELUX deck or curb mounted skylight and
deck or curb mounted flashing installation instructions, the VELUX "No Leak"
installation warranty is void.
VELUX America LLC understands that there are other types of adhesive un-
derlayment that are of equal or higher quality than what is provided by VELUX
America LLC. However, VELUX America LLC cannot approve or validate that
any specific type of adhesive underlayment is better or worse. Thus, VELUX
America LLC places the risk of using an alternative adhesive underlayment
onto the specifier by stating that if the alternative underlayment becomes a
failure point for the skylight or flashing system even if installed according to
our instructions, then the VELUX "No Leak" installation warranty cannot be
honored. Further, the alternative underlayment must not in any way obstruct,
alter or prevent the proper functioning of the complete skylight and flashing
installation, such as increasing the overall flashing system thickness beyond
prescribed dimensions.
VELUX America LLC arms that if a high quality alternative adhesive underlay-
ment, installed per our instructions, does not fail but a leak occurs in some other
VELUX skylight or flashing component due to no cause from the alternative
underlayment, then such a leak would be covered under the terms of the VELUX
"No Leak" installation warranty.
ESPAÑOL: Requisitos importantes de instalación
Inclinación del techo
VS, VSE y VSS están diseñados para techos con inclinación de 14° - 85°
(3:12 - 137:12). Para los techos con inclinación de menos de 14° (3:12), póngase
en contacto con su distribuidor VELUX para solicitar las pautas de instalación.
Importancia de una instalación correcta
El rendimiento satisfactorio del producto depende de su correcta instalación.
Las ventanas de tejado y los tragaluces VELUX
®
deben instalarse siguiendo
estas instrucciones. El proveedor no acepta responsabilidad alguna por errores
del instalador. Aunque las ventanas de tejado y los tragaluces VELUX se han
diseñado y fabricado para lograr los niveles de calidad más altos, la exposición
a condiciones climáticas severas e incluso a condiciones interiores adversas
(por ejemplo, humedad muy alta) pueden producir niveles de temperatura que
exceden las condiciones de desempeño del producto. En estos casos puede ser
necesario establecer medidas preventivas.
El proveedor se reserva el derecho a hacer modificaciones a los productos sin
notificación previa con el fin de mejorarlos.
Precaución: No se recomienda quitar la hoja de la ventana durante la instala-
ción del tragaluz.
Comuníquese con su distribuidor VELUX para obtener más información.
Barrera de vapor
Cuando una barrera de vapor forma parte de la construcción de un techo, debe
extenderse y conectarse a la ranura de remate del tragaluz.
Tratamiento del marco de madera
La mayoría de los tragaluces VELUX vienen prepintados en blanco pero se
pueden pedir tragaluces barnizables. Los tragaluces barnizables han recibido
un tratamiento temporario que los protege del moho y los hongos. Es necesario
tratarlos con barniz, pintura, etc. antes de su instalación o inmediatamente
después. Debe tenerse cuidado de no aplicar barniz, pintura, etc. a las empaque-
taduras.
Consulte a las autoridades y jurisdicciones locales respecto de las nor-
mas de reciclaje y correcta eliminación de tragaluces y materiales.
AVISO
Los tragaluces y las superficies interiores en las viviendas más antiguas pueden
haberse pintado con pintura que contiene plomo, que puede desprenderse al
retirar los tragaluces. Tenga la debida precaución para minimizar la exposición al
polvo y los residuos.
Para obtener más información acerca de la correcta eliminación de pintura con
plomo, visite el sitio web: www.epa.gov/lead.
El proveedor no asume responsabilidad alguna por el incumplimiento de
leyes, ordenanzas, normas de construcción o requisitos de seguridad por
parte del arquitecto, instalador o propietario del edificio.
AVISO
Bajo ciertas circunstancias, todo cristal está sujeto a romperse de manera
inesperada o espontánea debido a imperfecciones en el cristal no detectadas
durante su manufacturación o durante el proceso de inspección por el fabrican-
te del cristal y de la fábrica VELUX.
Su distribuidor VELUX ofrece la opción de tragaluces de cristal laminado o
templado: El cristal laminado es una combinación de dos o más hojas de cristal
con una o más capas intercaladas de plástico (pvb) o resina. En caso de rotura,
la capa está diseñada para sostener unidos los fragmentos de cristal. El cristal
templado no contiene capa intercalada para sostener unidos los fragmentos
de cristal. En su lugar, el cristal templado está diseñado para que se rompa en
pedazos bien pequeños. Cuando el cristal templado se rompe, pedazos de cristal
pueden soltarse y golpear a un individuo.