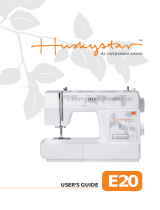
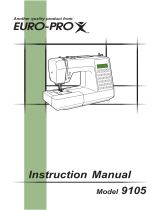
SINGER M2100 Owner's manual

Category
Sewing machines
Type
Owner's manual

SINGER M2100: With a variety of stitch patterns and capabilities, this versatile machine is perfect for beginners and experienced sewers alike. Easily wind bobbins, insert them, and thread the machine with the clear instructions provided. Choose your desired pattern and sew straight or reverse stitches, with an adjustable thread tension to ensure precise results. Create blind hems, buttonholes, sew on buttons, and add zippers and piping with ease. This machine also allows for free-motion darning and stippling for decorative touches.

SINGER M2100: With a variety of stitch patterns and capabilities, this versatile machine is perfect for beginners and experienced sewers alike. Easily wind bobbins, insert them, and thread the machine with the clear instructions provided. Choose your desired pattern and sew straight or reverse stitches, with an adjustable thread tension to ensure precise results. Create blind hems, buttonholes, sew on buttons, and add zippers and piping with ease. This machine also allows for free-motion darning and stippling for decorative touches.

Instruction ManualM2100 / M2105
This household sewing machine is designed to comply with IEC/EN 60335-2-28 and UL1594.
IMPORTANT SAFETY INSTRUCTIONS
When using an electrical appliance, basic safety precautions should always be followed,
including the following:
Read all instructions before using this household sewing machine. Keep the instructions at a
suitable place close to the machine. Make sure to hand them over if the machine is given to a
third party.
DANGER
- To reduce the risk of electric shock:
- A sewing machine should never be left unattended when plugged in. The electrical socket,
to which the machine is plugged in should be easily accessible. Always unplug this sewing
machine from the electric outlet immediately after using and before cleaning, removing
covers, lubricating or when making any other user servicing adjustments mentioned in the
instruction manual.
WARNING
- To reduce the risk of burns, re, electric shock, or injury to
person:
- Do not allow to be used as a toy. Close attention is necessary when this sewing machine is
used by or near children.
- Use this sewing machine only for its intended use as described in this manual. Use only
I
attachments recommended by the manufacturer as contained in this manual.
- Never operate this sewing machine if it has a damaged cord or plug, if it is not working
properly, if it has been dropped or damaged, or dropped into water. Return the sewing
machine to the nearest authorized dealer or service center for examination, repair, electrical
or mechanical adjustment.
- Never operate the sewing machine with any air openings blocked. Keep ventilation openings
of the sewing machine and foot control free from the accumulation of lint, dust, and loose
cloth.
- Keep ngers away from all moving parts.Special care is required around the sewing machine
needle.
- Always use the proper needle plate. The wrong plate can cause the needle to break.
- Do not use bent needles.
- Do not pull or push fabric while stitching. It may deect the needle causing it to break.
- Wear safety glasses.
- Switch the sewing machine o (“0”) when making any adjustment in the needle area, such as
threading needle, changing needle, threading bobbin, or changing presser foot, etc.
- Never drop or insert any object into any opening.
- Do not use outdoors.
- Do not operate where aerosol (spray) products are being used or where oxygen is being
administrated.
- To disconnect, turn all controls to the o (“0”) position, then remove plug from outlet.
- Do not unplug by pulling on cord. To unplug, grasp the plug, not the cord.
- The foot control is used to operate the machine. Never place other objects on the foot control.
II
- Do not use the machine if it is wet.
- If the LED lamp is damaged or broken, it must be replaced by the manufacturer or its service
agent or a similarly qualied person, in order to avoid a hazard.
- If the cord connected with the foot control is damaged, it must be replaced by the
manufacturer or its service agent or a similarly qualied person, in order to avoid a hazard.
- This sewing machine is provided with double insulation. Use only identical replacement parts.
See instructions for Servicing of Double-Insulated Appliances.
SAVE THESE INSTRUCTIONS
FOR CENELEC COUNTRIES ONLY:
This appliance can be used by children aged from 8 years and above and persons with reduced
physical, sensory or mental capabilities or lack of experience and knowledge if they have been
given supervision or instruction concerning use of the appliance in a safe way and understand
the hazards involved. Children shall not play with the appliance. Cleaning and user maintenance
shall not be made by children without supervision.
The noise level under normal operating conditions is less than 75dB(A).
The machine must only be used with foot control of type FC-2902D, (220-240V) manufactured
by Zhejiang Founder Motor Corporation, LTD. (Vietnam) / 4C-326G (230V) / 4C-336G (240V)
manufactured by Wakaho Electric Ind. Co., Ltd. (Vietnam).
III
FOR NON CENELEC COUNTRIES:
This sewing machine is not intended for use by persons (including children) with reduced
physical, sensory or mental capabilities, or lack of experience and knowledge, unless they
have been given supervision or instruction concerning use of the sewing machine by a person
responsible for their safety. Children should be supervised to ensure that they do not play with
the sewing machine.
The noise level under normal operating conditions is less than 75dB(A).
The machine must only be used with foot control of type KD-1902, FC-1902 (110-120V) / KD-
2902, FC-2902A, FC-2902C, FC-2902D, (220-240V) manufactured by Zhejiang Founder Motor
Corporation, LTD. (Vietnam) / 4C-316B (110-125V) / 4C-316C (127V) /4C-326C (220V) / 4C-326G
(230V) / 4C-336G (240V) manufactured by Wakaho Electric Ind. Co., Ltd. (Vietnam).
SERVICING OF DOUBLE INSULATED PRODUCTS
In a double-insulated product, two systems of insulation are provided instead of grounding. No
ground means is provided on a double-insulated product, nor should a means for grounding
be added to the product. Servicing of a double-insulated product requires extreme care and
knowledge of the system and should be done only by qualied service personnel. Replacement
parts for a double-insulated product must be identical to those parts in the product. A double-
insulated product is marked with the words ‘DOUBLE INSULATION’ or ‘DOUBLE INSULATED’.
IV
V
VI
List of contents
Machine Basics
Principal Parts of the Machine ..................................................................................................................................................1
Connecting Machine to Power Source ......................................................................................................................................3
Two Step Presser Foot Lifter .....................................................................................................................................................4
Accessories ...............................................................................................................................................................................5
Threading the Machine
Winding the Bobbin ...................................................................................................................................................................6
Inserting the Bobbin ..................................................................................................................................................................7
Threading the Upper Thread .....................................................................................................................................................8
Raising the Bobbin Thread ........................................................................................................................................................9
Thread Tension ........................................................................................................................................................................10
Sewing
How to Choose Your Pattern .................................................................................................................................................. 11
Sewing Straight Stitch .............................................................................................................................................................12
Reverse Sewing ......................................................................................................................................................................13
Removing the Work .................................................................................................................................................................13
Cutting the Thread...................................................................................................................................................................13
Blind Hem ................................................................................................................................................................................14
Buttonholes .............................................................................................................................................................................15
Sewing on Buttons ..................................................................................................................................................................16
Zippers and Piping ..................................................................................................................................................................17
Free Motion Darning, Stippling ................................................................................................................................................18
General Information
Installing the Removable Extension Table ..............................................................................................................................19
Changing the Presser Foot .....................................................................................................................................................20
Needle/ Fabric/ Thread Chart .................................................................................................................................................21
Darning Plate ...........................................................................................................................................................................22
Maintenance and Troubleshooting
Inserting the Needle ................................................................................................................................................................23
Maintenance ............................................................................................................................................................................24
Troubleshooting Guide ............................................................................................................................................................25
Machine Basics
11
1. Thread tension dial
2. Thread take-up lever
3. Thread cutter
4. Presser foot
5. Needle plate
6. Removable extension table/ accessory storage
7. Pattern selector dial
8. Bobbin winding stopper
9. Reverse sewing lever
Unpacking
- Place the box on a steady, at surface. Lift your machine
out of the box and remove the outer packaging.
- Remove all other packing material and the plastic bag.
Principal Parts of the Machine
Machine Basics
2
Principal Parts of the Machine
1. Thread guide
2. Bobbin winder spindle
3. Spool pin
4. Handwheel
5. Power and light switch
6. Main plug socket
7. Bobbin thread guide
8. Handle
9. Face plate
10. Presser foot lifter
11. Foot speed control
12. Power cord
3
Connect the machine to a power source as illustrated. (1)
This appliance is equipped with a polarized plug which must
be used with the appropriate polarized outlet. (2)
Attention:
Unplug power cord when machine is not in use.
Foot control
The foot control pedal regulates the sewing speed. (3)
Attention:
Consult a qualied electrician if in doubt of how to connect
machine to power source.
Sewing light
Press main switch (A) to “ l “ for power and light.
IMPORTANT NOTICE
For appliance with a polarized plug (one blade is wider
than the other). To reduce the risk of electric shock, this
plug is intended to t in a polarized outlet only one way. If
it does not t fully in the outlet, reverse the plug. If it still
does not t, contact a qualied electrician to install the
proper outlet. Do not modify the plug in any way.
a. Polarized attachment plug
b. Conductor intended to be grounded
Connecting Machine to Power Source
4
When sewing several layers or thick fabrics, the presser foot
can be raised to a higher position for easy positioning of the
work. (A)
Attention:
Your SINGER
®
machine is adjusted to provide the best
stitch result at normal room temperature. Extreme hot and
cold temperatures can aect the sewn result.
Two Step Presser Foot Lifter
5
Standard accessories
a. All purpose foot
b. Zipper foot
c. Buttonhole foot
d. Button sewing foot
e. L-screwdriver
f. Seam ripper/ brush
g. Spool pin felt (2x)
h. Pack of needles (3x)
i. Edge/ quilting guide
j. SINGER
®
Class 15 bobbins (4x)
k. Darning plate
l. Soft cover
Optional Accessories:
For information about additional presser feet, attachments
and accessories that may be available for your machine, visit
www.singer.com.
Accessories
a b c d
f
j
l
e
ki
hg
6
Winding the Bobbin
- Place the thread and spool pin felt (a) onto the spool pin. (1)
- Draw the thread from the spool through the upper thread
guide. (2)
- Wind the thread clockwise around bobbin winder tension
discs. (3)
- Thread bobbin as illustrated and place on spindle. (4)
- Push bobbin spindle to right. (5)
- Hold thread end. (6)
- Step on foot control pedal. (7)
- Release the pedal after a few turns. Release the thread
and cut as close as possible to the spool. Press the pedal
again. Once the spool is full, it rotates slowly. Release the
pedal and cut thread. (8)
- Push bobbin spindle to left (9) and remove.
Please Note:
When the bobbin winder spindle is in “bobbin winding”
position, the machine will not sew and the hand wheel will
not turn. To start sewing, push the bobbin winder spindle
to the left (sewing position).
a
Threading the Machine
7
When inserting or removing the bobbin, the needle must
be fully raised.
- Open the hinged cover. (1)
- Pull the bobbin case tab (a) and remove the bobbin case.
(2)
- Hold the bobbin case with one hand. Insert the bobbin so
that the thread runs in a clockwise direction (arrow). (3)
- Pull the thread through the slit and under the nger. Leave
a 6 inch tail of thread. (4)
- Hold the bobbin case by the hinged latch. (5)
- Insert it into the shuttle. (6)
Attention:
Turn power switch to o (“O”) before inserting or removing
the bobbin.
Inserting the Bobbin
8
This is a simple operation but it is important to carry out
correctly as by not doing so several sewing problems could
result.
- Raise the needle to its highest position by turning the
handwheel towards you (counterclockwise) so that the
mark on the handwheel points directly up. Raise the
presser foot to release the tension discs. (1)
- Place the thread and spool pin felt (a) onto the spool pin. (2)
Note: For safety, it is strongly suggested you turn o the
power before threading.
- Draw the thread from the spool through the upper thread
guide. (3)
- Guide the thread around the thread guide as illustrated. (4)
- Thread tension module by leading thread down right
channel and up left channel. (5) During this process it is
helpful to hold the thread between the spool and thread
guide.
- At the top of this movement pass thread from right to
left through the slotted eye of the take-up lever and then
downwards again. (6)
- Now pass thread behind the thin wire needle clamp guide
(7) and then down to the needle which should be threaded
from front to back.
- Pull about 6-8 inches of thread to the rear beyond the
needle eye. Trim thread to length with built in thread cutter.
(8)
Threading the Upper Thread
9
Hold the upper thread with the left hand. (1)
Turn the handwheel towards you (counterclockwise) lowering,
then raising needle.
Note:
If it is dicult to raise the bobbin thread, check to make
sure the thread is not trapped by the hinged cover or the
Removable Extension Table.
Raising the Bobbin Thread
Gently pull on the upper thread to bring the bobbin thread up
through the needle plate hole. (2)
Lay both threads to the back under the presser foot. (3)
10
Upper thread tension
Basic thread tension setting: “4”.
To increase the tension, turn the dial to the next number up.
To reduce the tension, turn the dial to the next number down.
1. Normal thread tension for straight stitch sewing.
2. Thread tension too loose for straight stitch sewing. Turn
dial to higher number.
3. Thread tension too tight for straight stitch sewing. Turn
dial to lower number.
4. Normal thread tension for zig zag and decorative sewing.
Correct thread tension is when a small amount of the
upper thread appears on the bottom side of fabric.
Lower thread tension
The bobbin tension has been set correctly at the factory, so
you do not need to adjust it.
Please note:
- Proper setting of tension is important to good sewing.
- There is no single tension setting appropriate for all stitch
functions, thread or fabric.
- A balanced tension (identical stitches both top and bottom)
is usually only desirable for straight stitch construction
sewing.
- 90% of all sewing will be between ”3” and ”5”.
- For zig zag and decorative sewing stitch functions, thread
tension should generally be less than for straight stitch
sewing.
- For all decorative sewing you will always obtain a nicer
stitch and less fabric puckering when the upper thread
appears on the bottom side of your fabric.
Thread Tension
11
To select a stitch, simply turn the pattern selector dial. The
pattern selector dial may be turned in either direction.
For straight stitch, select pattern "
" with the pattern
selector dial.
For zigzag stitch, select pattern "
" with the pattern
selector dial.
a. Pattern Selector Dial
b. Reverse Sewing Lever
How to Choose Your Pattern
Sewing
12
Sewing Straight Stitch
To begin sewing, set the machine for straight stitch. (1)
Place the fabric under the presser foot with the fabric edge
lined up with the desired seam guide line on the needle plate.
(2)
Lower the presser foot lifter, and then step on the foot control
to start sewing. (3)
  • Page 1 1
  • Page 2 2
  • Page 3 3
  • Page 4 4
  • Page 5 5
  • Page 6 6
  • Page 7 7
  • Page 8 8
  • Page 9 9
  • Page 10 10
  • Page 11 11
  • Page 12 12
  • Page 13 13
  • Page 14 14
  • Page 15 15
  • Page 16 16
  • Page 17 17
  • Page 18 18
  • Page 19 19
  • Page 20 20
  • Page 21 21
  • Page 22 22
  • Page 23 23
  • Page 24 24
  • Page 25 25
  • Page 26 26
  • Page 27 27
  • Page 28 28
  • Page 29 29
  • Page 30 30
  • Page 31 31
  • Page 32 32
  • Page 33 33
  • Page 34 34
  • Page 35 35
  • Page 36 36

SINGER M2100 Owner's manual

Category
Sewing machines
Type
Owner's manual

SINGER M2100: With a variety of stitch patterns and capabilities, this versatile machine is perfect for beginners and experienced sewers alike. Easily wind bobbins, insert them, and thread the machine with the clear instructions provided. Choose your desired pattern and sew straight or reverse stitches, with an adjustable thread tension to ensure precise results. Create blind hems, buttonholes, sew on buttons, and add zippers and piping with ease. This machine also allows for free-motion darning and stippling for decorative touches.

Ask a question and I''ll find the answer in the document

Finding information in a document is now easier with AI