Page is loading ...

Page 1
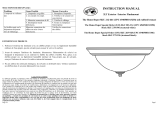
LED Bath Vanity
Home Depot
SKU 1001844674 (UPC 718212228234)
Home Depot
SKU 1001844668 (UPC 718212228241)
(Oil Rubbed Bronze Finish)
INSTRUCTION MANUAL

Page 2
Thank you for purchasing this Home Decorators Collection interior light
fixture. This product has been manufactured with the highest standards of
safety and quality.
NOTE: This equipment has been tested and found to comply with the limits for a
Class B digital device, pursuant to Part 15 of the FCC Rules. These limits are
designed to provide reasonable protection against harmful interference in a
residential installation. This equipment generates, uses and can radiate radio
frequency energy and, if not installed and used in accordance with the instructions,
may cause harmful interference to radio communications. However, there is no
guarantee that interference will not occur in a particular installation. If this
equipment does cause harmful interference to radio or television reception, which
can be determined by turning the equipment off and on, the user is encouraged to try
to correct the interference by one or more of the following measures: Reorient or
relocate the receiving antenna. Increase the separation between the equipment and
receiver. Connect the equipment into an outlet on a circuit different from that to
which the receiver is connected. Consult the dealer or an experienced radio/TV
technician for help.
FEATURES:
1. LED Bath Vanity in Oil Rubbed Bronze Finish.
2. Timeless Elegant Design.
3. Easy to assemble and install.
QUESTIONS, PROBLEMS, MISSING PARTS:
Before returning to your local Home Depot, please call our Customer Service Team
at 1-800-986-3460 or visit HOMEDEPOT.COM/HOMEDECORATORS.
Please
reference your SKU (1001844674 or 1001844668 Oil Rubbed Bronze
Fixture) or UPC (718212228234 or 718212228241 Oil Rubbed Bronze
Fixture).

Page 3
CAUTION:
1. Before starting installation of this fixture or removal of a previous
fixture, disconnect the power by turning off the circuit breaker or by
removing the fuse at the fuse box.
2. CONSULT A QUALIFIED ELECTRICIAN IF YOU HAVE ANY
ELECTRICAL QUESTIONS.
3. Dimmable with ELV and/or LED compatible wall dimmer switches.
4. If you have any non-electrical questions about this fixture, please
contact our Customer Service Team at 1-800-986-3460
or visit
HOMEDEPOT.COM/HOMEDECORATORS. Please reference your
SKU (1001844674 or 1001844668 Oil Rubbed Bronze Fixture) or
UPC (718212228234 or 718212228241 Oil Rubbed Bronze Fixture).
5. Keep your receipt and these Instructions for Proof of Purchase.
TOOLS REQUIRED FOR ASSEMBLY & INSTALLATION
(Not included):
Safety goggles Silicon Rubber Sealant Wire strippers Flathead screwdriver
for exterior use
Phillips screwdriver Electrical tape Wire cutters

Page 4
PARTS INCLUDED FOR ASSEMBLY (parts are not to scale):
3 Glass Shade (#2) for SKU 1001844674 1 Allen Wrench (#12)
4 Glass Shade (#2) for SKU 1001844668
3 Allen Screw (#11) for SKU 1001844674 3 Silicone Ring (#10) for SKU 1001844674
4 Allen Screw (#11) for SKU 1001844668 4 Silicone Ring (#10) for SKU 1001844668
ASSEMBLY INSTRUCTIONS:
1. Shut off power at the fuse box or circuit breaker box. If necessary, remove old fixture
and all mounting hardware from wall outlet box.
2. Carefully unpack your new fixture and lay out all the parts on a clear area. Take care
not to lose any small parts necessary for installation.
3. Fixture glass is pre-assembled. To replace glass, loosen allen screws (#11) by allen
wrench (#12) and carefully take broken glass off.
4. Put silicone ring (#10) onto glass shade (#2) and screw glass shade (#2) into holder
(#1),then use allen wrench (#12) to screw allen screws (#11) back.

Page 6
PARTS INCLUDED FOR INSTALLATION (parts are not to scale):
2 Screw (#4) for SKU 1001844674 2 Outlet Box Screws (#6) 1 Mounting Plate (#7)
4 Screw (#4) for SKU 1001844668 for SKU 1001844674
1 Mounting Plate (#7) for SKU 1001844668 3 Wire Connectors (#5) 1 Ground Screw (#9)
INSTALLATION INSTRUCTIONS:
1. Mount the Mounting Plate (#7) to the Outlet Box (#8) using the two provided Outlet
Box Screws (#6).
2. Connect the white wire from the fixture to the white wire from the Outlet Box (#8),
and the black wire from the fixture to the black wire from the Outlet Box (#8). Cover
the two wire connections using the two provided Wire Connectors (#5). Wrap the
two wire connections with electrical tape for a more secure connection. If your outlet
box has a ground wire (green or bare copper), connect fixture’s ground wire to it
using the wire connector (#5). Otherwise connect the copper ground wire from the
fixture to Ground screw (#9) on the Mounting Plate (#7). Note: If you have electrical
questions, consult your
local electrical code for approved grounding methods.
3. Mount the body of the fixture on the wall by aligning the Mounting Plate wing holes
to side holes of the Back Plate (#3). Be careful not to pinch any of the wires between
the fixture and the Outlet Box (#8). Tighten the fixture to the wall by screwing the
Screws (#4) into the side holes of the Back Plate (#3).
4. Installation is complete. Turn on the power at the circuit breaker or fuse box. Turn
the light switch on to activate the fixture.

Page 7
INSTALLATION:
8. Outlet B ox
3. B ack Plate
4. Screw
5. W ire C onnector
6. Outlet B ox Screw
7. M ounting Plate
9. G round Screw
8. Outlet B ox
7. M ounting Plate
6. Outlet B ox Screw
5. W ire C onnector
4. Screw
3. B ack Plate
9. G round Screw

Page 8
TROUBLESHOOTING:
PRODUCT MAINTENANCE:
1. To clean the outside of the fixture, use a dry or slightly dampened clean cloth (use
clean water, never a solvent) to wipe the glass and surface of the fixture.
2. To clean the inside of the fixture, first disconnect power to the fixture by turning off
the circuit breaker or by removing the fuse at the fuse box. Next, use a dry or slightly
dampened clean cloth (use clean water, never a solvent) to wipe the inside glass and
interior surface of the fixture.
3. Do not use any cleaners with chemicals, solvents or harsh abrasives. Use only a dry
soft cloth to dust or wipe carefully.
LIMITED WARRANTY
The manufacturer warrants this lighting fixture to be free from defects in materials and workmanship for a
period of three (3) years from date of purchase. This warranty applies only to the original consumer
purchaser and only to products used in normal use and service. If this product is found to be defective, the
manufacturer’s only obligation, and your exclusive remedy, is the repair or replacement of the product at the
manufacturer’s discretion, provided that the product has not been damaged through misuse, abuse, accident,
modifications, alterations, neglect or mishandling. This warranty shall not apply to any product that is found
to have been improperly installed, set-up, or used in any way not in accordance with the instructions
supplied with the product. This warranty shall not apply to a failure of the product as a result of an accident,
misuse, abuse, negligence, alteration, or faulty installation, or any other failure not relating to faulty material
or workmanship. This warranty shall not apply to the finish on any portion of the product, such as surface
and/or weathering, as this is considered normal wear and tear.
The manufacturer does not warrant and specially disclaims any warranty, whether express or implied,
of fitness for a particular purpose, other than the warranty contained herein. The manufacturer
specifically disclaims any liability and shall not be liable for any consequential or incidental loss or
damage, including but not limited to any labor / expense costs involved in the replacement or repair of
said product.
Possible Cause Corrective Action
Fixture will not light. 1. LED is burned out. 1. Replace the fixture.
2. Power is off. 2. Make sure power
supply is on.
3. Faulty wire connection. 3. Check wiring.
4. Faulty switch. 4. Test or replace switch.
Fuse blows or circuit
breaker trips when light
is turned on.
Crossed wires or power wire
is grounding out.
Check wire connections.

Page 17
Bath LED Vanity
Home Depot
SKU 1001844674 (UPC 718212228234)
Home Depot
SKU 1001844668 (UPC 718212228241)
(Huile Frotter Bronze Terminer)
MANUEL D'INSTRUCTIONS
1/24