Home Decorators Collection 15334B Operating instructions

Type
Operating instructions

This manual is also suitable for

Page 1
4 Light Vanity Fixture
Home Depot SKU 1001844784 (UPC 718212153345)
(Chrome Finish)
INSTRUCTION MANUAL
Page 2
Thank you for purchasing this Home Decorators Collection interior light
fixture. This product has been manufactured with the highest standards of
safety and quality.
FEATURES:
1. Transitional 4 Light Vanity Light in Chrome Finish.
2. Timeless Elegant Design.
3. Easy to assemble and install.
QUESTIONS, PROBLEMS, MISSING PARTS:
Before returning to your local Home Depot, please call our Customer Service
Team at 1-800-986-3460 or visit httpwww.homedepot.com/homedecorators.
Please reference your SKU (1001844784 Chrome Fixture) or UPC
(718212153345 Chrome Fixture).
Page 3
CAUTION:
1. Before starting installation of this fixture or removal of a previous
fixture, disconnect the power by turning off the circuit breaker or by
removing the fuse at the fuse box.
2. CONSULT A QUALIFIED ELECTRICIAN IF YOU HAVE ANY
ELECTRICAL QUESTIONS.
3. If you have any non-electrical questions about this fixture, please
4. Keep your receipt and these Instructions for Proof of Purchase.
TOOLS REQUIRED FOR ASSEMBLY & INSTALLATION
(not included):
Light Bulb
(100 watt maximum)
Safety goggles
Step Ladder
Wire strippers
Flathead screwdrive
r
Phillips screwdriver Electrical tape
Wire cutters
contact our Customer Service Team at 1-800-986-3460 or visit
http://www.homedepot.com/homedecorators. Please reference your SKU
(1001844784 Chrome fixture) or UPC (718212153345 Chrome fixture).
Page 4
PARTS INCLUDED FOR ASSEMBLY (parts are not to scale):
ASSEMBLY INSTRUCTIONS:
1. Shut off power at the fuse box or circuit breaker box, if necessary remove old fixture
and all mounting hardware from outlet box.
2. Carefully unpack your new fixture and lay out all the parts on a clear area, Take care
not to lose any small parts necessary for installation.
3. Place the Glass Shade (#1) and Metal Ring (#5) onto the Socket (#11) and secure them
with the Screw Shell (#2) by using the included Spanner (#14).
4 Glass Shade (#1) 4 Screw Shell (#2) 4 Metal Ring (#5) 1 Spanner (#14)
Page 5
ASSEMBLY:
11. Socket
Page 6
PARTS INCLUDED FOR INSTALLATION (parts are not to scale):
2 Outlet Box Screw (#8)
1 Mounting Plate (#9)
INSTALLATION INSTRUCTIONS:
3.
5. Install the light bulb (not included) in accordance with the fixture’s specifications.
(DO NOT EXCEED THE MAXIMUM WATTAGE RATING!!)
6. Installation is complete. Turn on the power at the circuit breaker or fuse box. Turn
the light switch on to activate the fixture.
1.
2. Attached the Mounting Plate (#9) to the Outlet Box (#12) with the two Outlet Box
Screws (#8) as shown. The side of the Mounting Plate (#9) marked “GND” must face
out.
Thread the Mounting Screws (#6) into the pre-drilled holes of the Mounting Plate (#9)
space the same distance apart as the holes on the fixture canopy. Thread the Hex Nuts
(#7) onto the Mounting Screws (#6), adjust to suitable installation length, then tightening
the Hex Nut (#7).
4. Place the Fixture body (#3) over the Mounting Screws (#6) so it protrudes through the
holes on the fixture canopy. Screw the Cap Nuts (#4) onto the end of the Mounting
Screws (#6) until fixture is secured to the wall.
2 Mounting Screw (#6)
3 Wire Connector (#13)
1 Ground Screw (#10)
2 Hex Nut (#7) 2 Cap Nut (#4)
Connect the white wire from the fixture to the white wire from the Outlet Box (#12),
and the black wire from the fixture to the black wire from the Outlet Box (#12). Cover
the two wire connections using the two provided Wire Connectors (#13). Wrap the two
wire connections with electrical tape for a more secure connection. If your outlet box
has a ground wire (green or bare copper), connect fixture’s ground wire to it using the
wire connector (#13). Otherwise connect the copper ground from the fixture to Ground
screw (#10) on the
Mounting Plate (#9). Note: If you have electrical questions, consult
your local electrical code for approved grounding method.
Page 7
INSTALLATION:
Ground Wire
Black Wire
White Wire
3. Fixture Body
4. Cap Nut
6. Mounting Screw
9. Mounting Plate
7. Hex Nut
8. Outlet Box Screw
12. Outlet Box
13. Wire Connector
10. Ground Screw
Page 8
TROUBLESHOOTING:
PRODUCT MAINTENANCE:
1. To clean the outside of the fixture, use a dry or slightl y dampened clean cloth (use
clean water, never a solvent) to wipe the glass and surface of the fixture.
2. To clean the inside of the fi xture, first disconnect power to the fixture by turning of f
the circuit breaker or by removing the fuse at the fuse box. Next, use a dry or slightly
dampened clean cloth (us e clean water, never a solvent) to wipe the inside glass and
interior surface of the fixture.
3. Do not use any cleaners with chemicals, solvents or harsh abras ives. Use only a dry
soft cloth to dust or wipe carefully.
LIMITED WARRANTY
The manufacturer warrants this lighting f ixture to be free from defects in materials and workmanship for a
period of fi ve (5) years fro m date of purchase. This warranty applies only to the origina l consumer
purchaser and only to products us ed in normal use and service. If this product is found to be de fective, the
manufacturers only obligation, and your exclusive remedy, is the repair or replacement of the product at the
manufacturers discretion, provided that the product has not been damaged through misuse, abuse, accident,
modifications, alterations, neglect or mishandling. This warranty shall not apply to any product that is found
to have been improperly installed, set-up, or use d in any way not in accordance with the instructions
supplied with the product. This warranty shall not apply to a failure of the product as a result of an accident,
misuse, abuse, negligence, alteration, or faulty installation, or any other failure not relating to faulty material
or workmanship. This warranty shall not apply to the finish on any portion of th e product, such a s surface
and/or weathering, as this is considered normal wear and tear.
The manufacturer does not warrant and specially disclaims any warranty, whether express or implied,
of fitness for a p articular purpose, other than the warranty contained herein. The manufacturer
specifically disclaims any liability and shall not be liable for any consequential or incidental loss or
damage, including but not limited to any labor / expense costs involved in the replacement or repair of
said product.
Possible Cause Corrective Action
Bulb will not light. 1. Bulb is burned out. 1. Replace light bulb.
2. Power is off. 2. Make sure power
supply is on.
3. Faulty wire connection. 3. Check wiring.
4. Faulty switch. 4. Test or replace switch.
Fuse blows or circuit
breaker trips when light
is turned on.
Crossed wires or power wire
is grounding out.
Check wire connections.
Page 9
4 Luz Lámpara de Tocador
Home Depot SKU 1001844784 (UPC 718212153345)
(Acabado en Cromo)
MANUAL DE INSTRUCCIONES
Page 10
Gracias por la compra de este accesorio Home Decorators Collection luz
interior. Este producto ha sido fabricado con los más altos niveles de
seguridad y calidad.
CARACTERÍSTICAS:
1. Tradicional 4 Luz de Vanidad en Acabado en Cromo.
2. Atemporal Elegante diseño.
3. Fácil de montar e instalar con Enlace rápido.
Preguntas, problemas, piezas faltantes:
Antes de regresar a su oficina local de Home Depot, llame a
nuestro Servicio de Antención al 1-800-986-3460 o visite
http://www.homedepot.com/homedecorators. Por favor, referir a SKU
(1001844784 Acabado en Cromo), UPC (718212153345 Acabado
en Cromo).
Page 11
PRECAUCIÓN:
1. Antes de comenzar la instalación de este lampara o eliminación de una
luz anterior , desconecte la alimentación apagando el interruptor o
quitando el fusible en la caja de fusibles.
2. CONSULTE CON UN ELECTRICISTA SI TIENE ALGUNA
PREGUNTAS ELÉCTRICAS.
3. Si usted tiene cualquier pregunta no eléctrica de esta, luz por favor,
4. Guarde su recibo y las instrucciones para la prueba de compra.
HERRAMIENTAS necesarias para el montaje y la instalación
(no incluidos):
Bombilla
(Máximo 100watt)
Gafas De Seguridad
Escalera Pelacable
Destornillador De
Cabeza Plana
Destornillador De
Cabeza Phillips
Cita Aislante
Cortaalambres
póngase en contacto con nuestro Servicio de Atención al 1-800-986-
3460 o visite http://www.homedepot.com/homedecorators. Por favor,
referir a SKU (1001844784 Acabado en Cromo), UPC (718212153345
Acabado en Cromo).
Page 12
PIEZAS INCLUIDAS PARA LA ASAMBLEA (partes no están a
escala):
INSTRUCCIONES DE MONTAJE:
1. Corte la corriente en la caja de fusibles o en el circuito principal. Si fuera necesario,
saque la lampara vieja y todo el montaje de la caja de union de la pared.
2. Desempaque cuidadosamente su nueva lampara y coloque todas las partes en una
superfice despejada. Tenga cuidado de no perder las partes pequeñas que son
necesarias para la instalacion.
3.
4 Vidrio (#1) 4 Tornillo de Shell (#2) 4 Anillo de metal (#5)
Coloque el vidrio (#1) y anillo de metal (#5) en el zócalo (#11) y asegurarlos con
1 Llave (#14)
tornillos de Shell (#2) usando la llave (#14) incluida.
Page 13
ASAMBLEA:
1. Vidrio
2. Tornillo de Shell
14. llave
Page 14
PIEZAS INCLUIDAS para la instalación (las partes no están a escala):
Instrucciones de instalación:
5
Instale los focus (no incluidos) de acuerdo a las especificaciones. (NO EXCEDA
MAS DE LOS VATIOS ESPECIFICADOS!!).
6. La instalación está completa. Encienda la energía en la caja de fusibles. Encienda el
interruptor de la luz para activar el aparato.
#10)( arreit ed ollinroT 1
)9#( ejatnom ed acalP 1 13)#( elbac ed rotcenoC 3
)7#( lanogaxeh acreuT 2
)8#( ollinrot ed adilas ed ajaC 2
1. Atornille los dos Tornillos de montaje (# 6) en los agujeros de la Placa de montaje (# 9)
2. Coloque la Placa de montaje (#9) a la caja de salida (#12) con los dos tornillos de la caja
de salida de tornillo (#8) como se muestra. El lado de la Placa de montaje (#9) marcado
"GND" debe ir hacia fuera.
3. Conecte el cable blanco del la lámpara al cable blanco de la caja de salida (#12), y el
cable negro de la lámpara al cable negro de la caja de salida ( # 12 ). Cubra las dos
conexiones de cable con los dos Conectores de alambre previstos (#13). Envuelva las
dos conexiones de los cables con cinta aislante para una conexión más segura. Si su
caja de salida tiene un cable de tierra (verde o desnudo de cobre), conecte el cable
de tierra accesorio a la misma utilizando el conector de cable (# 13). De otra manera
conecte el alambre de cobre al tornillo de tierra (#10) en la Placa de montaje (#9). Nota:
Si usted tiene preguntas eléctricas, consulte a su código de electricidad local por los
métodos aprobados de puesta a tierra.
4. Coloque la Cuerpo de lámpara (#3) sobre la Tornillo de montaje (#6) para que la Tornillo
de montaje (#6) sobre salga a través del Cubierta. Mientras sostiene la lampara contra la
pared asegurela con la Copa Decorativa (#4).
)6#( ejatnom ed ollinroT 2
)4#( avitaroced acreuT 2
a la misma distancia de separado que los agujeros en la Cubierta. Pase la tuerca hexagonal
#7 en el tornillo de montaje (# 6 ) , ajuste a la longitud de montaje adecuado, después se
aprieta la tuerca hexagonal (#7).
Page 15
INSTALACIÓN:
4.
Tuerca decora va
3. Cuerpo de
lámpara
6. Tornillo de montaje
7. Tuerca hexagonal
8. Caja de salida de tornillo
9. Placa de montaje
10. Tornillo de tierra
12. Caja de salida
13. Conector de cable
Cable de tierra
Cable negro
Cable blanco
Page 16
SOLUCIÓN DE PROBLEMAS:
Mantenimiento de productos:
1. Para limpiar el exteri or del aparato, utilice un seca o li geramente húmeda tela (use
agua limpia, nunca un disolvente) para limpiar el vidrio y la superficie de la lámpara.
2. Para limpiar el interior del aparato, primero desconecte la alimentación de la lámpara
de apagar el in terruptor de circuito o quita ndo el fusible de la caja de fusibles. A
continuación, utilice una tela seca o ligeramente húmeda (u se agua limpia, nunca un
disolvente) para limpiar el cristal en el interior y la superficie interior de la lámpara.
3. No utilice limpiadores con productos químicos, solventes o abrasivos s everos. Utilice
sólo un paño suave y seco para el polvo o limpiar con cuidado.
GARANTÍA LIMITADA
El fabricante garantiza que este accesorio de iluminación a estar libre de defectos en materiales y mano de
obra durante un pe ríodo de ci nco (5) años a pa rtir de la f echa de co mpra. Esta ga rantía se aplica sólo a l
comprador original y s ólo a los pr oductos utilizados en condic iones normales de uso y se rvicio. Si se
encuentra que este producto está defectuoso, la única obligación del fabricante, y su solución exclusiva, es la
reparación o sustitución del producto, a discreción del fabricante, siempre que el producto no ha sido dañado
por el mal uso, abuso, accidentes, modificaciones, alteraciones , negligencia o mal manejo. Esta garantía no
se aplicará a cualquier producto que se demuestre que ha sido instalado incorrectamente, puesta a punto, o
utilizado en c ualquier manera no conform e con las instruc ciones suministradas con el produc to. Esta
garantía no se a plicará a una falla del producto como consecuencia de un a ccidente, mal uso, abuso,
negligencia, alteración o instalación defectuosa, o cualquier otro fallo que no se refieran a los materiales o
ejecución defectuosa. Esta garantía no se aplicará a la meta en cualquier parte del producto, tales como l a
superficie y / o la intemperie, ya que se considera uso y desgaste normal.
El fabricante no garantiza y especialmente niega cualquier garantía, expresa o implícita, de aptitud
para un propósito particular, excepto la garantía contenida en este documento. El fabricante rechaza
específicamente cualquier responsabilidad y no será responsable por cualquier pérdida consecuente o
incidental o da ños, incluyendo pero no limitado a cualquier mano de obra Gastos de gastos que
implica la sustitución o reparación de dicho producto.
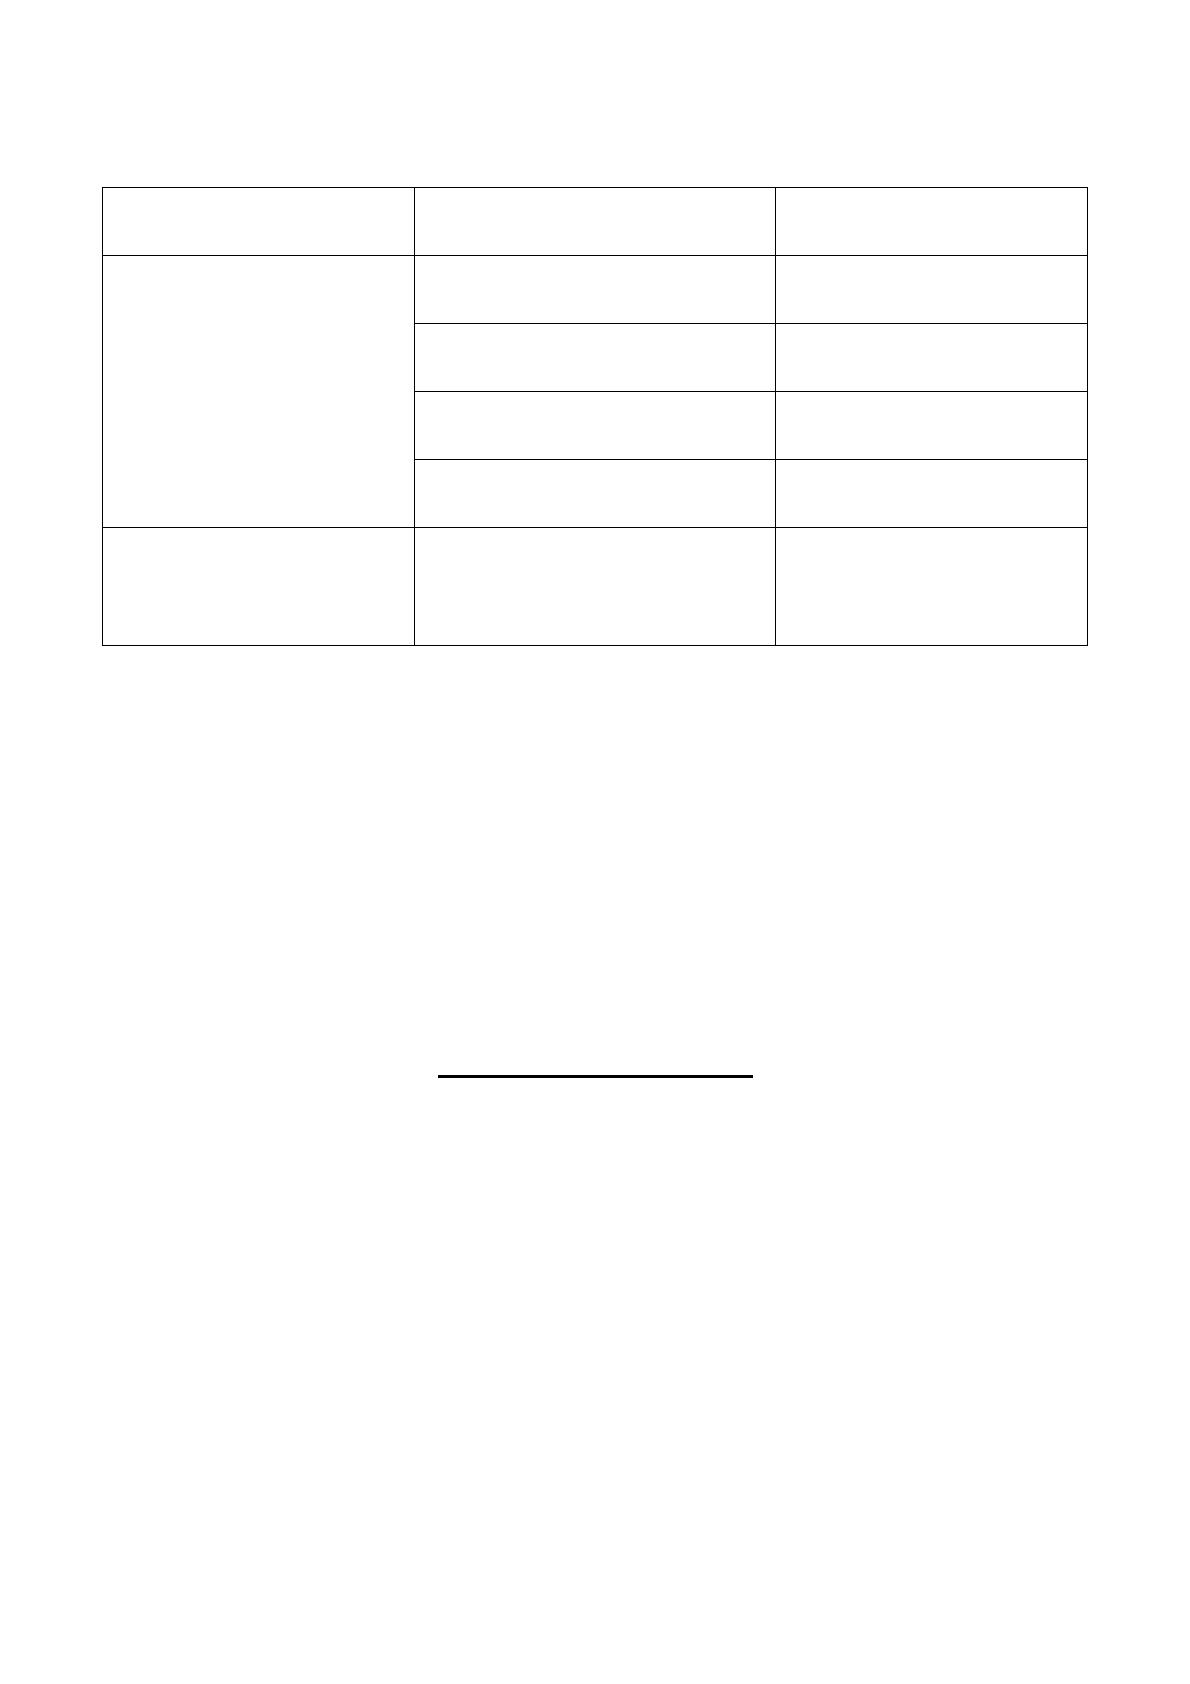
Posible causa de Acción
Correctiva
Bombilla no se
encenderá
la oferta está encendido. 1. Bombilla está quemada 1. Reemplace la
bombilla.
2. Está apagada. 2. Asegúrese de que el
poder .
3. Conexión del cable
defectuoso.
3. Verifique el cableado.
4. Interruptor defectuoso. 4. Pruebe o cambiar el
interruptor.
Funde un fusible o
circuito
viajes interruptor
cuando la luz
está encendida. Cables
cruzados o cables de
alimentación
es tierra hacia fuera.
Compruebe las
conexiones de cables.
Page 17
Home Depot SKU 1001844784 (UPC 718212153345
(Fini Chrome)
MANUEL D'INSTRUCTIONS
4 Lumière Applique de Salle de Bains
Page 18
Nous vous remercions d'avoir acheté ce Home Decorators Collection
appareil d'éclairage à l'intérieur. Ce produit a été fabriqué avec des
niveaux plus élevés de sécurité et de qualité.
CARACTÉRISTIQUES:
1. Nové Design 4 Light in Vanity en Fini Chrome.
2. Design élégant et intemporel.
3. Facile à assembler et installer.
Questions, des problèmes, des pièces manquantes:
Avant de retourner à votre Home Depot local, appelez notre Service Center
au 1-800-986-3460 ou visitez http://www.homedepot.com/homedecorators.
vous plaît se référer à SKU (1001844784 Fini Chrome), UPC
(718212153345 Fini Chrome).
Page 19
ATTENTION:
1. Avant d'installer cette lampe ou la suppression d'un jour précédent
, Mettez l'interrupteur ou en enlevant les fusibles dans la boîte à
fusibles.
2. Consultez un électricien qualifié SI VOUS AVEZ DES
ELECTRIQUE QUESTIONS.
3. Si vous avez des questions, ce pouvoir, de la lumière s'il vous plaît
4. Conservez votre reçu et des instructions pour preuve d'achat.
Outils nécessaires pour l'assemblage et l'installation (non inclus):
Ampoule
(60 watt max)
Lunettes De Sécurité
Ladde
r
Strippers
Tourenvis
À TêtePlate
Tourenvis
À Tête Cruciforme
Ruban isolant
Coupe-fil
contacter notre Service Center au 1-800-986-3460 ou visitez
http://www.homedepot.com/homedecorators. S'il vous plaît se référer à
SKU (1001844784 Fini Chrome), UPC (718212153345 Fini Chrome).
Page 20
PIÈCES FOURNIES pour l'assemblage (pièces ne sont pas à l'échelle):
4 Verre (#1)
INSTRUCTIONS D'ASSEMBLAGE:
1. Couper le courant en enlevant le fusible ou en coupant le circuit du disjoncteur. Si
nécessaire, retirer le vieux luminaire ainsi que toutes les pièces de montage de la
boîte de dérivation.
2. Déballez attentivement votre nouveau support et disposez toutes les pieces dans un
endroit degage. Faites attention de ne pas perdre toutes les petites pièces nécessaires
pour l’installation.
3.
4 Vis Shell (#2)
4 Anneau de métal (#5)
Lieu verre ombre (#1) et Anneau de métal (#5) sur la prise (#11) et les fixer avec vis
Shell (#2) utilisation de la clé (#14) fournie.
1 clé à écrous (#14)
  • Page 1 1
  • Page 2 2
  • Page 3 3
  • Page 4 4
  • Page 5 5
  • Page 6 6
  • Page 7 7
  • Page 8 8
  • Page 9 9
  • Page 10 10
  • Page 11 11
  • Page 12 12
  • Page 13 13
  • Page 14 14
  • Page 15 15
  • Page 16 16
  • Page 17 17
  • Page 18 18
  • Page 19 19
  • Page 20 20
  • Page 21 21
  • Page 22 22
  • Page 23 23
  • Page 24 24

Home Decorators Collection 15334B Operating instructions

Type
Operating instructions
This manual is also suitable for

Ask a question and I''ll find the answer in the document

Finding information in a document is now easier with AI