Page is loading ...

Printed on
recycled paper.
1/97
POCKET SERIAL INTERFACE
DSPI
RS232
POWER
AUX CROWN BUS10 VDC IN
1718 W. Mishawaka Rd.
Elkhart, IN 46517 U.S.A.
ENABLE
© 1997 by Crown International, Inc., P.O. Box 1000, Elkhart, Indiana 46515-1000 U.S.A. Telephone:
219-294-8000. The
IQ–PSI
is produced by the Professional Audio Division of Crown International, Inc.
Trademark Notice:
IQ2
™
is a trademark and
Crown
®
,
Amcron
®
,
IQ System
®
and
P.I.P.
®
are registered
trademarks of Crown International, Inc. Other trademarks are the property of their respective owners.
IQ System
®
to Host Computer Pocket Serial Interface

WORLDWIDE
SUMMARY OF WARRANTY
The Crown Audio Division of Crown International, Inc., 1718 West
Mishawaka Road, Elkhart, Indiana 46517-4095 U.S.A. warrants to you,
the ORIGINAL PURCHASER and ANY SUBSEQUENT OWNER of
each NEW Crown
1
product, for a period of three (3) years from the date
of purchase by the original purchaser (the “warranty period”) that the
new Crown product is free of defects in materials and workmanship, and
we further warrant the new Crown product regardless of the reason for
failure, except as excluded in this Crown Warranty.
1
Note: If your unit bears the name “Amcron,” please substitute it for the
name “Crown” in this warranty.
ITEMS EXCLUDED FROM THIS CROWN WARRANTY
This Crown Warranty is in effect only for failure of a new Crown product
which occurred within the Warranty Period. It does not cover any
product which has been damaged because of any intentional misuse,
accident, negligence, or loss which is covered under any of your
insurance contracts. This Crown Warranty also does not extend to the
new Crown product if the serial number has been defaced, altered, or
removed.
WHAT THE WARRANTOR WILL DO
We will remedy any defect, regardless of the reason for failure (except
as excluded), by repair, replacement, or refund. We may not elect refund
unless you agree, or unless we are unable to provide replacement, and
repair is not practical or cannot be timely made. If a refund is elected,
then you must make the defective or malfunctioning product available
to us free and clear of all liens or other encumbrances. The refund will
be equal to the actual purchase price, not including interest, insurance,
closing costs, and other finance charges less a reasonable
depreciation on the product from the date of original purchase.
Warranty work can only be performed at our authorized service centers.
We will remedy the defect and ship the product from the service center
within a reasonable time after receipt of the defective product at our
authorized service center.
HOW TO OBTAIN WARRANTY SERVICE
You must notify us of your need for warranty service not later than ninety
(90) days after expiration of the warranty period. All components must
be shipped in a factory pack. Corrective action will be taken within a
reasonable time of the date of receipt of the defective product by our
authorized service center. If the repairs made by our authorized service
center are not satisfactory, notify our authorized service center
immediately.
DISCLAIMER OF CONSEQUENTIAL
AND INCIDENTAL DAMAGES
YOU ARE NOT ENTITLED TO RECOVER FROM US ANY
INCIDENTAL DAMAGES RESULTING FROM ANY DEFECT IN THE
NEW CROWN PRODUCT. THIS INCLUDES ANY DAMAGE TO
ANOTHER PRODUCT OR PRODUCTS RESULTING FROM SUCH A
DEFECT.
WARRANTY ALTERATIONS
No person has the authority to enlarge, amend, or modify this Crown
Warranty. This Crown Warranty is not extended by the length of time
which you are deprived of the use of the new Crown product. Repairs
and replacement parts provided under the terms of this Crown Warranty
shall carry only the unexpired portion of this Crown Warranty.
DESIGN CHANGES
We reserve the right to change the design of any product from time to
time without notice and with no obligation to make corresponding
changes in products previously manufactured.
LEGAL REMEDIES OF PURCHASER
No action to enforce this Crown Warranty shall be commenced later
than ninety (90) days after expiration of the warranty period.
THIS STATEMENT OF WARRANTY SUPERSEDES ANY OTHERS
CONTAINED IN THIS MANUAL FOR CROWN PRODUCTS.
9/90
NORTH AMERICA
SUMMARY OF WARRANTY
The Crown Audio Division of Crown International, Inc., 1718 West Mishawaka
Road, Elkhart, Indiana 46517-4095 U.S.A. warrants to you, the ORIGINAL
PURCHASER and ANY SUBSEQUENT OWNER of each NEW Crown prod-
uct, for a period of three (3) years from the date of purchase by the original
purchaser (the “warranty period”) that the new Crown product is free of defects
in materials and workmanship. We further warrant the new Crown product
regardless of the reason for failure, except as excluded in this Warranty.
ITEMS EXCLUDED FROM THIS CROWN WARRANTY
This Crown Warranty is in effect only for failure of a new Crown product which
occurred within the Warranty Period. It does not cover any product which has
been damaged because of any intentional misuse, accident, negligence, or
loss which is covered under any of your insurance contracts. This Crown
Warranty also does not extend to the new Crown product if the serial number
has been defaced, altered, or removed.
WHAT THE WARRANTOR WILL DO
We will remedy any defect, regardless of the reason for failure (except as
excluded), by repair, replacement, or refund. We may not elect refund unless
you agree, or unless we are unable to provide replacement, and repair is not
practical or cannot be timely made. If a refund is elected, then you must make
the defective or malfunctioning product available to us free and clear of all liens
or other encumbrances. The refund will be equal to the actual purchase price,
not including interest, insurance, closing costs, and other finance charges less
a reasonable depreciation on the product from the date of original purchase.
Warranty work can only be performed at our authorized service centers or at
the factory. We will remedy the defect and ship the product from the service
center or our factory within a reasonable time after receipt of the defective
product at our authorized service center or our factory. All expenses in
remedying the defect, including surface shipping costs in the United States,
will be borne by us. (You must bear the expense of shipping the product
between any foreign country and the port of entry in the United States and all
taxes, duties, and other customs fees for such foreign shipments.)
HOW TO OBTAIN WARRANTY SERVICE
You must notify us of your need for warranty service not later than ninety (90)
days after expiration of the warranty period. All components must be shipped
in a factory pack, which, if needed, may be obtained from us free of charge.
Corrective action will be taken within a reasonable time of the date of receipt
of the defective product by us or our authorized service center. If the repairs
made by us or our authorized service center are not satisfactory, notify us or
our authorized service center immediately.
DISCLAIMER OF CONSEQUENTIAL AND INCIDENTAL DAMAGES
YOU ARE NOT ENTITLED TO RECOVER FROM US ANY INCIDENTAL
DAMAGES RESULTING FROM ANY DEFECT IN THE NEW CROWN
PRODUCT. THIS INCLUDES ANY DAMAGE TO ANOTHER PRODUCT OR
PRODUCTS RESULTING FROM SUCH A DEFECT. SOME STATES DO NOT
ALLOW THE EXCLUSION OR LIMITATIONS OF INCIDENTAL OR
CONSEQUENTIAL DAMAGES, SO THE ABOVE LIMITATION OR
EXCLUSION MAY NOT APPLY TO YOU.
WARRANTY ALTERATIONS
No person has the authority to enlarge, amend, or modify this Crown Warranty.
This Crown Warranty is not extended by the length of time which you are
deprived of the use of the new Crown product. Repairs and replacement parts
provided under the terms of this Crown Warranty shall carry only the unexpired
portion of this Crown Warranty.
DESIGN CHANGES
We reserve the right to change the design of any product from time to time
without notice and with no obligation to make corresponding changes in
products previously manufactured.
LEGAL REMEDIES OF PURCHASER
THIS CROWN WARRANTY GIVES YOU SPECIFIC LEGAL RIGHTS, YOU
MAY ALSO HAVE OTHER RIGHTS WHICH VARY FROM STATE TO STATE.
No action to enforce this Crown Warranty shall be commenced later than ninety
(90) days after expiration of the warranty period.
THIS STATEMENT OF WARRANTY SUPERSEDES ANY OTHERS
CONTAINED IN THIS MANUAL FOR CROWN PRODUCTS.
9/90
Telephone: 219-294-8200. Facsimile: 219-294-8301
Telephone: 219-294-8200. Facsimile: 219-294-8301
THREE YEAR
FULL WARRANTY
YEAR
3
YEAR
3

WARNING
TO REDUCE THE RISK OF ELECTRIC
SHOCK, DO NOT EXPOSE THIS
EQUIPMENT TO RAIN OR MOISTURE!
The information furnished in this manual does not include all of the details of design, production, or variations of the
equipment. Nor does it cover every possible situation which may arise during installation, operation or maintenance. If
you need special assistance beyond the scope of this manual, please contact our Technical Support Group.
Crown Audio Division Technical Support Group
Plant 2 SW, 1718 W. Mishawaka Rd., Elkhart, Indiana 46517 U.S.A.
Phone: 800-342-6939 (North America, Puerto Rico and Virgin Islands) or 219-294-8200
Fax: 219-294-8301 Fax Back (North America only): 800-294-4094 or 219-293-9200
Fax Back (International): 219-294-8100 Internet: http://www.crownintl.com

Page 4
IQ–PSI IQ Pocket Serial Interface
CONTENTS
1 Welcome ......................................................................5
1.1 Unpacking.............................................................5
2 Facilities ......................................................................6
3 Installation...................................................................8
3.1 Setting the IQ Address .........................................8
3.2 Connecting to the Crown Bus ...............................8
3.3 Connecting to a Host Computer .........................10
3.1.1 Setting the Baud Rate ..............................10
3.4 Connecting Auxiliary Devices.............................11
3.4.1 AUX Output ..............................................11
3.4.2 AUX Input .................................................11
4 Technical Information ..............................................12
5 Specifications ...........................................................13
6 IQ Address Tables ....................................................14
7 Service .......................................................................16
7.1 Worldwide Service..............................................16
7.2 North American Service......................................16
7.2.1 Service at a N. American Service Center 16
7.2.2 Factory Service ........................................16
ILLUSTRATIONS
1.1 The
IQ–PSI.....................................................................
5
2.1 Front and Bottom Views of an
IQ–PSI............................
6
2.2 Rear View of an
IQ–PSI .................................................
7
3.1 An
IQ System
with an
IQ–PSI.........................................
8
3.2 IQ Address Switch (SW3) Values.................................. 8
3.3 A Screw-Terminal Plug ................................................. 9
3.4
IQ–PSI
Output Connection to an IQ Mixer Input ............ 9
3.5 IQ
P.I.P.
Output Connection to the
IQ–PSI
Input ............ 9
3.6
IQ–PSI
Output Connection to an IQ
P.I.P.
Input............. 9
3.7 Crown Bus Wiring “Loops” from Output to Input ......... 10
3.8 RS232 Cable Wiring ................................................... 10
3.9 Baud Rate Settings .................................................... 10
3.10 The Internal AUX Port Circuit ...................................... 11
3.11 A Sample AUX Output Circuit ..................................... 11
4.1
IQ–PSI
Circuit Block Diagram..................................... 12
6.1 IQ Address Switch (SW3) Settings from 0 to 125 ........ 14
6.2 IQ Address Switch (SW3) Settings from 126 to 250 .... 15

Page 5
IQ–PSI IQ Pocket Serial Interface
The
IQ–PSI
will function in “component mode” when a
host computer is not detected. In this mode the AUX
port will still be available for use, but the RS232 serial
port will be inactive. In addition, the unit’s Crown Bus
input and output will be closed to allow the normal flow
of communication around the Crown Bus loop.
Commands received at the unit’s Crown Bus input will
be analyzed and executed if they are addressed to the
IQ–PSI
.
The AUX port of the
IQ–PSI
enables it to be connected
to a non-IQ component. For example, the AUX port
can be connected to a relay to turn on and off a remote
device. Or the AUX port can send and receive simple
logic signals. Whether the
IQ–PSI
is being used as an
interface or as a component, the AUX port will continue
to function.
The
IQ–PSI
requires a single 9-volt battery or an
external AC source (an AC power adapter is included
with domestic units only). Battery life is approximately
one hour (alkaline cell).
This manual will help you successfully install and use
this new interface. We strongly recommend you read
all the instructions, warnings and cautions. Also, for
your protection, please send in the warranty
registration card today. And save your bill of sale—it
is your official proof of purchase.
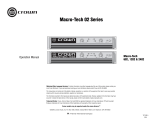
AUX CROWN BUS10 VDC IN
1718 W. Mishawaka Rd.
Elkhart, IN 46517 U.S.A.
ENABLE DSPI RS232
POWER
POCKET SERIAL INTERFACE
Fig. 1.1 The IQ–PSI
1 Welcome
The IQ Pocket Serial Interface
(IQ–PSI)
is designed to
serve as a portable IQ interface, connecting a selected
Crown Bus loop to a host computer in an
IQ System
. A
member of the
IQ2
™
family, the
IQ–PSI
supports all
IQ2
and legacy protocol components when operating
as a system interface. In addition, the
IQ–PSI
features
a standard IQ AUX port, and can function as an IQ
component with its own IQ address.
The
IQ–PSI
automatically senses whether a computer
is connected to it by monitoring the RTS (Request To
Send) pin of its RS232 serial port. The
IQ–PSI
will
operate in “interface mode” when a host computer is
detected. In this mode the
IQ–PSI
can be directed by
the host computer to select any IQ component on the
same Crown Bus loop and send commands or retrieve
data. Input messages received on the Crown Bus are
transferred out the RS232 port to the host computer.
1.1 Unpacking
Please unpack and inspect the interface for any damage
that may have occurred during transit. If damage is found,
notify the transportation company immediately. Only you,
the consignee, may initiate a claim for shipping damage.
Crown will be happy to cooperate fully as needed. Save
the shipping carton as evidence of damage for the
shipper’s inspection.
Even if the unit arrived in perfect condition, as most do,
save all packing materials so you will have them if you
ever need to transport the unit. NEVER SHIP THE UNIT
WITHOUT THE FACTORY PACK.

Page 6
IQ–PSI IQ Pocket Serial Interface
Fig. 2.1 Front and Bottom Views of an IQ–PSI
2 Facilities
A. Power Switch
This two-position sliding switch turns the unit on and off.
Slide the switch toward the serial cable to turn it on. When
first turned on, the green Enable indicator (D) will glow
brightly and the yellow DSPI (C) will “wink” twice to show
that adequate voltage is available.
B. RS232 Computer Connector & Cable
A female 9-pin “D-shell” connector and 16-inch (41-cm)
cable is provided for serial connection to a host com-
puter. The RS232 communication standard is supported.
Note: A 9-pin to 25-pin adapter will be required if the
serial port of the host computer has only a 25-pin connec-
tor.
The
IQ–PSI
is configured so that if an active computer
is plugged into the RS232, the PSI detects that the RTS is
high and functions automatically as an interface; with no
computer detected, it functions as an
IQ
component.
C. DSPI
This yellow DSPI (Data Signal Presence Indicator)
flashes when the
IQ–PSI
sends or receives a valid IQ
command. It can also be forced to stay on as an aid to
rapid troubleshooting of Crown Bus wiring. In addition,
when the
IQ–PSI
is switched on, the DSPI will “wink”
twice to show that adequate voltage is available. The
absence of adequate voltage could indicate a low bat-
tery, defective AC power adapter or an AC mains low-
voltage condition commonly referred to as a “brownout.”
D. Enable Indicator
This green LED lights whenever the power switch (A) of
the unit is turned on and power is available.
E. External 10 VDC Power Connector
Connect the external AC power adapter (included with
domestic units only) to this male coaxial DC power con-
nector. It requires a plug with an outside diameter (O.D.)
of 5.5 mm and inside diameter (I.D.) of 2.1 mm. The
external power adapter should provide from 8.5 to 15
VDC at 300 mA.
Note: The center conductor of the plug
should carry the positive voltage.
No battery is required
when an external AC source is used. If desired, interna-
tional customers should provide their own external AC
power adapter which is appropriate for the AC input
C D
E
F G
A
B
AUX CROWN BUS10 VDC IN
1718 W. Mishawaka Rd.
Elkhart, IN 46517 U.S.A.
ENABLE DSPI RS232
POWER
POCKET SERIAL INTERFACE

Page 7
IQ–PSI IQ Pocket Serial Interface
Fig. 2.2 Rear View of an IQ–PSI
voltage and receptacle connectors common to their lo-
cale. Caution: Users of domestic units should use
only the AC power adapter supplied with the unit.
F. AUX Connector
A 3-pin male “Euro-style” connector is provided to con-
trol or send/receive signals from auxiliary equipment.
When the AUX output is turned on, +10 VDC (+9 VDC
if the unit is being run on battery power) is provided
across the ground and output pins. A nominal current
of 10 mA is available. The AUX connector also includes
a high-impedance input that can sense logic signals
across the ground and input pins. A mating 3-pin
“Euro-style” screw-terminal plug is also provided.
G. Crown Bus Connector
A 4-pin male “Euro-style” connector is provided for con-
nection to a single Crown Bus loop. Two pins are used for
output and two pins are used for input. See Section 3.2 for
more information. A mating 4-pin “Euro-style” screw-ter-
minal plug is also provided.
H. Battery Access Panel
Remove this access panel to replace the battery or
change the settings of the baud rate switch or IQ address
switch . To remove the access panel, slide it toward the
serial cable. Caution: Use only alkaline batteries.
I. Baud Rate Switch (Not Shown)
A 4-segment DIP switch (SW4), located inside the battery
compartment, is used to set the baud rate. Available
baud rates range from 4,800 to 38,400 baud. See Section
3.3.1 for more information.
J. IQ Address Switch (Not Shown)
An 8-segment DIP switch (SW3), located inside the bat-
tery compartment, is used to set the IQ address so mul-
tiple units can be connected to the same Crown Bus
loop. Each
IQ–PSI
must have a unique IQ address. Sec-
tion 6 lists the DIP switch settings and their correspond-
ing IQ addresses.
+–+–
INPUT OUTPUT
IN OUT
AUX CROWN BUS
+10
VDC
EXT
PWR
INPUT
12345678
1
2
4
8
16
32
64
128
1234
IQ ADDRESSBAUD RATE
THE SWITCHES SHOWN BELOW ARE LOCATED
INSIDE THE BATTERY COMPARTMENT.
MODEL: IQ-PSI
S/N:
VER:
CAUTION: USE ALKALINE BATTERY ONLY!
ON
(DOWN)
H
38,400
19,200
9,600
4,800

Page 8
IQ–PSI IQ Pocket Serial Interface
3 Installation
The installation of an
IQ–PSI
can be divided into four
parts: setting the IQ address, connecting to a Crown
Bus loop, connecting to a host computer and connect-
ing auxiliary devices.
3.1 Setting the IQ Address
Since more than one
IQ–PSI
can be connected to the
same Crown Bus loop, it is necessary to give each unit a
unique IQ address. The IQ address is set with an 8-
segment DIP switch (SW3) located inside the battery
compartment.
Each segment of the DIP switch is, itself, a tiny switch
and has a numerical value which doubles as the seg-
ment number increases. For example, segment 1 has a
value of 1; segment 2 has a value of 2; segment 3 has a
value of 4; segment 4 has a value of 8; and so on.
The address is determined by adding the values of all
“ON” segments. In the example in Figure 3.2, segments
1, 3, 4 and 7 are on. Simply add the values to find the
address: 1+4+8+64=77.
Fig. 3.1 An IQ System with an IQ–PSI
A valid IQ address is any number from 1 to 250. Do not
use a value higher than 250 since they are reserved for
special use. Also, an address of “0” (zero) should not be
used. A convenient series of IQ address tables are in-
cluded in Section 6 at the end of this manual.
3.2 Connecting to the Crown Bus
The Crown Bus is a serial communication loop designed
to transmit IQ commands and data. As a communica-
tion standard it is independent of the wiring system
used. This flexibility is a great strength, enabling a
Crown Bus loop to be wired with either fiber optic
cabling or with inexpensive twisted-pair wire, whichever
the installation requires. A single
IQ System
can have
more than one Crown Bus loop. To function properly, a
Crown Bus loop must be unbroken.
The Crown Bus is implemented in the
IQ–PSI
as a 20
milliamp current loop operating at 38.4 K baud, so that it
can function with inexpensive twisted-pair wiring. If fiber
optic wiring is required, contact Crown’s Technical Sup-
port Group at 1-800-342-6939 for information on adding
the appropriate transceivers.
Here are some guidelines for twisted-pair wiring:
• When interference is a problem, use shielded
twisted-pair wire at least 26 AWG in size. The wire
should be of good quality and should have low
capacitance—30 pF/foot or less is good. The
shield serves two purposes: First, it helps prevent
the IQ data signal from transmitting to nearby au-
dio wiring. Second, it helps prevent outside RF
from interfering with the data signal. However, in
most cases interference is not a problem and,
since unshielded wire has lower capacitance, it is a
better choice.
• Minimize the total capacitance of a Crown Bus
loop. The total capacitance should be less than 30
nF. Allow approximately 60 pF for each IQ compo-
nent in a loop. This accounts for a slight signal
degradation which occurs as data signals pass
through a component.
• Add an IQ Repeater for very long loops—greater
than 1,000 feet (305 m)—or when required by high-
capacitance wire. Although we recommend adding
ENABLEDSPI
ENABLE
CH1 CH2
ODEP
POWER
OFF
IOC
SPI
ENABLE
CH1 CH2
ODEP
POWER
OFF
IOC
SPI
ENABLE
CH1 CH2
ODEP
POWER
OFF
IOC
SPI
CROWN BUS LOOP
RS232
AUX CROWN BUS10 VDC IN
1718 W. Mi shawaka Rd.
Elkhart, IN 46517 U.S.A.
ENABLE DSPI RS232
POWER
POCKET SERIAL INTERFACE
12345678
1
2
4
8
16
32
64
128
ON
(DOWN)
Fig. 3.2 IQ Address Switch (SW3) Values

Page 9
IQ–PSI IQ Pocket Serial Interface
4-pin DIN output connector from an IQ
P.I.P.
to the input
portion of the
IQ–PSI
.
Figure 3.6 shows how to connect the output portion of
Fig. 3.5 IQ P.I.P. Output Connection to the IQ–PSI Input
Fig. 3.4 IQ–PSI Output Connection to an IQ Mixer Input
Figure 3.4 shows how the output of the
IQ–PSI
is wired
to an IQ component with a similar connector.
Wiring the output of a similar IQ component back to the
input of the
IQ–PSI
is simply the reverse.
Note: Be-
cause the IQ–PSI does not have a ground connection,
the shield (if one is used) should be carried through to
the input of the next IQ component with a ground
3
/
16
in
(0.48 cm)
Fig. 3.3 A Screw-Terminal Plug
a repeater for loops longer than 1,000 feet, it is
often possible to go 2,000 feet (610 m) or more.
The most significant characteristic of the wire is its
capacitance. Lower capacitance allows longer
loops. Unshielded wire usually has less capaci-
tance.
• Never use the ground wire in a mic snake line. It
may sometimes be convenient to run Crown Bus
data signals to and from stage monitor amplifiers
along unused wire pairs in a mic snake. Do not use
the ground wire which is normally connected to pin
1 on an XLR connector, or data noise will be added
to the audio lines. Use only the signal lines which
normally connect to pins 2 and 3 of the XLRs.
Note: Because typical mic cables have high ca-
pacitance, the maximum possible Crown Bus loop
distance will be less.
Outside RF interference is seldom a problem for a
Crown Bus loop—especially if shielded twisted-pair wire
is used. However, there are extreme situations when
fiber optic wiring is recommended. For example, locat-
ing a Crown Bus loop next to an AM radio transmission
line may require fiber optic cabling. An extremely long
Crown Bus loop distance (greater than 10 miles) may
also require fiber optic cabling.
There are two different types of connectors used for
Crown Bus wiring. These include DIN connectors and
“Euro-style” screw terminal plugs. The
IQ–PSI
uses a 4-
pin male “Euro-style” connector that accepts a comple-
mentary screw-terminal plug like the one shown in
Figure 3.3. Most IQ mixers use these same plugs for
Crown Bus connection.
Fig. 3.6 IQ–PSI Output Connection to an IQ P.I.P. Input
Optional Shield
GND
Note: The
IQ–PSI
does not have a
GND connection.
OUT IN
+–+–
OUT IN
+–+–
Output (+)
Output (–)
Input (+)
Input (–)
Output (+)
Output (–)
Input (+)
Input (–)
IQ–PSI
Output IQ Mixer Input
OUT IN
+–+–
Output (+)
Output (–)
Input (+)
Input (–)
GND 1
Output (+) 2
Not used 3
Not used 4
IQ–PSI
InputIQ
P.I.P.
Output
23
41
Note: The
IQ–PSI
does not have a GND connection.
If a shield is used, it should be carried through to the
in
p
ut of the next IQ com
p
onent with a GND terminal.
Optional Shield
Note: The
IQ–PSI
does not have a
GND connection.
OUT IN
+–+–
1 Input (–)
2 Input (+)
3 GND
4 Not used
5 Not used
Output (+)
Output (–)
Input (+)
Input (–)
IQ–PSI
Output IQ
P.I.P.
Input
2
5
3
4
1
Optional Shield
connection.
The next two figures show how to wire components with
different connectors. Figure 3.5 shows how to connect a

Page 10
IQ–PSI IQ Pocket Serial Interface
the
IQ–PSI
connector to a 5-pin DIN input connector on
an IQ
P.I.P
.
The IQ components in a Crown Bus loop are wired
sequentially. The loop begins and ends with the
IQ–PSI
.
Fig. 3.8 RS232 Cable Wiring
Note: A 9-pin to 25-pin adapter will be needed if the host
computer you plan to use has a 25-pin connector in-
stead of a 9-pin connector.
3.3.1 Setting the Baud Rate
Before communication can take place between the
IQ–
1 2 3 4
SW4
38400
19200
9600
4800
BAUD
RATE
1234
ON
(DOWN)
Fig. 3.9 Baud Rate Settings
IQ–PSI
IQ Component
IQ Component
IQ Component
CROWN BUS LOOP
Fig. 3.7 Crown Bus Wiring “Loops” from the
Output to the Input of Each IQ Component
The output of one IQ component “loops” to the input of
the next and so on. This is shown below:
3.3 Connecting to a Host Computer
Most IBM
®
PCs have a serial or “com” port. This is
actually an RS232 serial port. Because RS232 uses
unbalanced signal wiring, it cannot be used for dis-
tances over 50 feet (15.2 m).
Not used
Receive Data (RXD)
Transmit Data (TXD)
Signal Ground (GND)
Request to Send (RTS)
Clear to Send (CTS)
2
3
5
7
8
3
2
5
8
7
Not used
Transmit Data (TXD)
Receive Data (RXD)
Signal Ground (GND)
Clear to Send (CTS)
Request to Send (RTS)
PIN PIN
Connectors are numbered as they appear from the outside.
(1, 4, 6, 9)
PC Serial Port
51
96
IQ–PSI
RS232
51
96
The following illustration shows how the RS232 cable of
the
IQ–PSI
is wired:
PSI
and a host computer, the baud rate must be set with
the 4-segment DIP switch (SW4) located inside the
battery compartment. (See Figure 3.9 below.) The high-
est baud rate possible should be used (typically
38,400).
Caution: Turn off the
IQ–PSI
before changing the
baud rate setting.
Important: The baud rate of the
IQ–PSI
and the host
computer must be the same. Any mismatch will
prevent communication from taking place.
The communication parameters of the host computer
are set by the IQ software. Please refer to the appropri-
ate software manual for details.
Here are some important guidelines when configuring
serial communication:
• Use the same communication standard at each
end. The
IQ–PSI
supports only the RS232 stan-
dard. Other standards such as RS422 should
not be used by the host computer. (Refer also to
the appropriate IQ software manual.)
• Set the
IQ–PSI
and the host computer to the
same baud rate.
• The
IQ–PSI
baud rate can be set as high as 38.4
K (38,400) baud. Use the highest baud rate pos-
sible, but be aware that the communication cir-
cuitry (UART) in some PCs cannot function over
9600 baud. We recommend that the host com-
puter have a serial interface with a 16550-com-

Page 11
IQ–PSI IQ Pocket Serial Interface
models this could be +8.5 to +15
VDC, depending onVDC, depending on
VDC, depending onVDC, depending on
VDC, depending on
the specific power adapter provided by the user.the specific power adapter provided by the user.
the specific power adapter provided by the user.the specific power adapter provided by the user.
the specific power adapter provided by the user. A
total of 10 milliamps of current is available. An internal
1.0 K ohm resistor protects against shorts.
Fig. 3.10 The Internal AUX Port Circuit
patible UART.
• Do not use twisted-pair wire for RS232 cables
because the unbalanced wiring of RS232 is sus-
ceptible to crosstalk. Instead use an untwisted
cable or ribbon cable.
• If the host computer fails to communicate with
the
IQ–PSI
and the baud rates are set the same,
try reducing the baud rate of both the
IQ–PSI
and the computer.
• If communication problems persist, check the
serial cable for damage.
• For further assistance, call Crown’s Technical
Support Group at 1-800-342-6939.
3.4 Connecting Auxiliary Devices
The auxiliary feature connector (AUX port) provides the
means to interface the
IQ System
to non-IQ compo-
nents. It can be used to turn another device on/off, send
a signal to another component and receive a signal from
another component.
AUX
CONNECTOR
GND
INTERNAL AUXILIARY
CIRCUITRY
INPUT
OUTPUT
1 K ohm
2 K ohm
IN OUT
TO
MICROPROCESSOR
1 K ohm
9 VDC
FROM
MICROPROCESSOR
The AUX connector is a 3-pin male “Euro-style” connec-
tor that accepts a screw-terminal plug (provided). The
first and last pins are used to send a signal and first and
second pins are used to receive a signal
.
The circuit
diagram in Figure 3.10 shows the internal AUX circuit.
3.4.1 AUX Output
When the auxiliary feature is turned on by the
IQ System
software, +10 VDC is supplied across the ground and
output pins for domestic units using an external power
adapter (+9 VDC if battery power is used). For export
AUX
CONNECTOR
GND
+8.5 to 15 V
Not Used
AUXILIARY
EQUIPMENT
110 VAC
SOLID
STATE
RELAY
(D 8063-6)
+–
Note: The actual output
voltage of the AUX con-
nector will depend on
the power source of the
IQ–PSI
.
Fig. 3.11 A Sample AUX Output Circuit
There are many possible uses for the AUX output, lim-
ited only by imagination. For example, it can be used to
turn on auxiliary cooling fans. To do this the AUX con-
nector would be used to close a relay. The relay would
then turn the fans on or off. This is shown in Figure 3.11
below.
Note: A Crown part number is provided in the above
illustration for a suitable solid-state relay (D 8063-6). Con-
tact your local Crown (or Amcron
®
) representative or the
Crown factory Parts Department (219-294-8200) to order
this relay.
By monitoring the operating condition of amplifiers with
the
IQ System
software, the need for additional cooling
will be apparent. The same software could then be used
to turn on the appropriate AUX connector. (For more in-
formation about turning the auxiliary feature on/off, con-
sult the IQ software
User’s Manual
.)
In addition to the preceding examples, the AUX ports of
more than one IQ component can be used to send bi-
nary codes to auxiliary equipment. For example, eight
AUX ports can be used to send 8-bit binary codes to
external equipment.
3.4.2 AUX Input
Depending on the IQ software being used, the AUX con-
nector can sense the presence of an input signal across
the ground and input pins. A 5 to 30 VDC signal at the
input will be interpreted as a logic “high” and will be
communicated to the Crown Bus where a host computer
can act upon it. A signal less than 5 VDC is interpreted
as a logic “low.”
Note: A negative signal is interpreted as
a logic low because the signal is internally clipped to
protect the internal circuitry.

Page 12
IQ–PSI IQ Pocket Serial Interface
4 Technical Information
The purpose of the
IQ–PSI
is to provide a means for
the
IQ System
host computer to communicate with the
IQ components on a Crown Bus loop. The pocket
serial interface allows for different baud rates from the
computer and uses the RS232 serial data standard.
(The baud rate can be set from 4,800 to 38,400.)
The
IQ-PSI
functions as an interface when an active
computer is connected to the RS232 port. If a
computer is not present (or the computer is not on),
the
IQ-PSI
will revert to the component mode.
Figure 4.1 shows a block diagram of the
IQ–PSI
. The
microprocessor of the interface communicates with
that of an IQ component over the 38,400 baud lines
originating from its own internal UART. It
communicates with a host computer via an external
UART.
Data from the host computer arrives at the serial
buffer at the user-selectable baud rate. The
IQ-PSI
receives the message and retransmits it, if necessary,
routing it to the appropriate component. If the
message received is intended for the IQ-PSI, the unit
takes appropriate action and responds with an
acknowledgment to the host.
Response and echo messages received from the IQ
loop are gathered at the loop input and sent out the
RS232 transmitter back to the host PC at the user-
determined baud rate.
The interface is also equipped with an auto reset
feature, generated by the microprocessor, which
provides both a reliable power-on reset and an
automatic “warm” reset in case control is lost due to a
noise pulse, etc.
An external +10 VDC power adapter is provided for
connection to a 120 VAC mains (North America only).
The unit can also operate for up to 1 hour with an
alkaline 9-volt battery.
RELAYSOPTOCOUPLER
MICROPROCESSOR
BUFFER
BUFFER
BAUD RATE
GENERATOR
IQ ADDRESS
SWITCH
CROWN BUS
AUX
AUX
BAUD RATE
GENERATOR
BAUD RATE
GENERATOR
RS-232
Fig. 4.1 IQ–PSI Circuit Block Diagram

Page 13
IQ–PSI IQ Pocket Serial Interface
5 Specifications
General
Internal Controls: A 4-segment DIP switch is used to
configure the baud rate for communication with the
host computer. An 8-segment DIP switch is used to
set the IQ address of the interface. Both DIP switches
are located inside the battery compartment.
External Controls: A two-position, Power On/Off
switch.
Connectors: Crown Bus Input/Output: One 4-pin
male “Euro-style” connector and a mating screw-
terminal plug. AUX Port: One 3-pin male “Euro-style”
connector and a mating screw-terminal plug.
Computer: One female, 9-pin “D shell” connector
attached to the unit via a 16-inch (41-cm) serial cable.
External +10 VDC Power Input: One male coaxial DC
power connector.
Indicators: A green Enable indicator is provided to
show that the unit is turned on and receiving power. A
yellow DSPI (Data Signal Presence Indicator) flashes
when a valid IQ command is sent or received from the
Crown Bus. It also provides a power-on battery
indicator and can be forced to stay on to facilitate
rapid troubleshooting of Crown Bus wiring. Both
indicators are located on the top side of the unit.
Power Supply: An external power adapter is provided
to transform standard 120 VAC, 60 Hz power to +10
VDC for the unit. In addition, the unit can be powered
for about 1 hour with a 9-volt alkaline battery.
Finish: Molded black high-impact styrene.
Crown Bus Data Communication
Data Rate: 38.4 K baud.
Data Format: Serial, binary, asynchronous; 1 start bit;
1 stop bit; 8 data bits; no parity.
Interface Type: Optically isolated 20 milliamp serial
loop.
Operation: Half duplex.
Intelligence: 8-bit microprocessor.
Transmission Distance: Variable from 200 to 3,000
feet (61 to 914 m), depending upon wire capacitance
and baud rate. Typically 1,000 feet (305 m) using
shielded twisted-pair wire, #26 AWG or larger. Can be
extended with an IQ Repeater.
Host Computer Data Communication
Data Rate: 4800, 9600, 19200, or 38400 baud.
Data Format: Serial, binary, asynchronous; 1 start bit;
1 stop bit; 8 data bits; no parity.
Interface Type: RS232.
Operation: Half duplex.
Intelligence: 8 bit microprocessor.
Transmission Distance: 50 feet (15.2 m) maximum.

Page 14
IQ–PSI IQ Pocket Serial Interface
6 IQ Address Tables
This section contains lookup tables for every valid IQ
address. The valid address are 1 to 250. Do not use an
address number higher than 250! Addresses above 250
are reserved for special system use. And do not use
address “0” (zero).
Remember: No two IQ components of the same type
which are connected to the same Crown Bus can have
the same address.
To use the IQ address tables, simply find the address
you want and set the IQ address switch of the
IQ–PSI
as shown. See Section 3.1 also.
Fig. 6.1 IQ Address Switch (SW3) Settings from 0 to 125
OFF
ON
OFF
ON
OFF
ON
OFF
ON
OFF
ON
OFF
ON
OFF
ON
OFF
ON
OFF
ON
OFF
ON
OFF
ON
OFF
ON
OFF
ON
OFF
ON
OFF
ON
OFF
ON
OFF
ON
OFF
ON
OFF
ON
OFF
ON
OFF
ON
1
OFF
OFF
ON
ON
OFF
OFF
ON
ON
OFF
OFF
ON
ON
OFF
OFF
ON
ON
OFF
OFF
ON
ON
OFF
OFF
ON
ON
OFF
OFF
ON
ON
OFF
OFF
ON
ON
OFF
OFF
ON
ON
OFF
OFF
ON
ON
OFF
OFF
2
OFF
OFF
OFF
OFF
ON
ON
ON
ON
OFF
OFF
OFF
OFF
ON
ON
ON
ON
OFF
OFF
OFF
OFF
ON
ON
ON
ON
OFF
OFF
OFF
OFF
ON
ON
ON
ON
OFF
OFF
OFF
OFF
ON
ON
ON
ON
OFF
OFF
3
OFF
OFF
OFF
OFF
OFF
OFF
OFF
OFF
ON
ON
ON
ON
ON
ON
ON
ON
OFF
OFF
OFF
OFF
OFF
OFF
OFF
OFF
ON
ON
ON
ON
ON
ON
ON
ON
OFF
OFF
OFF
OFF
OFF
OFF
OFF
OFF
ON
ON
4
OFF
OFF
OFF
OFF
OFF
OFF
OFF
OFF
OFF
OFF
OFF
OFF
OFF
OFF
OFF
OFF
ON
ON
ON
ON
ON
ON
ON
ON
ON
ON
ON
ON
ON
ON
ON
ON
OFF
OFF
OFF
OFF
OFF
OFF
OFF
OFF
OFF
OFF
5
OFF
OFF
OFF
OFF
OFF
OFF
OFF
OFF
OFF
OFF
OFF
OFF
OFF
OFF
OFF
OFF
OFF
OFF
OFF
OFF
OFF
OFF
OFF
OFF
OFF
OFF
OFF
OFF
OFF
OFF
OFF
OFF
ON
ON
ON
ON
ON
ON
ON
ON
ON
ON
6
OFF
OFF
OFF
OFF
OFF
OFF
OFF
OFF
OFF
OFF
OFF
OFF
OFF
OFF
OFF
OFF
OFF
OFF
OFF
OFF
OFF
OFF
OFF
OFF
OFF
OFF
OFF
OFF
OFF
OFF
OFF
OFF
OFF
OFF
OFF
OFF
OFF
OFF
OFF
OFF
OFF
OFF
7
OFF
OFF
OFF
OFF
OFF
OFF
OFF
OFF
OFF
OFF
OFF
OFF
OFF
OFF
OFF
OFF
OFF
OFF
OFF
OFF
OFF
OFF
OFF
OFF
OFF
OFF
OFF
OFF
OFF
OFF
OFF
OFF
OFF
OFF
OFF
OFF
OFF
OFF
OFF
OFF
OFF
OFF
8
IQ Address Switch
0
1
2
3
4
5
6
7
8
9
10
11
12
13
14
15
16
17
18
19
20
21
22
23
24
25
26
27
28
29
30
31
32
33
34
35
36
37
38
39
40
41
Address
IQ
OFF
ON
OFF
ON
OFF
ON
OFF
ON
OFF
ON
OFF
ON
OFF
ON
OFF
ON
OFF
ON
OFF
ON
OFF
ON
OFF
ON
OFF
ON
OFF
ON
OFF
ON
OFF
ON
OFF
ON
OFF
ON
OFF
ON
OFF
ON
OFF
ON
1
ON
ON
OFF
OFF
ON
ON
OFF
OFF
ON
ON
OFF
OFF
ON
ON
OFF
OFF
ON
ON
OFF
OFF
ON
ON
OFF
OFF
ON
ON
OFF
OFF
ON
ON
OFF
OFF
ON
ON
OFF
OFF
ON
ON
OFF
OFF
ON
ON
2
OFF
OFF
ON
ON
ON
ON
OFF
OFF
OFF
OFF
ON
ON
ON
ON
OFF
OFF
OFF
OFF
ON
ON
ON
ON
OFF
OFF
OFF
OFF
ON
ON
ON
ON
OFF
OFF
OFF
OFF
ON
ON
ON
ON
OFF
OFF
OFF
OFF
3
ON
ON
ON
ON
ON
ON
OFF
OFF
OFF
OFF
OFF
OFF
OFF
OFF
ON
ON
ON
ON
ON
ON
ON
ON
OFF
OFF
OFF
OFF
OFF
OFF
OFF
OFF
ON
ON
ON
ON
ON
ON
ON
ON
OFF
OFF
OFF
OFF
4
OFF
OFF
OFF
OFF
OFF
OFF
ON
ON
ON
ON
ON
ON
ON
ON
ON
ON
ON
ON
ON
ON
ON
ON
OFF
OFF
OFF
OFF
OFF
OFF
OFF
OFF
OFF
OFF
OFF
OFF
OFF
OFF
OFF
OFF
ON
ON
ON
ON
5
ON
ON
ON
ON
ON
ON
ON
ON
ON
ON
ON
ON
ON
ON
ON
ON
ON
ON
ON
ON
ON
ON
OFF
OFF
OFF
OFF
OFF
OFF
OFF
OFF
OFF
OFF
OFF
OFF
OFF
OFF
OFF
OFF
OFF
OFF
OFF
OFF
6
OFF
OFF
OFF
OFF
OFF
OFF
OFF
OFF
OFF
OFF
OFF
OFF
OFF
OFF
OFF
OFF
OFF
OFF
OFF
OFF
OFF
OFF
ON
ON
ON
ON
ON
ON
ON
ON
ON
ON
ON
ON
ON
ON
ON
ON
ON
ON
ON
ON
7
OFF
OFF
OFF
OFF
OFF
OFF
OFF
OFF
OFF
OFF
OFF
OFF
OFF
OFF
OFF
OFF
OFF
OFF
OFF
OFF
OFF
OFF
OFF
OFF
OFF
OFF
OFF
OFF
OFF
OFF
OFF
OFF
OFF
OFF
OFF
OFF
OFF
OFF
OFF
OFF
OFF
OFF
8
IQ Address Switch
42
43
44
45
46
47
48
49
50
51
52
53
54
55
56
57
58
59
60
61
62
63
64
65
66
67
68
69
70
71
72
73
74
75
76
77
78
79
80
81
82
83
Address
IQ
OFF
ON
OFF
ON
OFF
ON
OFF
ON
OFF
ON
OFF
ON
OFF
ON
OFF
ON
OFF
ON
OFF
ON
OFF
ON
OFF
ON
OFF
ON
OFF
ON
OFF
ON
OFF
ON
OFF
ON
OFF
ON
OFF
ON
OFF
ON
OFF
ON
1
OFF
OFF
ON
ON
OFF
OFF
ON
ON
OFF
OFF
ON
ON
OFF
OFF
ON
ON
OFF
OFF
ON
ON
OFF
OFF
ON
ON
OFF
OFF
ON
ON
OFF
OFF
ON
ON
OFF
OFF
ON
ON
OFF
OFF
ON
ON
OFF
OFF
2
ON
ON
ON
ON
OFF
OFF
OFF
OFF
ON
ON
ON
ON
OFF
OFF
OFF
OFF
ON
ON
ON
ON
OFF
OFF
OFF
OFF
ON
ON
ON
ON
OFF
OFF
OFF
OFF
ON
ON
ON
ON
OFF
OFF
OFF
OFF
ON
ON
3
OFF
OFF
OFF
OFF
ON
ON
ON
ON
ON
ON
ON
ON
OFF
OFF
OFF
OFF
OFF
OFF
OFF
OFF
ON
ON
ON
ON
ON
ON
ON
ON
OFF
OFF
OFF
OFF
OFF
OFF
OFF
OFF
ON
ON
ON
ON
ON
ON
4
ON
ON
ON
ON
ON
ON
ON
ON
ON
ON
ON
ON
OFF
OFF
OFF
OFF
OFF
OFF
OFF
OFF
OFF
OFF
OFF
OFF
OFF
OFF
OFF
OFF
ON
ON
ON
ON
ON
ON
ON
ON
ON
ON
ON
ON
ON
ON
5
OFF
OFF
OFF
OFF
OFF
OFF
OFF
OFF
OFF
OFF
OFF
OFF
ON
ON
ON
ON
ON
ON
ON
ON
ON
ON
ON
ON
ON
ON
ON
ON
ON
ON
ON
ON
ON
ON
ON
ON
ON
ON
ON
ON
ON
ON
6
ON
ON
ON
ON
ON
ON
ON
ON
ON
ON
ON
ON
ON
ON
ON
ON
ON
ON
ON
ON
ON
ON
ON
ON
ON
ON
ON
ON
ON
ON
ON
ON
ON
ON
ON
ON
ON
ON
ON
ON
ON
ON
7
OFF
OFF
OFF
OFF
OFF
OFF
OFF
OFF
OFF
OFF
OFF
OFF
OFF
OFF
OFF
OFF
OFF
OFF
OFF
OFF
OFF
OFF
OFF
OFF
OFF
OFF
OFF
OFF
OFF
OFF
OFF
OFF
OFF
OFF
OFF
OFF
OFF
OFF
OFF
OFF
OFF
OFF
8
IQ Address Switch
84
85
86
87
88
89
90
91
92
93
94
95
96
97
98
99
100
101
102
103
104
105
106
107
108
109
110
111
112
113
114
115
116
117
118
119
120
121
122
123
124
125
Address
IQ

Page 15
IQ–PSI IQ Pocket Serial Interface
OFF
ON
OFF
ON
OFF
ON
OFF
ON
OFF
ON
OFF
ON
OFF
ON
OFF
ON
OFF
ON
OFF
ON
OFF
ON
OFF
ON
OFF
ON
OFF
ON
OFF
ON
OFF
ON
OFF
ON
OFF
ON
OFF
ON
OFF
ON
OFF
ON
1
ON
ON
OFF
OFF
ON
ON
OFF
OFF
ON
ON
OFF
OFF
ON
ON
OFF
OFF
ON
ON
OFF
OFF
ON
ON
OFF
OFF
ON
ON
OFF
OFF
ON
ON
OFF
OFF
ON
ON
OFF
OFF
ON
ON
OFF
OFF
ON
ON
2
ON
ON
OFF
OFF
OFF
OFF
ON
ON
ON
ON
OFF
OFF
OFF
OFF
ON
ON
ON
ON
OFF
OFF
OFF
OFF
ON
ON
ON
ON
OFF
OFF
OFF
OFF
ON
ON
ON
ON
OFF
OFF
OFF
OFF
ON
ON
ON
ON
3
ON
ON
OFF
OFF
OFF
OFF
OFF
OFF
OFF
OFF
ON
ON
ON
ON
ON
ON
ON
ON
OFF
OFF
OFF
OFF
OFF
OFF
OFF
OFF
ON
ON
ON
ON
ON
ON
ON
ON
OFF
OFF
OFF
OFF
OFF
OFF
OFF
OFF
4
ON
ON
OFF
OFF
OFF
OFF
OFF
OFF
OFF
OFF
OFF
OFF
OFF
OFF
OFF
OFF
OFF
OFF
ON
ON
ON
ON
ON
ON
ON
ON
ON
ON
ON
ON
ON
ON
ON
ON
OFF
OFF
OFF
OFF
OFF
OFF
OFF
OFF
5
ON
ON
OFF
OFF
OFF
OFF
OFF
OFF
OFF
OFF
OFF
OFF
OFF
OFF
OFF
OFF
OFF
OFF
OFF
OFF
OFF
OFF
OFF
OFF
OFF
OFF
OFF
OFF
OFF
OFF
OFF
OFF
OFF
OFF
ON
ON
ON
ON
ON
ON
ON
ON
6
ON
ON
OFF
OFF
OFF
OFF
OFF
OFF
OFF
OFF
OFF
OFF
OFF
OFF
OFF
OFF
OFF
OFF
OFF
OFF
OFF
OFF
OFF
OFF
OFF
OFF
OFF
OFF
OFF
OFF
OFF
OFF
OFF
OFF
OFF
OFF
OFF
OFF
OFF
OFF
OFF
OFF
7
OFF
OFF
ON
ON
ON
ON
ON
ON
ON
ON
ON
ON
ON
ON
ON
ON
ON
ON
ON
ON
ON
ON
ON
ON
ON
ON
ON
ON
ON
ON
ON
ON
ON
ON
ON
ON
ON
ON
ON
ON
ON
ON
8
IQ Address Switch
126
127
128
129
130
131
132
133
134
135
136
137
138
139
140
141
142
143
144
145
146
147
148
149
150
151
152
153
154
155
156
157
158
159
160
161
162
163
164
165
166
167
Address
IQ
OFF
ON
OFF
ON
OFF
ON
OFF
ON
OFF
ON
OFF
ON
OFF
ON
OFF
ON
OFF
ON
OFF
ON
OFF
ON
OFF
ON
OFF
ON
OFF
ON
OFF
ON
OFF
ON
OFF
ON
OFF
ON
OFF
ON
OFF
ON
OFF
ON
1
OFF
OFF
ON
ON
OFF
OFF
ON
ON
OFF
OFF
ON
ON
OFF
OFF
ON
ON
OFF
OFF
ON
ON
OFF
OFF
ON
ON
OFF
OFF
ON
ON
OFF
OFF
ON
ON
OFF
OFF
ON
ON
OFF
OFF
ON
ON
OFF
OFF
2
OFF
OFF
OFF
OFF
ON
ON
ON
ON
OFF
OFF
OFF
OFF
ON
ON
ON
ON
OFF
OFF
OFF
OFF
ON
ON
ON
ON
OFF
OFF
OFF
OFF
ON
ON
ON
ON
OFF
OFF
OFF
OFF
ON
ON
ON
ON
OFF
OFF
3
ON
ON
ON
ON
ON
ON
ON
ON
OFF
OFF
OFF
OFF
OFF
OFF
OFF
OFF
ON
ON
ON
ON
ON
ON
ON
ON
OFF
OFF
OFF
OFF
OFF
OFF
OFF
OFF
ON
ON
ON
ON
ON
ON
ON
ON
OFF
OFF
4
OFF
OFF
OFF
OFF
OFF
OFF
OFF
OFF
ON
ON
ON
ON
ON
ON
ON
ON
ON
ON
ON
ON
ON
ON
ON
ON
OFF
OFF
OFF
OFF
OFF
OFF
OFF
OFF
OFF
OFF
OFF
OFF
OFF
OFF
OFF
OFF
ON
ON
5
ON
ON
ON
ON
ON
ON
ON
ON
ON
ON
ON
ON
ON
ON
ON
ON
ON
ON
ON
ON
ON
ON
ON
ON
OFF
OFF
OFF
OFF
OFF
OFF
OFF
OFF
OFF
OFF
OFF
OFF
OFF
OFF
OFF
OFF
OFF
OFF
6
OFF
OFF
OFF
OFF
OFF
OFF
OFF
OFF
OFF
OFF
OFF
OFF
OFF
OFF
OFF
OFF
OFF
OFF
OFF
OFF
OFF
OFF
OFF
OFF
ON
ON
ON
ON
ON
ON
ON
ON
ON
ON
ON
ON
ON
ON
ON
ON
ON
ON
7
ON
ON
ON
ON
ON
ON
ON
ON
ON
ON
ON
ON
ON
ON
ON
ON
ON
ON
ON
ON
ON
ON
ON
ON
ON
ON
ON
ON
ON
ON
ON
ON
ON
ON
ON
ON
ON
ON
ON
ON
ON
ON
8
IQ Address Switch
168
169
170
171
172
173
174
175
176
177
178
179
180
181
182
183
184
185
186
187
188
189
190
191
192
193
194
195
196
197
198
199
200
201
202
203
204
205
206
207
208
209
Address
IQ
OFF
ON
OFF
ON
OFF
ON
OFF
ON
OFF
ON
OFF
ON
OFF
ON
OFF
ON
OFF
ON
OFF
ON
OFF
ON
OFF
ON
OFF
ON
OFF
ON
OFF
ON
OFF
ON
OFF
ON
OFF
ON
OFF
ON
OFF
ON
OFF
1
ON
ON
OFF
OFF
ON
ON
OFF
OFF
ON
ON
OFF
OFF
ON
ON
OFF
OFF
ON
ON
OFF
OFF
ON
ON
OFF
OFF
ON
ON
OFF
OFF
ON
ON
OFF
OFF
ON
ON
OFF
OFF
ON
ON
OFF
OFF
ON
2
OFF
OFF
ON
ON
ON
ON
OFF
OFF
OFF
OFF
ON
ON
ON
ON
OFF
OFF
OFF
OFF
ON
ON
ON
ON
OFF
OFF
OFF
OFF
ON
ON
ON
ON
OFF
OFF
OFF
OFF
ON
ON
ON
ON
OFF
OFF
OFF
3
OFF
OFF
OFF
OFF
OFF
OFF
ON
ON
ON
ON
ON
ON
ON
ON
OFF
OFF
OFF
OFF
OFF
OFF
OFF
OFF
ON
ON
ON
ON
ON
ON
ON
ON
OFF
OFF
OFF
OFF
OFF
OFF
OFF
OFF
ON
ON
ON
4
ON
ON
ON
ON
ON
ON
ON
ON
ON
ON
ON
ON
ON
ON
OFF
OFF
OFF
OFF
OFF
OFF
OFF
OFF
OFF
OFF
OFF
OFF
OFF
OFF
OFF
OFF
ON
ON
ON
ON
ON
ON
ON
ON
ON
ON
ON
5
OFF
OFF
OFF
OFF
OFF
OFF
OFF
OFF
OFF
OFF
OFF
OFF
OFF
OFF
ON
ON
ON
ON
ON
ON
ON
ON
ON
ON
ON
ON
ON
ON
ON
ON
ON
ON
ON
ON
ON
ON
ON
ON
ON
ON
ON
6
ON
ON
ON
ON
ON
ON
ON
ON
ON
ON
ON
ON
ON
ON
ON
ON
ON
ON
ON
ON
ON
ON
ON
ON
ON
ON
ON
ON
ON
ON
ON
ON
ON
ON
ON
ON
ON
ON
ON
ON
ON
7
ON
ON
ON
ON
ON
ON
ON
ON
ON
ON
ON
ON
ON
ON
ON
ON
ON
ON
ON
ON
ON
ON
ON
ON
ON
ON
ON
ON
ON
ON
ON
ON
ON
ON
ON
ON
ON
ON
ON
ON
ON
8
IQ Address Switch
210
211
212
213
214
215
216
217
218
219
220
221
222
223
224
225
226
227
228
229
230
231
232
233
234
235
236
237
238
239
240
241
242
243
244
245
246
247
248
249
250
Address
IQ
Fig. 6.2 IQ Address Switch (SW3) Settings from 126 to 250

Page 16
IQ–PSI IQ Pocket Serial Interface
7 Service
This unit has very sophisticated circuitry which should
only be serviced by a fully trained technician.
7.1 Worldwide Service
Service may be obtained from an authorized service
center. (Contact your local Crown/Amcron
representative or our office for a list of authorized
service centers.) To obtain service, simply present the
bill of sale as proof of purchase along with the
defective unit to an authorized service center. They
will handle the necessary paperwork and repair.
Remember to transport your unit in the original factory
pack.
7.2 North American Service
Service may be obtained in one of two ways: from an
authorized service center or from the factory. You may
choose either. It is important that you have your copy
of the bill of sale as your proof of purchase.
7.2.1 Service at a North American Service Center
This method usually saves the most time and effort.
Simply present your bill of sale along with the defective
unit to an authorized service center to obtain service.
They will handle the necessary paperwork and repair.
Remember to transport the unit in the original factory
pack. A list of authorized service centers in your area
can be obtained from our Technical Support Group.
7.2.2 Factory Service
To obtain factory service, fill out the service
information page that follows and send it along with
your proof of purchase and the defective unit to the
Crown factory. For warranty service, we will pay for
ground shipping both ways in the United States after
receiving copies of the shipping receipts. Shipments
should be sent “UPS ground.” (If the unit is under
warranty, you may send it C.O.D. for the cost of freight
via UPS ground.) The factory will return it via UPS
ground. Please contact us if other arrangements are
required.
Always use the
original factory pack
to transport the unit.
Factory Service Shipping Instructions:
1. When sending a Crown product to the factory
for service, be sure to fill out the service infor-
mation form that follows and enclose it inside
your unit’s shipping pack. Do not send the ser-
vice information form separately.
2. To ensure the safe transportation of your unit to
the factory, ship it in an original factory packing
container. If you don’t have one, call or write
Crown’s Parts Department. With the exception
of polyurethane or wooden crates, any other
packing material will not be sufficient to with-
stand the stress of shipping. Do not use loose,
small size packing materials.
3. Do not ship the unit in any kind of cabinet (wood
or metal). Ignoring this warning may result in
extensive damage to the unit and the cabinet.
Accessories are not needed—do not send the
instruction manual, cables and other hardware.
If you have any questions, please call or write the
Crown Technical Support Group.
Crown Audio Division
Technical Support / Factory Service
Plant 2 SW, 1718 W. Mishawaka Rd., Elkhart,
Indiana 46517 U.S.A.
Telephone:
219-294-8200
800-342-6939 (North America,
Puerto Rico, and Virgin Islands only)
Fax:
219-294-8124 (Factory Service)
219-294-8301 (Tech Support)
Fax Back:
219-293-9200 (North America only)
800-294-4094 (North America only)
219-294-8100 (International)
Internet:
http://www.crownintl.com

Page 17
IQ–PSI IQ Pocket Serial Interface
Detach and send with unit.
Crown Factory Service Information
Shipping Address: Crown International, Inc., Factory Service, Plant 2 SW, 1718 W. Mishawaka Rd., Elkhart, IN 46517
Phone: 1-800-342-6939 or 1-219-294-8200 Fax: 1-219-294-8124
Owner’s Name:_________________________________________________________________________
Shipping Address:______________________________________________________________________
Phone Number: _____________________________ Fax Number:_____________________________
Model: ________________________ Serial Number: _____________ Purchase Date: ___________
NATURE OF PROBLEM
(Be sure to describe the conditions that existed when the problem occurred and what attempts were made to correct it.)
______________________________________________________________________________
______________________________________________________________________________
______________________________________________________________________________
______________________________________________________________________________
______________________________________________________________________________
______________________________________________________________________________
______________________________________________________________________________
______________________________________________________________________________
______________________________________________________________________________
______________________________________________________________________________
______________________________________________________________________________
______________________________________________________________________________
______________________________________________________________________________
______________________________________________________________________________
______________________________________________________________________________
Other equipment in your system:_________________________________________________________
______________________________________________________________________________
______________________________________________________________________________
______________________________________________________________________________
______________________________________________________________________________
______________________________________________________________________________
______________________________________________________________________________
If warranty has expired, payment will be:
❏ ❏
❏ ❏
❏ Cash/Check
❏❏
❏❏
❏ VISA
❏❏
❏❏
❏ MasterCard
❏❏
❏❏
❏ C.O.D.
Card Number:___________________________ Exp. Date:_______ Signature:____________________________
ENCLOSE THIS PORTION WITH THE UNIT. DO NOT MAIL SEPARATELY.
/