Product Information
Product Visual - Black Product Visual - White Dimensions
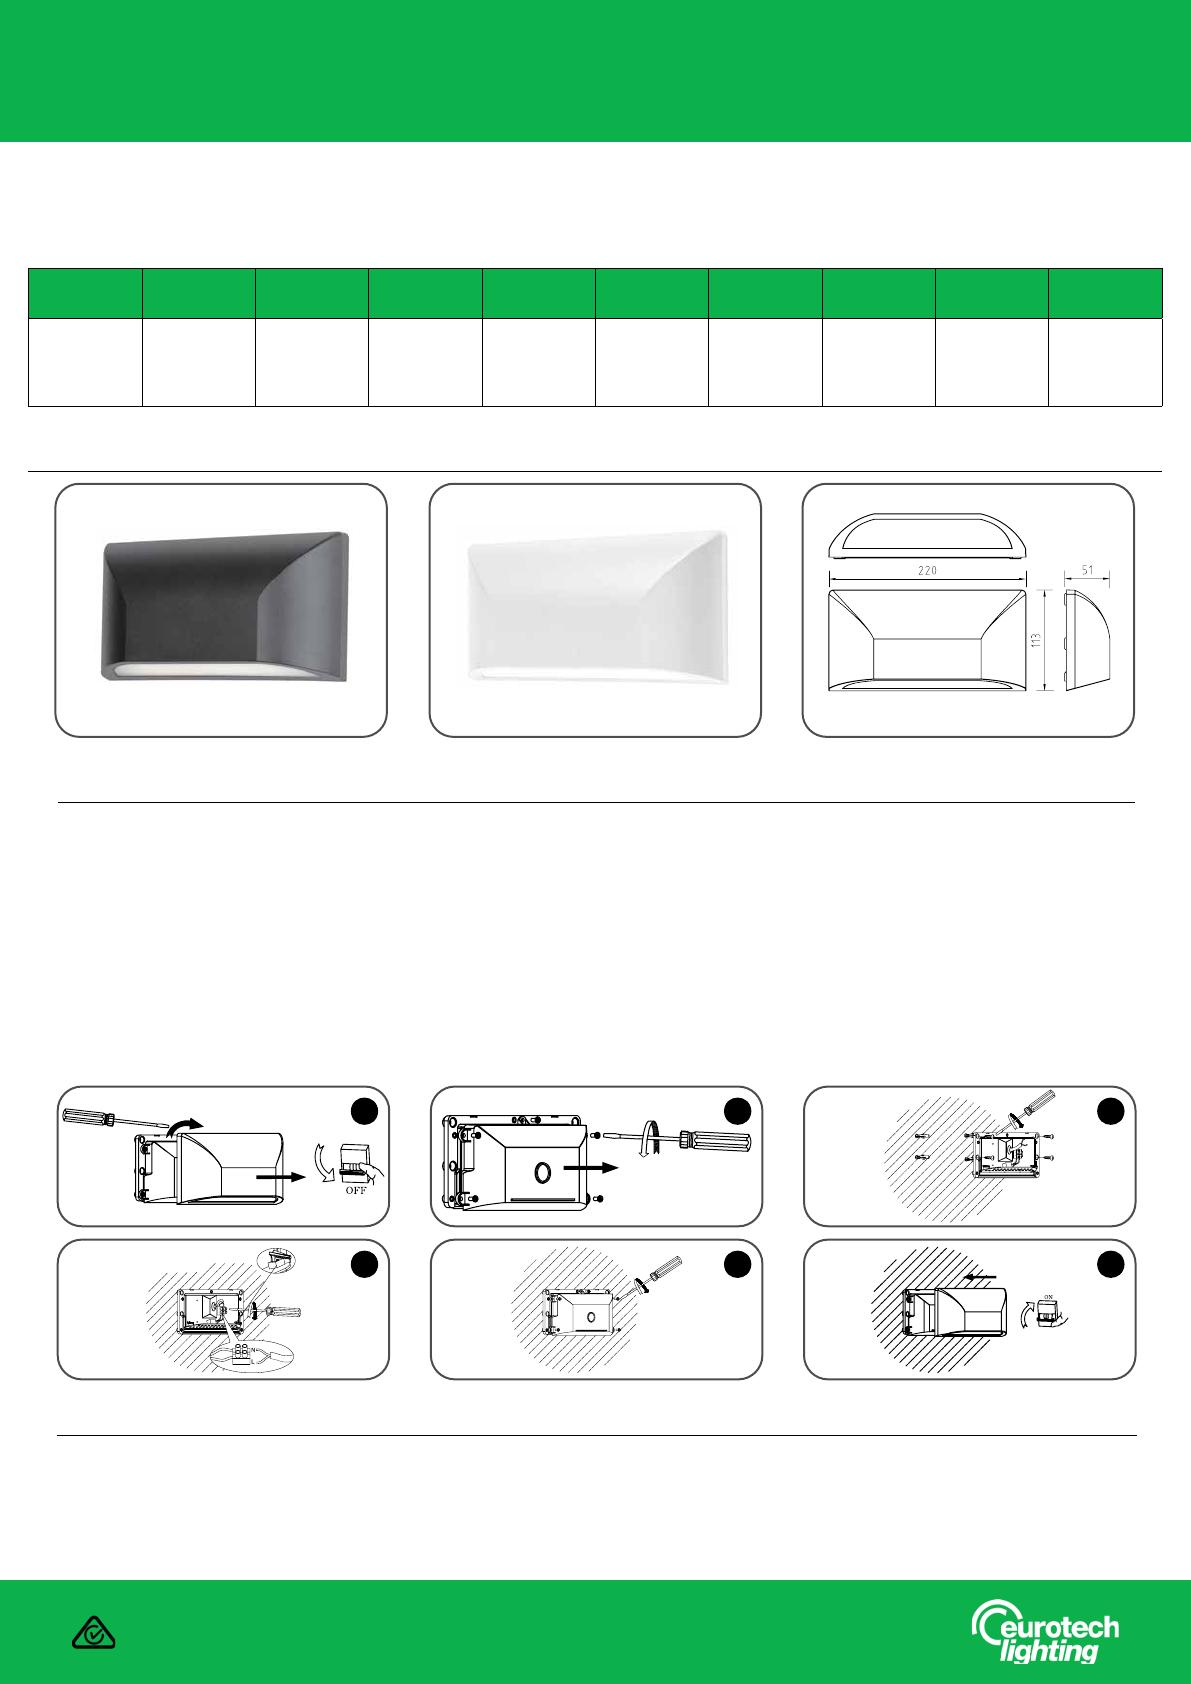
Arc - One Way, Wall Light
Model: LSO2202
Installation Instructions
All installations must be carried out by a qualified electrician following local regulations. Make sure that the power is switched off before
installation. Please read and follow the ‘Installation instructions’ and ‘Safety instructions’ sections carefully before commencing installation.
Installation of this model can change from time to time please read instructions every time before installation. For detailed specification, please go to our website eurotechlighting.co.nz
Code: Colour: Dimensions
(mm):
Double
Insulated: IP Rating: Kelvins: Lumens: Material: Voltage: Wattage:
LSO2202CCT Black & White
cover
220L x 113W
x 51D Yes IP65 CCT= 3000K /
4000K / 6000K
340lm / 370lm
/ 360lm
UV resistant,
anti-corrosion.
ABS + PC body
& diffuser
230V 6W
For detailed specification, please go to our website eurotechlighting.co.nz
Saftey Instructions
Read these instructions carefully before commencing installation.
1. The light source contained in this luminaire shall only be replaced by the manufacturer or this service
agent or a similar qualified person.
2. This LED luminaire must be installed by a licensed electrician ONLY following all local regulations.
3. Ensure that the cables will not be squeezed or damaged by sharp edges.
4. Clean the light with a soft cloth and a standard PH-neutral detergent.
5. Misuse of/or changes to the appliance shall void all warranties.
6. Do not install on a surface that is not suitable or deformed.
7. Do not install on or above a surface with a high temperature.
8. There should not be any materials that are corrosive, explosive.
6
Installation Instructions
1. Make sure power is turned off. Pop front cover off the fitting.
2. Unscrew IP65 sheild.
3. Gently knock the provided plastic expansion tubes into the pre-drilled holes, ensuring the plastic tubes are flush with the mounting surface. Run the cable
through the rubber seal. Fix backplate to the wall.
4. Connect cables paying attention to live + neutral markings.
Blue = Negative
Brown = Positive
Use the switch at the back of the fitting to chnage the colour temperature.
5. Screw IP65 sheild to backplate ensuring a tight seal is made.
6. Ensure installation is correct before switching on the fitting to test. Once correct, fit the provided front cover.
31 2
4 5

