Prime-Line U 10895 Operating instructions
- Category
- Garage Door Opener
- Type
- Operating instructions
This manual is also suitable for

Door Jamb Protector
Installation Instructions
Protector para Jamba de Puerta
Instrucciones de Instalación
Part No.s U-10893, U-10894, U-10895, U-10896
U L T I M A T E D O O R P R O T E C T I O N
Tools Required:
Herramientas requeridas:
Drill
Taladro
Pry Bar
Palanca (pata de cabra)
Hammer
Martillo
Small Flashlight
Linterna chica
Reciprocating Saw
Sierra reciprocante
Phillips Screwdriver
Atornillador de punta en cruz
Flat Head Scr
ewdriver
Atornillador de punta plana
Carpenter's Level
Nivel de carpintero
Gloves
Guantes
Eye Protection
Protectores de ojos
Wood Shims
Cuñas de madera
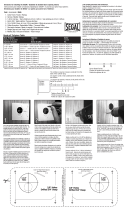
4. - Pre-drill the holes using a 1/8" drill bit as necessary. Then, using the
security screws provided, attach the Mega Jamb by threading the screws
through the existing holes and all the way into the stud assembly behind
the door jamb. It may be necessary to have an assistant hold the Mega
Jamb in position for best alignment
.
4
. - Taladre los orificios necesarios con una broca de 3mm (1/8”). Luego,
con los tornillos de seguridad provistos, atornille la Mega Jamba por sus
orificios hasta el fondo del pie montante o columna en que se apoya la
j
amba. Puede ser necesaria la ayuda de otra persona para alinear bien la
Mega Jamba.
5. - Remount coping material along door edge to hide the drywall and
jamb assembly and complete the trim. Paint touch ups may be necessary
to cover any areas that may become scratched during installation.
5. - Recubra el borde de la pared en la abertura para la puerta para ocul-
tar el panel de yeso y la jamba y completar con la moldura. Podría ser
necesario retocar los arañones que se hubiesen producido durante la
instalación.
Fig. 4
Fig. 5
1/8" Drill Bit
Broca de 3mm (1/8")
Hinge Reinforcement
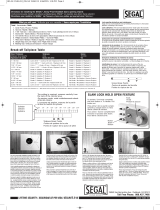
1. - Remove two (2) screws from each leaf of each hinge on
the door and jamb. (4 screws per hinge) Pre-drill using a 1/8"
drill bit to increase the depth of the existing holes. Install a 3-
1/2" security screw in each of the holes. (4 per hinge) Avoid
over-tightening of screws on the jamb side to prevent warping
of the jamb frame.
Refuerzo de bisagras
1. Extraiga (4) tornillos de cada bisagra (2 de la aleta en la
puerta y 2 de la aleta en la jamba). Luego profundice sus orifi-
cios con una broca de 3mm (1/8”) e instale ahí los tornillos de
seguridad de 9cm (3-1/2”). No ajuste demasiado los tornillos
en la jamba para evitar alabear o arquear el marco de la jamba.
Contents List:
Installation instructions and parts list:
1 - Jamb shield
2 - Door guards
18 - 3-1/2" Security screws
8 - 5/8" Securing screws
Lista de contenido:
Instrucciones de instalación y lista de piezas:
1 – Protector de jamba
2 – Placas protectoras de cerradura
18 – Tornillos de seguridad de 9cm (3-1/2")
8 - Tornillos de fijación de 16mm (5/8")
26950 San Bernardino Ave., Redlands, CA 92374
10893 INS

Painting Instruction
If you would like to paint the Mega Jamb - Prior to installation, use plain steel wool or fine emery cloth to rough the surface of the Mega Jamb component
to be painted. It is not necessary to remove any material from the surface, but rather to remove the shine and allow the paint a surface to which it can
a
dhere. (Do not remove the existing powder coated surface entirely.)
Clean the surface of the component with a tack cloth and a cleaner that will not leave a film or residue. Ensure that the cleaning agent will not cause an
adverse reaction to the existing powder coating. (Mineral spirits, rubbing or denatured alcohol are recommended.)
After cleaning, the component can be painted. Make sure to cover all exposed surfaces and DO NOT TOUCH OR HANDLE the components until thoroughly
dry. Items may be touched up as needed after you install them.
Instrucciones para pintar
Si desea pintar la Mega Jamba antes de instalarla, frote las superficies a pintar con lana o viruta de acero o tela esmeril (lija) para volverlas más ásperas.
No es necesario sacar completamente recubrimiento de polvo que trae, sólo opacarle el brillo para que la pintura se pueda adherir.
Limpie la superficie del componente con una tela y un agente limpiador que no deje película o residuo. Cerciórese que el producto limpiador no cause
reacción adversa al recubrimiento de polvo existente. (Se recomienda usar destilados de petróleo, alcohol de frotar o desnaturalizado).
El componente puede pintarse después de limpiarse. Asegúrese de cubrir todas las superficies expuestas y NO TOQUE O AGARRE los componentes hasta
que estén completamente secos. Los componentes pintados pueden retocarse después de la instalación si fuese necesario.
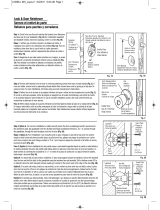
Door Guard Installation
1. - Remove lockset hardware and door knobs from door. The bolt and latch
assemblies can be left in place. Keep outer assemblies separate to ensure ease of
re-assembly when door guard installation is complete.
2. - Slide the Mega-Jamb door guards into position onto the door in the proper
positions. Ensure that the holes fit properly over the latch and bolt assemblies still
mounted in the door.
3. - Option A. For new door installation or added security where the door is
undamaged and the wood around the latchbolt is solid, slip guardplate over the
latchbolt and install combination thread no. 8 x 1" screws through the guardplate,
through the latch faceplate, and into the door.
Option B. For doors that are split, broken, misdrilled, or have weak support
around the latchbolt, remove the latchbolt from the door and bolt the latch to the
guardplate using the machine hex nuts provided. Drill a shallow recess 3/8" in
diameter where the latch faceplate screws usually go, to allow for the nuts to seat
in the edge of the door
.
With the door guards in place, re-install the locks and door knob assemblies. Make
sure the door guards do not interfere with the operation of the locks or knobs and
that they are flush and level on all sides of the door. Tighten all screws on the
locks and doorknob assemblies, as well as on the door guards themselves. Check
for smooth operation of the locks and doorway.
Fig. 1.
Fig. 2.
Fig. 3.
Mega-Jamb Installation
Fig. 1-B
Fig. 1-C
Fig. 1 A
Fig. 2 A
Fig. 2 B
Fig. 3
Existing
strike holes
Instalación de las placas guardacerraduras
1. - Desmonte las placas y manijas de la cerradura de la hoja de la puerta. El cerrojo y
el pueden quedarse. Mantenga las piezas externas separadas para facilitar su reen
samble al terminar la instalación.
2. - Deslice las placas en la hoja de la puerta, cerciorándose que los orificios encajen
bien en el cerrojo y pestillo que quedaron montados.
3. - Opción A. Para instalar una puerta nueva o para seguridad adicional (si la puerta
no estuviese dañada y la madera alrededor del cerrojo estuviese sólida) deslice la
placa sobre el cerrojo e instale los tornillos de combinación No. 8 x 1” (25.4mm)
atravesando la placa guardacerradura, la placa del cerrojo y la puerta.
Opción B. Para puertas rajadas, rotas, con orificios mal taladrados o soporte débil
alrededor del cerrojo, saque el cerrojo y emperne la placa guardacerradura con los
pernos de máquina y tuercas hexagonales provistos. Taladre un receso superficial
de 9mm (3/8”) de diámetro donde usualmente van los tornillos de la placa máscara
del cerrojo para empotrar las tuercas en el borde de la puerta Luego reinstale la
cerradura y sus manijas en la puerta, cerciorándose que no interfieran con su
operación, y que estén a ras y niveladas en todos los lados de la puerta. Ajuste
todos los tornillos de la cerradura, manijas y placas guardacerradura. Revise que la
operación de la cerradura y de la puerta en la jamba sea suave.
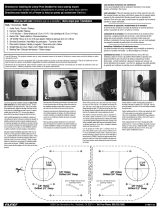
1-A. - Remove strike plates and existing hard-
ware from door jamb. Door mouldings should
also be removed to expose the jamb where it
meets the drywall and stud assembly.
1
-A. Desmonte las placas de la cerradura en
la jamba y las molduras del marco en la pared
para exponer el encuentro de la jamba con el
p
anel de yeso y el pie montante (columna).
1-B. - Using a pry bar, loosen the jamb sur-
face from the wall studs.
1
-B. - Afloje la jamba del pie montante (colum-
na) de la pared.
1-C. - Use a reciprocating saw to cut through
nails protruding through the jamb and into the
wall studs at the edge of the doorway.
1-C. - Con la sierra reciprocante, corte todos
los clavos de la jamba y del pie montante de la
pared que sobresalgan hacia la abertura de la
puerta
2-A. & 2B. - Align the Mega Jamb onto the existing wooden jamb, insuring the strike
holes line up with the metal cut-outs in the Mega Jamb.
2-A. & 2B. - Coloque la Mega Jamba sobre la jamba de madera existente alineando los
orifi para el cerrojo y el pestillo de la cerradura en ambas.
3. - Place wooden shims behind the jamb and against
the studs in order to provide a level and aligned strike
area for the door. Insure the door will close properly
when installed. Check the gap consistentcy between
door and jamb.
3. -Instale cuñas de madera entre el pie montante y la
jamba para nivelarla y alinearla con la hoja de la puer
ta
cuando se cierre. Asegúrese que la luz entre el canto
de la hoja y la jamba de la puerta sea uniforme en toda
su extensión.
-
 1
1
-
 2
2
Prime-Line U 10895 Operating instructions
- Category
- Garage Door Opener
- Type
- Operating instructions
- This manual is also suitable for
Ask a question and I''ll find the answer in the document
Finding information in a document is now easier with AI
in other languages
Related papers
-
 Prime-Line U 9586 Operating instructions
-
 Prime-Line U 10817 User manual
-
 Prime-Line SE 14328 User manual
-
 Prime-Line SE 15366 User guide
-
 Prime-Line SE 19361 User manual
-
 Prime-Line SE 14326 Operating instructions
-
 Prime-Line SE 13312 Installation guide
-
 Prime-Line SE 15361 User guide
-
 Prime-Line K 5057 Operating instructions
Other documents
-
Everbilt 14891 Operating instructions
-
Everbilt 28456 Installation guide
-
Unique Home Designs 5V0000ULWH00D Installation guide
-
Unique Home Designs 1S2001KN1CCISA Installation guide
-
Unique Home Designs 5V0002EL0DS00B Installation guide
-
Unique Home Designs 1S0000CL1WB00A Installation guide
-
Titan 1S2001JL1CCP3A Installation guide
-
Feather River Doors GV3694 Installation guide
-
Titan 1S2001KL2DSISA Installation guide
-
 Fishbone Offroad FB25091 Installation guide


