Page is loading ...

SSDR010_REV_A01 © 2020 FRONT RUNNER VEHICLE OUTFITTERS
Universal Drawer
Large Pick-Up
SSDR010
ENG
1
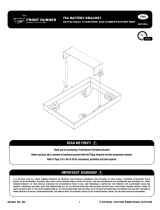
Thank you for purchasing Front Runner Universal Drawer System.
Before you start, take a moment to familiarize yourself with the Fitting Instructions and the components received.
Refer to Page 2 for a list of all the components, quantities and tools required.
READ ME !
IMPORTANT WARNING!
IT IS CRITICAL THAT ALL FRONT RUNNER PRODUCTS BE PROPERLY AND SECURELY ASSEMBLED AND ATTACHED TO YOUR VEHICLE. IMPROPER ATTACHMENT COULD
RESULT IN AN AUTOMOBILE ACCIDENT, AND COULD CAUSE SERIOUS BODILY INJURY OR DEATH. YOU ARE RESPONSIBLE FOR ASSEMBLING AND SECURING ALL FRONT
RUNNER PRODUCTS TO YOUR VEHICLE, CHECKING THE ATTACHMENTS PRIOR TO USE, AND PERIODICALLY INSPECTING THE PRODUCTS FOR ADJUSTMENT, WEAR AND
DAMAGE. THEREFORE, YOU MUST READ AND UNDERSTAND ALL OF THE INSTRUCTIONS AND PRECAUTIONS SUPPLIED WITH YOUR FRONT RUNNER PRODUCT PRIOR TO
INSTALLATION OR USE. IF YOU DO NOT UNDERSTAND ALL OF THE INSTRUCTIONS AND CAUTIONS, OR IF YOU HAVE NO MECHANICAL EXPERIENCE AND ARE NOT THOROUGHLY
FAMILIAR WITH THE INSTALLATION PROCEDURES, YOU SHOULD HAVE THE PRODUCT INSTALLED BY A PROFESSIONAL INSTALLER OR OTHER QUALIFIED PERSONNEL.
NOTE: Front Runner will not be responsible for any damage caused by the failure to install the product according to these instructions.
Please call us if you have any questions about the installation of this product.

SSDR010_REV_A01 © 2020 FRONT RUNNER VEHICLE OUTFITTERS
2
TOOLS NEEDED
10MM
10MM
1 1 X Drawer
2 X Set Of Keys
2 6 X Eye Nut
3 6 X M8 Nylon Washer
4 6 X Stud Plate
5 1 X Track
6 2 X M8x16 Hex Bolt
7 2 X M8 Spring Washer
8 2 X M8x25 Flat Washer
9 2 X M8 Channel Nut
10 12 X M6x19x1ss Flat Washer
11 4 X M6 Spring Washer
12 4 X M6x20 Hex Bolt
13 4 X M6x30 Hex Bolt
14 8 X M8 D-Ring
15 4 X M6 Nyloc Nut
16 4 X 60mm Carabiner
17 4 X M6 Wing Nut
18 4 X Turnbuckle
19 4 X M6 Riv Nut
FIGURE 1.1
13MM
6.5MM
GET ORGANIZED
1
IN THE BOX
17
1
4
3
2
10
11
9
12
5
16
18
17
13
10
15
19
7
6
8
14
10
20 9 X Finishing Washer
21 6 X M6 Cage Nuts
22 6 X M6 x 35 Countersink Screw
23 9 X M6 x 40 Countersink Screw
IN THE BOX
20 21 22 23

SSDR010_REV_A01 © 2020 FRONT RUNNER VEHICLE OUTFITTERS
3
FIT AND SECURE
2
6
2.1
2.2
2.3
Slide 2 channel nuts (Item 9) into the track
(Item 5). Center the track under the drawer
and secure with the fasteners as shown.
Secure the four D-Rings (Item14) on both
sides of the drawer using the fasteners
shown.
Assemble the eye-nuts (Item 2) with a
M6 nylon washer (Item 3) and a stud plate
(Item 4) and slide them into place.
6
7
8
9
5
14 10 11 12
4
3
2
13MM
10MM

SSDR010_REV_A01 © 2020 FRONT RUNNER VEHICLE OUTFITTERS
4
D-Ring
D-Ring
FIT AND SECURE
2
Assemble each of the 4
turnbuckles (Item 18) with a wing nut
(Item 17) as shown. The wing nut will be
used to lock the turnbuckles after they
have been set.
Place the drawer into the vehicle
and center. Making sure the turnbuckles
are pulling outward to prevent the drawer
from moving after it has been secured.
If the load bed has tie down points that
are positioned as mentioned above, no
additional points will be needed. Move on
to step 2.6.
If the load bed does not have tie down
points, drill 6.5mm holes using the D-rings
and turnbuckles as a guide.
Take care when drilling and check for any
obstructions beneath the load bed before
drilling.
Secure the D-rings to the vehicle with the
fasteners shown.
Hook the 60mm Carabiner (Item 16) onto
the D-rings (Item 14) on the drawers
upright. Place the turnbuckles (Item 18) on
the other side of the 60mm Carabiner and
hook it into the D-rings (Item 14) that are
secured to the vehicle.
Secure the drawer by tensioning the
turnbuckles until there is no more
movement on the drawer. Make sure the
Drawer System remains in position when
doing this.
Lock the turnbuckles with the wing nuts.
Do this by tightening the wing nuts up to
the turnbuckles.
Refer to diagram 2.4
2.4
2.5
2.6
18
17
16
13
10
15
14
10
14
10MM
10MM
16
18
14
19

SSDR010_REV_A01 © 2020 FRONT RUNNER VEHICLE OUTFITTERS
5
INSTALL OTHER VEHICLE AND RACK ACCESSORIES
4
Now's the time to visit your favorite Front Runner Dealer in person or online.
Be sure to tag us. We love to see our gear in action! #FrontRunnerOutfitters #BornToRoam
Share your adventures on:
FINISH
3
Congratulations! You did it. Take a step back and admire your work!
/