Page is loading ...

SSDS109_REV_A00 © COPYRIGHT 2016 FRONT RUNNER VEHICLE OUTFITTERS
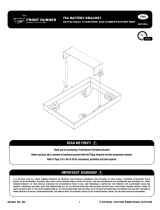
TOYOTA HILUX REVO DC (2016-CURRENT)
Drawer deck completion set
SSDS109
ENG
1
45 min
IMPORTANT WARNING!
Thank you for purchasing a Front Runner Deck Completion Set.
Before you start, take a moment to familiarize yourself with this Fitting Intruction and the components received.
Refer to Page 2 for a list of all the components, quantities and tools required.
READ ME!
IT IS CRITICAL THAT ALL FRONT RUNNER PRODUCTS BE PROPERLY AND SECURELY ASSEMBLED AND ATTACHED TO YOUR VEHICLE. IMPROPER ATTACHMENT COULD
RESULT IN AN AUTOMOBILE ACCIDENT, AND COULD CAUSE SERIOUS BODILY INJURY OR DEATH. YOU ARE RESPONSIBLE FOR ASSEMBLING AND SECURING ALL FRONT
RUNNER PRODUCTS TO YOUR VEHICLE. CHECKING THE ATTACHMENTS PRIOR TO USE, AND PERIODICALLY INSPECTING THE PRODUCTS FOR ADJUSTMENT, WEAR AND
DAMAGE. THEREFORE YOU MUST READ AND UNDERSTAND ALL OF THE INSTRUCTIONS AND PRECAUTIONS SUPPLIED WITH YOUR FRONT RUNNER PRODUCT PRIOR TO
INSTALLATION OR USE. IF YOU DO NOT UNDERSTAND ALL OF THE INSTRUCTIONS AND CAUTIONS, OR IF YOU HAVE NO MECHANICAL EXPERIENCE AND ARE NOT THOROUGHLY
FAMILIAR WITH THE INSTALLATION PROCEDURES, YOU SHOULD HAVE THE PRODUCT INSTALLED BY A PROFESSIONAL INSTALLER OR OTHER QUALIFIED PERSONNEL.

SSDS109_REV_A00 © COPYRIGHT 2016 FRONT RUNNER VEHICLE OUTFITTERS
2
TOOLS NEEDED
13MM
4MM
10MM
10MM
6.5MM
REAR OF VEHICLE
FRONT OF VEHICLE
9
4
3
5
10
1
8
9
6
7
11
12
11
13
2
14
15
1 1 X Side Deck LH
2 1 X Rear Deck LH
3 1 X Rear Deck RH
4 1 X Side Deck RH
5 1 X Front Face RH
6 1 X Front Face LH
7 4 X Button Head M6x16
8 4 X Flat Washer M6
9 8 X Nyloc Nut M6
10 4 X Carabiner Laser Cut Hook - 115mm Long
11 8 X Flat Washer M6x19x1
12 4 X D-Ring M8
13 4 X Hex Bolt M6x25
14 2 X Finishing Washer
15 2 X Countersunk Screw M6x30
IN THE BOX
FIGURE 1.1
GET ORGANIZED
1
Here is what you are looking at for SSDS109

SSDS109_REV_A00 © COPYRIGHT 2016 FRONT RUNNER VEHICLE OUTFITTERS
3
FIT AND SECURE
2
Fix the wing set to the drawer.
Refer to SSWS001 Fitment Guide
Fix the D-rings to the drawer.
D-rings are supplied with SSDR010.
See diagram 2.2 for placement of the
D-ring at the front right side of the drawer.
Repeat this step on the left side of
the drawer.
See diagram 2.3 for placement of the
D-ring at the rear right side of the drawer.
Repeat this step on the left side of
the drawer.
2.1
2.2
2.3
10MM
10MM
Place the drawer in the vehicle.
Fix the track to the drawer.
Refer to SSDR010 Fitment Guide.
13MM

SSDS109_REV_A00 © COPYRIGHT 2016 FRONT RUNNER VEHICLE OUTFITTERS
4
FIT AND SECURE
2
On the rear right side of the load bin mark
the dimensions as per diagram.
Drill a 6.5mm hole.
Repeat this on the left side.
On the front right hand side of the vehicle
mark the dimensions as per diagram.
Drill a 6.5mm hole.
Repeat this on the left side.
Move the front of the drawer 50mm from
the rear of the vehicle and centralize the
drawer from left to right.
2.4
2.5
2.6
50 MM
115 MM
65 MM
180 MM
6.5MM
REAR OF VEHICLE
FRONT OF VEHICLE
6.5MM
REAR OF VEHICLE

13
11
12
11
13
11
12
11
10
8
8
6
7
5
10
SSDS109_REV_A00 © COPYRIGHT 2016 FRONT RUNNER VEHICLE OUTFITTERS
5
FIT AND SECURE
2
Place the front faces to the drawer
and secure.
2.7
2.8
2.9
10MM
10MM
10MM
10MM
Secure the 4 D-rings to the load bay.
Connect item 10 and the turnbuckle
as per diagram.
Refer to SSDR010 for the assembly
of the turnbuckles.
Refer to SSDR010 for the assembly
of the turnbuckles.
Secure the 4 D-rings to the load bay.
Connect the C-hook, item 10
and the turnbuckle as per diagram.
Fit the turnbuckles loosely on all four
corners. Make sure the drawer is
centralized in the load bin and
50mm from the rear of the vehilce before
you fully tightening the turnbuckles.
4MM
Fit the turnbuckles loosely on all four
corners. Make sure the drawer is
centralized in the load bin and
50mm from the rear of the vehilce before
you fully tightening the turnbuckles.
FRONT OF DRAWER
FRONT OF DRAWER
REAR OF DRAWER

SSDS109_REV_A00 © COPYRIGHT 2016 FRONT RUNNER VEHICLE OUTFITTERS
6
15 14
COMPLETION
3
INSTALL OTHER VEHICLE AND RACK ACCESSORIES
4
Now's the time to visit your favorite Front Runner Dealer in person or online.
9
3.1
Congratulations. You did it. Take a step back and admire your work!
FIT AND SECURE
2
2.10
Fit the side and rear decks.
Secure the rear decks as per diagram
with the fasterers supplied.
4MM
/