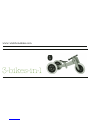
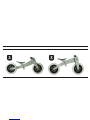
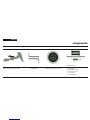
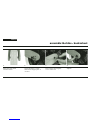
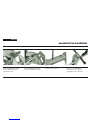
Below you will find brief information for Bike Mark II. The Wishbone Bike Mark II is a versatile pre-bike with a unique 3-in-1 design, allowing it to be configured as a trike, balance bike, or walking bike. It features a sustainable design constructed from plantation-sourced woods and non-toxic products. The bike allows for quick adjustments for seat height and handle bar positions. This manual provides instructions of basic assembly, maintenance and safety guidelines.
Below you will find brief information for Bike Mark II. The Wishbone Bike Mark II is a versatile pre-bike with a unique 3-in-1 design, allowing it to be configured as a trike, balance bike, or walking bike. It features a sustainable design constructed from plantation-sourced woods and non-toxic products. The bike allows for quick adjustments for seat height and handle bar positions. This manual provides instructions of basic assembly, maintenance and safety guidelines.


-
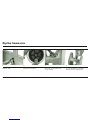
 1
1
-
 2
2
-
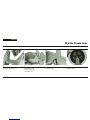
 3
3
-
 4
4
-
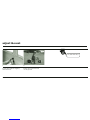
 5
5
-
 6
6
-
 7
7
-
 8
8
-
 9
9
-
 10
10
-
 11
11
-
 12
12
-
 13
13
-
 14
14
-
 15
15
-
 16
16
-
 17
17
-
 18
18
-
 19
19
-
 20
20
-
 21
21
-
 22
22
-
 23
23
-
 24
24
-
 25
25
-
 26
26


Below you will find brief information for Bike Mark II. The Wishbone Bike Mark II is a versatile pre-bike with a unique 3-in-1 design, allowing it to be configured as a trike, balance bike, or walking bike. It features a sustainable design constructed from plantation-sourced woods and non-toxic products. The bike allows for quick adjustments for seat height and handle bar positions. This manual provides instructions of basic assembly, maintenance and safety guidelines.
Ask a question and I''ll find the answer in the document
Finding information in a document is now easier with AI
Other documents
-
Kmart 42866015 User manual
-
Simple 2450 Owner's manual
-
-
TerraTrike ROVER Quick start guide
-
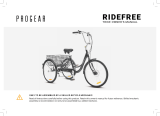 LIFESPAN KIDS RideFree 20" Tricycle White Owner's manual
-
Ice Trike Owner's manual
-
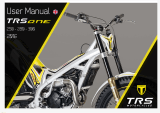 TRS One 300 2016 User manual
-
Catrike 2007 Trail Owner's manual
-
Optima BARON User manual
-
HASE Bikes KETTWIESEL ALLROUND Nexus Owner's manual

