12
REFERENCE
Position
Page
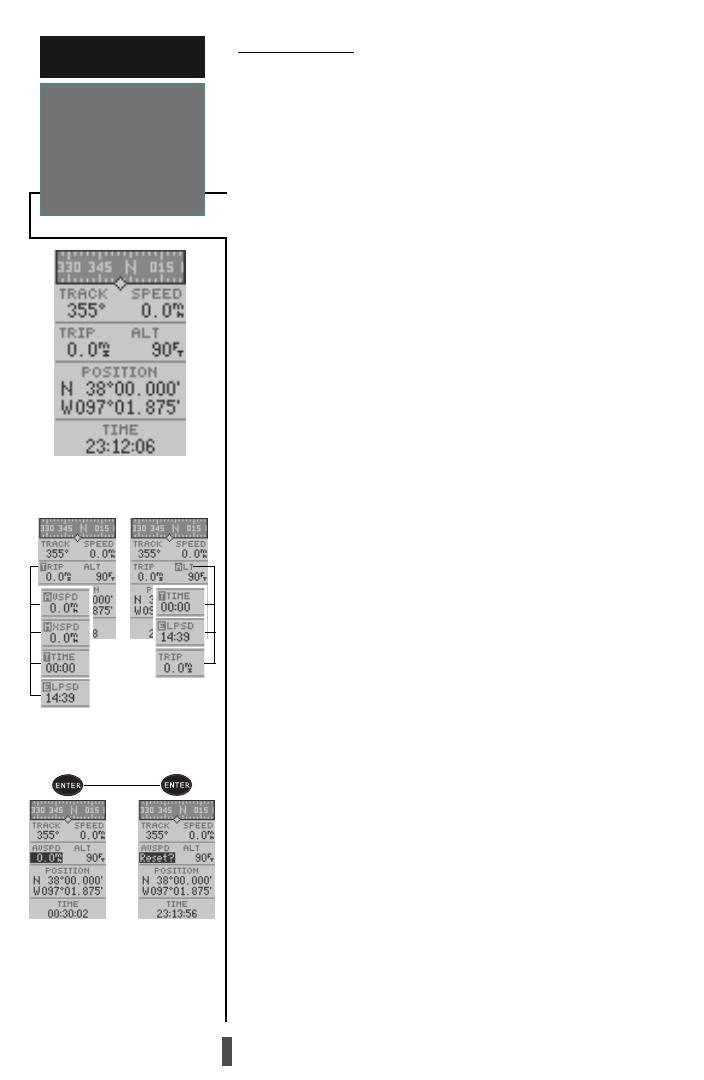
Position Page
The second page in the GPS 12CX’s primary page
sequence is the Position Page. This page shows you
where you are, what direction you’re heading, and how
fast you’re going, and it’s most useful when you are
traveling without an active destination waypoint. The
Compass Tape at the top of the page is a graphic repre-
sentation of the track, and indicates the direction you’re
heading while you’re moving.
Directly below this display are the track, speed, trip
odometer and the altitude (default) fields. Below these
fields is the position field. The position field indicates
your current latitude and longitude in degrees and min-
utes. The GPS 12CX uses this basic information to mark
exact positions as waypoints, which help guide you from
one place to another. The bottom of the page contains a
12- or 24-hour clock.
Both the trip odometer and the altitude fields are
user selectable, and both offer a trip odometer, trip timer,
and elapsed time. This way, you can always be sure of
viewing this information regardless of the option you’ve
selected for the other user-selectable field.
The following user-selectable options are available on
the Position Page:
Trip Odometer (TRIP)— total distance traveled since reset.
Trip Timer (TTIME)— total (cumulative) time in which a
ground speed has been maintained since last reset.
Elapsed Time (ELPSD)— total time in hours and min
utes since last reset.
Average Speed (AVSPD)— average speed traveled since
last reset.
Maximum Speed (MXSPD)— maximum speed traveled
since last reset.
Altitude (ALT)— vertical distance above mean sea level.
To reset TTIME, MXSPD, AVSPD, or TRIP:
1. Highlight the user-selectable field, and press
ENTER
. ‘Reset’ will appear as a selectable option.
2. Press
ENTER
to confirm or
QUIT
to exit.
The trip odometer, trip timer, and average speed
fields are linked. Resetting one of these options in a user-
selectable field will automatically reset the correspond-
ing data in the other. This ensures that information
shown in these fields reflects your current trip.
Position PagePosition Page
Position PagePosition Page
Position Page
User Selectable OptionsUser Selectable Options
User Selectable OptionsUser Selectable Options
User Selectable Options
To Reset TTIME, MXSPD,To Reset TTIME, MXSPD,
To Reset TTIME, MXSPD,To Reset TTIME, MXSPD,
To Reset TTIME, MXSPD,
AVSPD, or TRIPAVSPD, or TRIP
AVSPD, or TRIPAVSPD, or TRIP
AVSPD, or TRIP


