Page is loading ...

I
usehndQre@@:*
.,.
-,
,,;
.:
,.,.
‘,.
M;crowave/Convection Oven
Safew
[nstructions....................3-6
Precautions to Avoid Possible
Exposure to Microwave Energy ..............3
Operating Instructions, Tips
Aluminum Foil ..................................4, 38, 39
Automatic Fan Feature .................................7
Broiler
Pan...........................5, 10, 12, 38, 39
Clock . . . . . . . . . . . . . . . . . . . . . . . . . . . . . . . . . . . . . . . . . . .
.
......................8
Combination Cooking .........................35-38
Control Panel ..............................................8, 9
Convection Cooking .............33, 34.38, 39
Cookware and Accessories 12
Cookware Reference Guide
......................4O
Exhaust Fan ........7
Features .....10
Microwave Cooking ........................7. 13-31
Add 30 Seconds 16
Auto Cook ..........................................24- 31
Auto
Defrost.......................................2O, 21
Auto Reheat
.................,.....................2 2, 23
Auto Start/Reminder 16
Cooking
by Temperature ................1820
Cooking
bv Time
14-16
Cooking Complete Reminder ...............10
Defrosting
bv Time 17, 18
DelaVed Cooking 13
Express Cook Feature 16
Hold Time. . . . . . . . . . . . . . . . . . . . . . . . . . . . . . . . . . . . . . . . . . . . . . . . . .
.
13
Microwaving Tips. . . . . . . . . . . . . . . . . . . . . . . . . . . . . . . . . . . . . . . 7
Minute/Second Timer . . . . . . . . . . . . . . . . . . . . . 13, 14
Popcorn . . . . . . . . . . .........32
Problem
SoIver.......................44,
45
More questions
?...call
GE Answer
Center’”
800.626.2000
Care and Cleaning ...................4 O-43
Cleaning Guide .............................................4 1
Exhaust Fan.. . . . . . . . . . . . . . . . . . . . . . . . . . . . . . . . . . . . . . . . . . ........42
Grease Filter . . . . . . . . . . . . . . . . . . . . . . . . . . . . . . . . . . . . . . . . . . ........42
Light Bulb Replacement ............................43
[nStal[atiOn
.........................................42
Adapter Plugs . . . . . . . . . . . . . . . . . . . . . . . . . . . . . . . . . . . . . . . . . . . . .
.
42
Extension Cords ...........................................42
Grounding instructions ..............................42
Consumer Services ..................47
Appliance Registration .................................2
Model and Serial Number Location ..........2
WarrantV ........................................Back Cover
L
Models: JVM190K
JVM192K
JVM193K
Microwave power output
of this oven is 750 watts.
I
I
IIEC
705
Te.$/
Pro(:~d(oe)
Power Levels ...8, 11, 13-15, 17-20, 35
Oven
Shelf..4, 5, 10, 12,22,24,28.32, 35
Probe ...,............4, 9-11, 18-20, 34, 36 38
GE Appliances

~LP
US
~LP
YOU...
Before using your oven,
read this book carefully.
It is intended to help you operate
and maintain your new microwave
oven properly.
Keep it handy for answers to your
questions.
If you don’t understand something
or need more help, write (include
your phone number):
Consumer Affairs
GE Appliances
Appliance Park
Louisville, KY 40225
Write down the model and
serial numbers.
You’ll
find them on a
label
on the
left side
wall
of the control panel
seen when the door is open.
These numbers are also on the
Consumer Product Ownership
Registration Card that came with
your microwave oven. Before
sending in this card, please write
these numbers here:
Model Number
Serial Number
Use these numbers in any
correspondence or service
calls
concerning your microwave oven.
Be sure your microwave
oven is registered.
It
is important that we know the
location of your microwave oven
should a need occur for
adjustments.
Your supplier is responsible for
registering you as the owner.
Please check with your supplier to
be sure he has done so; also send
in your Consumer Product
Ownership Registration Card. If
you move, or if you are not the
original purchaser,
please
write to
us, stating model and serial
numbers.
This appliance
mwt
be
re@tered.
Please be
certiin that it is.
Write to:
GE Appliances
Range Product Service
Appliance Park
Louisville, KY 40225
If you received a
damaged oven...
Immediately contact the dealer (or
builder) that sold you the oven.
Save time and money.
Before you request service...
Check the Problem Solver in the
back of this book. It lists causes of
minor operating problems that you
can correct yourself.
All these things are normal
with your microwave oven.
●
Steam or vapor escaping from
around the door.
●
Light reflection around door or
outer case.
●
Dimming oven light and change
in blower sound may occur while
operating at power
levels
other
than high.
●
Dull thumping sound while oven
is operating.
●
Some TV-Radio interference
might be noticed while using
your microwave oven. It’s similar
to the interference caused by
other
small
appliances and does
not indicate a problem with your
oven.
To obtain service, see the
Consumer Services page in the
back of this book.
We’re proud of our service and
want you to be pleased. If for some
reason you are not happy with the
service you receive, here are three
steps to follow for further help.
IF YOU NEED SERVICE...
FIRST, contact the people who
FINALLY, if your problem is still
serviced your appliance. Explain not resolved, write:
why you are not pleased. In most
Major Appliance Consumer
cases, this will solve the problem.
Action Panel
NEXT, if you are
still
not pleased,
20 North
Wacker
Drive
write
all
the details—including Chicago, IL 60606
your phone number—to:
Manager, Consumer Relations
GE Appliances
Appliance Park
Louisville, KY 40225

PRECAUTIONSTO .
:
AVODPOSS~LE
‘
“’;”
EXPOSURE TO
~~~‹
“
‘
‘
EXCESS~E
~~~‹
“
MICROWAVE
E~RGY
~
lns;rucion;
se;t~n.
●
To
reduce
the
risk
of
fire in
the
ov~n
mvity:
●
Use this
apylia~ce
only for its intended
use
as
—Do
not
ovemook
fd.
Carefully
attend
described in this
manual.
Do
not
use
corrosive
tippliance
if
paper,
piastic
or
other
combustible
chemicals or
vapors
in
this appliance. This
materials are
plac$d
inside
the
oven
to
facilitate
microwave/convection oven is specifically
c(?oking.
designed to
heat
or cook food, and is not
intended for laboratory or industrial use.
{< ’fltlfilltti’f!
#$(’.k.ffxlree)

●
Do
not use
paper products
when
the
microwav~nveetiun
oven is
operated
in
the
convection
or combination mode.
4

~
removal
from
the microwave
oven.
To prevent burns from splashing
—Be
sure
that
the
sheif
is.positiin;d
properly’
liquid, stir
the
liquid briefly before
inside
the
overt
to
prevent
product
damage.
Use
of
sheIf
with
Auto
Cook,
Auto
Reheat
or
removing the container
from
the
Popcorn
feature
is
not
recorrune~ded
(see
the
microwave oven.
Auto Cook. Auto Reheat or
Popcorn
sections}.

{continu&d)
The
Exhamt
Hod
.
~CIean
the..vent
haod
oftEn,
Do
nut
allow
grease
to
build
upon
the.
ho~d
or the
filter.
o
Have
it
installd.and
.~~~iy
grounded
by
a
quai~ed
installer. Seethe
speeial
installation
—U&
care
vvhen
c!e%uing.
the
vent
.h,ood
filter,
hMet
pagked
with
ths
microwave
uve~.
Corrosive
clean~ng
a~ertts,
such
8s
Iye-~ased
oven
cleaners,
may
damtige
the
filter.’
●
The exhaust
fan
in
the
oven~ll
o~rate
-When
flsming
foods
und6r
the
h~,
turn
automatically under
ce~in
conditions
(see
Automatic
Fan
F~ature).
While
the
fan
is
the
fan
off.
me.
fan.
ifopemting,
may
~prexd
op~rating,
aution
is
required
to prevent
the
the
tlafne.
‘,
starting
and
spr=ding
of accidental cooking
fires
while
the
exhaust fan is in
wse,
For
$his
reason:
SAVE THESE
~~
—Never
leave
wrface
units
unatte~ded
at
high.
INSTRUCTIONS
heat
settings.
~oiIovcr
causes smoking
tid
greasy
spilloveti
that
may
ignite
and
spread
if
e~u$t
fan
is
operating.
To
minimize automatic
Optional
Accessori&
fan
oprafion,
use
adequate
sized
cookware
and
use
high
heat
only
when
rificessary.
Avai\ahi~
at
oxtr~
ciisk
from
your
GE
supplier.
-In
the
event
ofa
grease
firet
JX@wH
Filler
Panel
Kit
<for
modeI
JVM~92K1.
smother
flaming
pan
on
surface
unit
JX41
Filler
Panel
Kit
(for
model
JVMIWKJ.
by covering
pan
completely with
JX81
Ch8rcoal
Filter
Kit
f(}r
non-vented
installtition.
well-iltting
lid,
cookie
sheet
or
I
I
6

● Make sure all cookware used in your microwave
● Paper towels, waxed paper and plastic wrap
oven is suitable for microwaving.
Most glass
can be used to cover dishes in order to retain
casseroles, cooking dishes, measuring cups, custard
moisture and prevent spattering. Be sure to vent
cups, pottery or china dinnerware which does not
plastic wrap so steam can escape.
have metallic trim or glaze with a metallic sheen
“
Some microwaved foods require stirring, rotating
can be used. Some cookware is labeled “suitable for
or rearran~in~.
Check the Cookbook
suDDlied.
microwaving.”
e.
,1
● Steam builds up pressure in foods which are
tightly covered by a skin or membrane.
Pierce
potatoes, egg yolks and chicken livers to prevent
bursting.
‘e
‘----””-
y
*y
both the dish-you
are testing and a
glass measuring
CUP
filled with one
If you use a meat thermometer while cooking, make
sure it is safe for use in microwave ovens.
cup of water—set the measuring cup either in or
next to the dish. Microwave 1 minute at high. If the
dish heats, it should not be used for microwaving. If
the dish remains
cool
and
only
the water in the cup
heats, then the dish is microwave-safe.
AUTOW~C
FAN
FEATUW
Cooking appliances installed under the oven may, under some heavy usage
conditions, cause temperatures high enough to overheat some internal parts
of the microwave oven.
To prevent overheating from taking place, the exhaust fan is designed
to automatically turn on at a low speed if excessive temperatures occur.
Should this happen, the fan cannot be manually turned off, but it
will
automatically turn off when the internal parts have cooled. The fan may
stay on up to approximately 30 minutes after the range and microwave
oven controls have been turned off.
7

YOUR TOUCH CONTROL
PA~L
The touch control panel allows you to set the oven controls with the
touch of a finger. It’s designed to be easy to use and understand. With
your new oven, you have several cooking options. In addition to microwave
or convection cooking, you have combination cooking, which uses both
methods.
Also
automatic microwave cooking (Auto Cook) and automatic
microwave defrosting (Auto Defrost), and automatic combination
temperature cooking (Auto Roast). Or you may make your own programs
to suit your own cooking needs.
1.
2.
3.
4.
5.
6.
7.
8.
9.
DISPLAY.
Displays time of day, time or
temperature during cooking functions, doneness
code words, preheat code words, power level
being used, cooking mode and instructions.
CONVECTION COOK. When convection
cooking, touch this pad before entering desired
oven time and temperature.
CONVECTION BROIL. Touch this pad
for broiling. Be sure to use spatter shield and
broil pan.
TIME COOK I
&
II. Microwave for a preset
amount of time using automatic power level 10
or change power level after setting time.
TIME DEFROST. Gentle thawing at automatic
power level 3, or change power
level
after
entering time.
POPCORN. Touch this pad, then START to cook
prepackaged microwave popcorn weighing 3.0
to 3.7 ounces.
AUTO REHEAT. Touch this pad, then START
for quick reheating of prepared foods.
NUMBER PADS. Touch these pads to enter time
of day or cooking time, internal food temperature
when using probe, oven temperature, power level,
cooking codes, food weights and broil code.
AUTO START~EMINDER.
A11OWS
YOU
to
program your oven to begin cooking at a preset
time of day—up to a 12-hour delay. The Reminder
feature can be used like an alarm clock.
10.
START. Touch this pad to begin any function.
11. VENT FAN.
Touch HIGH, LO or OFF for fan
speed.
12. COMBINATION AUTO ROAST. Touch
this pad and roast by using a combination of
microwave speed and convection browning.
13. COMBINATION COOK. Touch this pad to
either cook by time or internal food temperature
with microwave speed and convection browning
alternating during the cooking cycle.
14. ADD 30 SECONDS.
Press this pad to add 30
seconds to the cook time as it’s counting down.
15.
POWER LEVEL.
Touch this pad before entering
another power level number if you want to change
from automatic power
level
10 (High) for cooking
or power level 3 (Low) for defrosting.
16. TEMP
COOWOLD.
Use the temperature
probe to cook by using a preset temperature.
When internal food temperature reaches
90°F.,
oven shows temperature until preset temperature
is reached and holds temperature for up to
one hour.
17. AUTO COOK.
Touch this
pad
and then
number pad for desired cod; number, and oven
automatically microwaves at pre-programmed
power levels and determines the proper amount
of cooking time until the food is done and oven
shuts off.
18. AUTO DEFROST. Touch this pad, then code
number and food weight. The oven automatically
sets power levels and defrosting time.
19.
MIN/SEC
TIMER. This features uses no
microwave energy while it functions as both a
kitchen timer or as a holding period between
defrost and time or temperature cooking.
20. CLOCK. Touch this pad to enter time of day
or check time of day while microwaving. To set
clock,
first touch CLOCK pad and then enter time
of day. For example, if time is 1:30, touch number
pads 1,3, and O and
“1:30”
will appear in display.
Then touch START or CLOCK. If you wish to
reset or change time, simply repeat above process.
21. CLEAWOFF.
When touched, it stops the oven
and erases all settings except time of day.
22. LIGHT. Touch ON to turn on hood light. Touch
NIGHT to turn on night light.
8

n
3
n
8
\
AUTO START
‘REMINDER
START
C*R
OFF
I
1
)
J
\
.
,
When You Plug in the Oven
Temperature Probe
The panel displays five 8’s on the upper portion and
‘PRObE”
Appears in the Display
all of the oven functions on the lower portion. After
15
seconds, all lights disappear and “RESET” appears
●
Probe has been forgotten when Combination Auto
Roast or
Temp
Coo~old
function is being used.
in the upper portion. Touch the
CLEAWOFF
pad, set
the clock and oven is ready for use.
●
Probe is not securely seated in oven wall receptacle.
If
power is disrupted at any time, the above sequence
recurs, and You must reset clock after touching the
●
Probe left in oven
wall
receptacle and you
programmed a function that doesn’t need the probe.
CLEAWOFF
pad.
9

~ATUWS
OF YOUR
OWN
Cooking Complete Reminder
(For all defrost and cook cycles except
Temp
Coo~old)
To remind you that you have food in the oven, the oven
will display “End” and beep once a minute until you
either open the oven door or touch the
CLEAWOFF
pad.
U!N%
@
I
I
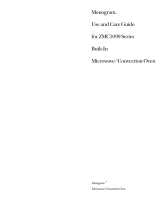
1.0 Cubic Foot
?
,
“L41
This is to certify
that this unit has
been tested in
conformance
with
AMCA
Bulletin No. 210.
C.F.M.
at 0.10
WG
234
Vert.
239 Her.
&
.
SONES
6.0
Vert.
6.3
Her.
1. Door Handle.
Pull to open door.
Door must be securely latched
for oven to operate.
2. Door Latches.
3. Window with Metal Shield.
Screen allows cooking to be
viewed while keeping
microwaves confined in oven.
4. Receptacle for Temperature
Probe.
Probe must be securely
inserted into receptacle before
oven
will
start any temperature or
Auto Roast cooking.
10
5.
Temperature Probe.
Probe
measures internal food
temperature. The probe must
be used when cooking by
temperature
in
microwave,
convection or combination
modes.
6.
Shelf.
The metal shelf must be in
place on the oven floor when
using convection or combination
cooking. Remove the shelf when
microwave-only cooking.
7. Touch Control Panel and
Digitil
Display.
For detailed
information on each feature,
see Your Touch Control Panel
section.
8. Hood Controls.
Fan.
Press HI, LO or OFF.
Light.
Press ON, NIGHT
or OFF.
9. Grease Filters.
10.
Cooktop Light.
11. Oven Floor.
12. Broiler Pan.
Consists of a drip
pan and a spatter shield. See
Convection Broiling section for
instructions.
NOTE:
Oven light and oven
vent(s) are located on the inside
walls of the microwave oven.
Rating plate is located on the left
side
wall
of the control panel seen
when the door is open.

-T
YOUR
OWN
CAN DO
Cooking with your new oven offers a wide variety
of food preparation options. Microwave cooking
uses very short, high frequency radio waves. The
movement of the microwaves through the food
generates heat and cooks most foods faster than
regular methods, while retaining their natural
texture and moisture. Microwave
cooting heats
food directly, not the cookware or the interior of
the oven. Reheating is easy and defrosting is
particularly convenient because less time is
spent in food preparation.
Convection cooking constantly circulates heated air .
around the food, creating even browning and
sealed-
in flavor by the constant motion of hot air over the
food surfaces.
Your new oven also offers the option of combination
cooking, using microwave energy along with
convection cooking. You cook with speed and
accuracy, while browning and crisping to perfection.
You can use microwave cooking, convection cooking
or combination cooking to cook by time. Simply
preset the length of cooking time desired and your
oven turns off automatically. Or you can cook by
temperature, by these methods, using the temperature
probe to determine the doneness by the internal
temperature of the food. This method takes the
guesswork out of cooking, shutting the oven off
automatically when the food reaches the desired
temperature.
The Automatic Cooking Control (Auto Cook) feature
does your microwave cooking for you. It’s easy and
convenient—just follow the step-by-step instructions
in this manual. A sensor detects steam from the food
and automatically adjusts cooking time and power
level
for best results.
Combination Auto Roast is a cooking function that
uses the temperature probe. You simply select from
4 Combination Auto Roast codes, and the oven
automatically adjusts power level, oven temperature
and internal food temperature to cook the food the
way
you want it.
Auto Defrost automatically sets the defrosting time
and power levels for you. You choose the appropriate
code number from 1 to 6 for the food you are
defrosting, then enter the food weight in pounds
and tenths of a pound and touch the START pad.
The oven calculates the defrosting time and changes
power levels during defrosting to give even defrosting
results.
The Auto StatiReminder feature lets you program the
oven to start cooking at a desired time, even if you’re
not at home. The Reminder feature can be used like
an alarm clock.
The following guide shows at a glance the difference
between microwave, convection and combination
cooking.
Comparison Guide
Microwave
Convection
Combination
COOKING
Microwave
energy is
Hot air circulates around
Microwave
energy and convection
METHOD
distributed evenly throughout
food to produce browned
heat combine to cook foods in up to
the oven for thorough, fast
exteriors and seal in juices. one-half the time of regular ovens,
cooking of food.
while browning and sealing in juices.
HEAT
Microwave energy.
Circulating heated air.
Microwave
energy and circulating
SOURCE
heated air.
HEAT
Heat produced within
food
Heat conducted from
Food heats from instant
energy from
CONDUCTION by instant energy penetration.
outside of food to inside. penetration and heat conducted from
outside of food.
BENEFITS
Fast,
high efficiency cooking.
Aids in browning and seals Shortened cooking time from
Oven and surroundings do
in flavor. Cooks some foods
microwave energy, plus browning
not get hot. Easy clean-up.
faster than regular ovens. and crisping from convection heat.
Read this book to learn the many different things your Microwave/Convection/Combination Oven can do. You will find a wide
variety of cooking methods and programs designed to suit your lifestyle.
11

COOKWA~
Am
ACCESSO~S
Cookware
Microwave
Convection
Combination
Heat-Resistant Glass,
YES
YES
YES
Glass-Ceramic (Pyrex@,
Fire
King@,
Coming
Ware@,
etc.)
Ceramic
YES YES YES
(Cookware with
no metal trim)
Metal NO
YES NO
Non Heat-Resistant Glass
NO
NO
NO
Microwave-Safe Plastics
YES
NO
YES*
Plastic Films and Wraps
YES
NO
NO
Paper Products
YES
NO
NO
Straw, Wicker and Wood
YES
NO
NO
*Use only microwave
cookware that is safe to 400°F.
NOTE:
For more information on the proper use of cookware in your
oven, see
your
Microwave Convection Cookbook.
Cookware Tips
Convection Cooking
METAL PANS are recommended for all types of baked
products, but especially where browning or crusting
is important.
Dark or dull finish
metal pans are best for breads and
pies because they absorb heat and produce crisper crust.
Shiny aluminum
pans are better for cakes, cookies or
muffins because these pans reflect heat and help
produce a light tender crust.
GLASS OR GLASS-CERAMIC casserole or baking
dishes are best suited for egg and cheese recipes due to
the cleanability of glass.
Microwave
Combination Cooking
GLASS OR GLASS-CERAMIC baking containers are
recommended. Be sure not to use items with
metal
trim
as it may cause arcing (sparking) with oven wall or
metal accessory shelf, damaging the cookware, the
shelf or the oven.
HEAT-RESISTANT PLASTIC microwave cookware
(safe to
4W°F.)
may be used, but it is not recommended
for foods requiring crusting or all-around browning,
because the plastic is a poor conductor of heat.
Convection
Combination
Broil
METAL SHELF
NO
YES
YES YES
NO
NO
NO YES
12

The MinutdSecond Timer
Using a Holding Time
The Minute/Second Timer has three timing
The Minute/Second Timer can also be used to
functions:
program a “holding time” between microwave
● It operates as a minute timer.
cooking
functions.-The
time can range from one
second to 99 minutes and 99 seconds. A holding or
“
It
mn
be set to delay cooking.
standing time may be found in some of your own
● It can be used as a hold setting after defrosting.
recipes fir in the Cookbook supplied.
The
Minute/Second Timer operates without
microwave energy.
How to Time a 3-Minute Phone Call
Step 1:
Touch
MIN/SEC
TIMER pad.
Step 2: Touch number pads 3,0 and O (for 3 minutes
and no seconds).
Step 3: Touch START. Display shows time counting
down.
Step
4: When time is up, oven signals, flashes “End,”
and display shows time of day.
Programming Delayed Cooking
To delay cooking up to
99
minutes and 99 seconds,
touch the pad for the desired cooking function. For
example, touch TIME COOK I & II and enter cook
time. Touch
MIN/SEC
TIMER and enter number
of minutes to delay cooking. Touch START.
When
delaying a temperature cooking function which
uses the temperature probe, be sure the probe is
in food before touching START.
How to Defrost, Hold and Time Cook
Let’s say you want to defrost a frozen casserole for
15 minutes, hold for
10
minutes and then Time Cook
for 25 minutes. Here’s how to do it:
Step 1:
Take casserole from freezer and place in oven.
n
Step 2:
Touch TIME DEFROST pad.
TIME
DEFROST
Step 3:
Touch pads 1,5,0 and O for 15 minutes
defrosting time. (Defrosting is automatically set on
power
level
3 but can be changed by touching the
POWER LEVEL pad and the desired power level.)
H
Step 4:
Set standing or hold time by
touching
MIN/SEC
TIMER pad.
Step
5: Touch pads 1,0,0 and O to hold for
ten minutes.
m
Step
6: Touch TIME
COOK I &11 pad.
Step
7: Touch 2,5,0 and O for 25 minutes of
cooking time.
m
Step 8:
Touch START. As each
START
function is automatically performed,
oven display shows instructions
entered and the function. When
time is up, the oven signals and
flashes “End.”
(continued next
page)

HOW TO USE THE
mTWSECO~
T~ER
(continued)
Using the MinutdSecond Timer While Running Another Program
The Minute/Second Timer can be used while another
NOTE: The Minute/Second Timer will not work
program is running. First setup the other program and
while Auto
StatiReminder, Combination Auto Roast,
touch START. Then touch the
MIN/SEC
TIMER pad.
Auto Defrost or Auto Cook are running.
Enter the amount of time you want by touching the
number pads. Do not touch START; the timer will
automatically begin within three seconds.
Questions and Answers
Q. What will happen if I accidentally reverse my
defrost, hold and cook instructions?
A
The oven will automatically rearrange your
program. Defrosting
will
always come first, then
hold, and then the cooking function.
NOTE:
Foods that spoil easily, such as milk, eggs,
fish, stuffings, poultry and pork should not be
allowed to sit out for more than one hour after
defrosting. Room temperature promotes the
growth of harmful bacteria.
Q.
Can
I defrost and hold only?
Q. I programmed my oven for a specific defrosting
A. Yes.
Sometimes you may only want to defrost a
time but it defrosted longer than necessary.
food, hold it, and cook it later. All you need to do
What happened?
is
program in defrost and amount of time. Then
A.
When instructions conflict, the oven carries out
program the hold time. Be sure to put the thawed
the last instruction. You may have set the oven
dish in the refrigerator promptly.
to defrost for 4 minutes, hold for 2 minutes, and
then defrost for 6 minutes. In this case, the oven
would
defrost for 6 minutes and hold for
2 minutes.
COOmG
Time Cook I
Time Cook allows you to microwave for a selected
amount of time.
Power level 10 (High) is recommended for most
cooking, but you may change this for more flexibility.
See your Cookbook.
To become better acquainted with time cooking, make
a cup of coffee by following the steps below.
:;;:!’f
I
m
m
Step
2: Touch TIME
COOK I &11 pad.
m
Step
3:
Select
your time. Touch pads 1,0
and O for one minute.
Because automatic power level 10 is recommended
for this cup of coffee, there is no need to change the
power level. (If power level 10 is not appropriate, see
“How to Change Power Level” on next page.)
m
Step
4: Touch the START pad.
and is microwave-safe (refer to Microwaving Tips
section). Place cup in oven and close door.
14

Step
5: When time is up, the oven signals and flashes
“End.” The oven, light and fan shut off.
How to Change Power Level
Step 6: Open the door.
After setting cooking time, touch POWER
LEVEL pad, then touch desired number for new
power level. Then touch START.
Using the Time Cook II Feature
The Time Cook 11 feature lets you set two time
cooking functions within one program. This is ideal if
you want
to
change power levels during your cooking
operations. Here’s how to do it.
Step 1:
Place food in oven in microwave-safe
container and close the door.
m
Step
2: Touch TIME COOK I & 11.
TIME COOK
I
&II
Step
3: Select your first cook time. For example,
touch 2, 1 and 5 for two minutes and 15 seconds.
Step 4:
Touch TIME COOK I & 11.
Step
5: Set your second cook time.
Step
6: Change the power level.
How to Change Power Level
After setting cooking time, touch POWER LEVEL
pad, then touch desired number for new power level.
Step
7: Touch START.
Step 8:
“POWER
10”
is displayed and Cook Time 1
is shown counting down.
Step
9: At the end of Cook Time 1, the second
power
level
is displayed and Cook Time 2 is shown
counting down.
Step 10:
When time is up, the oven signals and
flashes “End.” The oven, light and fan shut off.
Step 11:
Open the door.
Questions and Answers
Q. I set my oven for the time called for in the
recipe, but at the end of the time allowed, my
food was not done. What happened?
A.
Since house power varies due to time or location,
many Time Cook recipes give you a time range to
prevent overcooking. Set the oven for minimum
time, test the food for doneness and cook
the
food
a little longer, if necessary.
Q. I touched the number pads and selected my
power level. When I touched START, however,
my oven didn’t come on. Why not?
A.
The TIME COOK
I
& 11 pad must be touched
before setting the power level otherwise your oven
will not begin cooking.
Q. I want to cook on a power level other than 10
(High). What do
I
need to do?
A.
To change power level, touch the POWER
LEVEL pad, then touch desired number for new
power
level.
Q. Can I interrupt Time Cook to check the food?
A. Yes.
To resume cooking, simply close the door
and press the START pad. The timer must be reset
for cooking to resume unless time is remaining
on timer.
15

The Express Cook Feature
COO~G
BY
T~E
(continued)
Add 30 Seconds
The Express Cook feature is a short-cut method to set
time for 1-5 minutes.
To Express Cook your food or beverage:
n
The Add 30 Seconds feature provides
ADD
~
a convenient way to extend cooking
SECONDS
time by 30 seconds while the oven
Step 1:
Touch a number pad (from 1 to 5) that
timer is counting down. It will add
30 seconds to the time shown each
corresponds with the amount of your desired cooking
time (in minutes). For example, touch the 2
Dad
for 2
time the pad is touched.
.
minutes of cooking time.
-
Step
2: Touch the START pad.
The oven will automatically signal, flash “End” and
shut off at the end of the programmed time.
How to Use Auto Start
The Auto Start feature allows you to program
Step 2:
Enter the time you want the oven to start.
your oven to begin cooking at a preset time of
(Be sure your microwave oven clock shows the
day—up to a 12-hour delay.
correct time of day.)
m
Step 1:
Touch AUTO
AUTO START START/REMINDER pad.
Step 3:
Enter your desired cooking program.
Step
4: Touch START pad. The oven will
automatically start at the desired time.
How to Use Reminder
The Reminder feature can be used like an alarm
Step 3:
Touch START pad.
clock, without starting the oven.
The reminder is now set at
Example: It is 7 a.m. and you must remember to
the time you programmed, and
leave for a dentist appointment at 10 a.m.
will
signal you at that time with
a beeping sound until you open
n
Step 1:
Touch AUTO
the door or touch the
CLEAWOFF
pad. The
AUTOSTART START/REMINDER pad.
REMINDER
display will show REM until the oven door is
opened or
CLEAWOFF
is touched. The
REMinder
time may be displayed by touching the AUTO
Step
2: Enter the time you want the oven to remind
START/REMINDER pad. The time-of-day may be
you. (Be sure your microwave oven clock shows the
displayed by touching the CLOCK pad.
correct time of day. The reminder time can be set up
to 12 hours later).
16

DEFROST~G
BY
TM
Time Defrost (Power Level 3)
Time Defrost is designed for speedy thawing of
frozen food and
is
one of the great advantages of
a microwave oven.
Use Time Defrost to quic~y thaw foods such as bread,
rolls, vegetables, fruits and frozen dinners. The Auto
Defrost setting is
prefemed
for meat and poultry because
the oven sets the defrosting time and power levels
for you.
●
Power level 3 is automatically set when you press
TIME DEFROST pad, but you may change this for
more flexibility.
●
See your Cookbook for defrosting guides.
How to Change Power Level
After setting defrosting time, touch POWER
LEVEL pad, then touch desired number for new
power level. Then touch START.
To become better acquainted with the defrost function,
defrost a 10 oz. package of frozen strawberries by
following the steps below.
Step 1:
Place a package of frozen strawberries in the
oven and close door. Be sure package contains no metal.
o
Step 2:
Touch TIME DEFROST.
TIME
DEFROST
Step 3:
Select one
hdf
of the total defrosting time
recommended in your Cookbook. For example, touch
pads 4,0 and O for 4 minutes.
m
Step
4: Touch START. When
START
the cycle is completed, the oven
signals and flashes “End,” then
automatically shuts off.
Step 5:
Turn the package over, close the door and repeat
Steps 2 and 3 to set remaining half of defrosting time.
Touch START.
Step
6: When the oven signals and flashes “End,” open
the door, remove the package and separate strawberries
to finish defrosting.
Defrosting Tips
●
Foods frozen in paper or plastic can be defrosted in
the package.
<*9
~q~;::ti;.”:s~
,“
●
Family-size, pre-packaged frozen dinners can be
-w
=
defrosted and microwaved. If the food is in a foil
●
For even defrosting, some foods need to be broken
container, transfer it to a microwave-safe dish.
up or separated part of the way through the
●
Your Cookbook has a defrosting guide.
defrosting time.
(cc~ntinued
next page)

DEFROST~G
BY
TM
(continued)
Questions and Answers
Q. When I press START, I hear a dull thumping
Q. Should all foods be completely thawed before
noise. What is it?
cooking?
A.
This sound is normal. It is letting you know the
oven is using a power level lower than
10
(High).
Q. Can I defrost small items in a hurry?
A. Yes,
but they
will
need more frequent attention
than usual. Raise the power level after entering
the time by touching the desired power level pad.
Power level 7 cuts the total defrosting time in
about 1/2; power
level
10 cuts the
total
defrosting
time to approximately 1/3. During either, rotate or
stir food frequently.
Q. Why don’t the defrosting times in the
Cookbook seem right for my food?
A.
Cookbook times are averages. Defrosting time can
vary according to the temperature in your freezer.
Set your oven for the time indicated in your
Cookbook. If your food is still not completely
thawed at the end of that time, reset your oven
and adjust the time accordingly.
A.
Some foods should not be completely thawed
before cooking. For example, fish cooks so quickly
it is better to begin cooking while it is still slightly
frozen.
Q. Can
I
open the door during Time Defrost to
check on the progress of my food?
A. Yes.
You may open the door at any time during
most microwaving. To resume defrosting,
close
the
door and press START. The oven begins operating
if time is
left
on timer. If not, reset timer.
COO~G
BY
TEWEMTURE
Internal temperature is the best test of doneness for
Temp
CooUHold
takes the guesswork out of cooking,
many
foods.
because the oven automatically switches to “Hold”
Use Temp
Coo~old
to cook a variety of foods to
setting after reaching the preset food temperature from
the desired finished food temperature. The Time
90°F.
to
199°F.
and maintains that temperature for up
Cook I &II
setting
is recommended for batters,
to one hour or until you touch the
CLEAWOFF
pad.
doughs, frozen fo;ds and foods which are
di~cult
NOTE:
Oven automatically switches to “Hold” when
to cook precisely with the probe.
preset food temperature is reached.
The Temperature Probe
The temperature probe is a food thermometer that
gauges the internal temperature of your food. Use
the probe when you want to Convection Cook or
Combination Cook to a
prefemed
internal
temperature. (Its appearance may vary from picture
at right. ) The probe must be used when using Temp
CooMHold
or Auto Roast. To use your probe
properly, follow directions on the next page.
18

How to Use the Temperature Probe
Place probe so that point rests in
center of the thickest meaty part of
roast, or into the cut end or
meatiest part of boneless ham or
lamb. Point should not touch bone,
fat or gristle. For bone-in ham or
lamb, insert probe into center of
lowest large muscle or joint.
Insert probe into meatiest part of
For dishes such as meatloaf or
inner thigh, below and parallel to
casserole, insert probe into center.
the leg of a whole turkey.
How to Temp Cook a
Rolled
Beef Rib Roast to Medium
Step 1:
Insert temperature probe and attach probe
securely in oven wall. Close the door.
n
Step 2:
Touch TEMP
COO~OLD
TEMP COOK
,“~g,~,,
pad.
Step
3: Touch 1,5 and O for
150°F.
n
Step 4:
Touch POWER LEVEL pad.
POWER
Touch 5 for medium power.
LEVEL
m
Step
5: Touch START. If internal
START
temperature of the roast is less than
90°F.,
display will show “COOL”; if
temperature is
90°F.
or above, display
shows temperature counting up.
Step
6: When
150°F.
is reached, the oven will sound
and display
“HOLd.”
The oven
will
then hold the
temperature.
m
Step
7: Touch the
CLEAWOFF
pad
to stop the cycle.
Step 8:
Remove probe and food from the oven.
Cooking Tips
c
Use a lower power level; foods will heat more
evenly though requiring more time.
Q
Be sure frozen food has been completely defrosted
before inserting probe. Probe may break off if used
in frozen foods.
●
Cover foods loosely for moisture control and quick,
even heating.
(cont;nued next
page)
19

COO~G
BY
TE~ERATUM
(continued)
Questions and Answers
Q. Are there any foods I can’t Temp Cook? Q. Can I leave my probe in the oven if it’s not
A. Yes.
Delicate butter icings, ice cream, frozen
inserted in food?
whipped toppings, etc., soften rapidly at warm
A. No, if it touches the oven wall, it may damage
temperatures. Batters, doughs and frozen foods are
the oven.
also difficult to cook precisely with the probe. It’s
best to Time Cook these foods.
Q. Can I Temp Cook different portions of food at
different temperatures?
Q. Why did
“PRObE” flash on the display after I
touched the START pad?
A. Yes. The
temperature probe gives you the freedom
to cook different portions of food at different
A.
“PRObE”
will flash if you don’t seat the cable
temperatures to suit individual eating styles.
end of the probe securely into the receptacle
Simply place probe in food and change
in the oven
wall
or if you touch the TEMP
temperature setting as needed.
COO~OLD
pad and forget to use the probe.
AUTO DEFROST
With the Auto Defrost feature, the oven
When the oven reaches approximately half of the total
automatically sets the defrosting time and power
defrosting time, the display flashes
“TURn,”
telling
levels
for you. You choose the appropriate code
you to turn food over and will not continue defrosting
number from 1 to 6 for the food you are defrosting,
until door is opened and START is touched again.
then enter the food weight in pounds and tenths of
After defrosting time is complete, the oven
a pound (See Conversion Guide on next page) and
touch START. The oven calculates the defrosting time
automatically turns off.
and changes power
levels
during defrosting to give
even defrosting results.
How to Set Auto Defrost
NOTE:
Before you begin, check the Automatic
Defrosting
guide
for minimum and maximum food
m
Step
5: Touch START pad. Defrost
time begins counting down on
weights
f;r~ach
code number. You
will
need to know
your food weight and corresponding code before
beginning.
Step
1:
Remove frozen meat from package and
place
in microwave-safe dish. Place in oven and close door.
m
AUTO
DEF.
Step
2: Touch AUTO DEFROST
@
pad.
m
‘isplay:
Step 6:
When 1/2
the defrosting time is
completed, the oven
signals and
“TURn”
flashes on display
instead of time counting
down. Open door and
turn package over.
Step
7:
Close door and touch the START pad. Display
shows remaining defrosting time counting down.
Step
4: Touch number pad 3 and O for weight of 3
lbs.
Step
8: When defrosting
time is completed, oven
signals,
“End” flashes,
and oven turns off.
20
/