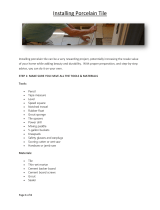
Page is loading ...

Floor & Wall Tile Installation Guide
Understanding Substrates and Surface Preparation
Floor, wall, and mosaic tiles must be installed over a structurally sound substrate that is clean, smooth, dry and
free of moisture/grease/wax/chemicals. Concrete, cement board, plywood, and drywall are examples of
common and acceptable substrates. Any damaged, loose or uneven areas must be repaired, patched and
leveled. Remove any moldings, trim, appliances, etc., which could interfere with installation. Door jambs may
be undercut for tile to slip under. When prepared correctly, these materials allow for proper mechanical
bonding with the adhesive mortar materials. Thinset, mastic, and epoxy are all examples of common tile
mortars. Carefully read and follow all instructions from the mortar manufacturer prior to installation.
Determining the Tile Layout
The ultimate goal when determining a layout is to minimize the amount of cut tiles across the entire installation.
This requires careful planning prior to mixing the mortar and setting the tiles.
For floor tile installations, begin by marking the center point of all four walls. Use chalk snap lines to mark the
center points of opposite walls and their intersection in the middle of room. Be sure that the lines are perfectly
square at 90 degrees to one another. Place a row of loose tiles (no mortar) along a center line in both
directions leaving spaces for uniform grout joints. Use tile spacers to achieve a consistent distance. If this initial
layout results in awkward or small tile cuts at the base of the wall, adjust your chalk line and snap it again.
Once satisfied with the layout, begin snapping additional chalk lines parallel to the original two. These will serve
as a visual guide throughout the installation.
For wall tile installations, determine the height and width of the installation area. Use a carpenter’s (or bubble)
level to mark an initial horizontal and vertical line in the center of the installation. Since gravity won’t allow the
tiles to be laid out across the installation area, create a “jury stick” tool out of straight 1”x2” lumber to help
visualize the tiles across the wall. Lay a horizontal row of tiles on the floor and mark the placement of the tiles
on the wood following the pattern you plan to use. Remember to insert spacers between each tile. If the wall
tiles used are not square, repeat this process to make a jury stick for vertical wall tile placement.
Working with Mortar
Select the correct adhesive mortar for the substrate. Carefully follow all instructions and precautions on the
mortar packaging. Mix just enough mortar in the bucket for 30 minutes of installation to avoid premature
curing. Spread a 1/4" coat of mortar on the substrate using the flat side of the trowel recommended on the
packaging. Cover an area approximately 2’x3’ on the floor, or 1’x2’ on the wall. Next, use the notched side of
trowel to comb the adhesive into standing ridges by holding the trowel at a 45-degree angle. This removes
excess adhesive resulting in a uniform, ridged setting bed. Do not spread more mortar on the substrate than
you can set tile in within 15 minutes.
Setting the Tile in Mortar
Variation in shading is an inherent characteristic of tile. Mix the tiles from several cartons prior to setting to
avoid dramatic shifts in color tone from one area to the next. Begin installing tiles in the center of the room, one

chalk line section at a time. Finish each grid before moving on to the next. Place the first tile in the corner of
the grid near the previous section and work outward. Do not slide tiles into place. Insert tile spacers as each
tile is set and leave them in place until the mortar has cured. Place perimeter tiles last and leave a 1/4" gap
between the tile and wall. Long linear tiles should never be set in a grid or running bond pattern. There should
be no more than a 33% overlap between adjacent pieces. The grout joint should be expanded larger than a
typical 1/8”. If the field tile exceeds 15” in length in any dimension, spread a thin layer of mortar directly onto
the back using the flat edge of the trowel prior to pressing into the mortar bed. This technique is called “back
buttering” the tile and it ensures a complete bond. When the tiles in each chalk line grid are set, tap them
down to ensure a proper bond and level plane. Remove excess mortar from open grout joints with a putty
knife. Do not grout or walk on the tile until the mortar has completely cured (usually after 24 hours).
Making Tile Cuts
Carefully measure tiles to be cut and mark with a pencil or felt-tip pen. Make straight or diagonal cuts with a
tile score and cut tool or a wet saw. Make curved cuts with a tile nipper by chipping away small pieces at a
time. Full-length curved cuts should be made with a rod saw. Smooth all sharp edges by hand using a silicon-
carbide stone.
Applying Grout to the Joints
Once the mortar has cured, carefully read and follow all instructions and precautions on the grout packaging.
Mix just enough to fill the joints in an area that can be completed in less than 30 minutes. Remove all tile
spacers and spread the grout across the tile surface. Apply pressure down into the joints with a silicon grout
float tilted at a 45-degree angle. Remove excess grout from the tile surface immediately by tilting the grout
float about 90-degrees and scraping it diagonally across the tile. Wait 20 minutes for the grout to begin to set
then use a damp sponge to clean the excess from the surface and smooth the grout joints. Rinse the sponge
often and change water in the bucket as it begins to turn cloudy. Let the grout dry until a haze forms on tile
surface, then polish the tile with a soft damp cloth. Rinse again with a sponge and clean water. The grout
should be completely cured within 24 hours of finishing the last step. Do not apply sealers to the tile or grout for
at least two weeks, and only in accordance with manufacturer's recommendations.
/