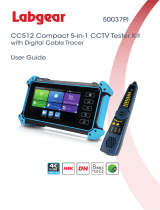
HD CCTV tester

Pomiacam HD CCTV tester User manual

  • Hello! I am an AI chatbot trained to assist you with the Pomiacam HD CCTV tester User manual. I’ve already reviewed the document and can help you find the information you need or explain it in simple terms. Just ask your questions, and providing more details will help me assist you more effectively!
  • What is the primary function of the Pomiacam HD CCTV Tester?
    What types of camera signals does the tester support?
    Can the tester control PTZ cameras?
    What is the maximum resolution that the tester can handle?
    Can the tester display video signals from XVRs?
    Does the tester have cable testing capabilities?
HD CCTV tester
User Manual
Thank you for purchasing the HD CCTV tester. Please read the manual
before using the HD CCTV tester and use properly.
For using the HD CCTV tester safely, please first read theSafety
Informationcarefully in the manual.
The manual should be kept well in case of reference.
Keep the S/N label for after-sale service within warranty period. Product
without S/N label will be charged for repair service.
If there is any question or problem while using the HD CCTV tester, or
damages occurred on the product, please contact our technical department.
Content
1. Safety information .......................................................................................... 1
2. Function interface ........................................................................................... 2
3. Operation........................................................................................................ 5
3.1 Installing the Battery ........................................................................ 5
3.2 General ............................................................................................. 6
4. Feature ........................................................................................................... 6
5. Feature introduction ....................................................................................... 7
5.1 TVI/CVI/AHD/CVBS camera test .................................................... 7
5.2 Coaxial PTZ control.......................................................................... 8
5.3 RS485 control ..................................................................................10
5.4 EX-SDI/HD-SDI camera test ...........................................................10
6. XVR display ..................................................................................................11
6.1 HDMI input .....................................................................................11
6.2 VGA input .......................................................................................12
7. Cable Tester ..................................................................................................12
7.1 UTP Cable Tester.............................................................................12
7.2 Digital cable tracer (Optional)..........................................................14
8. U disk reading ...............................................................................................16
9. Audio test ......................................................................................................16
10. Setting .........................................................................................................17
11. Packing kits .................................................................................................17
12. Specifications ..............................................................................................18
1
1. Safety information
The tester is intended to use in compliance with the local rules of the
electrical usage and avoid to apply at the places which are inapplicable for
the use of electrics such as hospital, gas station etc.
To prevent the functional decline or failure, the product should not be
sprinkled or damped.
The exposed part of the tester should not be touched by the dust and
liquid.
During transportation and use, it is highly recommended to avoid the
violent collision and vibration of the tester, lest damaging components and
causing failure.
Don’t leave the tester alone while charging and recharging. If the battery
is found severely hot, the tester should be powered off from the electric
source at once. The tester should not be charged over 10 hours.
Don’t use the tester where the humidity is high. Once the tester is damp,
power off immediately and move away other connected cables.
The tester should not be used in the environment with the flammable gas.
Do not disassemble the instrument since no component inside can be
repaired by the user. If the disassembly is necessary indeed, please contact
with the technician of our company.
The instrument should not be used under the environment with strong
electromagnetic interference.
Don’t touch the tester with wet hands or waterish things.
2
Don’t use the detergent to clean and the dry cloth is suggested to use. If
the dirt is not easy to remove, the soft cloth with water or neutral detergent
can be used. But the cloth should be tweaked sufficiently.
2. Function interface
1
RS485 data transmission indicator: the light is red while the data is
being transmitted
2
Charging indicator: the light is red while the battery is being charged.
The light will automatically turn off if charge completed
3
Power indicator: the light is green while the tester is turned on
3
4
Zoom in the image
5
Zoom out the image
6
Focus the image faraway
7
Focus the image nearby
8
Upward, select function, set parameter and tilt the PTZ upward
9
Rightward, select function, set parameter and pan the PTZ rightward
10
Confirm button, enter functions and save settings
11
Downward, select function, set parameter and tilt the PTZ downward
12
Leftward, select function, set parameter and pan the PTZ leftward
13
Setting button, enter the function parameter settings
14
Return/Close: Return and cancel the operation
4
15
CVBS/AHD/TVI/CVI input (BNC interface)
16
EX/HD-SDI input (BNC interface) Optional
17
HDMI input
18
DC 5V 1A power output, USB power bank
19
DC 12V 1A power output, temperately supply power for camera
20
ON/OFF power switch
21
LED light
22
Light power button
5
23
DC 5V 2A charging interface
24
RS485 Interface: RS485 communication for the PTZ
25
Audio input
26
UTP port, UTP cable tester port/ Cable tracer port (*Optional)
27
VGA input
3. Operation
3.1 Installing the Battery
The tester has built-in lithium ion rechargeable battery. The battery inside
battery cabin should be disconnected for safety during transportation!
Prior to the use of the instrument, please take out the battery insulation paper.
Sliding the ON/OFF power switch can power on or off the tester.
6
Notice: please use 5V 2A adapter to charge when charging. Too high
voltage/current will burn the instrument!
When the battery icon is full or the charge indicator turns off automatically,
indicate the battery charging is completed
3.2 General
The 5 inch TFT-LCD screen HD CCTV Tester is designed for maintenance
and installation of CVBS, TVI, CVI, AHD cameras, as well as HDMI input,
VGA input, Audio input, PTZ control, PING test, LED Flashlight, DC 12V
1A power output, etc. Its portability, user-friendly design and many other
functions make the CCTV tester an essential tool for all installers or
technicians.
4. Feature
5 inch TFT-LCD screen, 800*480 resolutions
RS485 PTZ control, baud 600-115200bps, compatible with more than 30
protocols such as PELCO-D/P, Samsung, Panasonic, Lilin, Yaan, etc
8MP TVI test, 3840 x 2160P 12.5/15 FPS, coaxial PTZ control & call
OSD menu
8MP AHD test, 3840x2160P 15 FPS, coaxial PTZ & call OSD menu
8MP CVI test, 3840 x 2160P 12.5/15FPS, coaxial PTZ & call OSD menu
8MP EX-SDI test, 3840 x 2160P 25/30FPS, coaxial PTZ & call OSD
menu (*Optional)
HD-SDI test, 1920 x 1080P 25/30/50/60 FPS, coaxial PTZ & call OSD
7
menu (*Optional)
3G-SDI test, 1920 x 1080P 50/60 FPS, coaxial PTZ & call OSD menu
(*Optional)
CVBS camera test, PTZ controller
DC12V/1A power output, camera can be powered from DC 12 Voltage.
DC 5V 1A power output, support reading USB disk
Audio in, support record and save the audio.
Improvement cable tester, UTP cable, telephone cable etc order and
connectivity test, can save testing report, if special number, need customized.
Can detect the near-end, mid-end and far-end fault point of RJ45 cable
connector
Digital Cable tracer, search BNC cable, network cable and telephone cable
from the mess cables. Cable tracer and UTP cable test app in the same
interface(*Optional)
3.7 V /5200mAh Li-ion Battery, after 4 hours charging, working time lasts
6.5 hours
5. Feature introduction
5.1 TVI/CVI/AHD/CVBS camera test
Connect camera to “AHD/CVI/TVI” port, enter “Auto HD” app. Can auto
recognize AHD/CVI/TVI/CVBS signal and display the image, as well as
display the camera type and frame.
8
5.2 Coaxial PTZ control
When enter “PTZ” option, press key switch to “menu setting”, and
switch to“key (open)” or “OK” option, press key to call out the camera
main menu.
9
10
5.3 RS485 control
Support RS485 control, baud 600-115200bps, compatible with more than 30
protocols such as PELCO-D/P, Samsung, Panasonic, Lilin, Yaan, etc. Can
set PTZ pan speed and Tilt speed, call set preset position. In the Auto
HD/CVBS IN interface, press “SET” , can set RS485 protocol, Port, Baud,
Address, PTZ, etc.
5.4 EX-SDI/HD-SDI camera test
Connect camera to “SDI” port, enter Auto HD app, and select SDI” to
enter SDI interface, can display the camera image, and will display the
resolution and frame rate in top-left corner, support up to 4K/8MP
3840x2160p 25/30fps EX-SDI camera test, coaxial PTZ, call OSD menu and
RS485 control.
11
6. XVR display
6.1 HDMI input
Connect one end of HDMI cable to Tester’s “HD IN” port, other end connect
to XVR’s “HDMI” port, enter “HDMI input” app, can receive the real-time
audio and video signal from XVR, and will display the resolution and frame
rate in top-left corner, support up to 4K/3840x2160p30fps resolution.
12
6.2 VGA input
Connect one end of VGA cable to Tester’s “VGA” port, other end connect to
XVR’s “VGA” port, enter “VGA input” app, can receive the real-time video
signal from XVR, support up to 1920x1200 resolution.
7. Cable Tester
7.1 UTP Cable Tester
Connect one end of LAN cable or telephone cable to Tester’s UTP/SCAN
port, other end connect to the UTP port of Cable tester or cable tracer
(*optional).
13
Cable tester can test cable sequence, continuity and cable type, can detect
near / medium / far end fault of RJ45 cable connector, display the number of
the remote kit (Remote default No.255).
14
Visual judgment of network cable availability:
All sequence of cable is correct, generally corresponds to Gigabit
straight/cross network cables.
Cable sequence is wrong, but the cable is still available, generally
corresponds to 100M straight-through/cross network cable.
All sequence of cable is wrong, not available.
Meter-end/cable tester-end fault location:
Tester-end/cable tester-end display “x”, it means the RJ45 cable connector or
within 1 meter from the RJ45 cable connector is faulty.
The middle part of sequence display “x”, it means the RJ45 cable connector
at the end of Tester/Cable tester is normal, and there is a breakpoint 1 meter
away from the RJ45 cable connector.
The middle part of sequence is not communicated and not display “x”, it
means the RJ45 cable connector at the end of Tester / Cable tester is faulty,
and the middle of the cable is normal.
Tester-end can perform RJ45 cable connector fault detection even when the
remote end is not connected to the cable tester’s UTP interface.
7.2 Digital cable tracer (Optional)
Press key button, to enter “Cable Tester” and select “Cable tracer” app.
Connect UTP cable or telephone cable to tester bottom port “UTP/SCAN”,
15
or use adapters and cables to connect other cables, such as BNC cable. Or
use BNC adapters and alligator clamp cable to connect BNC cable etc.
Note: If use BNC adapters and alligator clip cable to connect BNC cable etc.
Please select to “BNC mode”, if connect shielded cable, please selectSTP
mode”.
Locate cables: Arrow keys to switch mode, “UTP mode” to looking for
unshielded network or telephone cables, “BNC mode” for finding BNC
cable after connecting adapter. STP mode” is used to find the shielded
network cable. Turn on the cable tracer. The round knob, if clockwise
rotation the knob to increase sensitivity, and turn it counter clockwise to
decrease the sensitivity.
16
Silent mode: Press the key “MUTE” for 2 seconds, and will make a sound
Di” to start.
In silent mode, locate cable according to the indicator signal of 1-8. Press the
"MUTE" key again to exit silent mode.
Cable sequence test: When search cable, also can test UTP cable sequence.
Through the indicator to check cable sequence whether is correct. If the
indicator is “ON” , it means the cable sequence is correct.
8. U disk reading
Insert U disk to Tester’s “USB” port, enter “Media player” app, can read the
image, music, video and documents. And also support DC 5V 1A power
output, as power bank.
9. Audio test
Connect pickups or other Audio equipment to tester’s bottom port “Audio
in”, you can test the audio input from audio pickup devices by connecting
the audio pickup device to the CCTV tester with the supplied audio cable.
17
10. Setting
Language: Select your desired language: English, Korean, Russian, Italian,
Polish, Spanish, French, Japanese, Deutsch,Turkish, Portuguese, Czech,
Serbian,etc.
Brightness/Contrast/Color: Set the image brightness of Auto HD, CVBS,
VGA and HDMI input
Backlight: Set the desired brightness of the cctv tester
Volume: Set volume level
PTZ address scan: You can toggle the PTZ Address scan off or on before
entering the PTZ controller app. This needs to be turned on in order to use
the PTZ Scan feature of the PTZ app.
Power on status: Set the instrument to power on and enter the program
directly. It can set the main screen/Auto HD/SDI/CVBS in/VGA/ HDMI in,
etc
11. Packing kits
1) Tester
2) Network cable tester
3) Adaptor DC5V 2A
4) RJ45-BNC converter (Only for cable tracer)
5) Li-ion battery (3.7V DC 5200mAh)
6) Tool bag /DC Power cable/BNC cable/RS485 cable/Audio cable
7) Safety cord/Wrist belt
8) Manual
/