Page is loading ...

USER MANUAL
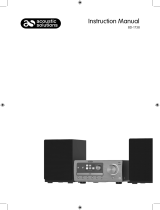
MODEL: MICRODAB10
DAB CD MICRO SYSTEM
DAB CD MICRO SYSTEM
AUDIO IN
SOURCE
PLAY/PAUSE
PREV NEXT
EJECT

Welcome1
Troubleshooting
5
Technical Specifications
6
Your Micro system
2.1 In The Box
2.2 Front View
2.3 Rear View
2
Quick Setup
3
Features4
CD Mode
MODEL: MICRODAB10
3.1 Install the Left/Right speakers
3.2 Power on the unit
3.3 Listen to the Radio
3.4 Place CD disc and play
3.5
Play audio device
Customer Support
7
4.1 Switch to CD mode
4.2 Eject the disc
4.3 Play the disc
4.4 Stop the disc
4.5
Skip the song
4.6 Accelerate the song
4.7 Select the song
4.8 Repeat the song
4.9 Random the songs
4.10
Set the programmed order
AUDIO Mode
4.11 Connect audio device
4.12 Power on the unit
4.13 Switch to AUDIO mode
4.14 Play audio device
4.15 Adjust the volume
FM Mode
DAB Mode
4.16 Switch to FM mode
4.17 Tune the frequency
4.18 Skip stations
4.19 Store the stations
4.20
Check the FM information
4.21 Scan setting
4.22 Switch to DAB mode
4.23 Select DAB stations
4.24 Store the stations
4.25 Check the DAB information
4.26
Manual tune
4.27 Auto scan
DAB menu settings
4.28 DRC setting
4.29 Prune the stations
4.30 System reset

Welcome
Thank you for choosing this Goodmans product. We’ve been
making electronics for the British people for 70 years. Each of
our projects has been carefully designed to be great at what
it does and this one is no exception. We hope you enjoy your
new DAB CD Micro system.
1
Your Micro system2
In The Box
Carefully remove your product from the box.
Inside the box you will find:
• Micro System
• Quick Start Guide
• Guarantee Booklet
2.1
Mains Power
Please ensure that your mains supply is compatible before use.
Disconnect the Power Cord from the mains when not in use.
Position of Micro System
Place on a fat, stable surface that is not subject to vibrations.
Avoid the following locations:
• Where it is exposed to direct sunlight
• Where it is close to heat radiating sources
• Where the humidity is high and ventilation is poor
• Where it is dusty
Adjusting the Aerial
Fully extend the aerial to ensure good reception in F
It may be necessary to alter the position of the product to achieve the best signal.
MODEL: MICRODAB10
• Remote Control
Your DAB CD Micro System requires a mains supply of 220V 240V AC, 50 Hz. ~
M/DAB mode.

Front View
Rear View
Remote sensor
Point the remote control to the sensor
within 7 metres range.
PLAY/PAUSE button
Press to pause or play the music.
STANDBY button
Press to set to standby mode or turn on.
PREVIOUS/NEXT buttons
Press to skip to the previous or next song
or station.
VOLUME+/- button
Press to adjust the volume level.
A
B
C
D
E
F
G
H
3.5mm Audio in socket
Used to connect external audio sources.
I
J
K
L
MODEL: MICRODAB10
2.2
2.3
L
AC 220V-240V 50Hz
ANTENNA
M
N
SOURCE button
Press to select the modes.
AUDIO IN
SOURCE
PLAY/PAUSE
PREV NEXT
EJECT
A
B
C
D
E
F
G
H
I
J
K
EJECT button
Press to pop out the disc drawer.
Aerial
Indicate the status.
Display the station information.
Disc drawer
Power Indicator
LCD Display
Power cord lead
Connect to the power supply.
M
N
Speaker connections

Remote control
A
B
C
D
E
F
G
H
STANDBY button
Press to enter the standby mode or turn on.
I
J
K
L
MODEL: MICRODAB10
2.4
M
N
O
P
Q
SOURCE buttons
Press to select modes: CD, DAB, FM, AUX IN.
PLAY/PAUSE button
Press to pause or play the music.
STOP/MENU button
Press to stop the music or enter the menu.
PROGRAM
SHUFFLE
LOUD
DSP
MUTE
TONE
VOLUME
DAB/FM
MENU
REPEAT
INFO
CD
AUX IN
STANDBY EJECT
ENTER
A
B
C
D
E
K
L
M
N
O
P
J
Q
R
F
G
I
H
PREVIOUS/NEXT buttons
Press to skip to the previous or next song.
NUMBER (0-9) buttons
Use these buttons to select song.
VOLUME+/- buttons
Press to adjust the volume level.
REPEAT button
Press to repeat the song.
MUTE button
Press to mute the sound, press again or
press VOLUME+/- button to resume.
TONE button
Use the TONE and VOLUME+/- buttons
to adjust the tone.
EJECT button
Press to pop out the disc drawer.
INFORMATION button
Press to view the station information.
ENTER button
PROGRAM button
Use to program the playback order.
SHUFFLE button
Press to play music in the random order.
LOUD button
Press to add a rounder bass sound at low levels.
R
DSP button
Press to select the sound fields.
FAST REWIND/FAST FORWARD buttons
Press to rewind or forward the music.
Press to perform a scan and confirm selection.

Audio cable
MODEL: MICRODAB10
Quick Setup
3
AC 220V-240V 50Hz
ANTENNA
ANTENNA
AUDIO IN
SOURCE
PLAY/PAUSE
PREV NEXT
EJECT
AUDIO IN
Music device
3.2 Plug in the mains cable and turn the power on at the power supply. Press the STANDBY button
to turn on the unit.
3.3 Extend the ANTENNA to get the best reception. Press the SOURCE button to enter the DAB or
FM mode. Follow the detailed operations to control playback in DAB or in FM mode.
3.4 Press the SOURCE button to enter the CD mode. Press the EJECT button to open the disc
drawer and insert a disc. Press the EJECT button again to close. The CD will begin playing from
the first track.
3.5 Press the SOURCE button to enter the Aux in (Audio) mode. Connect your audio device to the
AUDIO IN socket via a 3.5mm aux in cable. Control playback via your connected audio device.
3.1
3.2
3.3
3.4
3.5
3.1 Insert the speaker cables (red+ and black-) into the back of the unit to connect the left and right
speakers.

MODEL: MICRODAB10
Features
4
AUDIO IN
SOURCE
PLAY/PAUSE
PREV NEXT
EJECT
EJECT
CD mode
4.1 Press the SOURCE button on the panel or the CD button on
remote control to enter the CD mode.
4.2 Press the EJECT button to pop out the disc drawer, put a CD
on, then press the EJECT button again.
4.3 Press the PLAY/PAUSE button to pause or play the song.
4.4 Press the STOP button on remote control to stop playing,
press the PLAY/PAUSE button to re-start.
4.5 Press the PREV/NEXT buttons on the panel or / buttons
on remote control to skip to the previous or next song.
4.6 Press the / buttons on remote control to fast rewind or
forward the song , press repeatedly to resume normal speed.
4.7 Press the NUMBER buttons 0-9 on remote control to directly
select the wanted song.
4.8 Press the REPEAT button on remote control to set the repeat
mode.
4.9 Press the SHUFFLE button no remote control to play the disc
in random order, press again to resume.
4.10 You can set the disc played in a programmed order.
a) Press the STOP button on remote control to stop playing.
b) Press the PROGRAM button on remote control.
The screen displays: 01[00] 02[00].
c) Press the NUMBER buttons on remote control to select the
tracks to program.
d) Press the / buttons on remote control to skip between
the program tracks.
e) Press the / buttons on remote control to access the
further track orders.
f) When complete, use the / on remote control to scroll
across to the arrow , and then press the ENTER button on
remote control to begin playback.
g) To cancel the program sequence, press the button twice.
01 [00] 02 [00]
Track order
Track to program
ENTER
PROGRAM

MODEL: MICRODAB10
Features
4
Audio allows your unit quickly and easily to connect to an MP3
player or other external sources.
4.11 Use a 3.5mm audio cable to connect your external audio
device to the AUDIO IN socket on the front panel.
4.12 Connect the Micro system mains plug to the power supply.
4.13 Press the SOURCE button on the panel or the AUX IN button
on remote control to enter the AUDIO mode.
4.14 You may need to operate the external audio device directly
for playback features.
4.15 For optimum volume levels, adjust the volume on the external
audio device.
Audio Mode
Audio cable
Music devices
AUDIO IN
SOURCE
PLAY/PAUSE
PREV NEXT
EJECT
FM mode
DAB/FM
4.16 Press the SOURCE button on the panel or the DAB/FM button
on remote control to switch to the FM mode.
4.17 Press the / buttons on remote control or the PREV/NEXT
buttons on the panel to decrease or increase the frequency in
0.05MHz increments.
4.18 Press and hold the PREV/NEXT buttons on the panel or the /
buttons on remote control to scan through the frequency
range quickly. The scan will stop once it has found a station.
4.19 Press and hold one of the NUMBER buttons 0-9 to store the
station under that number. Directly press the required number
button to select a preset and activate the stored station.
4.20 Press the INFO button on remote control to cycle through the
information provided by the broadcasting stations:
Radio text: broadcasting text about the program;
Program type: the style or genre of music;
Program name: the frequency or name of the station;
Audio mode: stereo or mono.
4.21 Scan setting
a) Press the MENU button on remote control, when the SCAN
SETTING appears, then press the ENTER button on remote
control to view the sub menu.
b) Press the / buttons on remote control to select
<ALL STATIONS> (which will detect any station, even with
weak signal) or <STRONG STATION> (which will only detect
stations with good signal strength).
c) Press the ENTER button on remote control to confirm the
require option.
d) When you perform a scan, only stations fitting the applied
setting will be detected.
INFO
MENU

MODEL: MICRODAB10
Features
4
DAB mode
4.22 Press the SOURCE button or the DAB/FM button to switch
to the DAB mode.
4.23 Press the / button on remote control or the PREV/NEXT
button on the panel to find the previous or next station, then
press the ENTER on remote control or PLAY/PAUSE button on
the panel to activate the station.
4.24 Press and hold one of the NUMBER buttons 0-9 to store the
station under that number. Press the required number button
to select a preset and press the ENTER button to activate the
stored station.
4.25 Press the INFO button on remote control to cycle through the
station information: DLS text, signal strength, program type,
ensemble name, channel frequency, signal error, and bit rate.
4.26 Manual tune
a) Press the MENU button on remote control, then press the
PREV/NEXT button on the panel or / button on remote
control to find <MANUAL TUNE> and press the ENTER
button on remote control or PLAY/PAUSE button on the
panel to enter the manual tune options interface.
b) Press the PREV/NEXT button on the panel or / button
on remote control to cycle through the stations from 5A to
13F.
c) When you have selected one of the stations from 5A to 13F,
press the PLAY/PAUSE button on the panel or the ENTER
button on remote control to view the details, press again to
activate the station.
4.27 Auto scan
Press the MENU button on remote control, when AUTO SCAN
appears, press the PLAY/PAUSE or ENTER button, the unit will
search for all available DAB stations.
ENTER
PLAY/PAUSE
PREV NEXT
MENU
DAB/FM
ENTER

MODEL: MICRODAB10
Features
4
DAB menu settings
4.28 DRC (Dynamic range control)
To reduce and adapt the dynamic range of the audio signal
to listen in a noisy environment. This is not always available
for some DAB stations.
a) Press the MENU button, then press the PREV/NEXT button
or / button to find <DRC>, and press the PLAY/PAUSE
or ENTER button to enter the options interface.
b) Press the PREV/NEXT button or / button to select from
DRC OFF/ DRC LOW/ DRC HIGH.
c) At last press the ENTER button or PLAY/PAUSE button to
confirm the selection.
4.29 Prune the stations
When the radio has performed a scan in several locations,
there are some stored stations are no longer receive. Prune
function removes them from the stored list.
a) Press the MENU button, then press the PREV/NEXT button
or / button to find <PRUNE>, and press the PLAY/
PAUSE or ENTER button to enter the options interface.
b) Press the PREV/NEXT button or / button to select YES,
then press the ENTER button or PLAY/PAUSE button to
confirm the selection.
4.30 System reset
To set the system to the original settings.
a) Press the MENU button, then press the PREV/NEXT button
or / button to find <RESET>, and press the PLAY/
PAUSE or ENTER button to enter the options interface.
b) Press the PREV/NEXT button or / button to select YES,
then press the ENTER button or PLAY/PAUSE button to
reset the system.
ENTER
MENU

Problem What to do
There is no sound from my unit.
Check that the volume is not set to the minimum.
Make sure that the unit has been able to locate
The display shows abnormal in FM mode.
Try adjusting the position of the aerial or location
of the radio. Or turn off the unit, then turn on.
Poor reception
As with any radio service, there will be areas
of weak signal that may cause poor reception.
Ad just the aerial while monitoring the signal
strength until the optimum signal is obtained.
If reception is still poor, try re-locating the unit
to another part of the room.
Some of the buttons on the unit
are not working.
This may be caused by electrostatic discharge.
Turn the system off, disconnect the mains
plug and reconnect after a few seconds.
Troubleshooting
5
MODEL: MICRODAB10
FM/DAB stations.

Model Number MICRODAB10
Power Supply
220-240V AC ~ 50 Hz
Speaker Output Power
5W x 2
FM frequency Range
87.5-108MHz
Max Power Consumption
40W
Technical Specifcation
6
DAB frequency range 174.928-239.200MHz
Remote control distance without obstacle
MODEL: MICRODAB10
Customer Support
7
For all product support, warranty or returns;
please go to www.goodmans.co.uk/support
www.goodmans.co.uk
7 metres
/