DESCRIPTION
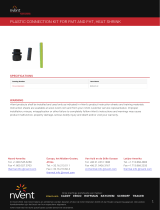
These instructions describe field connecting of nVent RAYCHEM
TraceTek TT bulk sensing cable.
For technical support, call nVent at (800) 545-6258.
TOOLS REQUIRED
• nVent RAYCHEM TraceTek TT-ULTRA-TORCH (PN 390067-000)
flameless heating tool (Ultratorch 200) or suitable heat gun
with concentrator tip
• nVent RAYCHEM TraceTek TT-STRIPPER (PN 358979-000)
Greenlee stripper (1917) or equivalent for 26 AWG wire
• nVent RAYCHEM TraceTek TT-CT-SCT crimp tool
(PN 644333-000)
• High impedance ohm-meter (Fluke 87 or equivalent; meter
must be capable of measuring to at least 20 megohms)
• Needle nose pliers • Small pair of wire cutters
• Permanent ink marker
ADDITIONAL MATERIALS REQUIRED FOR
TT-3000-CK-MC-M OR TT-3000-CK-MC-F
• nVent RAYCHEM TraceTek TT-Test-Tool-Pin&Socket
(PN 986291-000)
• nVent RAYCHEM TraceTek TT-MET-MC (PN 571293-000)
• nVent RAYCHEM TraceTek TT-FET-MC (PN 383017-000)
NOTES
• Do not use an open flame heating tool.
• The pin connector should always be installed on the cable end
pointed towards the alarm module.
• Use with TT3000 sensing cable only. This kit is not compatible
with other TraceTek sensing cables.
A
B
C
D
SCT
H
G
F
E
nVent RAYCHEM TraceTek TT-3000-CK-MC-M/F (PN 999313-000)
KIT CONTENTS: (5 M and 5 F connectors)
Item Qty Description
A 5 TT-CK-MC-M pin connector with spinner ring
B 5 TT-CK-MC-F socket connector
C 45 SolderSleeve
®
splices (5 extra)
D 11 Heat-shrinkable tubing, labeled SCT (1 extra)
E 11 Heat-shrinkable tubing, unlabeled (1 extra)
F 1 TT-MET-MC Pin end termination
G 1 TT-FET-MC Socket end termination
H 1 Pin and socket test tool
nVent RAYCHEM TraceTek TT-3000-CK-MC-M or (PN 415441-000)
(1 M connector)
nVent RAYCHEM TraceTek TT-3000-CK-MC-F (PN 494333-000)
(1 F connector)
Item Qty Description (Either A or B present in kit)
A 1 TT-CK-MC-M pin connector with spinner ring
B 1 TT-CK-MC-F socket connector
C 5 SolderSleeve
®
splices (1 extra)
D 1 Heat-shrinkable tubing, labeled SCT (0 extra)
E 1 Heat-shrinkable tubing, unlabeled (0 extra)
TT-3000-CK-MC-M/F
TT-3000-CK-MC-M
TT-3000-CK-MC-F
Field Installed Connectors for nVent RAYCHEM TraceTek 3000
Bulk Cable Installation Instructions

2 | nVent.com
Black wires
3
• Use the ohmmeter to measure the resistance
between the black wires. The resistance must
be greater than 20 megohms (meter may
read: ∞ O.L., etc.).
• If the measurement is less than 20 megohms,
the cable is wet or contaminated and must be
removed, inspected and cleaned and/or dried.
1 in
1
1/2 in
3/4 in
2
• Using the needle nose pliers, pull the four
wires from their grooves exposing
1 1/8 inch (28 mm) of wireless core.
• Cut off 1 inch (25 mm) of the core
without damaging the wires.
• Grasp the wire tips with the needle nose pliers.
• Pull the wires into their grooves and lightly tug to
straighten without stretching.
• Cut the wires to leave 3/4 inch (19 mm) protruding from
the cable end.
• Carefully strip 1/2 inch (13 mm) of insulation
from each of the wires (use 26 awg slot).
BlackBlack BlackBlack
Yellow (large tab)
TT-FET-MC TT-MET-MC
Red
Spinner
ring
Pin Connector
(Part A)
Yellow (large tab)
Red
Socket Connector
(Part B)
4
• Note the large tab cutout around rim
of connector. Position the large tab
at 12 o’clock position, see below.
• Use permanent ink marker to mark
flat portion of connector body behind
the large tab.
• For the pin connector (Part A) only,
slip the spinner ring, large hole first,
onto the connector.
• Attach TT-MET-MC and TT-FET-MC
to socket and pin connector (Parts
B and A) to use as a holder to avoid
burning fingers while applying heat.
Locate the Yellow Wire Connector Post
FIRE HAZARD. Heat guns and flameless heating
tools can cause fire or explosion in hazardous
areas. Be sure there are no flammable materials
or vapors in the area before using these tools.
Follow all site safety guidelines when working in
hazardous areas.
Component approvals and performance are based
on the use of specified parts only.
HEALTH HAZARD. Overheating heat-shrinkable
tubing or SolderSleeves will produce fumes that
may cause irritation. Use adequate ventilation and
avoid charring or burning. Consult MSDS RAY3122
and RAY5103 for further information.
CHEMTREC 24-hour emergency telephone:
(800) 424-9300
Non-emergency health and safety information:
(800) 545-6258
.
WARNING:
WARNING:

nVent.com | 3
Small end
Large end
SolderSleeve
Solder bands must
melt and flow onto
the wires and posts
TT-MET-MC
TT-MET-MC
SolderSleeve ends
must be inside connector
Align the tube
end with the
ribbed section
of the connector
SCT
Part D
SCT heat-
shrinkable
tubing
TT-FET-MC
5
7
6
8
• Keep wires in the same order that they exit from the cable end.
• Slide a SolderSleeve splice (small end first) onto each
wire, all the way to the cable end.
• The solder ring must lie over bare conductor, not
insulation.
• Wire ends must extend beyond the solder rings.
• Heat the SolderSleeves until they have shrunk fully and
the solder rings have melted and flowed. Keep the heat
source moving to avoid charring the connector.
• Carefully remove assembly from heat. Hold connector
and cable steady and allow to cool. Moving solder joint
when hot can weaken the connection.
• Once yellow wire is aligned correctly to the mark on
connector body, the red wire will be opposite to it and all
wires will be in their correct positions.
• Orient the connector and push aligned connector posts
into the SolderSleeves.
• Verify the SolderSleeve ends are inside the back of the
connector.
• Make sure the solder bands are in contact with
connector posts and the wires.
• Slide SCT labeled heat-shrinkable tube
over the assembly.

4 | nVent.com
Leave a
1/16 in gap
1/4 in
TT-FET-MC
SCT
SCT
Adhesive will
flow from the
end of the tube
SCT
Do not reheat this area
TT-FET-MC
TT-FET-MC
9
10
• Heat shrink 1/4 inch (6 mm) of the tube onto the connector,
moving the heat source around the tube to heat evenly.
• Leave a small gap (1/16 inch {1.5 mm}) between the tube
and the ribbed section of the connector.
• Do not overheat
The tube may slip off of the connector if it is overheated.
• Allow to cool before proceeding.
• Heat shrink the tubing starting at the
connector end, avoiding the already shrunk
section. Keep the heat source moving slowly
to avoid charring.
• Continue heating after the tube surface is
smooth to ensure that the internal adhesive
flows freely.
• Heat the tube uniformly until adhesive flows
from the end to ensure a water resistant seal.
• While the tube is still hot, inspect the
exposed adhesive at the tubing/cable
interface. If a void is visible, use a glove or
rag to squeeze the tube slightly and fill the
void with molten adhesive.
• Remove heat and immediately proceed to
next step.
CAUTION: Burn Hazard. Do not get hot adhesive on
your bare skin. The hot adhesive will burn your skin.

nVent.com | 5
TT-FET-MC
Small opening
SCT
Attach the mating
test-tool-half to the
connector to be tested
Yellow (1)
Red (4)
Black (3)Black (2)
Yellow (1)
Red (4)
Black (2)Black (3)
Wire orientation at
cable end opposite
socket connector
Wire orientation at
cable end opposite
pin connector
SCT
TT-FET-MC
SCT
11
13
12
• While the tubing is still hot, place tubing in the smaller
opening of the crimp tool. Align opening with SolderSleeve/
cable area. Crimp SCT tubing to cool and seal. Open and
rotate crimp tool 90 degrees and crimp again to ensure
proper adherence to cable.
• If the tubing has moved more than 1/8 inch (3 mm) off
the threaded connector, push the hot tubing back to the
original position while supporting assembly using holder end
termination. You may have to reheat the tube. Hold the tool in
place while it cools the tube.
• Remove the crimp tool and let the assembly finish cooling.
Electrical Test
• Attach the mating test-tool-half to the connector to be
tested.
• If both cable ends have connectors, attach a mating end
termination at the opposite end. If there is no connector
on the opposite cable end, prepare it according to steps
1 and 2. Then twist together wires 1 & 2 and wires 3 & 4.
• Use an ohmmeter to measure the resistance between the
test tool posts.
• The resistance between the 2 longest posts or the 2
shortest posts should be ≈ 4x cable length (ft.) (i.e. A
100 ft. (30 m)cable should measure ≈ 400 Ω between the
two longest posts and ≈ 400 Ω between the two shortest
posts.)
• The resistance between the 2 intermediate length posts
should be greater than 20 megohms.
• If the assembly fails any of the resistance tests;
1) Check that the 2 black wires are not touching at the
opposite cable end.
2) If necessary, cut off and discard the connector and
install a new one.
• Remove the end termination.
• For the pin connector, the spinner ring must turn freely.
If necessary, gently use pliers to break it free.
Test the Connector Assembly

SCT
SCT
SCT
Part E
Unlabeled
heat-shrinkable tube
14
• Before mating the connector assemblies, slide the unlabeled
shrink tube (Part E) onto one of the cables. Connect the pin and
socket connectors together rmly. Center the unlabeled shrink
tube over the pin/socket connection. Heat shrink the tube over
the connection, beginning in the center and shrinking towards
the ends until the tube fully conforms to the shape of the
connection and adhesive ows from each end of the tube.
• Avoid overheaating Part E. The thin wall unlabeled shrink tubing
requires less heat than the SCT cable shrink tubing.
• Let the entire connector area cool before handling the cable.
Note: Do not leave connector open to environment. If the
connector becomes wet or contaminated, it will need to be
replaced.
CAUTION: Burn Hazard. Do not get hot adhesive on
your bare skin. The hot adhesive will burn your skin.
Apply Environmental Seal
©2018 nVent. All nVent marks and logos are owned or licensed by nVent Services GmbH or its aliates. All other trademarks are the property of their respective owners.
nVent reserves the right to change specications without notice.
RaychemTraceTek-IM-H55003-TT3000Bulkcable-EN-1805 PN 328491-000
nVent.com
North America
Tel +1.800.545.6258
Fax +1.800.527.5703
Europe, Middle East, Africa
Tel +32.16.213.511
Fax +32.16.213.604
Asia Pacific
Tel +86.21.2412.1688
Fax +86.21.5426.3167
Latin America
Tel +1.713.868.4800
Fax +1.713.868.2333
/


