GENUS Vero Model-1 User manual
- Category
- Alarm clocks
- Type
- User manual
This manual is also suitable for
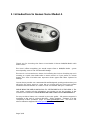
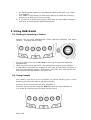
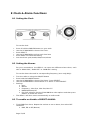
GENUS Vero Model-1 offers crystal clear stereo sound from both DAB and FM radio stations. With 10 station presets, you can easily access your favorite stations. Wake up to your favorite DAB station or an alarm buzzer with dual alarms and three preset options. Adjust the brightness of the display to your liking. Headphone output allows for private listening.
GENUS Vero Model-1 offers crystal clear stereo sound from both DAB and FM radio stations. With 10 station presets, you can easily access your favorite stations. Wake up to your favorite DAB station or an alarm buzzer with dual alarms and three preset options. Adjust the brightness of the display to your liking. Headphone output allows for private listening.


-
 1
1
-
 2
2
-
 3
3
-
 4
4
-
 5
5
-
 6
6
-
 7
7
-
 8
8
-
 9
9
-
 10
10
-
 11
11
-
 12
12
-
 13
13
-
 14
14
-
 15
15
-
 16
16


GENUS Vero Model-1 User manual
- Category
- Alarm clocks
- Type
- User manual
- This manual is also suitable for
GENUS Vero Model-1 offers crystal clear stereo sound from both DAB and FM radio stations. With 10 station presets, you can easily access your favorite stations. Wake up to your favorite DAB station or an alarm buzzer with dual alarms and three preset options. Adjust the brightness of the display to your liking. Headphone output allows for private listening.
Ask a question and I''ll find the answer in the document
Finding information in a document is now easier with AI
Related papers
Other documents
-
TechniSat DIGITRADIO 220 User manual
-
Matsui MATCR515D User manual
-
TechniSat DIGITRADIO 225 Owner's manual
-
Technika DAB121 User manual
-
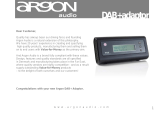 argon audio DAB+ Adaptor User manual
-
Stoves Genus 600 Datasheet
-
-
Argon DABAdapter 2 plus Owner's manual
-
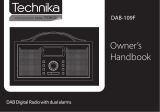 TEKNIKA DAB-109F User manual
-

