Page is loading ...

Bottle Coolers Installation Manual
© 2004, IMI Cornelius Inc. - 1 - Publication Number: 630460276INS
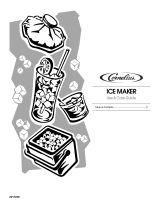
INSTALLATION MANUAL
Bottle Coolers
CAUTION - Only trained and certified electrical, plumbing and refrigeration technicians should
service this unit. ALL WIRING AND PLUMBING MUST CONFORM TO NATIONAL AND LOCAL
CODES.
INTRODUCTION
This manual is a user’s guide that offers recommendations that go from the cabinet’s transportation to
daily use.
This manual has been prepared to help the owner preserve the life of his equipment.
CHECK FOR SHIPPING AND TRANSPORTATION DAMAGE
Before leaving the factory, each cabinet is thoroughly inspected and its performance is tested to assure
proper operating temperature.
At the moment you receive your refrigerator, check the crate thoroughly for signs of shipping damage. If
there is external damage, there could be internal damage as well, and uncrating should be done while
the carrier’s representative is present. In any case, equipment should be uncrated as soon as possible,
preferably within five days.
If concealed damage is found, contact the carrier immediately (and save all crating materials) and file
necessary freight claim with him. If damage is severe and obvious, write a brief description of the
evidence on the carrier’s delivery receipt and over the representative’s signature.
The manufacturer is not responsible for in-transit damage and the consignee must file any required
damage claims directly with the carrier.
CHECK FOR ACCESSORIES
Upon receiving your refrigerator, check that all components such as
Also, if you have ordered any additional accessories, check that they have been included.
TRANSPORTATION OF THE REFRIGERATOR
Measure all doorways and passages before moving the cabinet to its final location. If door and
passageways are too narrow to allow movement or installation of the cabinet, you may stand it in an
upright position, laying the bottom part on pads or thick blankets to avoid damage to the cabinet finish.
After the cabinet is set upright, check for oil leakage in the compressor compartment. If leakage is found,
call a qualified service person before attempting to operate the cooler. If no leakage is found, wait at least
½ hour before to putting the cooler into operation.
To move the cabinet, hold it by the inferior base.
Do not let it fall abruptly.
Release Date: May, 2004 www.cornelius.com Revision: A

Bottle Coolers Installation Manual
Publication Number: 630460276INS - 2 - © 2004, IMI Cornelius Inc.
WHERE TO LOCATE THE CABINET
Locate equipment on a surface strong enough to support the combined weight of the cabinet and product
load.
The surface must be level and solid enough to prevent vibration of motor.
Failure to level the cabinet could impede proper drainage.
Locate the refrigerator in a dry, cool, and well-ventilated area. Do not locate any cooler in direct sunlight,
near heating ducts, radiators, stoves, or other heat sources. Excessive heat will definitely affect the
performance of the refrigerator and may cause condensation. In winter, keep it in a place where the oil
inside the compressor will not freeze.
The back of the cabinet should be installed at least 8” from the wall to assure proper air circulation and
motor ventilation. Dissipation of heat away from the condensing unit on self-contained units is extremely
important; there must be free air movement for proper operation.
REMOVING THE CRATE AND SKID
Remove the crate carefully to prevent damage to the exterior surfaces of the cabinet. The cabinet is
fastened with screws to a wooden skid. It is not necessary to remove the wooden skid; but if desired,
follow these steps:
1. Elevate the cabinet and skid.
2. Use a 3/8” wrench to loosen the screws that tie down the skid to the base of the cabinet (one at
each corner) and remove the skid.
3. Install casters. See Casters Mounting Instructions. Casters are optional accessories for horizontal
beverage coolers.
FIGURE 1
FIGURE 2

Bottle Coolers Installation Manual
© 2004, IMI Cornelius Inc. - 3 - Publication Number: 630460276INS
CASTERS MOUNTING INSTRUCTIONS
1. Raise the case far enough off the floor for caster installation.
2. Screw the caster stems into the holes provided on the cabinet bottom.
3. The two casters with brakes should be mounted on the front on the right and left hand ends.
4. Gently lower the case to the floor and push it into place.
5. After the case is in position, lock the two front casters with the brakes so that the case will not move.
6. Do not lean or tilt the cabinet in any direction when installing or moving it.
ELECTRICAL INSTALLATION
115-1-60 voltage is standard.
*These specifications are commercial references.
**+/-0.5 ampere under normal operation before cycle starts.
***Minimum 109 volts/maximum 127 volts.
Electrical installation must be done according to local electrical codes.
Be sure the electrical specifications of your refrigerator and your utility service are the same.
Check the line voltage to ensure the supply does not fluctuate by more than 5% below or more than 10%
above rated voltage.
Each refrigerator should be connected to its own electrical circuit to avoid voltage fluctuations that could
damage the unit. To avoid an overload, make sure that no other electrically operated appliances are
connected to the circuit operating this cooler. Overloaded circuits are extremely hazardous.
Do not under any circumstances cut or remove the round grounding prong from the power cord. This
could be a safety hazard under certain conditions.
WARNING: Avoid the use of extension cords.
Table 1:
Model Type Compressor* Total amps.** Voltage*** Temperature Range
COR5014UBCSD Bottle cooler 1/4 HP 6.7 115-1-60 33°F - 40°F
COR6519UBCSD Bottle cooler 1/3 HP 8.7 115-1-60 33°F - 40°F
COR9530UBCST Bottle cooler 1/3 HP 8.7 115-1-60 33°F - 40°F
FIGURE 3

Bottle Coolers Installation Manual
Publication Number: 630460276INS - 4 - © 2004, IMI Cornelius Inc.
INSTALLATION
It is always good practice to have a competent refrigeration service man perform the start-up. It is also
advisable to obtain a service contract from this same individual to be assured of reliable and efficient
service in case of any future problems.
The installer must follow these steps:
1. Check for any refrigerant leaks. Occasionally leaks develop in transit from vibrations.
2. Check for vibrations or any objectionable noises.
3. Inspect the door for a proper seal.
4. Adjust the temperature control for the desired temperature. See Temperature Control Section.
5. Make the electrical hook up, check serial
and rating plate for the voltage and current requirements.
See Electrical Installation recommendations included in this manual.
6. Allow the compressor to cycle three times (approximately 2 hours) and the cabinet to reach proper
temperature before loading product inside.
7. The fixture should be checked again after one (1) week of operation for proper performance.
LOADING PRODUCT IN THE CABINET
Each cabinet is designed to perform within certain temperature and humidity requirements, based on
ambient factors.
After the equipment is running, it should be operated long enough to bring the storage temperature down
to cycling of the condensing unit. On refrigerators three to four hours will usually be enough to allow the
temperature to drop.
The evaporator fans draw air up from the storage area, circulate it through the evaporator, and discharge
it up the rear wall of the cabinet.
If you need more than two minutes when loading, we recommend turning off the equipment so that cold
air is not expelled.
Do not leave the lids open.
TEMPERATURE CONTROL
Before leaving the plant, the refrigerator temperature control is set to operate with required temperature.
The temperature control may be adjusted to suit your needs. Turn the control clockwise for colder
operation and counter clockwise for warmer operation. Adjust control knob in increments of ¼ turn and
allow unit to operate for several hours before making any further adjustment. Once it is set, there should
be no need to change it.

Bottle Coolers Installation Manual
© 2004, IMI Cornelius Inc. - 5 - Publication Number: 630460276INS
CROSS SECTION VIEWS
COR5014BCSD
Height Width Depth
31 1/4” 52 1/4” 27 1/2”
TOP VIEW FRONT VIEW
SIDE VIEW CROSS SECTION VIEW
FIGURE 4

Bottle Coolers Installation Manual
Publication Number: 630460276INS - 6 - © 2004, IMI Cornelius Inc.
COR6519UBCSD
Height Width Depth
34 1/4” 66 3/4” 27 1/2”
TOP VIEW FRONT VIEW
SIDE VIEW CROSS SECTION VIEW
FIGURE 5

Bottle Coolers Installation Manual
© 2004, IMI Cornelius Inc. - 7 - Publication Number: 630460276INS
COR9530UBCSD
Height Width Depth
34 1/4” 98” 27 1/2”
TOP VIEW FRONT VIEW
SIDE VIEW CROSS SECTION VIEW
FIGURE 6

Bottle Coolers Installation Manual
Publication Number: 630460276INS - 8 - © 2004, IMI Cornelius Inc.
/