Page is loading ...

Loveseat
Caution : You must read this before you proceed.
1 OF 6

Part NO. Picture Description
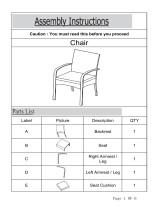
A
Chair Backrest with
Legs
B Chair Seat
C Front Leg
Label Picture Description
a Bolt M8X60mm
b Bolt M8X50mm
d Flat Washer Ring
e Spring Washer Ring
f Allen Key
Qty
1 PC
Qty
11PCS
1 PC
2 PCS
3 PCS
13 PCS
13 PCS
1 PC
2 OF 6

Hardware
Pack
M8X50mm bolts - 3pcs
M8X60mm bolts - 11pcs
Flat Washer Ring -13pcs
Spring Washer Ring -
13pcs
Allen Key - 1pc
Unpack and
place all parts
for clear
visibility.
Before Beginning Assembly:
3 OF 6

Chair Seat
Step 2
Put the Chair Backrest with Legs ( A) onto a flat table or panel.
Align the MOUNTING POSITIONs on Chair Backrest with Legs (A) with the
MOUNTING POSITIONs on chair seat frame.
Use your left hand to push the seat frame floorwards, depicted by Arrow 1.
This action helps to ensure the Chair Seat(B) is pressed towards to the Chair
Backrest with Legs (A) with no gap between these.
Then, lock the middle MOUNTING POSITIONs and the corner MOUNTING
POSITIONs with 6 Bolts(a)+ 6 Flat Washer Ring(d) + 6 Spring Washer Ring(e)
with the Allen Key(f).
And then lock the side MOUNTING POSITIONs with 2 Bolts(b) +2 Flat
Washer Ring(d) + 2 Spring Washer Ring(e) with the Allen Key(f).
CAUTION: When tightening these bolts, tighten sequentially.
DO NOT tighten any screw fully and then towards the next one.
This would cause the frame to warp.
Place the Chair Back(A) on a soft surface to avoid any scratches on the
products.
REMOVE the non-woven fabric from the underside of the Chair Seat(B).
Take out the 2 wooden legs and the package of hardware accessories .
Step 1
Chair Backrest with Legs
4 OF 6

Step 4
Insert each front leg completely vertically into each seat frame corner.
PRESS FIRMLY DOWN with your hand until there is no gap.
Now tighten the bottom bolt first, then the bolt on the top by using 4 Bolts(b)+
4 Flat Washer Rings(d)+ 4 Spring Washer Rings(e) with Allen Key(f).
Make sure all parts are connected and locked into position.
Finally, seal the Seat Base Cover back on to the underside of the chair seat .
Turn it the right side up.The chair is ready for use.
5 OF 6

6 OF 6
/


