Page is loading ...

EPSON Perfection
®
1250/1650 Series
Scanner Basics
basics.book Page i Monday, July 16, 2001 4:11 PM

ii
Copyright Notice
All rights reserved. No part of this publication may be reproduced, stored in a retrieval system, or transmitted in
any form or by any means, electronic, mechanical, photocopying, recording, or otherwise, without the prior
written permission of SEIKO EPSON CORPORATION. The information contained herein is designed only for
use with this EPSON scanner. EPSON is not responsible for any use of this information as applied to other
scanners.
Neither SEIKO EPSON CORPORATION nor its affiliates shall be liable to the purchaser of this product or third
parties for damages, losses, costs, or expenses incurred by purchaser or third parties as a result of: accident, misuse,
or abuse of this product or unauthorized modifications, repairs, or alterations to this product, or (excluding the
U.S.) failure to strictly comply with SEIKO EPSON CORPORATION’s operating and maintenance instructions.
SEIKO EPSON CORPORATION shall not be liable for any damages or problems arising from the use of any
options or any consumable products other than those designated as Original EPSON Products or EPSON
Approved Products by SEIKO EPSON CORPORATION.
A Note Concerning Responsible Use of Copyrighted Materials
Digital cameras and scanners, like photocopiers and conventional cameras, can be misused by improper copying of
copyrighted material. While some countries’ laws permit limited copying of copyrighted material in certain
circumstances, those circumstances may not be as broad as some people assume. EPSON encourages each user to
be responsible and respectful of the copyright laws when using digital cameras and scanners.
Trademarks
EPSON and EPSON Stylus are registered trademarks and EPSON Smart Panel is a trademark of SEIKO EPSON
CORPORATION.
EPSON Perfection is a registered trademark, EPSON Software is a trademark, and EPSON PhotoCenter, EPSON
Store, and SoundAdvice are service marks, of Epson America, Inc.
General Notice: Other product names used herein are for identification purposes only and may be trademarks of
their respective owners. EPSON disclaims any and all rights in those marks.
The E
NERGY
S
TAR
emblem does not represent EPA endorsement of any product or service.
Printed on recycled paper
Copyright © 2001 by Epson America, Inc. CPD-12467
7/01
basics.book Page ii Monday, July 16, 2001 4:11 PM

iii
Contents
Scanning from Start to Finish
1
Placing Your Document 1
Using the Scanner Buttons 2
Using EPSON Smart Panel 2
Scanning and Printing with Photo Print 4
Scanning to E-mail 5
Scanning a Photo to a File 7
Scanning to the EPSON PhotoCenter 11
Selecting TWAIN Settings 16
Recommended Settings 18
Scanning Transparencies 19
Using Film Holders 19
Scanning with the EPSON Perfection 1650 PHOTO
20
Scanning with the EPSON Perfection 1250 PHOTO
22
Scanning Reflective Documents or Photographs
23
Problem Solving
25
Scanner Light
25
Problems and Solutions
26
Setup Problems 26
Scanner Problems 28
Software Problems 29
Image Problems 29
Where To Get Help
32
For More Information
32
EPSON Technical Support
33
Software Technical Support 34
basics.book Page iii Monday, July 16, 2001 4:11 PM


1
Scanning from Start to Finish
Your EPSON Perfection
®
scanner lets you turn pictures and documents into digital
files on your computer with the press of a button. You can use the buttons in
conjunction with the EPSON Smart Panel
™
software or you can use EPSON Smart
Panel by itself. Instructions for using EPSON Smart Panel and each of the buttons are
included in this chapter.
If you’re experienced with scanning, you can use EPSON
®
TWAIN to scan with
applications like Adobe
®
Photoshop
®
Elements or any other TWAIN-compliant
program. See “Selecting TWAIN Settings” on page 16 for instructions.
Instructions for setting up your scanner can be found on the Start Here poster.
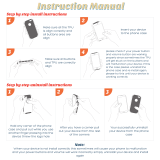
Placing Your Document
Place your document face down on the document table glass, as shown below.
The self-adjusting cover allows you to place thick documents on the
document table glass without removing it.
Perfection 1250:
center document
under arrow
Perfection 1650:
align document in
upper right corner
basics.book Page 1 Monday, July 16, 2001 4:11 PM

2
Scanning from Start to Finish
Using the Scanner Buttons
The scanner’s
]
Start,
{
Photo Print,
|
E-Mail, and
}
Scan to Web buttons let you
perform one-touch scanning with EPSON Smart Panel, as described below:
Using EPSON Smart Panel
You can use EPSON Smart Panel with the scanner’s buttons, or you can use it by
itself. Follow these steps to use EPSON Smart Panel to scan your document or photo.
The
]
Start button is set to open the Smart Panel by default. However,
you can assign the
]
Start button to automatically open any of the Smart
Panel applications. See the next page for instructions.
For Windows
®
users:
In addition to the Smart Panel applications, you can assign other
applications that support “Scanner events” (for example, Microsoft
®
Imaging for Windows) to the
]
Start button. See your electronic
Reference Guide for instructions.
1. Place your photo(s) face down on the document table glass; then close the scanner
cover. (If you place multiple photos, make sure that their edges do not touch.)
2. Do one of the following to open EPSON Smart Panel:
■
Press the
] Start button on your scanner.
■
Click the Smart Panel icon on the desktop.
■
On a Macintosh,
®
you can also open the Apple
®
menu and select
EPSON
SMART PANEL
.
]
Start Press the
]
Start button on the scanner to open EPSON Smart
Panel (default). For details, see the section below.
{
Photo Print Press the
{
Photo Print button to automatically scan and print a
photo. For details, see page 4.
|
E-Mail Press the
|
E-Mail button to scan your image and send it as an
e-mail attachment. For details, see page 5.
}
Scan to Web Press the
}
Scan to Web button to scan an image and upload it to
the EPSON photo-sharing site, PhotoCenter.
SM
For details, see
page 11.
basics.book Page 2 Monday, July 16, 2001 4:11 PM

Using EPSON Smart Panel
3
EPSON Smart Panel opens:
3. Click the icon for your desired Smart Panel scanning application. The window for
that application appears and lets you adjust settings for your scan. Follow the
on-screen steps for each application.
For instructions on using each of the Smart Panel applications, see your electronic
EPSON Smart Panel User’s Guide as described on page 32.
If you select Copy or Photo Print, make sure your printer is turned on and
the correct paper type and size is loaded in your printer.
If you want the ] Start
button to open a Smart
Panel application instead
of Smart Panel, select
the application here. The
] icon appears next to
the selected application.
basics.book Page 3 Monday, July 16, 2001 4:11 PM

4
Scanning from Start to Finish
Scanning and Printing with Photo Print
The
{ Photo Print button allows you to scan and print your photographs in one easy
step.
Make sure your printer is turned on and the correct paper type and size is
loaded in your printer.
1. Make sure the paper you want to print on is loaded in your printer.
2. Place your photo face down on the document table; then close the scanner cover.
3. Press the
{ Photo Print button on the scanner’s control panel.
4. EPSON Smart Panel opens and confirms you have a printer installed on your
system. Then EPSON TWAIN automatically scans your image.
5. When the scan completes, the EPSON Photo Print screen appears and your
scanned image automatically prints.
If you want to verify or change the paper and print size settings, cancel the
scan; then select your paper and print size. Press the
{
Photo Print button
on the scanner or the green
x
button on the screen to scan and print with
the new settings.
basics.book Page 4 Monday, July 16, 2001 4:11 PM

Scanning to E-mail
5
Scanning to E-mail
The
|
E-Mail button works with the Scan to E-mail application in Smart Panel to
automatically scan your document and attach it to an e-mail.
If you access Scan to E-mail from Smart Panel instead of using the
| E-Mail button, your steps are slightly different. See your electronic
Smart Panel manual for details.
Your e-mail program must be MAPI-compliant—for example Microsoft
Exchange or Outlook. See your e-mail documentation for details. AOL
®
is
not a MAPI-compliant e-mail program.
To send a photo using AOL, scan it and save it as a file as described on
page 7, then attach it to an e-mail and send it.
Follow these steps to scan with the
|
E-Mail button and Smart Panel:
1. Make sure you are connected to the Internet.
2. Place your photo(s) face down on the document table glass; then close the scanner
cover.
If you place more than one photo on the document table, make sure that
their edges do not touch.
3. Press the
|
E-Mail button. EPSON Smart Panel opens, then EPSON TWAIN
automatically scans your image.
If you’d rather scan in Manual mode so you can adjust your scan settings, click
Cancel
. (See page 16 for instructions on selecting TWAIN settings.) After
adjusting your settings, close EPSON TWAIN and continue with step 4.
basics.book Page 5 Monday, July 16, 2001 4:11 PM

6
Scanning from Start to Finish
4. When the scan completes, the Scan to E-mail dialog box opens. Select your e-mail
program and then click
Launch
. (You only need to select your e-mail program
the first time you use EPSON Smart Panel. For subsequent scans, it is
automatically selected.)
5. An e-mail dialog box opens with your photo(s) attached. Enter the recipient’s
e-mail address, type in a message, and then click
Send
.
select your
e-mail program
click Launch
recipient’s
e-mail address
click Send to
deliver your e-mail
attached photos
basics.book Page 6 Monday, July 16, 2001 4:11 PM

Scanning a Photo to a File
7
Some e-mail programs, such as Outlook Express, do not immediately
send the e-mail, but instead place it in an “outbox.” To send the e-mail,
you must launch the e-mail program and then click Send/Recv. See your
e-mail program’s documentation for more information.
Scanning a Photo to a File
You can scan a photo directly to a file. This is useful for:
■
creating files to attach to an e-mail
■
archiving your photos as digital files
■
distributing your photos to friends and family.
Follow these steps to scan a photo to a file:
1. Place your photo(s) face down on the document table glass; then close the cover.
If you place more than one photo on the document table, make sure that
their edges do not touch.
2. Do one of the following to open EPSON Smart Panel:
■
Double-click the EPSON Smart Panel icon on the desktop.
■
On a Macintosh, you can also open the Apple menu and select
EPSON
SMART PANEL
.
Send and
Receive
Outbox
basics.book Page 7 Monday, July 16, 2001 4:11 PM

8
Scanning from Start to Finish
3. EPSON Smart Panel opens. Click
Scan to File
.
EPSON TWAIN automatically scans your image. If you’d rather scan in Manual
mode so you can adjust your scan settings, click
Cancel
. (See page 16 for
instructions on selecting TWAIN settings.) After adjusting your settings, close
EPSON TWAIN and continue with step 4.
Scan to File
basics.book Page 8 Monday, July 16, 2001 4:11 PM

Scanning a Photo to a File
9
4. When the scan completes, the Scan to File dialog box opens. If you want to scan
more photos, place them on the document table glass, close the scanner cover, and
then click
Scan More
. When you’re finished scanning, click
Finish
.
You can see a larger version of an image by double-clicking it.
click File0001
to rename it
click Scan More
if you have
more photos
to scan
if you don’t
want to save
a file, click
the checkbox
to deselect it
basics.book Page 9 Monday, July 16, 2001 4:11 PM

10
Scanning from Start to Finish
5. At the next dialog box, you may specify a file path and file format. When you’re
finished, click
Save
. The photo is saved in your selected folder.
The file path is the location where the file is saved. If you are not going to
use the default path (My Documents), be sure to use a path that is easy to
remember.
Bitmap is the default file format in Windows. JPEG is the default file
format on Macintosh. Bitmap files are high quality, but have a large file
size. To send a photo through the Web or by e-mail, try the JPEG file
format instead. JPEG format allows you to select different levels of image
quality (remember that higher quality results in a larger file size).
current folder for
saved photos
select a file format
available only if
JPEG is selected
to save your files
in a different path,
click Browse, then
select the new path
basics.book Page 10 Monday, July 16, 2001 4:11 PM

Scanning to the EPSON PhotoCenter
11
Scanning to the EPSON PhotoCenter
With the
} Scan to Web button, you can scan photos and upload them to the
EPSON PhotoCenter at
http://photo.epson.com
. The EPSON PhotoCenter is a
free photo-sharing site that allows you to:
■
store, organize, and share your photos
■
print high-resolution photos straight from the Web
■
order prints and custom photo gifts.
If you are using AOL, first log on to AOL, then follow the steps below.
If you access Scan to Web from Smart Panel instead of using the
}
Scan
to Web button, your steps are slightly different. See your electronic Smart
Panel manual for details.
Follow these steps to scan photos to the EPSON PhotoCenter:
1. Make sure you are connected to the Internet.
2. Go to
http://photo.epson.com
and register your e-mail address and password.
3. Place your photo(s) face down on the document table glass; then close the cover.
If you place more than one photo on the document table, make sure that
their edges do not touch.
4. Press the
} Scan to Web button. EPSON Smart Panel opens, then EPSON
TWAIN automatically scans your image.
If you’d rather scan in Manual mode so you can adjust your scan settings, click
Cancel
. (See page 16 for instructions on selecting TWAIN settings.) After
adjusting your settings, close EPSON TWAIN and continue with step 5.
basics.book Page 11 Monday, July 16, 2001 4:11 PM

12
Scanning from Start to Finish
5. When the scan completes, the Scan to Web dialog box opens.
■
Select
USA
under
Site Name
, and enter the same
User ID
(e-mail address)
and
Connection Password
you used when you registered at the EPSON
PhotoCenter. (You only need to do this once. For subsequent scans, these are
automatically selected.)
■
Click
Upload
. The photos upload to the EPSON PhotoCenter.
If you have other digital images on your hard drive that you want to upload,
click Select File, browse to the location of the files, and add them to the
File Specification list before you click Upload.
select
USA
User ID (e-mail
address) and
password for the
EPSON PhotoCenter
click Upload to
transfer files to the
EPSON PhotoCenter
click Select File,
then browse to add
more files
basics.book Page 12 Monday, July 16, 2001 4:11 PM

Scanning to the EPSON PhotoCenter
13
6. When the upload completes, a message prompts you to confirm your upload.
Click
OK
to connect to the EPSON PhotoCenter. Under
Member Sign In
,
enter your e-mail address and password, and then click
go
.
7. You are automatically logged into the EPSON PhotoCenter and receive a message
stating that you have new photos in your Photo Inbox. Click
Photo Inbox
to
view your photos.
If you don’t see your photos, increase the size of your browser window or
use the scroll bar to scroll down until you see your photos.
Member
Sign In box
click Photo
Inbox to view
your photos
available
albums
click here
to create a
new album
basics.book Page 13 Monday, July 16, 2001 4:11 PM

14
Scanning from Start to Finish
8. If you want others to see your photos, you must move them to an album. Select
the photos you want to share. Either select them individually by clicking
Select
photo
for each picture or click
Select All
to select them all.
9. Select the album you want to move your photos to. Then click
Move
or
Copy
to
move the photos to the album. (If you want to create a new album, select
New
Album
from the album selection box. After you click
Move
or
Copy
, you will see
another window where you can name the album and add a password.)
Now that your photos are in an album, you can view them at any time and share them
with your friends and family.
select all photos
or select them
individually
select an album
or create a
new one
basics.book Page 14 Monday, July 16, 2001 4:11 PM

Scanning to the EPSON PhotoCenter
15
Sharing Your Photos
Now your friends and family can view the photos you’ve uploaded to the EPSON
PhotoCenter. Have them visit
http://photo.epson.com
, enter your e-mail address
under
Visit Albums
, then click
go
.
Your friends and family can view the photos in the shared albums you’ve created.
After viewing your photos, they can print the photos at home, order reprints, or use
the photos in an e-mail postcard.
your friends and
family enter
your e-mail
address here
select a
photo, then
click one of
these options
click here for
help with
the EPSON
PhotoCenter
basics.book Page 15 Monday, July 16, 2001 4:11 PM

16
Scanning from Start to Finish
Selecting TWAIN Settings
Before you scan, you need to open a host application—the program into which you
plan to import the scanned image or document, such as EPSON Smart Panel,
ArcSoft
™
PhotoImpression,
™
or other TWAIN-compliant program. You have to start
this application before you can access EPSON TWAIN. (The scanner buttons
automatically open EPSON Smart Panel or a Smart Panel application.)
The first time you open your application, you need to select the scanner “source” you
want to scan with. Your EPSON Perfection scanner comes with the EPSON TWAIN
driver. Select it as the source in your application (EPSON Smart Panel automatically
selects EPSON TWAIN).
When you scan with EPSON Smart Panel, the default TWAIN mode is Full Auto
and the software automatically selects the settings for your scan. If you want to use
Manual mode and select the settings yourself, follow these steps:
1. Start your scan. This can be done with the scanner buttons, from Smart Panel, or
from within your application.
2. Click
Cancel
when you see this
screen:
3. Click
Manual mode
when you
see this screen:
basics.book Page 16 Monday, July 16, 2001 4:11 PM
/