Cover photo may show optional equipment
not supplied with standard unit.
© Copyright 2016 Printed
Read the Accessory manual entirely. When
you see this symbol, the subsequent
instructions and warnings are serious - follow
without exception. Your life and the lives of
others depend on it!
!
Table of Contents
For utility vehicles with 2" receiver hitch,
DH10, DH15 & DH25 Disc Harrows, and FPS48
Electric Spin Spreader
5/24/16
701-162M
Accessory Manual
25609

Electric Spin Spreader For utility vehicles with 2" receiver hitch, DH10, DH15 & DH25 Disc Harrows, and FPS48 701-162M
5/24/16
Table of Contents
© Copyright 2016 All rights Reserved
Land Pride provides this publication “as is” without warranty of any kind, either expressed or implied. While every precaution has been taken in the preparation of this manual, Land
Pride assumes no responsibility for errors or omissions. Neither is any liability assumed for damages resulting from the use of the information contained herein. Land Pride reserves
the right to revise and improve its products as it sees fit. This publication describes the state of this product at the time of its publication, and may not reflect the product in the future.
Land Pride is a registered trademark.
All other brands and product names are trademarks or registered trademarks of their respective holders.
Printed in the United States of America.
Important Safety Information . . . . . . . . . . . . . 1
Safety at All Times . . . . . . . . . . . . . . . . . . . . . . . . . 1
Look For The Safety Alert Symbol . . . . . . . . . . . . . . 1
Introduction . . . . . . . . . . . . . . . . . . . . . . . . . . . 3
Application . . . . . . . . . . . . . . . . . . . . . . . . . . . . . . . 3
Using This Manual . . . . . . . . . . . . . . . . . . . . . . . . . . 3
Owner Assistance . . . . . . . . . . . . . . . . . . . . . . . . . . 3
Section 1: Assembly & Set-up . . . . . . . . . . . . 4
Electric Spin Spreader . . . . . . . . . . . . . . . . . . . . . . . 4
Mount Spreader To A Disc Harrow . . . . . . . . . . . . . 6
Mount Spreader To A Vehicle . . . . . . . . . . . . . . . . . 8
Section 2: Operating Procedures . . . . . . . . . 9
Calibrating the Spin Controller . . . . . . . . . . . . . . . . 9
Field Set-up . . . . . . . . . . . . . . . . . . . . . . . . . . . . . . . 9
Daily Operational Checks . . . . . . . . . . . . . . . . . . . 10
Cleaning And Storing . . . . . . . . . . . . . . . . . . . . . . 10
Spin Spreader Discharge Rates . . . . . . . . . . . . . . 10
Narrow Pattern Calculations . . . . . . . . . . . . . . . . 10
Wide Pattern Calculations . . . . . . . . . . . . . . . . . 10
Discharge Rate Table - 4 Ft. Spread Pattern . . . 11
Discharge Rate Table - 5 Ft. Spread Pattern . . . 12
Discharge Rate Table - 6 Ft. Spread Pattern . . . 13
Discharge Rate Table - Wide Spread Pattern . . 14
Section 3: Additional Equipment . . . . . . . . . 15
Additional Seeding Equipment . . . . . . . . . . . . . . . 15
Disc Harrow . . . . . . . . . . . . . . . . . . . . . . . . . . . . 15
Drag Harrow . . . . . . . . . . . . . . . . . . . . . . . . . . . . 15
Seed Bed Roller . . . . . . . . . . . . . . . . . . . . . . . . . 15
Complete One Pass Seeding Application . . . . . . 16
Section 4: Specifications . . . . . . . . . . . . . . . 17
Section 5: Features & Benefits . . . . . . . . . . 18
Section 6: Troubleshooting . . . . . . . . . . . . . 19
Section 7: Appendix . . . . . . . . . . . . . . . . . . . 20
Listing of Parts . . . . . . . . . . . . . . . . . . . . . . . . . . . 22
Parts Not Used . . . . . . . . . . . . . . . . . . . . . . . . . . . 25
Table of Contents

1
Important Safety Information
5/24/16
Electric Spin Spreader For utility vehicles with 2" receiver hitch, DH10, DH15 & DH25 Disc Harrows, and FPS48
Table of Contents
Important Safety Information
▲
These are common practices that may or may not be applicable to the products described in
this manual.
Safety at All Times
Thoroughly read and understand
the instructions given in this
manual before operation. Refer to
the “Safety Label” section, read all
instructions noted on them.
Do not allow anyone to operate
this equipment who has not fully
read and comprehended this
manual and who has not been
properly trained in the safe
operation of the equipment.
▲ Operator should be familiar with
all functions of the Spin Spreader.
▲ Never allow children to operate
equipment.
▲ Operate Spin Spreader from the
driver’s seat only.
▲ Make sure all guards and shields
are in place and secured before
operating the Spin Spreader.
▲ Do not leave Spin Spreader
unattended with motor running.
▲ Keep hands, feet, and clothing
away from power-driven parts.
▲ Wear snug fitting clothing to avoid
entanglement with moving parts.
▲ Operating equipment safely
requires the full attention of the
operator. Avoid wearing radio
headphones while operating the
Spin Spreader.
!
Look For The Safety Alert Symbol
The SAFETY ALERT SYMBOL indicates there is a
potential hazard to personal safety involved and extra
safety precaution must be taken. When you see this
symbol, be alert and carefully read the message that
follows it. In addition to design and configuration of
equipment, hazard control and accident prevention
are dependent upon the awareness, concern,
prudence and proper training of personnel involved in
the operation, transport, maintenance and storage of
equipment.
Be Aware of
Signal Words
A Signal word designates a degree or
level of hazard seriousness. The
signal words are:
Indicates an imminently hazardous
situation which, if not avoided, will
result in death or serious injury. This
signal word is limited to the most
extreme situations, typically for
machine components that, for
functional purposes, cannot be
guarded.
!
DANGER
Indicates a potentially hazardous
situation which, if not avoided, could
result in death or serious injury, and
includes hazards that are exposed
when guards are removed. It may also
be used to alert against unsafe
practices.
Indicates a potentially hazardous
situation which, if not avoided, may
result in minor or moderate injury. It
may also be used to alert against
unsafe practices.
!
WARNING
!
CAUTION
Practice Safe Maintenance
▲ Understand procedure before doing
work. Use proper tools and
equipment, refer to Operator’s
Manual for additional information.
▲ Work in a clean dry area.
▲ Lower attached implement to the
ground and follow all shutdown
procedures before leaving the
operator’s seat to perform
maintenance.
▲ Allow implement to cool completely
before working on it.
▲ Disconnect battery ground cable (-)
before servicing or adjusting
electrical systems or before welding
on implement.
▲ Do not grease or oil implement
while it is in operation.
▲ Inspect all parts. Make sure parts
are in good condition & installed
properly.
▲ Replace parts on this machine with
genuine Land Pride parts only. Do
not alter this machine in a way
which will adversely affect its
performance.
▲ Remove buildup of grease, oil, and
debris.
▲ Remove all tools and unused parts
from implement before operation.

2
Important Safety Information
Electric Spin Spreader For utility vehicles with 2" receiver hitch, DH10, DH15 & DH25 Disc Harrows, and FPS48
5/24/16
Table of Contents
These are common practices that may or may not be applicable to the products described in
this manual.
Keep Riders Off
Machinery
▲ Never carry riders or use
machinery as a person lift.
▲ Riders obstruct operator’s view.
▲ Riders could be struck by foreign
objects or thrown from the
machine.
▲ Never allow children to operate
equipment.
Wear
Protective Equipment
▲ Wear protective clothing and
equipment appropriate for the job
such as safety shoes, safety
glasses, hard hat, and ear plugs.
▲ Clothing should fit snug without
fringes and pull strings to avoid
entanglement with moving parts.
▲ Prolonged exposure to loud noise
can cause hearing impairment or
hearing loss. Wear suitable
hearing protection such as
earmuffs or earplugs.
▲ Operating equipment safely
requires the operator’s full
attention. Avoid wearing radio
headphones while operating
machinery.
Prepare for Emergencies
▲ Be prepared if a fire starts.
▲ Keep a first aid kit and fire
extinguisher handy.
▲ Keep emergency numbers for
doctor, ambulance, hospital, and
fire department near phone.
911
Use Seat Belt and ROPS
▲ Operate only utility vehicles and
tractors equipped with a Roll-Over
Protective Structure (ROPS) and
seat belt.
▲ Keep folding ROPS in the “locked
up” position at all times.
▲ Fasten seat belt snugly and
securely to help protect against
serious injury or death from falling
and machine overturn.
▲ Wear protective equipment such
as a hard hat, safety shoes, safety
glasses, and ear plugs.
Use Safety
Lights and Devices
▲ Slow moving tractors,
self-propelled equipment, and
towed implements can create a
hazard when driven on public
roads. They are difficult to see,
especially at night.
▲ Flashing warning lights and turn
signals are recommended
whenever driving on public roads.
Handle
Chemicals Properly
▲ Protective clothing should be
worn.
▲ Handle all chemicals with care.
▲ Follow instructions on container
label.
▲ Agricultural chemicals can be
dangerous. Improper use can
seriously injure persons, animals,
plants, soil, and property.
▲ Inhaling smoke from any type of
chemical fire is a serious health
hazard.
▲ Store or dispose of unused
chemicals as specified by the
chemical manufacturer.

3
Introduction
5/24/16
Electric Spin Spreader For utility vehicles with 2" receiver hitch, DH10, DH15 & DH25 Disc Harrows, and FPS48
Table of Contents
Using This Manual
•
This Operator’s Manual is designed to help familiarize
you with safety, assembly, operation, adjustments,
troubleshooting, and maintenance. Read this manual
and follow the recommendations to help ensure safe
and efficient operation.
• The information contained within this manual was
current at the time of printing. Some parts may change
slightly to assure you of the best performance.
• To order a new manual contact your authorized dealer.
Manuals can also be downloaded, free-of-charge from
our website at www.landpride.com or printed from the
Land Pride Service & Support Center by your dealer.
Owner Assistance
If customer service or repair parts are required contact a
Land Pride dealer. A dealer has trained personnel, repair
parts and equipment needed to service the Electric Spin
Spreader.
The parts on your Electric Spin Spreader have been
specially designed and should only be replaced with
genuine Land Pride parts. Therefore, should your Spin
Spreader require replacement parts go to your Land
Pride Dealer.
Your dealer wants you to be satisfied with your new
Electric Spin Spreader. If for any reason you do not
understand any part of this manual or are not satisfied
with the service received, the following actions are
suggested:
1. Discuss the matter with your dealership service
manager making sure he is aware of any problems
you may have and that he has had the opportunity to
assist you.
2. If you are still not satisfied, seek out the owner or
general manager of the dealership, explain the
problem and request assistance.
3. For further assistance write to:
Land Pride Service Department
1525 East North Street
P.O. Box 5060
Salina, Ks. 67402-5060
E-mail address
lpservicedept@landpride.com
Introduction
Land Pride welcomes you to the growing family of new
product owners.
This Electric Spin Spreader has been designed with care
and built by skilled workers using quality materials. It is
exclusively designed to mount on the rear of a small
utility vehicle with a 2" receiver hitch such as ATV’s and
Land Pride Trekers. Also, it will fit on the back of any
Land Pride Disc Harrow, and FPS48. Please thoroughly
read these installation instructions, vehicle Operator
manual and Disc Harrow Operator Manual before
beginning. Especially read information relating to safety
concerns.
Proper assembly, maintenance and safe operating
practices will help you get years of satisfactory use from
your Electric Spin Spreader.
Application
The Land Pride Electric Spin Spreader is a highly
versatile full component package designed to plant or
spread seeds. It can then be used to spread prilled or
granulated fertilizer, lime, gypsum, and other soil
conditioning amendments at distances ranging from 4 ft.
to 20 ft. It can also be used in the off-season to spread
sand or salt for winter icing or slick snow conditions.
This unit has a 12volt remote tether control that can be
operated right from the driver’s seat to turn the spreader
on or off or to set the seed-gate opening to different
application rates.
The Spin Spreader has applications in overseeding of
pastures, grassy runways, open areas, roadsides,
medians, wild game food plots, hunting clubs, hunting
resorts, ranches, farms, game preserves, landscaping,
and hobby farming. It also works very well in gardens and
nurseries to incorporate fertilizer and pelletized gypsum
or lime as soil amendments.
Accessories are available for mounting the spreader to a
2" receiver hitch on a utility vehicle or a Land Pride Disc
Harrow. A Land Pride Drag Harrow and Seed Bed Roller
can be attached behind the Disc Harrow making your
Land Pride Disc Harrow, Spin Spreader, Drag Harrow
and Seed Bed Roller a complete seeding package.
General Information
These instructions apply to:
322-117A ELECTRIC SPIN SPREADER
322-100D EXTENSION TUBE, SPIN SPREADER
805-035C PIN BENT 1/2 X 3 WITH HAIRPIN
322-264A HITCH MOUNT W/REAR HITCH
890-975C 2" BALL HITCH 3500LB 3/4 THRD
890-971C TOW HOOK (LOAD 10,000 LBS)

4
Section 1: Assembly & Set-up
Electric Spin Spreader For utility vehicles with 2" receiver hitch, DH10, DH15 & DH25 Disc Harrows, and FPS48
5/24/16
Table of Contents
Electric Spin Spreader
Refer to Figure 1-1 on page 5:
322-117A ELECTRIC SPIN SPREADER
A detailed listing of parts for the Spin Spreader is
provided on page 22. Use the list as a checklist to
inventory parts received. Please contact your local Land
Pride dealer for any missing hardware.
Install the Electric Spin Spreader as follows:
1. Remove Spin Spreader and all component from the
shipping boxes.
2. Attach spin motor (#16) to hitch weldment (#34) with
flat washers (#28) and 10-32 hex nuts (#27). Tighten
hex nuts to the correct torque.
3. Attach spreader distribution plate (#15) to the motor
shaft with cotter pin (#14). Spread one or more legs of
cotter pin to keep it from falling out.
4. Attach spreader back plate (#31) to spreader hitch
weldment (#34) with 8-32 x 2" Phillips head
screws (#36) and hex nylock nuts (#35). Tighten
nylock nuts. See “NOTE” under “Parts Not Used”
on page 25 for shipping location of nylock nuts (#35)
and screws (#36).
5. Attach left-hand and right-hand straps (#29 & #30) to
hitch weldment (#34) as shown with 5/16"-18 x 2 1/2"
GR5 lower bolt (#23) and nylock nut (#25). Screw nut
on 2 or 3 turns. Do not tighten at this time.
6. Attach left-hand and right-hand straps (#29 & #30) to
hitch weldment (#34) as shown with 5/16"-18 x 3"
GR5 all thread upper bolt (#22) and nylock nut (#25).
Screw nut on 2 or 3 turns. Do not tighten at this time.
7. Attach left-hand and right-hand straps (#29 & #30)
together at the back with 5/16"-18 x 3" GR5 all thread
bolt (#22), 3/4" long spacer (#21), and nylock
nut (#25). Screw nut on 2 or 3 turns. Do not tighten at
this time.
8. Attach Flow regulator (#18) directly below hole “H” in
spreader tank (#1) as shown with 8-32 hex
nuts (#2A). Tighten hex nuts.
9. (Optional) Attach restrictor plate (#3) on top of
existing nuts (#2A) with 8-32 hex huts (#2B). Tighten
nuts.
NOTE: Not all components included in the shipping
box will be used. See “Parts Not Used” on page 25.
IMPORTANT: Drive “G” for Flow regulator (#18)
is located directly below hole “H” in spreader
tank (#19).
NOTE: The restrictor plate (#3) is used to decrease
the discharge rate of product flow out the two hopper
openings. Some applications will require that the
restrictor plate be removed. Other applications will
require that the restrictor plate be installed.
10. Slide spreader tank (#19) between left and right-
hand straps (#29 & #30).
11. Hand screw 1/2"-13 hex nut (#24) on eye bolt (#33)
until nut has bottomed out on the threads.
12. Insert eye bolt (#33) through hitch weldment (#34),
hole “H” in tank (#19), formed washer (#37), and hex
nylock nut (#26). Draw nylock nut up until 1 to 2
threads are pass the nylock nut. Do not tighten
nut (#24) or nylock nut (#26) at this time.
13. Adjust left-hand and right-hand straps (#29 & #30) to
fit between beads in spreader tank (#1) and tighten
the front two 5/16"-18 hex nylock nuts (#25) to the
correct torque for GR5 bolts and then the back nylock
nut (#25) to the correct torque.
14. Hold eye in eye bolt (#33) vertical with a screwdriver
or drive punch and tighten nylock nut (#24) against
hitch weldment (#34) until tight.
15. Insert wiring for spin motor (#16) into wire clip (#7) as
shown with mounting holes in clip up. Skid to step 17
if attaching spin deflector (#4).
16. Attach wire clip (#7) on inside of channel to hole “F”
with 1/4"-20 x 3/4" GR5 hex flange serrated
screw (#8), flat washer (#6), and wing nut (#5). Hand
tighten wing nut. Skip to step 18.
17. Attach optional spin deflector as follows:
a. Attach spin deflector (#4) and wire clip (#7) on
inside of channel to hole “F” with 1/4"-20 x 3/4"
GR5 hex flange serrated screw (#8), flat washer
(#6), and wing nut (#5). Hand tighten wing nut.
b. Complete attachment of spin deflector (#4) to the
remaining 3 holes using 1/4"-20 x 3/4" GR5 hex
flange serrated screws (#8), flat washers (#6),
and wing nuts (#5). Hand tighten wing nuts
18. Fully insert cap plug (#12) in tank lid (#20) as shown.
19. Attach tank lid (#20) to spreader hopper (#19).
20. Attach large square tube cap (#32) to top of hitch
weldment tube “J”.
21. Cable ties (#11), hand control (#17), and tie down
straps (#13) will be installed after mounting the Spin
Spreader to a FPS, utility vehicle, or disc harrow.
NOTE: Spin deflector (#4) is used to reduce the
broadcast spread pattern to as small as 48". Install
the spin deflector only if a desired spread pattern
width is needed.
Installation Note: The spin deflector (#4) can be
installed without removing the hopper from its mount.
Simply slide the deflector between hopper (#19) and
spin plate (#15).
IMPORTANT: Tie down straps (#13) must be used
with spreader to protect against damage to spreader
and supporting structures.
Section 1: Assembly & Set-up


6
Section 1: Assembly & Set-up
Electric Spin Spreader For utility vehicles with 2" receiver hitch, DH10, DH15 & DH25 Disc Harrows, and FPS48
5/24/16
Table of Contents
Mount Spreader To A Disc Harrow
Refer to Figure 1-2 on page 7:
322-264A Hitch Mount With Rear Hitch for Disc Harrow
A detailed listing of parts for the hitch mount and rear
hitch is provided on page 24. Use the list as a checklist to
inventory parts received. Please contact your local Land
Pride dealer for any missing hardware.
1. Park Disc Harrow on a flat surface, move gear shift
lever to park or to neutral and set park brake, turn
engine switch to off and remove ignition key.
2. Attach spin spreader mounting bracket (#22) to the
Disc Harrow rear cross tube (M) with two 3/8"-16
U-bolts (#23 or #24 or #25) and two 3/8" flange lock
nuts (#26). See note above. Make certain the bracket
is centered on the tube and then tighten U-bolts to
the correct torque.
3. Slide spreader mounting bracket (G) over Spin
Spreader extension tube (#22). Secure in place with
5/16" x 2 1/2" clevis pin (#9) and hair pin cotter (#10).
4. Attach one end of each ratchet tie down straps (#13)
to the spreader eyebolt (L) and the other ends to the
Disc Harrow in a V-pattern as shown.
5. Tighten tie down straps to prevent spreader box from
jiggling in its mount. Do not over tighten.
6. Plug hand control white connector (A) into feedgate
connector (B).
7. Plug hand control black connector (C) into spin motor
connector (D).
8. Plug lighter plug (E) into a 12 volt accessory
receptacle.
9. Secure wiring harness for controller (#15) with cable
ties (#11).
10. Attach rear hitch (#27) to spreader mount (#22) with
3/4" clevis pins (#28) and 5/32" cotter pins (#29).
Bend one leg of each cotter pin to keep it in place.
NOTE: Hardware bag consist of 3 different sizes of
U-bolts. Use the correct U-bolt size that matches the
Disc Harrow rear cross tube.
• DH10 Series (#23) U-bolt 3/8"-16 x 2 x 2 3/4"
• DH15 Series (#24) U-bolt 3/8"-16 x 3 1/32 x 3 1/2"
• DH25 Series (#25) U-bolt 3/8"-16 x 3 1/32 x 4"
IMPORTANT: Tie down straps (#13) must be used
with spreader to protect against damage to spreader
and supporting structures.
IMPORTANT: Not securing Spin Spreader with tie
down straps will result in MOUNT DAMAGE.
11. Attach one of three hitches listed below to the rear
hitch tube. See page 24 for a detailed listing of parts.
Hitch Plate (Standard)
a. Attach hitch plate (#32) to rear hitch tube (#27)
with 1/2"-13 x 3 1/2" GR5 hex flange screw s(#30)
and hex flange lock nuts (#31).
b. Tighten lock nuts to the correct torque.
c. Insert 3/8" x 5 1/8" long detent hitch pin (#33) into
hitch plate (#32).
2" Ball Hitch Part No. 890-975C (Option)
a. Attach hitch plate (#32) to rear hitch tube (#27)
per instructions above.
b. Attach 2" ball (#35) to hitch plate (#32).
c. Tighten ball nut to the correct torque.
Tow Hook Part No. 890-971C (Option)
a. Remove hitch plate (#32).
b. Attach tow hook (#34) to rear hitch tube (#27) with
1/2"-13 x 3 1/2" GR5 hex flange screws (#30) and
hex flange lock nuts (#31).
c. Tighten lock nuts to the correct torque.


8
Section 1: Assembly & Set-up
Electric Spin Spreader For utility vehicles with 2" receiver hitch, DH10, DH15 & DH25 Disc Harrows, and FPS48
5/24/16
Table of Contents
Mount Spreader To A Vehicle
Refer to Figure 1-3:
A detailed listing of parts for the extension tube (#18) &
bent pin (#19) is provided on page 24. Use the list as a
checklist to inventory parts received. Please contact your
local Land Pride dealer for any missing hardware.
1. Park vehicle on a flat surface, move gear shift lever to
park or to neutral and set park brake, turn engine
switch to off and remove ignition key.
2. Attach Spin Spreader extension tube (#18) to your
vehicle’s 2" receiver hitch with bent pin (#19). Secure
with hair pin cotter included with the bent pin.
3. Slide spreader mounting bracket (G) over Spin
Spreader extension tube (#18). Secure in place with
5/16" x 2 1/2" clevis pin (#9) and hair pin cotter (#10).
IMPORTANT: Tie down straps (#13) must be used
with spreader to protect against damage to spreader
and supporting structures.
4. Attach one end of each ratchet tie down strap (#13) to
the spreader eyebolt (L) and the other ends to the
vehicle in a V-pattern as shown.
5. Tighten tie down straps to prevent spreader box from
jiggling in its mount. Do not over tighten.
6. Plug hand control white connector (A) into feedgate
connector (B).
7. Plug hand control black connector (C) into spin motor
connector (D).
8. Plug lighter plug (E) into a 12 volt accessory
receptacle.
9. Secure controller wiring harness (#15) with cable
ties (#11).
IMPORTANT: Not securing Spin Spreader with tie
down straps will result in MOUNT DAMAGE.
Figure 1-3
25787

9
Section 2: Operating Procedures
5/24/16
Electric Spin Spreader For utility vehicles with 2" receiver hitch, DH10, DH15 & DH25 Disc Harrows, and FPS48
Table of Contents
Calibrating the Spin Controller
Refer to Figure 2-4:
Spin Spreader Control
Figure 2-4
1. Thoroughly lubricate the spreader before calibrating.
2. Calibrate the control unit by holding the OFF button
down and momentarily pressing the ON button.
While in the calibration mode, the lights will flash
rapidly. Once calibration is complete, the lights will go
out and the gate will close. The unit is now ready for
operation.
3. Set dispensing amount by pressing the MORE or
LESS buttons to achieve the desired gate opening.
Position 1 is the minimum amount and position 6 is
the maximum amount of material flow. The Material
Flow light flashes when unit is not running (OFF) and
is on solid when unit is running (ON).
4. While moving at a constant rate, start material
spreading by pressing the ON button.
5. Press the OFF button to stop the spin motor and
close the control gate.
IMPORTANT: To assure proper operation, the
Electric Spin Spreader controls should be calibrated
each time it is plugged into the 12 volt receptacle or
if you loose power to receptacle.
IMPORTANT: Make sure the Spin Spreader is
empty and the vehicle is running when calibrating.
23910
NOTE: The MORE or LESS buttons may be
pressed at anytime to achieve the desired material
flow rate.
Field Set-up
!
CAUTION
Wear eye protection to prevent getting chemicals and/or dirt
in the eyes while cleaning the Electric Spin Spreader.
!
CAUTION
Be sure to wear proper protective clothing when servicing or
lubricating your spin seeder. Refer to chemical
manufacturers’ labels for specific clothing requirements.
1. Prior to operation, thoroughly lubricate the Spin
Spreader. Check for proper operation of the
mechanisms by running the spin motor and slide
gate at no-load. See “Calibrating the Spin Controller”
on this page.
2. Review spreader rate tables on pages 11 through 14.
Make initial setting at the controller (positions 1
through 6) and install or remove the restrictor plate as
needed.
3. Install the spin deflector if a narrow pattern is desired
or remove the spin deflector if a full width pattern is
preferred.
4. Press the OFF button to make sure the Spin
Spreader gate is closed and then fill the bin with
product.
5. Make a run with the Spin Spreader turned on to
check product dispersion rate.
IMPORTANT: Always make sure you are traveling
before turning the Spin Spreader on. Always turn the
Spin Spreader off before end of travel. Running the
spreader while not traveling will discharge too much
material in one spot.
NOTE: A good method for checking product
dispersion is to fill the bin with the required pounds
of material to cover 1,000 sq. ft. in a straight run. A
4 ft. wide pattern would require 250 ft. of straight run.
You should run out of product at the end of the 250
ft. If not, make the following adjustments:
1. Increase travel speed to disperse less product
per sq. ft. or decrease speed to disperse more.
2. If the speed you are traveling is preferred,
change position number on the controller to
disperse more or less product.
3. You may also want to adjust the spin deflector at
the wing nuts to control placement of product.
4. Make a new run to recheck dispersion rate.
Section 2: Operating Procedures

10
Section 2: Operating Procedures
Electric Spin Spreader For utility vehicles with 2" receiver hitch, DH10, DH15 & DH25 Disc Harrows, and FPS48
5/24/16
Table of Contents
Daily Operational Checks
1. Clean the unit of dirt and trash to minimize rusting
and wear.
2. Visually inspect all nuts for tightness.
3. Replace any decals that are worn or damaged.
4. Prior to operation, thoroughly lubricate the Spin
Spreader.
5. Check for proper operation of the mechanisms by
running the machine at no-load for a few minutes.
6. Calibrate spin controller and spin deflector for
spreading the quantity desired and recheck
adjustments for accuracy.
7. All spreader parts must be cleaned properly after
every use to extend its life and efficiency.
Cleaning And Storing
!
CAUTION
Wear eye protection to prevent getting chemicals and/or dirt
in the eyes while cleaning the Spin Spreader.
!
CAUTION
Be sure to wear proper protective clothing when servicing or
lubricating your Fertilizer Spreader. Refer to chemical
manufacturers’ labels for specific clothing requirements.
Fertilizer is extremely corrosive and all remaining
particles including dust particles should be removed from
the spreader soon after application.
1. Remove all product left in the holding tank.
2. Disconnect and store spin controller in a dry location.
3. DO NOT wash the feedgate with water. Remove the
two screws from the bottom of the gate and slide the
gate forward until it drops off the unit. Be careful not
to loose the screws.
4. Use a soft bristle brush to clean the felt and remove
any dust from around the gear or on the felt.
5. Completely wash the rest of the Spin Spreader with
water and dry thoroughly.
6. Add a light coat of oil on all metal parts and motor to
help prevent rusting and corrosion.
7. Reinstall the feedgate.
8. Store the Electric Spin Spreader and electrical
controls in a location that is sheltered from moisture.
Spin Spreader Discharge Rates
DISCLAIMER: The Discharge Rate Tables are intended
as guidelines only. Land Pride accepts no responsibility
for actual site application rates or germination rates.
IMPORTANT: Remove spin controller and
discharge gate before washing the Spin Spreader.
These rates can vary dramatically due to varying
conditions and operator skill level.
Narrow Pattern Calculations
Calculations in the Discharge Rate Tables on page 11 for
narrow patterns (4’, 5’ & 6’ widths) are based on:
• With and without a restrictor plate installed.
• With the spin deflector attached.
• Dispersal pattern at 48" width.
• Traveling at 1 MPH (mile per hour)
EXAMPLE:
If you are traveling 1 MPH and dispersing a 4’ wide
pattern of alfalfa using flow position 2, your discharge
rate is 515.63 lbs/acre or 11.84 lbs/1000 sq. ft. at 1 MPH
(See Discharge Rate Table on page 11). If you are
driving at 4 MPH, calculate the discharge rate as follows:
• Divide 515.63 by 4 = 128.91 lbs/acre.
• Divide 11.84 by 4 = 2.96 lbs/1000 sq. ft.
REMEMBER: Increasing travel speed decreases the
amount of material being applied.
Wide Pattern Calculations
Calculations in the Discharge Rate Tables on page 14 for
the wide pattern spreader rates are based on:
• With the spin deflector removed.
• With and without a restrictor plate installed.
• Dispersal pattern at widths indicated in the table.
• Traveling at 1 MPH (mile per hour)
EXAMPLE:
If you are traveling 1 MPH and dispersing a 4’ wide
pattern of alfalfa using flow position 2, your discharge
rate is 103.13 lbs/acre or 2.37 lbs/1000 sq. ft. at 1 MPH
(See Spreader Rate table on page 14). If you are driving
at 5 MPH, calculate the discharge rate as follows:
• Divide 103.13 by 5 = 20.63 lbs/acre.
• Divide 2.37 by 5 = 0.47 lbs/1000 sq. ft.
REMEMBER: Increasing travel speed decreases the
amount of material being applied.
NOTE: If vehicle does not have a speed meter or no
way to calculate speed, a hand held Global
Positioning System (GPS) that indicates speed is
available at most sporting goods stores.
NOTE: Data in the Discharge Rate Tables is based
on traveling at 1 MPH. To calculate discharge rate
when traveling at a different speed, divide the data
in the table by the MPH you are traveling.
NOTE: Data in the Discharge Rate Tables is based
on traveling at 1 MPH. To calculate discharge rate
when traveling at a different speed, divide the data
in the table by the MPH you are traveling.

11
Section 2: Operating Procedures
5/24/16
Electric Spin Spreader For utility vehicles with 2" receiver hitch, DH10, DH15 & DH25 Disc Harrows, and FPS48
Table of Contents
Discharge Rate Table - 4 Ft. Spread Pattern @ 1 MPM
Alfalfa Position 1 Position 2 Position 3 Position 4 Position 5 Position 6
W/Restrictor Lbs/acre 129.94 515.63 1108.80 1817.06 2003.93 1989.90
Lbs/1000 sq. ft. 2.98 11.84 25.45 41.71 46.00 45.68
Unrestricted
Restrictor required (See above data with restrictor)
Biologic Position 1 Position 2 Position 3 Position 4 Position 5 Position 6
W/Restrictor Lbs/acre 0.00 0.00 100.65 312.68 405.08 481.80
Lbs/1000 sq. ft. 0.00 0.00 2.31 7.18 9.30 11.06
Unrestricted Lbs/acre 0.00 41.25 154.28 348.98 644.33 1574.10
Lbs/1000 sq. ft. 0.00 0.95 3.54 8.01 14.79 36.14
MegaPlot Position 1 Position 2 Position 3 Position 4 Position 5 Position 6
W/Restrictor
Not Compatible with restrictor
Unrestricted Lbs/acre 0.00 0.00 0.00 0.00 821.29 1884.30
Lbs/1000 sq. ft. 0.00 0.00 0.00 0.00 18.85 43.26
EasyPlot Position 1 Position 2 Position 3 Position 4 Position 5 Position 6
W/Restrictor
Not Compatible with restrictor
Unrestricted Lbs/acre 0.00 0.00 0.00 0.00 0.00 419.93
Lbs/1000 sq. ft. 0.00 0.00 0.00 0.00 0.00 9.64
Clover (Ladina) Position 1 Position 2 Position 3 Position 4 Position 5 Position 6
W/Restrictor Lbs/acre 147.26 620.40 1161.60 1908.64 2101.28 2151.60
Lbs/1000 sq. ft. 3.38 14.24 26.67 43.82 48.24 49.39
Unrestricted
Restrictor required (See above data with restrictor)
Clover (Red) Position 1 Position 2 Position 3 Position 4 Position 5 Position 6
W/Restrictor Lbs/acre 92.81 348.56 750.34 1256.06 1499.44 1835.63
Lbs/1000 sq. ft. 2.13 8.00 17.23 28.84 34.42 42.14
Unrestricted
Restrictor required (See above data with restrictor)
Clover (Yellow Sweet) Position 1 Position 2 Position 3 Position 4 Position 5 Position 6
W/Restrictor Lbs/acre 482.63 1586.48 1701.98 1706.51 1715.18 1805.10
Lbs/1000 sq. ft. 11.08 36.42 39.07 39.18 39.38 41.44
Unrestricted
Restrictor required (See above data with restrictor)
Oats Position 1 Position 2 Position 3 Position 4 Position 5 Position 6
W/Restrictor
Not Compatible with restrictor
Unrestricted Lbs/acre 0.00 0.00 152.21 1020.94 1172.33 2074.88
Lbs/1000 sq. ft. 0.00 0.00 3.49 23.44 26.91 47.63
Ryegrass (annual) Position 1 Position 2 Position 3 Position 4 Position 5 Position 6
W/Restrictor Lbs/acre 0.00 121.28 358.05 469.84 502.43 525.94
Lbs/1000 sq. ft. 0.00 2.78 8.22 10.79 11.53 12.07
Unrestricted Lbs/acre 0.00 363.41 999.90 1810.05 3410.55 0.00
Lbs/1000 sq. ft. 0.00 8.34 22.95 41.55 78.30 0.00
Sorghum Position 1 Position 2 Position 3 Position 4 Position 5 Position 6
W/Restrictor Lbs/acre 0.00 215.74 614.63 1001.96 1041.56 1059.71
Lbs/1000 sq. ft. 0.00 4.95 14.11 23.00 23.91 24.33
Unrestricted
Restrictor required (See above data with restrictor)
Soybeans Position 1 Position 2 Position 3 Position 4 Position 5 Position 6
W/Restrictor
Not Compatible with restrictor
Unrestricted Lbs/acre 0.00 0.00 0.00 0.00 0.00 1541.51
Lbs/1000 sq. ft. 0.00 0.00 0.00 0.00 0.00 35.39
Gypsum (pelletized) Position 1 Position 2 Position 3 Position 4 Position 5 Position 6
W/Restrictor
Not Compatible with restrictor
Unrestricted Lbs/acre 0.00 0.00 1027.54 3557.40 5568.75 5999.40
Lbs/1000 sq. ft. 0.00 0.00 23.59 81.67 127.84 137.73
Prilled Fertilizer Position 1 Position 2 Position 3 Position 4 Position 5 Position 6
W/Restrictor Lbs/acre 0.00 0.00 852.23 1196.25 1228.84 1234.61
Lbs/1000 sq. ft. 0.00 0.00 19.56 27.46 28.21 28.34
Unrestricted Lbs/acre 0.00 742.50 2148.30 4244.63 6761.70 7212.15
Lbs/1000 sq. ft. 0.00 17.05 49.32 97.44 155.23 165.57
Sand Position 1 Position 2 Position 3 Position 4 Position 5 Position 6
W/Restrictor Lbs/acre 0.00 0.00 573.79 1564.20 2047.65 2716.73
Lbs/1000 sq. ft. 0.00 0.00 13.17 35.91 47.01 62.37
Unrestricted Lbs/acre 0.00 0.00 1536.56 4050.75 5443.35 7154.40
Lbs/1000 sq. ft. 0.00 0.00 35.27 92.99 124.96 164.24
Salt Position 1 Position 2 Position 3 Position 4 Position 5 Position 6
W/Restrictor Lbs/acre 0.00 0.00 593.59 972.68 1060.13 1133.96
Lbs/1000 sq. ft. 0.00 0.00 13.63 22.33 24.34 26.03
Unrestricted Lbs/acre 0.00 848.51 3460.88 6857.40 9820.80 10513.80
Lbs/1000 sq. ft. 0.00 19.48 79.45 157.42 225.45 241.36

12
Section 2: Operating Procedures
Electric Spin Spreader For utility vehicles with 2" receiver hitch, DH10, DH15 & DH25 Disc Harrows, and FPS48
5/24/16
Table of Contents
Discharge Rate Table - 5 Ft. Spread Pattern @ 1 MPM
Alfalfa Position 1 Position 2 Position 3 Position 4 Position 5 Position 6
W/Restrictor Lbs/acre 103.95 412.50 887.04 1453.65 1603.14 1591.92
Lbs/1000 sq. ft. 2.38 9.47 20.36 33.37 38.80 36.54
Unrestricted
Restrictor required (See above data with restrictor)
Biologic Position 1 Position 2 Position 3 Position 4 Position 5 Position 6
W/Restrictor Lbs/acre 0.00 0.00 80.52 250.14 324.06 385.44
Lbs/1000 sq. ft. 0.00 0.00 1.85 5.74 7.44 8.85
Unrestricted Lbs/acre 0.00 33.00 123.42 279.18 515.46 1259.28
Lbs/1000 sq. ft. 0.00 .76 2.83 6.41 11.83 28.91
MegaPlot Position 1 Position 2 Position 3 Position 4 Position 5 Position 6
W/Restrictor
Not Compatible with restrictor
Unrestricted Lbs/acre 0.00 0.00 0.00 0.00 657.03 1507.44
Lbs/1000 sq. ft. 0.00 0.00 0.00 0.00 15.08 34.61
EasyPlot Position 1 Position 2 Position 3 Position 4 Position 5 Position 6
W/Restrictor
Not Compatible with restrictor
Unrestricted Lbs/acre 0.00 0.00 0.00 0.00 0.00 335.94
Lbs/1000 sq. ft. 0.00 0.00 0.00 0.00 0.00 7.71
Clover (Ladina) Position 1 Position 2 Position 3 Position 4 Position 5 Position 6
W/Restrictor Lbs/acre 117.81 496.32 929.28 1526.91 1681.02 1721.28
Lbs/1000 sq. ft. 2.70 11.39 21.34 35.06 38.59 39.51
Unrestricted
Restrictor required (See above data with restrictor)
Clover (Red) Position 1 Position 2 Position 3 Position 4 Position 5 Position 6
W/Restrictor Lbs/acre 74.25 278.85 600.27 1004.85 1199.55 1468.50
Lbs/1000 sq. ft. 1. 7 0 6.40 13.78 23.07 27.54 33.71
Unrestricted
Restrictor required (See above data with restrictor)
Clover (Yellow Sweet) Position 1 Position 2 Position 3 Position 4 Position 5 Position 6
W/Restrictor Lbs/acre 386.10 1269.18 1361.58 1365.21 1372.14 1444.08
Lbs/1000 sq. ft. 8.86 29.14 31.26 31.34 31.50 33.15
Unrestricted
Restrictor required (See above data with restrictor)
Oats Position 1 Position 2 Position 3 Position 4 Position 5 Position 6
W/Restrictor
Not Compatible with restrictor
Unrestricted Lbs/acre 0.00 0.00 121.77 816.75 937.86 1659.90
Lbs/1000 sq. ft. 0.00 0.00 2.79 18.75 21.53 38.10
Ryegrass (annual) Position 1 Position 2 Position 3 Position 4 Position 5 Position 6
W/Restrictor Lbs/acre 0.00 97.02 286.44 375.87 401.94 420.75
Lbs/1000 sq. ft. 0.00 2.22 6.58 8.63 9.22 9.66
Unrestricted Lbs/acre 0.00 290.73 799.92 1448.04 2728.44 0.00
Lbs/1000 sq. ft. 0.00 6.67 18.36 33.24 62.64 0.00
Sorghum Position 1 Position 2 Position 3 Position 4 Position 5 Position 6
W/Restrictor Lbs/acre 0.00 172.59 491.7 801.57 833.25 847.77
Lbs/1000 sq. ft. 0.00 3.96 11.29 18.40 19.13 19.47
Unrestricted
Restrictor required (See above data with restrictor)
Soybeans Position 1 Position 2 Position 3 Position 4 Position 5 Position 6
W/Restrictor
Not Compatible with restrictor
Unrestricted Lbs/acre L0.00 0.00 0.00 0.00 0.00 1233.21
Lbs/1000 sq. ft. 0.00 0.00 0.00 0.00 0.00 28.31
Gypsum (pelletized) Position 1 Position 2 Position 3 Position 4 Position 5 Position 6
W/Restrictor
Not Compatible with restrictor
Unrestricted Lbs/acre 0.00 0.00 822.03 2845.92 4455.00 4799.52
Lbs/1000 sq. ft. 0.00 0.00 18.87 65.34 102.27 110.18
Prilled Fertilizer Position 1 Position 2 Position 3 Position 4 Position 5 Position 6
W/Restrictor Lbs/acre 0.00 0.00 681.78 957.00 983.07 987.69
Lbs/1000 sq. ft. 0.00 0.00 15.65 21.97 22.57 22.67
Unrestricted Lbs/acre 0.00 594.00 1718.64 3395.70 5409.36 5769.72
Lbs/1000 sq. ft. 0.00 13.64 39.46 77.95 124.18 132.46
Sand Position 1 Position 2 Position 3 Position 4 Position 5 Position 6
W/Restrictor Lbs/acre 0.00 0.00 459.03 1251.36 1638.12 2173.38
Lbs/1000 sq. ft. 0.00 0.00 10.54 28.73 37.61 49.90
Unrestricted Lbs/acre 0.00 0.00 1229.25 3240.60 4354.68 5723.52
Lbs/1000 sq. ft. 0.00 0.00 28.22 74.39 99.97 131.39
Salt Position 1 Position 2 Position 3 Position 4 Position 5 Position 6
W/Restrictor Lbs/acre 0.00 0.00 474.87 778.14 848.1 907.17
Lbs/1000 sq. ft. 0.00 0.00 10.90 17.86 19.47 20.82
Unrestricted Lbs/acre 0.00 678.81 2768.70 5485.92 7856.64 8411.04
Lbs/1000 sq. ft. 0.00 15.58 63.56 125.49 180.36 193.09

13
Section 2: Operating Procedures
5/24/16
Electric Spin Spreader For utility vehicles with 2" receiver hitch, DH10, DH15 & DH25 Disc Harrows, and FPS48
Table of Contents
Discharge Rate Table - 6 Ft. Spread Pattern @ 1 MPM
Alfalfa Position 1 Position 2 Position 3 Position 4 Position 5 Position 6
W/Restrictor Lbs/acre 86.63 343.75 739.20 1211.37 1335.95 1326.60
Lbs/1000 sq. ft. 1.99 7.89 16.97 27.81 30.67 30.45
Unrestricted
Restrictor required (See above data with restrictor)
Biologic Position 1 Position 2 Position 3 Position 4 Position 5 Position 6
W/Restrictor Lbs/acre 0.00 0.00 67.10 208.45 270.05 321.20
Lbs/1000 sq. ft. 0.00 0.00 1.54 4.79 6.20 7.37
Unrestricted Lbs/acre 0.00 27.50 102.85 232.65 429.55 1049.4
Lbs/1000 sq. ft. 0.00 .63 2.36 5.34 9.86 24.09
MegaPlot Position 1 Position 2 Position 3 Position 4 Position 5 Position 6
W/Restrictor
Not Compatible with restrictor
Unrestricted Lbs/acre 0.00 0.00 0.00 0.00 547.53 1256.2
Lbs/1000 sq. ft. 0.00 0.00 0.00 0.00 12.57 28.84
EasyPlot Position 1 Position 2 Position 3 Position 4 Position 5 Position 6
W/Restrictor
Not Compatible with restrictor
Unrestricted Lbs/acre 0.00 0.00 0.00 0.00 0.00 279.95
Lbs/1000 sq. ft. 0.00 0.00 0.00 0.00 0.00 6.43
Clover (Ladina) Position 1 Position 2 Position 3 Position 4 Position 5 Position 6
W/Restrictor Lbs/acre 98.17 413.60 774.40 1272.43 1400.85 1434.40
Lbs/1000 sq. ft. 2.25 9.49 17.78 29.21 32.16 32.93
Unrestricted
Restrictor required (See above data with restrictor)
Clover (Red) Position 1 Position 2 Position 3 Position 4 Position 5 Position 6
W/Restrictor Lbs/acre 61.87 232.37 500.23 827.37 999.63 1223.75
Lbs/1000 sq. ft. 1. 4 2 5.33 11.4 9 19.23 22.95 28.09
Unrestricted
Restrictor required (See above data with restrictor)
Clover (Yellow Sweet) Position 1 Position 2 Position 3 Position 4 Position 5 Position 6
W/Restrictor Lbs/acre 321.75 1057.65 1134.65 1137.67 1143.45 1203.4
Lbs/1000 sq. ft. 7.39 24.28 26.05 26.12 26.25 27.63
Unrestricted
Restrictor required (See above data with restrictor)
Oats Position 1 Position 2 Position 3 Position 4 Position 5 Position 6
W/Restrictor
Not Compatible with restrictor
Unrestricted Lbs/acre 0.00 0.00 101.47 680.63 781.55 1383.25
Lbs/1000 sq. ft. 0.00 0.00 2.33 15.63 17.94 31.75
Ryegrass (annual) Position 1 Position 2 Position 3 Position 4 Position 5 Position 6
W/Restrictor Lbs/acre 0.00 80.85 238.70 313.23 334.95 350.63
Lbs/1000 sq. ft. 0.00 1.85 5.48 7.19 7.69 8.05
Unrestricted Lbs/acre 0.00 242.27 666.60 1206.70 2273.70 0.00
Lbs/1000 sq. ft. 0.00 5.56 15.30 27.70 52.20 0.00
Sorghum Position 1 Position 2 Position 3 Position 4 Position 5 Position 6
W/Restrictor Lbs/acre 0.00 143.83 409.75 667.97 694.37 706.47
Lbs/1000 sq. ft. 0.00 3.30 9.41 15.33 15.94 16.22
Unrestricted
Restrictor required (See above data with restrictor)
Soybeans Position 1 Position 2 Position 3 Position 4 Position 5 Position 6
W/Restrictor
Not Compatible with restrictor
Unrestricted Lbs/acre 0.00 0.00 0.00 0.00 0.00 1027.67
Lbs/1000 sq. ft. 0.00 0.00 0.00 0.00 0.00 23.59
Gypsum (pelletized) Position 1 Position 2 Position 3 Position 4 Position 5 Position 6
W/Restrictor
Not Compatible with restrictor
Unrestricted Lbs/acre 0.00 0.00 685.03 2371.60 3712.50 3999.60
Lbs/1000 sq. ft. 0.00 0.00 15.73 54.45 85.23 91.82
Prilled Fertilizer Position 1 Position 2 Position 3 Position 4 Position 5 Position 6
W/Restrictor Lbs/acre 0.00 0.00 568.15 797.15 819.23 823.07
Lbs/1000 sq. ft. 0.00 0.00 13.04 18.31 18.81 18.89
Unrestricted Lbs/acre 0.00 495.00 1432.20 2829.75 4507.80 4808.10
Lbs/1000 sq. ft. 0.00 11.37 32.88 64.96 103.49 110.38
Sand Position 1 Position 2 Position 3 Position 4 Position 5 Position 6
W/Restrictor Lbs/acre 0.00 0.00 382.53 1042.80 1365.10 1811.15
Lbs/1000 sq. ft. 0.00 0.00 8.78 23.94 31.34 41.58
Unrestricted Lbs/acre 0.00 0.00 1024.37 2700.50 3628.90 4769.60
Lbs/1000 sq. ft. 0.00 0.00 23.51 61.99 83.31 109.49
Salt Position 1 Position 2 Position 3 Position 4 Position 5 Position 6
W/Restrictor Lbs/acre 0.00 0.00 395.73 648.45 706.75 755.97
Lbs/1000 sq. ft. 0.00 0.00 9.09 14.89 16.23 17.35
Unrestricted Lbs/acre 0.00 565.67 2307.25 4571.60 6547.20 7009.20
Lbs/1000 sq. ft. 0.00 12.99 52.97 104.95 150.30 160.91

14
Section 2: Operating Procedures
Electric Spin Spreader For utility vehicles with 2" receiver hitch, DH10, DH15 & DH25 Disc Harrows, and FPS48
5/24/16
Table of Contents
Discharge Rate Table - Wide Spread Pattern @ 1 MPM
Alfalfa (20 ft.Spreading Width) Position 1 Position 2 Position 3 Position 4 Position 5 Position 6
W/Restrictor Lbs/acre 25.99 103.13 221.76 363.41 400.79 397.98
Lbs/1000 sq. ft. 0.60 2.37 5.09 8.34 9.20 9.14
Unrestricted
Restrictor required (See above data with restrictor)
Biologic (20 ft.Spreading Width) Position 1 Position 2 Position 3 Position 4 Position 5 Position 6
W/Restrictor Lbs/acre 0.00 0.00 20.13 62.54 81.02 96.36
Lbs/1000 sq. ft. 0.00 0.00 0.46 1.44 1.86 2.21
Unrestricted Lbs/acre 0.00 8.25 30.86 69.80 128.87 314.82
Lbs/1000 sq. ft. 0.00 .19 0.71 1.60 2.96 7.23
MegaPlot (20 ft.Spreading Width) Position 1 Position 2 Position 3 Position 4 Position 5 Position 6
W/Restrictor
Not Compatible with restrictor
Unrestricted Lbs/acre 0.00 0.00 0.00 0.00 164.26 376.86
Lbs/1000 sq. ft. 0.00 0.00 0.00 0.00 3.77 8.65
EasyPlot (12 ft.Spreading Width) Position 1 Position 2 Position 3 Position 4 Position 5 Position 6
W/Restrictor
Not Compatible with restrictor
Unrestricted Lbs/acre 0.00 0.00 0.00 0.00 0.00 139.98
Lbs/1000 sq. ft. 0.00 0.00 0.00 0.00 0.00 3.21
Clover (Ladina) (20 ft.Spreading Width) Position 1 Position 2 Position 3 Position 4 Position 5 Position 6
W/Restrictor Lbs/acre 29.45 124.08 232.32 381.73 420.26 430.32
Lbs/1000 sq. ft. 0.68 2.85 5.33 8.76 9.65 9.88
Unrestricted
Restrictor required (See above data with restrictor)
Clover (Red) (20 ft.Spreading Width) Position 1 Position 2 Position 3 Position 4 Position 5 Position 6
W/Restrictor Lbs/acre 18.56 69.7 150.07 251.21 299.89 367.13
Lbs/1000 sq. ft. 0.43 1. 6 0 3.45 5.77 6.88 8.43
Unrestricted
Restrictor required (See above data with restrictor)
Clover (Yellow Sweet) (20 ft.Spread Width) Position 1 Position 2 Position 3 Position 4 Position 5 Position 6
W/Restrictor Lbs/acre 96.53 317.30 340.40 341.30 343.04 361.02
Lbs/1000 sq. ft. 2.22 7.28 7.81 7.84 7.88 8.29
Unrestricted
Restrictor required (See above data with restrictor)
Oats (25 ft.Spreading Width) Position 1 Position 2 Position 3 Position 4 Position 5 Position 6
W/Restrictor
Not Compatible with restrictor
Unrestricted Lbs/acre 0.00 0.00 24.35 163.35 187.57 331.98
Lbs/1000 sq. ft. 0.00 0.00 0.56 3.75 4.31 7.62
Ryegrass (annual) (12 ft.Spreading Width) Position 1 Position 2 Position 3 Position 4 Position 5 Position 6
W/Restrictor Lbs/acre 0.00 40.43 119.35 156.61 167.48 175.31
Lbs/1000 sq. ft. 0.00 0.93 2.74 3.60 3.84 4.02
Unrestricted Lbs/acre 0.00 121.14 333.30 603.35 1136.85 0.00
Lbs/1000 sq. ft. 0.00 2.78 7.65 13.85 26.10 0.00
Sorghum (25 ft.Spreading Width) Position 1 Position 2 Position 3 Position 4 Position 5 Position 6
W/Restrictor Lbs/acre 0.00 34.52 98.34 160.31 166.65 169.55
Lbs/1000 sq. ft. 0.00 0.79 2.26 3.68 3.83 3.89
Unrestricted
Restrictor required (See above data with restrictor)
Soybeans (25 ft.Spreading Width) Position 1 Position 2 Position 3 Position 4 Position 5 Position 6
W/Restrictor
Not Compatible with restrictor
Unrestricted Lbs/acre 0.00 0.00 0.00 0.00 0.00 246.64
Lbs/1000 sq. ft. 0.00 0.00 0.00 0.00 0.00 5.66
Gypsum (pelletized) (20 ft.Spreading Width) Position 1 Position 2 Position 3 Position 4 Position 5 Position 6
W/Restrictor
Not Compatible with restrictor
Unrestricted Lbs/acre 0.00 0.00 205.51 711.48 1113.75 1199.88
Lbs/1000 sq. ft. 0.00 0.00 4.72 16.33 25.57 27.55
Prilled Fertilizer (21 ft.Spreading Width) Position 1 Position 2 Position 3 Position 4 Position 5 Position 6
W/Restrictor Lbs/acre 0.00 0.00 162.33 227.86 234.06 235.16
Lbs/1000 sq. ft. 0.00 0.00 3.73 5.23 5.37 5.40
Unrestricted Lbs/acre 0.00 141.43 409.20 808.50 1287.94 1373.74
Lbs/1000 sq. ft. 0.00 3.25 9.39 18.56 29.57 31.54
Sand (25 ft.Spreading Width) Position 1 Position 2 Position 3 Position 4 Position 5 Position 6
W/Restrictor Lbs/acre 0.00 0.00 91.81 250.27 327.62 434.68
Lbs/1000 sq. ft. 0.00 0.00 2.11 5.75 7.52 9.98
Unrestricted Lbs/acre 0.00 0.00 245.85 648.12 870.94 1144.70
Lbs/1000 sq. ft. 0.00 0.00 5.64 14.88 19.99 26.28
Salt (25 ft.Spreading Width) Position 1 Position 2 Position 3 Position 4 Position 5 Position 6
W/Restrictor Lbs/acre 0.00 0.00 94.97 155.63 169.62 181.43
Lbs/1000 sq. ft. 0.00 0.00 2.18 3.57 3.89 4.17
Unrestricted Lbs/acre 0.00 135.76 553.74 1097.18 1571.33 1682.21
Lbs/1000 sq. ft. 0.00 3.12 12.71 25.19 36.07 38.62

15
Section 3: Additional Equipment
5/24/16
Electric Spin Spreader For utility vehicles with 2" receiver hitch, DH10, DH15 & DH25 Disc Harrows, and FPS48
Table of Contents
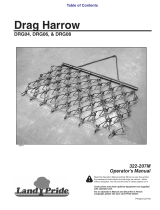
Drag Harrow (6’ x 4’ Shown)
Figure 3-2
Seed Bed Roller
Refer to Figure 3-3:
The Land Pride SBR72 Three-point hitch or pull type
Seed Bed Roller has uses and applications in
landscaping, sports field maintenance, pasture
maintenance, professional turf care, general seeding
and overseeding applications around home sites,
construction sites, horse paddocks, nurseries, sod
farms, and small farm or ranch operations. The SBR72
will break up smaller clumps and dirt clods, while
pressing applied seed into firm contact with the soil
profile for greatly improved germination rates. The
notched profile of the roller also develops a pattern of
uniformly spaced mini-furrows that tend to hold seed and
fertilizer in place. These small furrows also retain
essential moisture, and resist erosion from the wind and
runoff from applied irrigation or rain. It can be pulled
behind the Electric Spin Spreader or behind any machine
equipped with a drawbar or receiver hitch. The hitch on
the tongue can be set-up as a clevis hitch or turned
around for a ball hitch.
SBR72 Set-up for Pull Type Hook-Up
Figure 3-3
25611
25762
Section 3: Additional Equipment
Additional Seeding Equipment
Disc Harrow
Refer to Figure 3-1:
Land Pride Disc Harrows are designed to open and break
up soil surface in preparation for planting.
Land Pride Disc Harrow Models
Model DH1048 & DH1060 . . . . . . . . . 48" & 60" Wide
Model DH1560 & DH1572 . . . . . . . . . . 60" & 72" wide
Model DH2572 & DH2584 . . . . . . . . . .72" & 84" wide
Additional equipment can be attached behind the Disc
Harrow to make it a complete seeding package. See
“Complete One Pass Seeding Application” on page 16.
Electric Spin Spreader Assembly (DH Series)
Figure 3-1
Drag Harrow
Refer to Figure 3-2:
The Land Pride Drag Harrows are designed for various
types of seedbed and ground preparations. They can be
used to smooth out freshly cultivated soil, work seed and
fertilizer into freshly cultivated soil or into turf and pasture
grass, fluff and level arenas, aerate soil for faster
dry-down time, de-thatch and aerate lawns and pastures,
break up aeration cores on turf surfaces and groom
snow-packed ski resorts.
The Drag Harrow can also be used in tandem with Land
Pride’s Disc Harrow, Electric Spin Spreader and Seed
Bed Roller to provide a highly efficient and complete
seeding application in one pass. See “Complete One
Pass Seeding Application” on page 16.
Land Pride Drag Harrow Models
Model DRG04 . . . . . . . . . . . . . . . . 4 ft. wide x 4 ft. long
Model DRG06 . . . . . . . . . . . . . . . . 6 ft. wide x 4 ft. long
Model DRG08 . . . . . . . . . . . . . . . 8 ft. wide x 4 ft. long

16
Section 3: Additional Equipment
Electric Spin Spreader For utility vehicles with 2" receiver hitch, DH10, DH15 & DH25 Disc Harrows, and FPS48
5/24/16
Table of Contents
Refer to Figure 3-4:
Remove the tongue and rotate the remaining A-frame
hitch up 90 degrees and it becomes a 3-point mounted
Seed Bed Roller.
SBR72 Set-up for 3-Point Hook-Up
Figure 3-4
25763
Complete One Pass Seeding Application
Figure 3-5
Complete One Pass Seeding Application
Refer to Figure 3-5:
Land Prides offers a Seeder/Overseeder component
system for one-pass ground cultivation and seed to soil
integration for applications on previously tilled soil,
existing pasture ground, large grassy areas, reclamation
sites and wild game food plots. This system is comprised
of a Land Pride DH10, DH15 or DH25 Series Disc
Harrow, rear mounted Electric Spin Spreader with
special hitch kit, trailing DRG04, DRG06 or DRG08 Drag
Harrow, and trailing pull-type SBR72 Seed Bed Roller.
See your nearest Land Pride Dealer for more information
or visit our web site at www.landpride.com.

17
Section 4: Specifications
5/24/16
Electric Spin Spreader For utility vehicles with 2" receiver hitch, DH10, DH15 & DH25 Disc Harrows, and FPS48
Table of Contents
Section 4: Specifications
Electric Spin Spreader Specifications
Description Specification
Spin Spreader Volume/Capacity 2 cu. ft. (15 gallons) (100 lbs. Maximum capacity weight)
Hopper Construction Poly with water tight poly press fit lid.
Deflector Ring Construction Poly construction and removable and adjustable.
Frame Construction Welded and formed steel tubing and sheet metal.
Wide Spread Pattern
Without Deflector
20 to 25 ft. (Actual spread pattern is dependent upon product type and condition during
application.)
Spin Spreader Deflector Diverts and restricts seed to smaller spreading width. Seed rate tables calculated at
48", 60" & 72" spread width.
Small Seed Restrictor Plate Restricts distribution rate of smaller seeds and doubles the number of calibration
settings when installed.
Remote Tether Control ON/OFF Control Button, Numeric Seed gate Calibration Settings, and Plus or Minus
Seed Gate Control Function.
Spin Spreader Electrical
Voltage Input 12 volt system with mail power plug for Power Point attachment.
Fuse Rating In line fuse for 15amps maximum.
Start-Up Amps 4 Amp surge for spreading.
Normal Operating Amps .5 Amps for spreading.

18
Section 5: Features & Benefits
Electric Spin Spreader For utility vehicles with 2" receiver hitch, DH10, DH15 & DH25 Disc Harrows, and FPS48
5/24/16
Table of Contents
Section 5: Features & Benefits
Electric Spin Spreader
Description Benefits
Water Tight Poly Hopper Protects seed and fertilizers from moisture and rodents. Poly construction provides for low
unit weight, quiet operation, and resists corrosion.
Small Seed Restrictor Plate Enables applications of smaller seeds without waste. Doubles the number of possible
application rates over similar competitive models.
Removable and Adjustable
Flinger Ring
Keeps seed or applied products contained to actual width of soil cultivation for reduced
waste. Ring removal enables highly productive wide area broadcast of fertilizer, gypsum,
lime, sand or salt.
Electronic Tether Control Enables easy and convenient control of on/off function and seed gate application rates right
from the seat of the traction unit.
Standard Application Rate
Chart
Enables customers to determine spreader settings with confidence and ease. Similar
competitive models don’t supply rate charts and require costly and wasteful experimentation
to determine proper calibration settings.
Versatile Mounting Systems Provides capabilities for mounting spreaders on a wide range of discs, tractors utility
vehicles, ATVs, and pickups.
12 Volt Operating System Enables attachment to a broad range of lower priced traction units equipped with 12 volt
power outlets.
Low Unit Weight Provides for easy one-person installation and removal
Page is loading ...
Page is loading ...
Page is loading ...
Page is loading ...
Page is loading ...
Page is loading ...
Page is loading ...
Page is loading ...
/