EVEP611SA, EVEP614BA 19
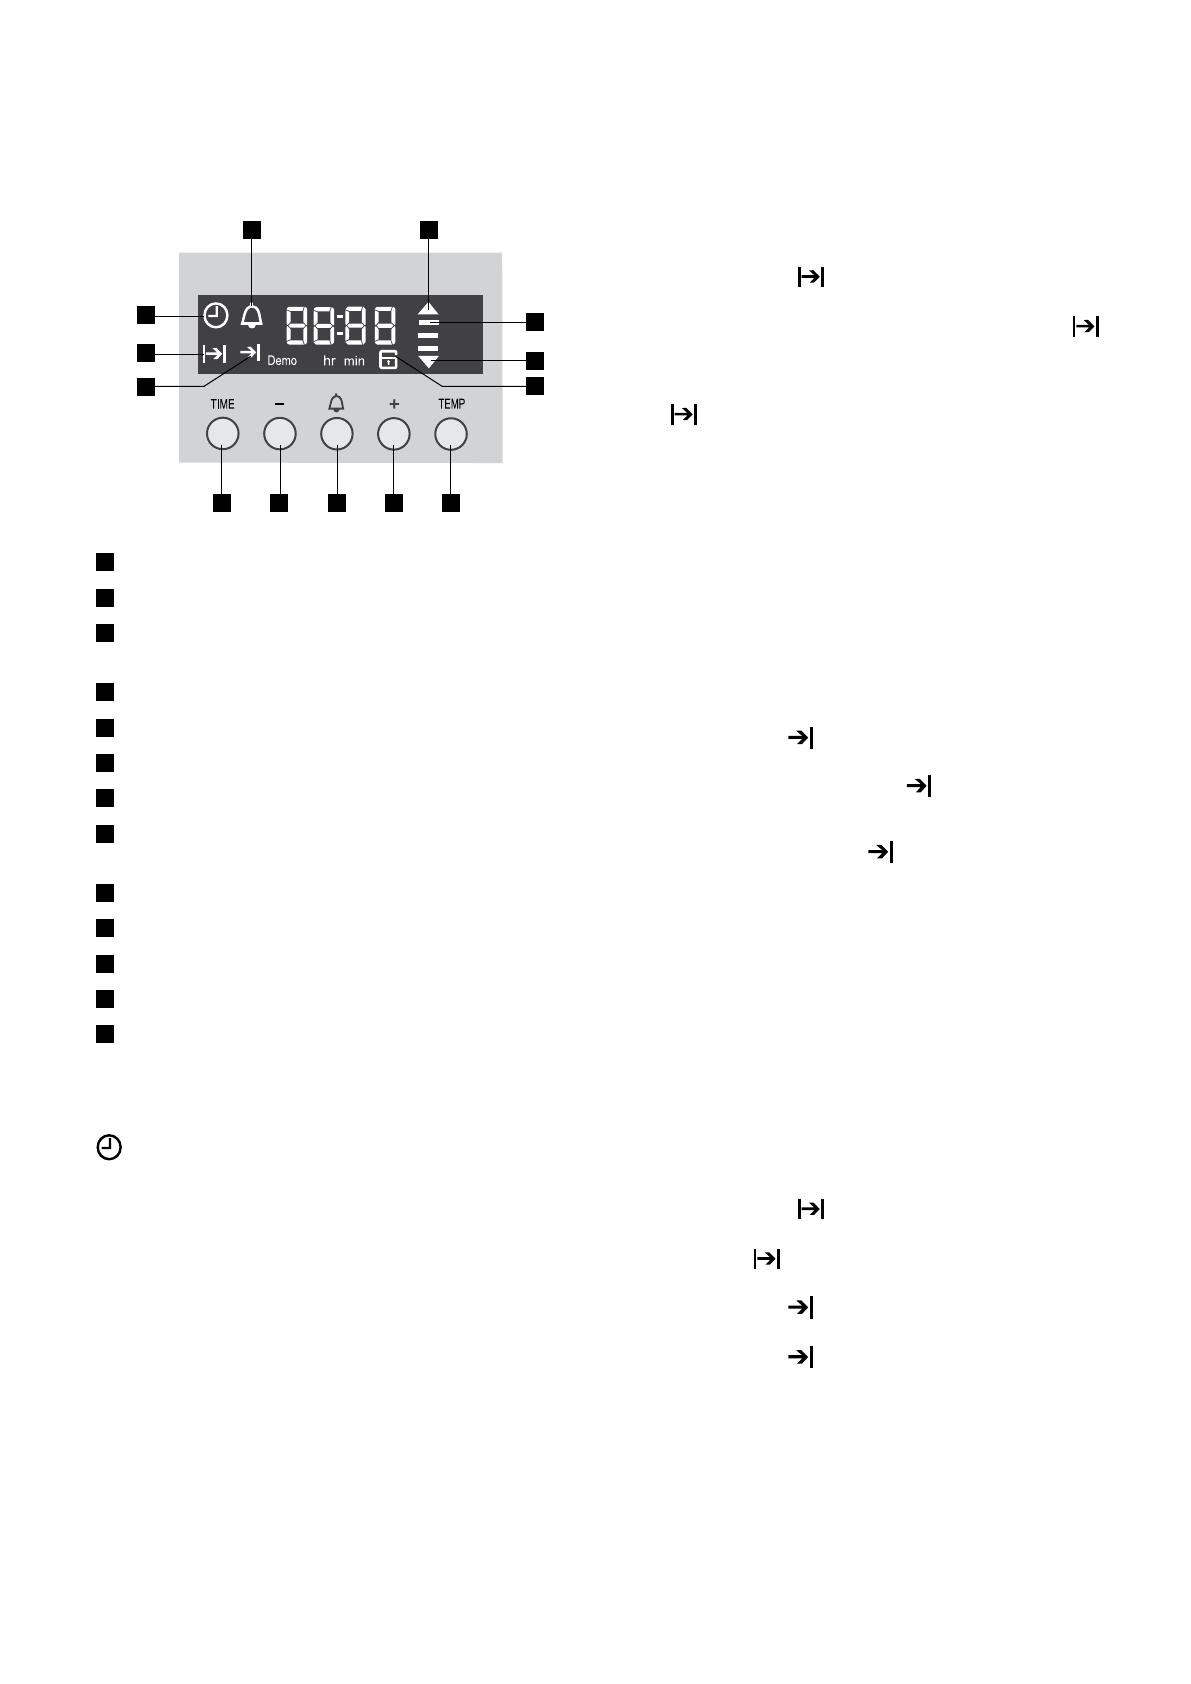
Cooking with the timer
1 2
3
4
25
678910
11
12
13
1 On when the timer is set
2 On when oven warming up
3 3 bars displayed when oven reaches set
temperature
4 On when oven cooling down
5 Oven door locked
6 Press to display current oven temperature
7 Press to increase hours/mins
8 Press to start timer mode.
Hold to turn oven light on/off.
9 Press to decrease hours/mins
10 Press to toggle through the timer modes
11 End time icon
12 Cook time icon
13 Time of day icon
Adjusting the clock
To change the time, press and hold the ‘TIME’ button
until the clock symbol begins to flash. The hour
display will be ready to change.
• Press + or – , then press ‘TIME’ when you have the
right hour.
• The minutes will flash and can be set in the same
manner.
• 5 seconds after the last change, the clock display will
stop flashing, confirming that the time has been set.
Note: The clock has a 24 hour display.
The timer can be used to turn the oven off in two ways by
setting the cooking time (duration) or by setting the end
time (time of day you want the oven off).
USING THE APPLIANCE
Setting the cook time
1. Use the knobs to select the desired oven function and
cooking temperature.
2. Press the ‘TIME’ button as often as necessary, until
the ‘cook time’ symbol appears.
3. Set the desired cooking time commencing with
minutes by using the + or – buttons, whilst the
symbol is flashing, then press the ‘TIME’ button
again and set the hours by using the + or – buttons.
After 5 seconds from the last time adjustment the
symbol will stop flashing. The appliance is now
programmed and the display will countdown to zero.
4. When the set time has elapsed, a signal will sound
and the appliance will turn off. To stop the signal,
press any button on the clock and then turn the oven
function selector to OFF.
Note: Cooking time cannot be set for the Rapid Heat
function. The feature can be cancelled at any time by
returning the function selector to off.
Setting the end time
1. Use the knobs to select the desired oven function and
cooking temperature.
2. Press the ‘TIME’ button as often as necessary, until
the ‘end time’ symbol appears.
3. Set the desired end time commencing with hours using
the + or – buttons whilst the symbol is flashing,
then press the ‘TIME’ button again and set the minutes
by using the + or – buttons. After 5 seconds from the
last time adjustment the symbol will stop flashing
and the appliance is now programmed.
4. When the set time has elapsed, a signal will sound
and the appliance will turn off. To stop the signal,
press any button on the clock and then turn the oven
function selector to OFF.
Note: Stop time cannot be set for the Rapid Heat function.
Setting the delayed start cooking time
The ‘cook time’ and ‘end time’ functions can be
combined to switch the oven on and off at a specific
time during the day.
1. Select the desired oven function and cooking
temperature.
2. Press the ‘TIME’ button as often as necessary, until
the ‘cook time’ symbol appears.
3. Set the desired cooking time by using + or – buttons,
whilst the symbol is flashing.
4. Press the ‘TIME’ button as often as necessary, until
the ‘end time’ symbol appears flashing
5. Set the desired switch-off time using the + or – whilst
the ‘end time’ symbol is flashing.
6. 5 seconds after the last change the ‘cook time’ and
‘end time’ arrows are lit to confirm that the oven has
been programmed.
7. When the delayed start cooking time has elapsed,
a signal will sound and the appliance will turn off. To
stop the signal, press any button on the clock and
then turn the oven function selector to OFF.
Note: Delayed start cooking time cannot be set for the
Rapid Heat function. The feature can be cancelled at
any time by returning the function selector to off.


