Panasonic SC-PM53 User manual

Category
CD players
Type
User manual

This manual is also suitable for

Panasonic SC-PM53 is a versatile CD stereo system with a range of features for music lovers. It supports playback of both MP3 and CD-DA format audio CDs, with a capacity of up to 99 tracks. The system also includes a cassette player and an AM/FM radio tuner, providing various options for listening to music. Additionally, it has a built-in timer function, allowing you to set it to turn on or off automatically at specific times. With its sleek design and user-friendly controls, Panasonic SC-PM53 offers a comprehensive audio experience for your home.

Panasonic SC-PM53 is a versatile CD stereo system with a range of features for music lovers. It supports playback of both MP3 and CD-DA format audio CDs, with a capacity of up to 99 tracks. The system also includes a cassette player and an AM/FM radio tuner, providing various options for listening to music. Additionally, it has a built-in timer function, allowing you to set it to turn on or off automatically at specific times. With its sleek design and user-friendly controls, Panasonic SC-PM53 offers a comprehensive audio experience for your home.

Operating Instructions
CD Stereo System
Model No. SC-PM53
SC-PM54
RQTV0102-3B
Before connecting, operating or adjusting this product,
please read the instructions completely.
Please keep this manual for future reference.
Note:
“EB” on the packaging indicates the United Kingdom.
Operations in these instructions are described using
remote control, but you can do the operations with
the main unit if the controls are the same.
Unless otherwise indicated, illustrations in these
operating instructions are of SC-PM53 for the
United Kingdom and Continental Europe.
Your unit may not look exactly as illustrated.
The illustrations show SC-PM53
EEBGN
Table of contents
Caution for AC Mains Lead ................ 2
Safety precautions ............................. 3
Disc information ................................. 3
Placement of speakers ....................... 3
Getting started .................................... 4
Overview of controls .......................... 6
Discs .................................................... 7
Cassette tape ...................................... 9
Radio .................................................... 10
Timer .................................................... 11
Sound adjustment .............................. 12
External unit ........................................ 13
Troubleshooting guide ....................... 14
Specifi cations ..................................... 15
Maintenance ........................................ 15
When moving the unit ........................ 15
SUPPLIED ACCESSORIES
Please check and identify the supplied accessories.
Use numbers indicated in parentheses when asking for
replacement parts. (As of December 2005)
1 x Remote control
(N2QAYB000008)
1 x AC mains lead
(For United Kingdom:
K2CT3CA00004)
1 x FM indoor antenna
(RSA0007-L)
(For Australia and N.Z.:
K2CJ2DA00010)
1 x Antenna plug adaptor
(For United Kingdom:
K1YZ02000013)
(For others:
K2CQ2CA00002)
2 x Remote control
batteries
1 x AM loop antenna
(N1DAAAA00001)
SC-PM54 is available in Australia and New Zealand only.
RQTV0102_2B.indd 1RQTV0102_2B.indd 1 2/9/07 11:14:00 AM2/9/07 11:14:00 AM
RQTV0102
2
Dear customer
Thank you for purchasing this product.
For optimum performance and safety, please read these
instructions carefully.
These operating instructions are applicable to the following
system.
System SC-PM53 SC-PM54
Main unit SA-PM53 SA-PM54
Speakers SB-PM53 SB-PM54
Back of product
Inside of product
Tuotten sisällä
Produktets
innside
Information on Disposal for Users of Waste Electrical
& Electronic Equipment (private households)
This symbol on the products and/or
accompanying documents means that used
electrical and electronic products should not be
mixed with general household waste. For proper
treatment, recovery and recycling, please take
these products to designated collection points,
where they will be accepted on a free of charge basis.
Alternatively, in some countries you may be able to return
your products to your local retailer upon the purchase of
an equivalent new product.
Disposing of this product correctly will help to save valuable
resources and prevent any potential negative effects on
human health and the environment which could otherwise
arise from inappropriate waste handling. Please contact
your local authority for further details of your nearest
designated collection point.
Penalties may be applicable for incorrect disposal of this
waste, in accordance with national legislation.
For business users in the European Union
If you wish to discard electrical and electronic equipment,
please contact your dealer or supplier for further
information.
Information on Disposal in other Countries outside the
European Union
This symbol is only valid in the European Union.
If you wish to discard this product, please contact your
local authorities or dealer and ask for the correct method
of disposal.
Caution for AC Mains Lead
Fuse cover
Figure A Figure B
Fuse
(5 ampere)
Fuse
(5 ampere)
Figure A Figure B
RQTV0102_2B.indd 2RQTV0102_2B.indd 2 2/9/07 11:14:04 AM2/9/07 11:14:04 AM
RQTV0102
3
EnglishEnglish
Disc information
This unit can play MP3 fi les and CD-DA format audio CD-R/RWs
that have been fi nalized.
• It may not be able to play some CD-R/RWs depending on the
condition of the recording.
Do not use irregularly shaped discs.
Do not use discs with labels and stickers that are coming off or with
adhesive exuding from under labels and stickers.
Do not attach extra labels or stickers on the disc.
Do not write anything on the disc.
CD
This unit can access up to 99 tracks.
Choose a disc with this mark:
Using DualDiscs
The “CD” sides of DualDiscs do not meet the CD-DA standard so it
may not be possible to play them on this unit.
MP3
Files are treated as tracks and folders are treated as albums.
This unit can access up to 999 tracks, 255 albums and 20 sessions.
Disc must conform to ISO9660 level 1 or 2 (except for extended
formats).
To play in a certain order, prefi x the folder and fi le names with the
3-digit numbers in the order you want to play them.
Not doing the following will cause damage to the unit.
• “GOODBYE is displayed when the unit turns off. Remove the
mains plug after this display disappears.
OPEN/CLOSE
Always press [OPEN/CLOSE 0] to insert or remove a disc.
Do not push or pull out the tray by hand as this may cause an
accident.
Place the disc label-up in the center or tray.
Insert only one disc into each tray.
Placement of speakers
SC-PM53
Speakers are designed
identically so that no
left or right channel
orientation is necessary.
SC-PM54
Place the speakers so
that the tweeter is on the
inside.
Use only the supplied speakers.
The combination of the main unit and speakers provide the best
sound. Using other speakers can damage the unit and sound
quality will be negatively affected.
Note
• Keep your speakers at least 10mm away from the system for proper
ventilation.
These speakers do not have magnetic shielding. Do not place
them near televisions, personal computers or other devices easily
infl uenced by magnetism.
To avoid damage to the speakers, do not touch the speaker cones
if you have taken the nets off.
Caution
• Use the speakers only with the recommended system.
Failure to do so can damage the amplifi er and speakers,
and can cause fi re. Consult a qualifi ed service person if
damage occurs or if a sudden change in performance is
apparent.
Do not attach these speakers to walls or ceilings.
Tweeter
RQTV0102_2B.indd 3RQTV0102_2B.indd 3 2/9/07 11:14:06 AM2/9/07 11:14:06 AM
RQTV0102
4
Step 1
Step 1
- Making the connections
Connect the AC mains lead cord only after all other connections have been made.
L
R
(6 )
Getting started
4
Connect the AC mains lead.
FOR THE UNITED KINGDOM ONLY
READ THE CAUTION FOR THE AC MAINS LEAD
ON PAGE 2 BEFORE CONNECTION.
The included AC mains lead is for use with this unit
only. Do not use it with other equipment.
Insertion of connector
Connector
Appliance inlet
Even when the connector is perfectly inserted,
depending on the type of inlet used, the front part of
the connector may jut out as shown in the drawing.
However there is no problem using the unit.
3
Connect the speaker cords.
Incorrect connection can damage the unit.
Red Black
(·)
Red (ª)
Black
FM ANT
75
AM ANT
EXT LOOP
2
Connect the FM indoor antenna.
Tape the antenna to a wall or column, in a
position with least amount of interference.
Adhesive
tape
FM indoor
antenna
1
Connect the AM loop antenna.
Stand the antenna up on its base. Keep the loose antenna cord
away from other wires and cords.
AM loop antenna
For Europe

L
R
HIGH (6 )
LOW
(6 )
Red
Blue (·)Black (·)
Red (ª)
Gray
(ª)
Gray
Blue
Black
For others
To household
mains socket
RQTV0102_2B.indd 4RQTV0102_2B.indd 4 2/9/07 11:14:11 AM2/9/07 11:14:11 AM
RQTV0102
5
EnglishEnglish
Optional antenna connections
FM outdoor antenna AM outdoor antenna
FM outdoor antenna
(not included)
75
coaxial cable
(not included)
FM ANT
75
AM ANT
EXT LOOP
(Only for the U.K.)
Use the antenna
plug adaptor
(included).
FM ANT
75
AM ANT
EXT LOOP
AM outdoor antenna
(not included)
AM loop antenna
(included)
Never use an outdoor antenna during a lightning storm.
You can connect the FM outdoor antenna for better reception. Please consult your dealer for installation.
Disconnect the FM indoor antenna if an FM outdoor antenna is installed.
Connect the AM outdoor antenna without removing the AM loop antenna. Run 5 to 12 m of vinyl-covered wire horizontally
along a window or other convenient location.
Step 2
Step 2
- Inserting batteries into the remote control
AA/R6/LR6
Batteries
Insert so the poles (+ and –) match those in the remote control.
Remove if the remote control is not going to be used for a long period of
time. Store in a cool, dark place.
Do not use rechargeable type batteries.
Mishandling of batteries in the remote control can cause electrolyte
leakage, which may cause a fi re.
Do not:
mix old and new batteries.
use different types of batteries at the same time.
heat or expose to fl ame.
take apart or short circuit.
attempt to recharge alkaline or manganese batteries.
use batteries if their covering has been peeled off.
Use
Aim at the remote control sensor, avoiding obstacles, at a maximum
range of 7
m directly in front of the unit.
Refer to page 6 for remote control signal sensor position.
S
S
tep 3
tep 3
- DEMO function
- DEMO function
When the unit is fi rst plugged in, a demonstration of its functions may be
shown on the display.
If the demo setting is off, you can show a demonstration by selecting
“DEMO ON”.
Press and hold [–DEMO, 7].
The display changes each time the button is held down.
DEMO ONDEMO OFF
While in standby mode, select “DEMO OFF” to reduce power
consumption.
RQTV0102_2B.indd 5RQTV0102_2B.indd 5 2/9/07 11:14:19 AM2/9/07 11:14:19 AM
RQTV0102
6
Overview of controls
Main unit
Main unit
Refer to numbers in parentheses for page reference.
Cassette lid (9)
Remote control sensor
1 Standby/on switch (y/l) (15)
Press to switch the unit from on to standby
mode or vice versa. In standby mode, the unit is
still consuming a small amount of power.
4 Bass selection (12)
Disc selection (7)
8 Tuner/Band selection (10)
Disc tray (7)
Headphone jack ( )
Avoid listening for prolonged
periods of time to prevent
hearing damage.
Plug type: 3.5
mm stereo
(not included)
Cassette lid open (9)
Display panel
9 Volume control
7 Recording start/pause (9, 13)
2 Disc play/pause (7)
3 Tape play (9)
Changing disc (7)
6 Music port selection (13)
Top of unit
! H.BASS selection (13)
Checking disc position (8)
AC supply indicator (AC IN)
This indicator lights when the unit is connected
to the AC mains supply.
Music port jack (13)
5 Treble selection (12)
Disc tray open/close (7)
Disc skip/search, tape fast-forward/
rewind, tune/preset channel selection,
time adjustment (9)
Stop/Demo (5, 9)
Remote control
Remote control
Buttons such as 1 function the same as the controls on the main unit.
1
Clock/Timer (11)
Play timer/Record timer (11)
Numeric (7, 10)
Delete (8)
Muting
Play mode (7, 9, 10)
Disc (7)
Program (8)
Clear (8)
2
Re-Master (13)
Sleep timer (11)
Preset EQ (12)
Disc skip/search, tape fast-
forward/rewind, tune/preset
channel selection, time
adjustment (7, 10, 11)
Repeat (8)
6
Treble/bass
adjustment (12)
4
!
7
Display (8, 10)
Dimmer
8
3
Stop (7)
9
5
Surround (13)
Auto off
Album selection
(7)
Enter (8)
This function allows you to
turn off the unit in disc or
tape mode only after left
unused for 10 minutes.
The setting is maintained
even if the unit is turned
off.
Dims the display panel.
Mutes the sound.
Press the button to activate.
Press again to cancel.
RQTV0102_2B.indd 6RQTV0102_2B.indd 6 2/9/07 11:14:20 AM2/9/07 11:14:20 AM
RQTV0102
7
EnglishEnglish
Basic play
Basic play
CD MP3
1Press [y] to turn the unit on.
2Press [1 3~ 5 3] to select your desired tray.
3Press [OPEN/CLOSE 0] to open the disc tray and
then load the disc. Press [OPEN/CLOSE 0] again to
close the tray.
Disc tray
Label must
face upward Tray number
4Press [CD 6] to start play.
5Adjust the volume.
To Action
stop the disc Press [STOP 7].
pause play Press [CD 6]. Press again to
resume play.
skip tracks Press [4/REW/4] or [3/FF/¢]
during play or pause.
search through tracks
CD
Press and hold [4/REW/4] or
[3/FF/¢] during play or pause.
direct play If the unit is on standby mode and a
disc is loaded, press [CD 6] or
[1 3 ~ 5 3] to start play.
skip album
MP3
Press [ALBUM or ] in the play
mode.
Press [ALBUM or ] once and
then the numeric buttons in the stop
mode.
Changing disc (CD CHANGE)
CD MP3
While one disc is playing, you can change the discs in other
trays (except in All-Disc random play or program play).
1Press [CHANGE 0].
2Press [1 3~ 5 3] to select the tray.
3Change the disc.
4Press [CHANGE 0] again to close the tray.
Play Mode function
Play Mode function
CD MP3
1Press [CD 6] and then [STOP 7].
2Press [DISC] and (within 10 seconds) press [1 ~ 5] to
select the disc.
3Press [PLAY MODE] to select the desired mode.
Mode To play
1-DISC
1DISC
one selected disc.
ALL-DISC
ALL DISC
all discs in trays, e.g., 45123.
1-TRACK
1TR
one selected track on the selected
disc.
Press the numeric buttons to select
the track.
1-ALBUM
1ALBUM
MP3
one selected album on the selected
disc.
Press [ALBUM or ] to select
the album.
1-DISC RANDOM
1DISC RND
one selected disc randomly.
1-ALBUM RANDOM
1ALBUM RND
MP3
all tracks in one selected album
randomly.
Press [ALBUM or ] to select
the album.
ALL-DISC RANDOM
ALL DISC RND
all loaded discs randomly.
Note
During any random play, you cannot skip to tracks that have been
played.
CD
During 1-DISC RANDOM or ALL-DISC RANDOM play, you can
search forward or backward only within the current track.
Discs
Disc trays
Numeric
buttons
RQTV0102_2B.indd 7RQTV0102_2B.indd 7 2/9/07 11:14:23 AM2/9/07 11:14:23 AM
RQTV0102
8
Discs (continued)
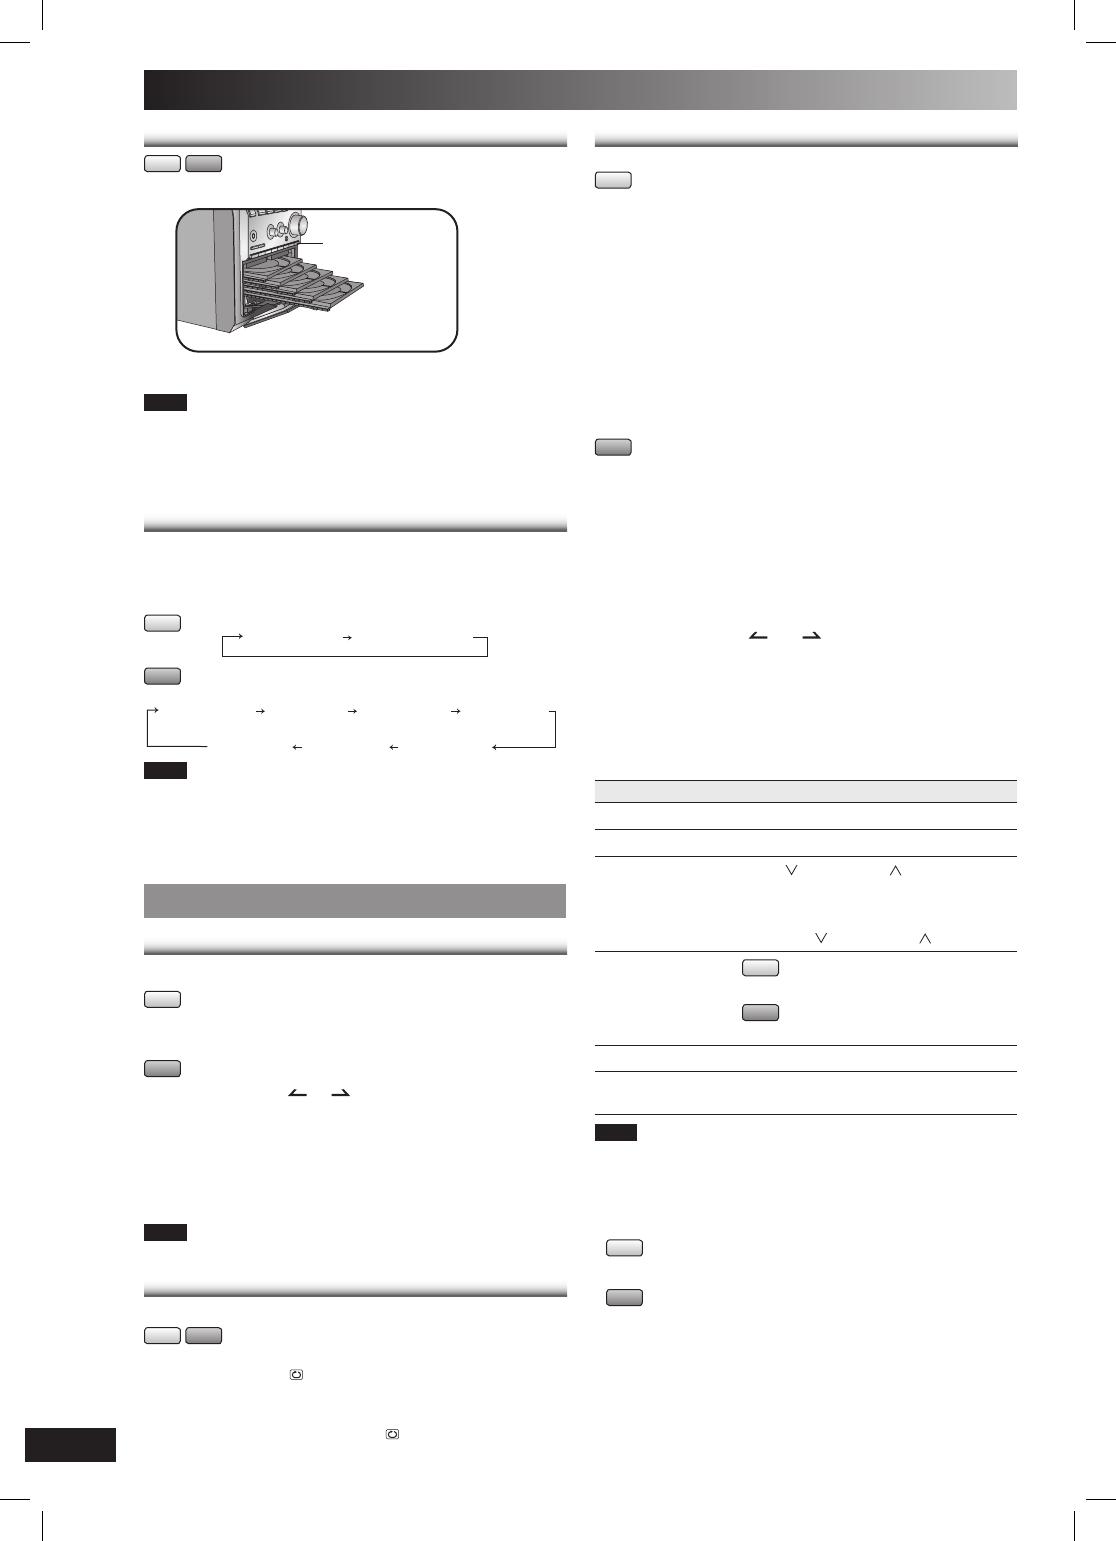
Checking which discs are in the trays (CD CHECK)
CD MP3
1Press [CD CHECK].
2
3
4
5
1
CD CHECK
2Press the button again to close the trays.
Note
The tray with a disc being played will not open.
If the player is stopped, all trays will open.
Do not remove or insert discs during disc check.
Do not pull out the trays during disc check.
8 cm discs cannot be checked.
Display function
Display function
This function allows you to display the information of the
current track.
Press [DISPLAY] repeatedly during play or pause mode.
CD Elapsed time Remaining time
MP3
Elapsed time
Remaining
time Album name Track name
ID3 (Artist) ID3 (Track) ID3 (Album)
Note
Maximum number of displayable characters: approximately 30
• This unit supports ver. 1.0 & 1.1 ID3 tags. Text data that is not
supported will not be displayed.
ID3 is a tag embedded in MP3 tracks to provide information about
the track.
Advanced play
Advanced play
Direct access play
Direct access play
This function allows you to start play from a specifi c track.
CD
Press the numeric buttons to select and play your
desired track.
MP3
1Press [ALBUM or ] to select the album.
2Press [3/FF/¢] once and then the numeric buttons
to select and play your desired track.
For two-digit track, press [
h
10] once, and then the two
digits.
For three-digit track, press [h10] twice, and then the three
digits.
Note
This function does not work during any random/program mode.
Repeat play
Repeat play
You can repeat program play or other selected play mode.
CD MP3
Press [REPEAT] before or during play.
“REPEAT ON” and are displayed.
To cancel
Press [REPEAT] again.
“REPEAT OFF” is displayed and is cleared.
Program play
Program play
This function allows you to program up to 24 tracks.
CD
1Press [CD 6] and then [STOP 7].
2Press [PROGRAM].
3Press [DISC].
4(Within 10 seconds or so)
Press [1~5] to select your desired disc.
5Press the numeric buttons to select your desired
track.
6Repeat steps 3 to 5 to program other tracks.
7Press [CD 6] to start play.
MP3
1Press [CD 6] and then [STOP 7].
2Press [DISC].
3(Within 10 seconds or so)
Press [1~5] to select your desired disc.
4Press [STOP 7].
5Press [PROGRAM].
6Press [ALBUM or ] to select your desired
album.
7Press [3/FF/¢] once and then the numeric buttons
to select your desired track.
8Press [ENTER].
Repeat steps 6 to 8 to program other tracks.
9Press [CD 6] to start play.
To Action
cancel program mode Press [PROGRAM] in the stop mode.
replay the program Press [PROGRAM] then [CD 6].
check program
contents
Press [ /REW/4] or [ /FF/¢] when
“PGM” is displayed in the stop mode.
To check while programming, press
[PROGRAM] twice after “PGM” appears,
then press [ /REW/4] or [ /FF/¢] .
add to the program CD
Repeat step 3 to 5 in the stop mode.
MP3
Repeat steps 6 to 8 in the stop mode.
clear the last track Press [DEL] in the stop mode.
clear all programmed
tracks
Press [CLEAR] in the stop mode. “CLR ALL
is displayed.
Note
When you try to program more than 24 tracks “PGM FULL
appears.
During program play, skipping is always in the programmed order,
whether forward or backward.
You cannot program CD-DA together with MP3 tracks.
You cannot change or open other trays during program play mode.
CD
During program play, you can search backward or forward only
within the current track.
MP3
The program memory is cleared when you change a disc or open
a disc tray.
RQTV0102_2B.indd 8RQTV0102_2B.indd 8 2/9/07 11:14:25 AM2/9/07 11:14:25 AM
RQTV0102
9
EnglishEnglish
Cassette tape
Cassette lid
Top of unit
The buttons described for “Cassette tape” are mainly for
the main unit unless indicated otherwise.
Basic play
Basic play
1Press [0] and insert the cassette.
"
Insert inside
the guides
Forward side
2Close the lid by hand.
3Press [TAPE 3] to start play.
To play the other side of the cassette, turn the cassette over.
To Action
stop tape playback Press [–DEMO, 7].
start one-touch play Press [TAPE 3] when the unit is OFF with
the cassette loaded.
fast-forward and
rewind
Press [4/REW/4] or [3/FF/¢] in the
stop mode.
Note
Tapes exceeding 100 minutes are thin and can break or get caught
in the mechanism.
Endless tapes can get caught up in the deck’s moving parts if used
incorrectly.
TPS (Tape Program Sensor)
This function enables you to search the beginning of a track,
up to a maximum of 9.
Press [4/REW/4] or [3/FF/¢] during play.
Play resumes from the track found.
Note
TPS may not function properly:
with short silent parts
when noise occurs between tunes
if silent parts found within tunes
Recording
Recording
Use normal position tapes.
High position and metal position tapes can be used, but this
unit will not be able to record or erase them correctly.
Preparation
Wind the leader tape so that recording can begin
immediately.
Recording the radio
Recording the radio
1Insert the cassette to be recorded.
2Tune to the required station (refer to page 10).
3Press [ REC/8] to start recording.
Recording discs
Recording discs
1Insert the cassette to be recorded.
2Press [CD 6] and then [–DEMO, 7].
3Press [OPEN/CLOSE 0] to insert the disc. Press
again to close.
4Press [PLAY MODE] on the remote control to select
your desired mode (refer to page 7).
5Press [ REC/8] to start recording.
Recording programmed tracks
1Insert the cassette to be recorded.
2Program the tracks you want (refer to page 8).
3Press [ REC/8] to start recording.
Other basic operations
To Action
erase a recorded
sound
1) Insert the cassette to be recorded.
2) Press [TAPE 3] and then
[–DEMO, 7].
3) Press [ REC¥8].
stop recording Press [–DEMO, 7].
stop recording
temporarily
1) Press [ REC¥8].
2) Press again to resume recording.
record on the other
side of the tape
Turn the cassette over and press
[ REC¥8].
You can perform the same operation of [ REC¥8] on the
main unit by pressing [REC ¶¥8] and [TAPE] simultaneously
on the remote control.
You attention is drawn to the fact that recording pre-recorded
tapes or discs or other published or broadcast material may
infringe copyright laws.
Erasure prevention
Erasure prevention
The illustration shows how to remove the tabs to prevent
recording. To record on the tape again, cover as shown.
Side A
Tab for
side A
Tab for
side B
To re-record
Normal tape
Adhesive tape
RQTV0102_2B.indd 9RQTV0102_2B.indd 9 2/9/07 11:14:27 AM2/9/07 11:14:27 AM
RQTV0102
10
Radio
Numeric
buttons
Manual tuning
Manual tuning
1Press [TUNER/BAND] to select “FM” or “AM”.
2Press [PLAY MODE] to select “MANUAL”.
3Press [4/REW/4] or [3/FF/¢] to select the
frequency of the required station.
ST
is displayed when a stereo FM broadcast is being
received.
To tune automatically
Press [4/REW/4] or [3/FF/¢] for a moment until the
frequency starts changing rapidly. The unit begins auto
tuning, stopping when it fi nds a station.
Auto tuning may not function when there is excessive
interference.
To cancel auto tuning, press [4/REW/4], [3/FF/¢] or
[STOP 7].
To improve FM sound quality
Press and hold [PLAY MODE] to display “MONO”.
To cancel
Press and hold [PLAY MODE] again until “MONO”
disappears.
MONO is also cancelled if the frequency is changed.
Turn off “MONO” for normal listening.
RDS broadcasting (For Europe)
Enable you to display the name of a broadcasting station or
a program type.
Press [DISPLAY] to display:
Station Name (PS)
Frequency display
Program Type (PTY)
RDS displays may not be available if reception is poor.
Program type displays
NEWS
AFFAIRS
INFO
SPORT
EDUCATE
DRAMA
CULTURE
SCIENCE
VARIED
POP M
ROCK M
M-O-R- M
LIGHT M
CLASSICS
OTHER M
WEATHER
FINANCE
CHILDREN
SOCIAL A
RELIGION
PHONE IN
TRAVEL
LEISURE
JAZZ
COUNTRY
NATIONAL
OLDIES
FOLK M
DOCUMENT
TEST
ALARM
M-O-R- M = “Middle-of-the-road music”
Memory preset
Memory preset
Up to 15 stations can be set in both the FM and AM bands.
Preparation
Press [TUNER/BAND] to select “FM” or “AM”.
Automatic presetting
Press and hold [PROGRAM] to start presetting.
Manual presetting
Manual presetting
1Press [PLAY MODE] to select “MANUAL”.
2Press [4/REW/4] or [3/FF/¢] to tune to the
required station.
3Press [PROGRAM].
4Press numeric buttons to select a channel.
The station occupying a channel is erased if another
station is preset in that channel.
5Repeat steps 2 to 4 to preset more stations.
Selecting a preset station
Press numeric buttons to select the channel.
For channels 10 to 15 press [
h
10], then the two digits.
OR
1Press [PLAY MODE] to select “PRESET”.
2Press [4/REW/4] or [3/FF/¢] to select the
channel.
AM allocation setting
By main unit only
This system can also receive AM broadcasts allocated in
10 kHz steps.
To change the step to 9 kHz to 10 kHz
1Press and hold [TUNER/BAND].
After a few seconds the display changes to a fl ashing
display of the current minimum frequency.
2Continue to hold down [TUNER/BAND].
When the minimum frequency changes, release the
button. To return to the original step, repeat the above
steps.
After the setting is changed, any previously preset
frequency will be cleared.
RQTV0102_2B.indd 10RQTV0102_2B.indd 10 2/9/07 11:14:29 AM2/9/07 11:14:29 AM
RQTV0102
11
EnglishEnglish
Timer
Setting the clock
Setting the clock
This is a 24-hour clock.
1Press [CLOCK/TIMER] to select “CLOCK”.
Each time you press the button:
CLOCK ˚ PLAY
Original display
˚ REC
2Within 5 seconds, press [4/REW/4] or [3/FF/¢]
to set the time.
3Press [CLOCK/TIMER] again to confi rm.
Displaying the clock
Press [CLOCK/TIMER] to display the clock for a few
seconds.
Note
The clock may lose or gain minutes over a period of time. Readjust
as necessary.
Using the sleep timer
This function enables you to turn off the unit automatically
after the set time.
Press [SLEEP] repeatedly to select your desired time.
30MIN 60MIN 90MIN 120MIN OFF
Sleep timer indicator
To cancel
Press [SLEEP] to select “OFF”.
Changing the remaining time
Press [SLEEP] to show the remaining time, and press
[SLEEP] again to select your desired time.
Note
The play and sleep timer or the record and sleep timer can be used
together.
The sleep timer always has priority. Be sure not to overlap timer
settings.
Using the play or record timer
You can set the timer to come on at a certain time to wake
you up (play timer) or to record from the radio or a music port
source (record timer).
Preparation
Turn the unit on and set the clock.
Timer Action
Play timer Prepare the music source you want to listen
to; cassette, disc number (1-5), radio or
music port source, and set the volume.
Record timer Check the cassette’s erasure prevention
tabs (refer to page 9), insert the cassette and
tune to the radio station (refer to page 10) or
select music port source (refer to page 13).
1Press [CLOCK/TIMER] repeatedly to select your
desired timer.
CLOCK ˚ PLAY
Original display
˚ REC
2Within 5 seconds, press [4/REW/4] or [3/FF/¢]
to set the starting time.
Play timer indicator
Start time
Record timer indicator
3Press [CLOCK/TIMER] to confirm.
4Repeat steps 2 and 3 to set the finishing time.
Finish time
To activate the timer
5Press [˚PLAY/REC] to turn on your desired timer.
˚ PLAY
no display (off)
˚ REC
6Press [y] to turn off the unit.
The unit must be off for the timers to operate.
To enjoy the desired source after the timer setting is
completed.
The volume level (for play timer) and music source are stored
in the timer memory and the timer will start in these preset
conditions. However, the disc numbers do not get stored in
the timer memory.
1. After step 5, start playing the desired source.
2. Reset the disc numbers if you have changed any of them,
confi rm that a disc or cassette is inserted, then press [y]
to put the unit on standby.
RQTV0102_2B.indd 11RQTV0102_2B.indd 11 2/9/07 11:14:31 AM2/9/07 11:14:31 AM
RQTV0102
12
Timer (Continued)
Other basic operations
To Action
change the settings Repeat steps 1 to 4 and 6 on page 11.
change the source
or volume
1) Press [˚PLAY/REC] to clear the timer
indicator from the display.
2) Make changes to the source or volume.
3) Perform steps 5 and 6 on page 11.
check the settings
(when the unit is on
or in standby mode)
Press [CLOCK/TIMER] repeatedly to
select ˚PLAY or ˚REC.
cancel Press [˚PLAY/REC] to clear the timer
indicators from the display.
Note
The play timer and record timer cannot be used together.
The play timer will start at the preset time, with the volume
increasing gradually to the preset level.
The record timer will start 30 seconds before the set time with the
volume muted.
The timer comes on at the set time every day if the timer is on.
The unit must be in the standby mode for the timer to function.
If you turn the unit off and on again while a timer is functioning, the
nish time setting will not be activated.
• If MUSIC PORT is selected as the source when the timer comes on,
the system turns on and engages MUSIC PORT as the source. If
you wish to playback or record from the portable audio equipment,
activate the equipment’s play mode and increase the volume. (See
the portable audio equipment’s instruction manual.)
Sound adjustment
Selecting sound effects
You can change the sound effect by selecting Preset EQ or
adjusting the bass or treble effect.
Preset EQ
Preset EQ
Press [PRESET EQ] repeatedly to select your desired
setting.
HEAVY
CLEAR
SOFT
VOCAL
EQ-OFF
Setting Effect
HEAVY Adds punch to rock
CLEAR Clarifi es higher frequencies
SOFT For background music
VOCAL Adds gloss to vocal
EQ-OFF No effect
Bass or treble
Bass or treble
Enable you to enjoy the lower or higher pitch sound.
1Press [BASS] or [TREBLE] to select your desired
setting.
Setting Effect
BASS For lower pitch sound
TREBLE For higher pitch sound
2Press [5] or [] to adjust the level.
OR
To adjust bass or treble using the main unit.
Turn [BASS] or [TREBLE] clockwise to increase the
level.
Turn [BASS] or [TREBLE] counter-clockwise to decrease
the level.
Note
The tone level can be varied within -3 to +3.
RQTV0102_2B.indd 12RQTV0102_2B.indd 12 2/9/07 11:14:34 AM2/9/07 11:14:34 AM
RQTV0102
13
EnglishEnglish
Enjoying surround sound
Enable you to add natural width and depth to the stereo
sound.
To activate
Press [SURROUND] to display indicator.
To cancel
Press [SURROUND] again to clear indicator.
Note
Surround sound is less discernible when listening through
headphones.
If interference in FM stereo reception increases, cancel the
surround sound effect.
Enhancing the bass
Enhancing the bass
Enable you to enjoy the powerful bass effect.
Press [H.BASS] repeatedly to select your desired
setting.
LEVEL 1
LEVEL 2
OFF
Note
The actual effect depends on the disc.
Re-master – Enjoying more natural sound
MP3
Discs recorded at 32 kHz, 44.1 kHz or 48 kHz
This feature reproduces the frequencies lost during recording
to give you a sound closer to the original.
Press [RE-MASTER] during play to select “RE-MASTER
ON”.
Each time you press the button:
RE-MASTER ON RE-MASTER OFF
Note
You cannot change RE-MASTER during recording.
External unit
The buttons described for “External unit” are mainly for
the main unit unless indicated otherwise.
Connecting to a portable audio equipment
This feature enables you to enjoy music from portable audio
equipment.
-53)#0
Portable audio equipment
(not included)
Audio cord (not included)
MUSIC
PORT
jack
Playing from portable audio equipment
Switch off the equalizer function (if there is any) of the
portable audio equipment before you plug into the MUSIC
PORT jack. Otherwise, sound from the speaker may be
distorted.
1Plug the audio cord into the MUSIC PORT jack and
press [MUSIC P.].
2Play the portable audio equipment. (See the portable
audio equipment’s instruction manual.)
Recording from portable audio equipment
1Insert the cassette to be recorded.
2Press [MUSIC P.].
3Play the portable audio equipment.
4Press [ REC¥8] to start recording.
Note
All peripheral components and cables are sold separately.
For other recording operations, refer to page 9, “Other basic
operations”.
RQTV0102_2B.indd 13RQTV0102_2B.indd 13 2/9/07 11:14:35 AM2/9/07 11:14:35 AM
RQTV0102
14
Troubleshooting guide
Before requesting service, make the below checks. If you can’t fi x the system as described below, or if something not listed
here occurs, refer to the enclosed directory to locate an Authorized Service Center convenient to you or contact your dealer.
Common problems
No sound. Turn the volume up.
The speaker cables may not be connected properly. Turn the unit off, check and correct the
connections and turn the unit on (refer to page 4).
Sound is unfi xed, reversed or comes
from one speaker only.
Check the speaker connections (refer to page 4).
Humming heard during play. An AC mains lead or fl uorescent light is near the cables. Keep other appliances and cords
away from this unit’s cables.
“ERROR” is displayed. Incorrect operation performed. Read the instructions and try again.
“– –:– –” appears on the display. You plugged the AC mains lead in for the fi rst time or there was a power failure recently.
Set the time (refer to page 11).
“F61” is displayed. Check and correct the speaker cables connections (refer to page 4). Unplug and plug in the
AC mains lead, then turn on the unit.
If this does not fi x the problem, there is a power supply problem. Consult the dealer.
Listening to the radio
Noise is heard.
The stereo indicator fl ickers or doesn’t
light.
Sound is distorted.
Use an outdoor antenna (refer to page 5).
A beat sound is heard. Turn the TV off or separate it from the unit.
A low hum is heard during AM
broadcast.
Separate the antenna from other cables and cords.
When there is a television set nearby
The picture on the TV
disappears or stripes appear
on the screen.
The location and direction of the antenna are incorrect. If you are using an indoor antenna,
change to an outdoor antenna (refer to page 5).
The TV antenna wire is too close to the unit. Separate the antenna wire of the TV set from
the unit.
Using the cassette deck
Recording is not possible. If the erasure prevention tabs have been removed, cover the holes with adhesive tape (refer
to page 9).
Playing discs
The display is wrong or play
won’t start.
The disc may be upside down (refer to page 3).
Wipe the disc.
Replace the disc if it is scratched, warped, or non-standard.
Condensation may have formed inside the unit due to a sudden change in temperature. Wait
about an hour for it to clear and try again.
The total number of tracks displayed
differs each time the same disc is
inserted.
Unusual sound is heard.
The disc may be scratched, or its data may be defective. Replace the disc.
CD-RW cannot be read. The disc was incompletely formatted. Use the recording equipment to fully format the disc
before recording.
“VBR–” is displayed instead of the
remaining play time.
The unit cannot display the remaining play time for variable bit rate (VBR) tracks.
“TAKE OUT/DISC” appears on the
display.
There is a problem with the disc mechanism. (A power failure may have occurred.)
The tray will open automatically. Remove the disc from the tray, and after ensuring there is
no disc in the tray, close it. The unit will make the disc changing noises for a few moments
and then it should operate normally.
The remote control
Remote control doesn’t work. Check that the batteries are inserted correctly (refer to page 5).
Replace the batteries if they are worn.
RQTV0102_2B.indd 14RQTV0102_2B.indd 14 2/9/07 11:14:36 AM2/9/07 11:14:36 AM
RQTV0102
15
EnglishEnglish
Maintenance
If the surfaces are dirty
To clean this unit, wipe with a soft, dry cloth.
Never use alcohol, paint thinner or benzine to clean this
unit.
Before using chemically treated cloth, read the instructions
that came with the cloth carefully.
For a cleaner, crisper sound
Clean the heads regularly to assure good quality playback
and recording.
Use a cleaning tape (not included).
When moving the unit
1Remove all discs.
2Press [y/I] to turn the unit off.
3Disconnect the AC mains lead.
Frequency range
For United Kingdom and
Continental Europe
55
Hz to 32
kHz (-16
dB)
78
Hz to 28
kHz (-10
dB)
For Australia and N.Z.
45
Hz to 35
kHz (-16
dB)
50
Hz to 31
kHz (-10
dB)
Dimensions (W x H x D)
144
mm x 249
mm x 200
mm
SC-PM53 Mass 1.9 kg
SC-PM54 Mass 2.0 kg
GENERAL
Power supply
For Continental Europe
AC 230V, 50
Hz
For United Kingdom,
Australia and N.Z.
AC 230 to 240
V, 50
Hz
Power consumption
For United Kingdom and
Continental Europe 125
W
For Australia and N.Z. 156
W
Dimensions (W x H x D)
175
mm x 249
mm x 355
mm
Mass
For United Kingdom and
Continental Europe
5.4
kg
For Australia and N.Z. 5.5
kg
Operating temperature range
+5°C to +35°C
Operating humidity range
5% to 90% RH (no condensation)
Power consumption in standby mode
For United Kingdom and
Continental Europe 0.6
W
For Australia and N.Z. 0.7
W
Note
1. Specifi cations are subject to change
without notice.
Mass and dimensions are approximate.
2. Total harmonic distortion is measured by
the digital spectrum analyzer.
3. For Australia and N.Z. The labels
“HIGH” and “LOW” on the rear or the
speakers refer to High frequency and Low
frequency.
AMPLIFIER SECTION
RMS OUTPUT POWER both channel
driven
10% total harmonic distortion
For United Kingdom and
Continental Europe
1
kHz 50
W per channel (6
)
For Australia and N.Z.
1
kHz
(Low channel) 45 W per channel (6
)
8
kHz
(High channel) 45 W per channel (6
)
Total Bi-Amp power 90
W per channel
Input Impedance
Music port 250 mV 12k
Output Impedance
Headphone 16
to 32
Phone jack
Terminal Stereo, 3.5 mm
Music port input jack
Terminal Stereo, 3.5 mm
FM TUNER SECTION
Frequency range
87.50
MHz to 108.00
MHz (50
kHz steps)
Sensitivity 0.3
µV (IHF)
S/N 26
dB 0.2
µV
Antenna terminals 75
(unbalanced)
Preset station FM 15 stations
AM 15 stations
AM TUNER SECTION
Frequency range
522 kHz to 1629
kHz (9
kHz steps)
520 kHz to 1630
kHz (10
kHz steps)
Sensitivity
For United Kingdom and
Continental Europe
S/N 20
dB (at 999
kHz) 900
µV/m
For Australia and N.Z.
S/N 20
dB (at 1000
kHz) 900
µV/m
CASSETTE DECK SECTION
Track system 4-track, 2-channel
Heads
Record/playback Solid permalloy head
Erasure Double gap ferrite head
Motor DC servo motor
Recording system AC bias 100
kHz
Erase system AC erase 100
kHz
Tape speed 4.8
cm/s
Overall frequency response (+3, –6
dB at
DECK OUT)
NORMAL 35
Hz to 14
kHz
S/N RATIO 54
dB (A weighted)
Wow and fl utter 0.08 % (WRMS)
Fast-forward and rewind time
Approx. 120 seconds with C-60 cassette tape
Specifi cations
CD SECTION
Disc played [8 cm or 12 cm]
(1) CD-Audio (CD-DA)
(2) CD-R/RW (CD-DA, MP3 formatted
disc)
(3) MP3
Sampling frequency
CD 44.1
kHz
MP3 32
kHz, 44.1
kHz, 48
kHz
Bit rate
MP3 32
kbps to 384
kbps
Decoding 16/20/24 bit linear
Pick up
Wavelength 785 nm
Beam source Semiconductor laser
Laser power CLASS 1
(For Norge)
Bølgelengde 785 nm
Laserstyrke
Ingen farlig stråling sendes ut
Audio output (Disc)
Number of channels 2-Channel
Frequency response
20
Hz to 20
kHz
(+1dB, -2
dB)
Wow and fl utter Below measurable limit
Digital fi lter 8
fs
D/A converter MASH (1 bit DAC)
SPEAKER SECTION
SC-PM53 Type 2 way, 2 speaker system
SC-PM54 Type 3 way, 3 speaker system
SC-PM53 Speaker(s)
Woofer 10 cm cone type (6
)
Tweeter 6
cm cone type (6
)
SC-PM54 Speaker(s)
Woofer 10 cm cone type (6
)
Tweeter 6
cm cone type (6
)
Super Tweeter 2.5
cm piezo type
Impedance 6
Input power (IEC)
For United Kingdom and
Continental Europe
50
W (Max)
For Australia and N.Z.
HIGH 90
W (Max)
LOW 90
W (Max)
Output sound pressure 80
dB/W (1.0 m)
Crossover frequency
For United Kingdom and
Continental Europe 3.5 kHz
For Australia and N.Z. 2.2 kHz
RQTV0102_2B.indd 15RQTV0102_2B.indd 15 2/9/07 11:14:37 AM2/9/07 11:14:37 AM
Matsushita Electric Industrial Co., Ltd.
Web Site: http://www.panasonic.co.jp/global/ RQTV0102-3B
L0106CH3017
En
SUOMI
Laite tulee asettaa lähelle verkkopistorasiaa ja pistokkeen
täytyy olla sellaisessa asennossa, että siihen on helppo
tarttua ongelman sattuessa.
NORSK
RQTV0102_2B.indd 16RQTV0102_2B.indd 16 2/9/07 11:14:38 AM2/9/07 11:14:38 AM
  • Page 1 1
  • Page 2 2
  • Page 3 3
  • Page 4 4
  • Page 5 5
  • Page 6 6
  • Page 7 7
  • Page 8 8
  • Page 9 9
  • Page 10 10
  • Page 11 11
  • Page 12 12
  • Page 13 13
  • Page 14 14
  • Page 15 15
  • Page 16 16

Panasonic SC-PM53 User manual

Category
CD players
Type
User manual
This manual is also suitable for

Panasonic SC-PM53 is a versatile CD stereo system with a range of features for music lovers. It supports playback of both MP3 and CD-DA format audio CDs, with a capacity of up to 99 tracks. The system also includes a cassette player and an AM/FM radio tuner, providing various options for listening to music. Additionally, it has a built-in timer function, allowing you to set it to turn on or off automatically at specific times. With its sleek design and user-friendly controls, Panasonic SC-PM53 offers a comprehensive audio experience for your home.

Ask a question and I''ll find the answer in the document

Finding information in a document is now easier with AI