Page is loading ...

1
Tin snips: There are many brands, styles
and designs that will work. We recommend
using straight cut n snips that are new or
freshly sharpened.
Installaon Guide Contents
Step 1: Choose your gutter and roof configuration ························ 2
Step 2: The basics in every installation ········································· 4
Step 3: Two very important rules ·················································· 8
How to bend the mesh ································································ 9
Maintenance & Helpful Tips ······················································· 11
Warranty ················································································· 12
Phone: 844-359-7683
Monday – Friday
8am to 5pm PST
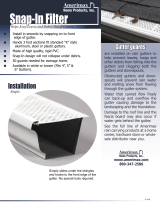
TOOLS YOU MAY NEED
Drill: For self-tapping
screws.**
**Not needed if you use the
tape installaon opon.
Ladder & ladder stando: A lad-
der stando is an aachment that
connects to a standard extension
ladder that pushes your ladder
away from the guer so you can
perform the install comfortably
without the ladder resng on the
guer.
Email: customerservice@guerglove.com
Protected by one or more of the following Guerglove patents: #9,021,747; #8,479,454; #7,310,912; #7,975,435;
#CA2747704C; #9,863,150; #9765524 B2 | Many other patents pending.
We are honored that you chose our gutter guard to protect your home! We designed it to fit
your gutter, no matter what type of gutter and roof configuration you have. If you need support
to complete your installation, our customer service team is standing by.

2
Step 1: Choose your guer and roof conguraon
Select the diagram on page 2 or 3 that best resembles your gutter and roof configuration. This will deter-
mine your recommended installation method. Once you have selected a diagram, continue to Step 2 begin-
ning on page 4.
Guer
Fascia
wood
Traditional gutter and roof configuration:
Slide gutter guard under roof shingles. If your
roofing material is adhered to your underlay-
ment, do not use this method, use either bend-
ing method in Diagram B to install your gutter
guard.
DIAGRAM B
Gutter hung low: Bend mesh either up or down, which-
ever you prefer, then fasten to the gutter, drip edge or
fascia with screws.
Guer
Fascia
wood
OPTION 1:
Bend mesh up
OPTION 2:
Bend mesh down
DIAGRAM C
Steep roof: Slide it under the roof shingle, if it causes the roof shingle
to ramp up or your roofing material is adhered to your underlayment,
see diagram F and bend the mesh up or down and fasten to the gutter,
drip edge or fascia with screws.
Guer
Fascia
wood
OPTION 1:
Bend mesh up
OPTION
2:
DIAGRAM A

3
DIAGRAM F
Roof ramping: If the gutter guard causes the roof shingles to ramp up, bend the
mesh down and then slide back under the shingle or use either bending method
in Diagram B.
DIAGRAM D
Flat roof: Bend the mesh up or down and
fasten to the back of the gutter, drip edge or fascia with
screws.
DIAGRAM E
Use screws to hold up gutter guard: If the gutter
guard isn’t wide enough to slide under the roof shin-
gles, put 3 screws in the back of the gutter, drip edge or
fascia to hold up each section of the gutter guard, then
use the tape method to secure the gutter guard to the
front lip of the gutter.
Guer
Screw for holding
up guer guard.
Fascia
wood
Guer
Roof ramping
Fascia
wood
Guer
Fascia
wood
Flat roof
Guer
Fascia
wood
OPTION 1:
Bend mesh up
OPTION 2:
Bend mesh down
Step 1: Connued...

4
Clean out your gutters: Take the time to clean the leaves, pine needles and other debris from your gutters
and downspouts first. Also, complete any necessary repairs to your gutters and downspouts.
When installing your new gutter guard, make sure to obey your local building code.
Important information in freezing conditions: If you live in an area that is prone to freezing, the following issues
can occur with any gutter guard.
ICICLES & ICE DAMS can form on your gutter during freezing conditions. Ice dams can cause water to leak back into
your home. Icicles can break and cause serious bodily harm. Properly installed, operated and maintained heating
elements on your roof and gutter can melt icicles and ice dams. Use a licensed electrical contractor in good standing
for installing any heating element products.
SNOW MELTING and running down your roof can run off the side of the gutter and refreeze on the ground below.
Water frozen on surfaces can create slipping hazards and cause serious bodily harm.
Step 2: The basics in every installation
2 INSTALL OPTIONS
You can either use the 3M Very High Bond tape (A) that
comes pre-applied on each section of gutter guard, or
screw it on with the supplied self-tapping screws.
TAPE METHOD: For best results, install in 65 degree weather or above. Allow a minimum of 12 hours to cure for full
bond.
SCREW METHOD: There are no pre-drilled holes for the screws. The supplied self-tapping screws drill the holes
themselves while being screwed through the gutter guard into the front lip of the gutter. A magnetic Hex Head Driver
Bit (B) is also included. If you need additional screws for your installation, contact customerservice@gutterglove.com
or call 844-359-7683.
A
Tape it on
B
Use 3 screws per
4 foot section
Screw it on
Ideal Gutter Guard Slope: The ideal slope of the gutter
guard is between 5 to 25 degrees. However, if your roof
is steeply pitched or gutter is hung low, it is recommend-
ed to drop the slope of the gutter guard to between 5
and 10 degrees.

5
Once gutter guard is in the desired position, pull off the remaining red strip.
Slide section under roof shingle.
Push down firmly by sliding finger along top.
Step 2.1
Clean: Use a mixture of 1 part 70% isopropyl rubbing alcohol and 4 parts
water to wipe off front lip so it is completely clean. Allow to dry completely.
Step 2.2
Straight Sections: Peel off a few
inches of the red strip.
Mesh extends slightly past the ends of each section. Line the ends up and the mesh will overlap each other as in “A” above. Set
the mesh ends on top of each other. It is ok to have gaps between the sections as in “B” above. The mesh is recessed in the gut-
ter slightly so rainwater will not run off “B”. If the mesh bows up at the point where both sections join, you can bend the mesh flat
to close the gap.
Step 2.3
B
A

6
Step 2.4
Cover end of gutter
Cut frame ends off with same procedure as step 2.4, above. Trim off additional mesh, so it can tuck inside the gutter.
Step 2.5
Inside corner (valley) of gutter
Cut the front and rear frame with new or freshly sharpened tin snips so the mesh is free to tuck inside the gutter to cover the
opening. SPECIAL NOTE: The rear frame (C) is shorter in length than the front frame (D). This ensures they do not over-
lap, causing the shingles to lift.
Slide excess mesh down and inside gutter. This caps off
the end to keep debris, birds, rodents and insects out.
Push mesh flap inside gutter and then slide up against adjacent section (E).
E
C
D

7
Step 2.6
Outside corner of gutter
Push rear frame down in gutter. Mark overlapping portion of adjacent section and trim off.
Cut both sides of the front frame and rear frame with tin snips. If unable to cut all the way through, it is fine to notch them (F & G),
then snap them in two. Cut through the mesh with the tin snips.
Step 2.7
Cutting sections
F
G
Tech Support
844-359-7683
Flat bars used to
lift up roof shingle.
Other install techniques
Flat bars used to
hold up roof shingles.

8
Step 3: Two very important installaon rules for all methods
Follow these rules to optimize the performance of your gutter guard.
RULE #1
Remove gap: Front frame of the gutter guard should be flat against the front lip of your gutter.
Tech Support
844-359-7683
RULE #2
Trough depth: The mesh trough must be at least 1/8th
of an inch below the front lip of the gutter. This can hap-
pen on steeply pitched roofs or gutters that are hung low
(1 inch or more) below roofline.
Front lip of guer
Gap
Front frame of
gutter guard
PUSH DOWN FLAT
TO REMOVE GAP
The trough must be
below the top of the front
lip of the gutter by at
least 1/8th of an inch.
Front lip of guer
Front frame of guer guard
PUSH DOWN FIRMLY
WITH YOUR FINGERS.
Stainless steel
mesh trough
Guer
Fascia
wood

9
How to bend the mesh
Tech Support
844-359-7683
Bending the back of the mesh allows the gutter guard to be installed on all gutter and roof configurations. All you
need are two 1” x 2” boards 4.5’ long and two 4” clamps. Choose a board that has square edges. A square edged
board will put straight creases in the mesh when you bend it.
Bend the mesh up or down depending on
your installation.

10
How to bend the mesh connued...
Below are several examples of where you can customize your installation by bending the mesh so the gutter guard is
ready to install on any gutter and roof configuration.

11
Maintenance & Helpful Tips
How do I keep my new gutter guard at peak performance?
Your new gutter guard is designed to be easy to maintain. Follow the tips below for easy maintenance.
1. Periodically inspect your gutter guard for any debris that may not have blown off. Particularly where
two sections of roof come together (valleys) or in areas that are protected from wind.
2. Brush off any accumulated debris. We created “The Gutter Guard Brush” for just this purpose. Just
screw the brush on the end of an extension pole, then from the ground, reach up and brush it off. Get
more information at TheGutterGuardBrush.com.***
***Patents pending
What do I do if I notice rainwater flowing over the front of my gutter?
1. Look on top of the gutter guard and see if there is any debris on it. Follow the maintenance instruc-
tions above to remove debris.
2. Confirm there is no gap between the front frame of your gutter guard and the gutter and that the mesh
trough is below the front lip of the gutter (see page 8). Adjust your gutter guard to match the recom-
mended installation to correct this.
3. If the overflow is occurring where two sections of the roof come together (valley), remove any accu-
mulated debris. If there is still overflow, you may need a rainwater diverter. A rainwater diverter (see
photos below) helps disperse rainwater over a wider area, rather than at one point. The diverter is
made out of an aluminum material, perforated with small round holes and attaches to the end of your
roof valley or other high-flow areas of your roof, just above the mesh. You can get more information
and purchase rainwater diverters at www.RainwaterDiverters.com.
4. Contact our team at 844-359-7683 or at customerservice@gutterglove.com.
If removal is necessary. for
the tape method, use a
sharp knife and cut tape be-
tween the gutter guard and
gutter. To reinstall, follow the
screw down method.
Removing gutter guard
If removal is necessary, for
the screw method, reverse
screws with power drill and
magnetic hex driver bit. Re-
attach through same holes
from original installation.

12
Gutterglove, Inc. (herein referred to as GGI) warrants to the original purchaser that its specially designed Atlas
Gutter Guard will be free from defects in manufactured parts and agrees that it will, at its option only, either repair
the defect or replace the defective part thereof with a new or reconditioned equivalent. This Limited Warranty is
valid for 25 (twenty-five) years for parts only and does not include cost of labor for re-installation. In coastal
areas, warranty is reduced to 5 (five) years for parts only. “Coastal areas” is defined as anywhere within 5 (five)
miles of the coast. Shipping costs will be absorbed by the purchaser of Atlas Gutter Guard. The above named item
is subject to the following terms and conditions. No other warranty is expressed or implied in this Limited Warranty.
Coverage Exclusions and Limitations: The above mentioned warranties are void if any of the following condi-
tions occur: Improper installation; Settlement of building structure; Structural shrinkage or distortion of structure
(Example: warping of roof or gutter over time, etc.); Vandalism; Hail; Fire; Tornado; Windstorm; Earthquakes; Light-
ning; Protective liquids or any type of roof preservation product applied to roof tops to extend the life of a roof;
Maintenance procedures are not followed properly; Tree sapping on mesh; Insect/bird droppings on mesh; Acci-
dental damage; Acts of God; Misuse or abuse of the gutter guard; Mildew accumulation; Paint overspray; Moss ac-
cumulation; Impact of foreign objects; Caustic atmospheric conditions (Example: Acid rain, harmful chemicals, salt
spray, etc.) or any other causes beyond the control of GGI. It is the owner(s) responsibility to unclog the mesh in
the event it gets clogged. Icicles can form, and ice can form on top of Atlas Gutter Guard in extreme cold weather
where snow is present.
GGI’s obligation under this warranty shall at no time exceed the original purchase price of this product at time of
sale, but not for installation or re-installation costs. These warranties cover only Atlas Gutter Guards and do not
cover the gutter or any part of the building structure.
GGI reserves the right to withdraw this warranty from the market at any time. Any and all warranties in effect at the
time of removal will not be affected by the withdrawal and will remain in effect until their expiration. This warranty is
non-transferrable.
GGI will not be liable to you or any subsequent owner(s) for a breach of any written or oral express warranties,
such as those given to you by a contractor, sub-contractor or installer. Any implied warranties imposed by law, such
as the implied warranties of merchantability and fitness for a particular purpose are limited in time to the duration of
this express warranty. GGI shall not be liable for any consequential damages for breach of any express, written,
oral, or implied warranty on any Atlas Gutter Guard. Your exclusive remedy shall be repair or replacement solely at
GGI’s option, only on terms stated in the warranties.
Activation of Warranty: This warranty becomes effective at time of purchase. Retain this document with original pur-
chase receipt. Failure to do so will render this warranty null and void.
Claims Procedure: Any claim made hereunder must be presented to GGI within the warranty period within a
reasonable period of time after discovering the defect. The claim should make reference to original date of installa-
tion, the purchaser’s name, address, phone number and a copy of the original receipt.
Contact Gutterglove at 844-359-7683
or at Gutterglove, Inc., 8860 Industrial Avenue, Suite 140, Roseville, CA 95678.
Revision: 01/26/2018
25 Year
Limited Parts Warranty
/