Panasonic SCPMX100EG Operating instructions
- Category
- Mixer/food processor accessories
- Type
- Operating instructions
This manual is also suitable for

RQT9995-B
EG
EB
GN
2015/05/14
Thank you for purchasing this product.
Please read these instructions carefully before using this product, and save this
manual for future use.
Model number suffix “EB” denotes UK model.
[For_the_United_Kingdom_and_Ireland]
Sales and Support Information
Customer Communications Centre
• For customers within the UK: 0344 844 3899
• For customers within Ireland: 01 289 8333
• Monday–Friday 9:00 am – 5:00 pm
(Excluding public holidays).
• For further support on your product, please visit our website:
www.panasonic.co.uk
Direct Sales at Panasonic UK
•
Order accessory and consumable items for your product with ease and
confidence by phoning our Customer Communications Centre
Monday–Friday 9:00 am – 5:00 pm
(Excluding public holidays).
• Or go on line through our Internet Accessory ordering application at
www.pas-europe.com.
• Most major credit and debit cards accepted.
• All enquiries transactions and distribution facilities are provided directly by
Panasonic UK.
• It couldn’t be simpler!
• Also available through our Internet is direct shopping for a wide range of
finished products. Take a browse on our website for further details.
Operating Instructions
CD Stereo System
Model No. SC-PMX100
SC-PMX100B
Table of contents
Safety precautions ................................................................................2
Caution for AC Mains Lead ..................................................................3
Supplied accessories ...........................................................................3
Maintenance ..........................................................................................3
Placement of speakers .........................................................................4
Making the connections .......................................................................4
Overview of controls ............................................................................5
Preparing the remote control...............................................................5
Network settings ...................................................................................6
Streaming music over the network .....................................................8
Using AirPlay.......................................................................................10
About Bluetooth
®
................................................................................10
Bluetooth
®
operations ........................................................................10
Media information ...............................................................................12
Inserting media ...................................................................................12
Media playback controls ....................................................................12
FM radio ...............................................................................................14
[PMX100B] DAB+....................................................................................14
Using the auxiliary input ....................................................................15
Using the PC input ..............................................................................15
Sound effects ......................................................................................16
Clock and timers .................................................................................16
Others ..................................................................................................16
Troubleshooting ..................................................................................18
Specifications......................................................................................21
Limited Warranty (ONLY FOR AUSTRALIA) .....................................23
SC-PMX100-100B_EGEBGN-RQT9995-B.book 1 ページ 2015年3月3日 火曜日 午前9時8分
Zahvaljujemo na kupnji ovog proizvoda.
Prije uporabe proizvoda pažljivo pročitajte ove upute i spremite priručnik za buduću
uporabu.
Za Ujedinjeno Kraljevstvo i Irsku
Podaci o prodajnim mjestima i tehničkoj podršci
Centar za korisničku podršku
• Za korisnike u Ujedinjenom Kraljevstvu: 0844 844 3899
• Za korisnike u Irskoj: 01 289 8333
• Ponedjeljak – petak 9:00 - 17:00
(osim državnih praznika).
• Informacije o dodatnoj podršci za proizvod potražite na našem web-mjestu:
www.panasonic.co.uk
Direktna prodaja za Panasonic UK
• Naručite dodatni pribor i potrošne predmete za svoj proizvod, jednostavno i s
povjerenjem, pozivanjem našeg Centra za korisničku podršku od ponedjeljka
do petka od 9:00 do 17:00 sati
(osim državnih praznika).
• Možete i ispuniti našu narudžbenicu za dodatni pribor na internetu
www.pas-europe.com.
• Primamo većinu kreditnih i debitnih kartica.
• Sve upite, transakcije i uvjete distribucije pruža direktno Panasonic UK.
• Ne može biti jednostavnije!
• Putem našeg web-mjesta možete izravno kupovati i širok raspon gotovih
proizvoda. Pretražite naše web-mjesto i saznajte više detalja.
Model s oznakom "EB" odnosi se na model za Ujedinjeno Kraljevstvo.
Upute za uporabu
Stereosustav s CD-om
Model br. SC-PMX100
SC-PMX100B
Sadržaj
Mjere opreza........................................................................................... 2
Mjere opreza za kabel za napajanje izmjeničnom strujom ................ 3
Isporučeni pribor ................................................................................... 3
Održavanje ............................................................................................. 3
Postavljanje zvučnika ........................................................................... 4
Povezivanje ............................................................................................ 4
Pregled funkcija ..................................................................................... 5
Priprema daljinskog upravljača ........................................................... 5
Postavke mreže ..................................................................................... 6
Reproduciranje glazbe preko mreže .................................................... 8
Upotreba funkcije AirPlay ................................................................... 10
Bluetooth® ........................................................................................... 10
Funkcije Bluetootha® ......................................................................... 10
Informacije o medijima........................................................................ 12
Umetanje medija .................................................................................. 12
Kontrole reprodukcije medija ............................................................. 12
FM-radioprijamnik ............................................................................... 14
DAB+ ......................................................................................14
Korištenje pomoćnog ulaza ................................................................ 15
Korištenje računalnog ulaza............................................................... 15
Zvučni efekti......................................................................................... 16
Sat i mjerači vremena.......................................................................... 16
Ostalo ................................................................................................... 16
Rješavanje problema........................................................................... 18
Tehnički podaci .................................................................................... 21
Ograničeno jamstvo (SAMO ZA AUSTRALIJU) ................................ 23
PMX100B

RQT9995
2
Do the procedures with the remote control. You can
also use the buttons on the main unit if they are the
same.
Your system and the illustrations can look differently.
These operating instructions are applicable to the
following system.
Unless otherwise indicated, illustrations in these operating
instructions are of SC-PMX100.
Safety precautions
Unit
• To reduce the risk of fire, electric shock or product damage,
- Do not expose this unit to rain, moisture, dripping or
splashing.
- Do not place objects filled with liquids, such as vases, on
this unit.
- Use only the recommended accessories.
- Do not remove covers.
- Do not repair this unit by yourself. Refer servicing to
qualified service personnel.
Unit
• To reduce the risk of fire, electric shock or product damage,
- Do not install or place this unit in a bookcase, built-in
cabinet or in another confined space. Ensure this unit is
well ventilated.
- Do not obstruct this unit’s ventilation openings with
newspapers, tablecloths, curtains, and similar items.
- Do not place sources of naked flames, such as lighted
candles, on this unit.
• This unit is intended for use in moderate climates.
• The mains plug is the disconnecting device.
Install this unit so that the mains plug can be unplugged
from the socket outlet immediately.
• This unit may receive radio interference caused by mobile
telephones during use. If such interference occurs, please
increase separation between this unit and the mobile
telephone.
• This unit utilizes a laser. Use of controls or adjustments or
performance of procedures other than those specified
herein may result in hazardous radiation exposure.
Battery
• Do not break open or short-circuit the battery.
• Do not charge the alkaline or manganese battery.
• Do not use the battery if the cover has peeled off.
• Do not heat or expose to flame.
• Do not leave the battery(ies) in a car exposed to direct
sunlight for a long period of time with doors and windows
closed.
• Remove the battery if you do not use the remote control for
a long period of time. Keep in a cool, dark area.
• Danger of explosion if battery is incorrectly replaced.
Replace only with the type recommended by the
manufacturer.
• When disposing of the batteries, please contact your local
authorities or dealer and ask for the correct method of
disposal.
MPEG Layer-3 audio coding technology licensed from Fraunhofer
IIS and Thomson.
The Bluetooth
®
word mark and logos are registered trademarks
owned by Bluetooth SIG, Inc. and any use of such marks by
Panasonic Corporation is under license.
Other trademarks and trade names are those of their respective
owners.
The Wi-Fi CERTIFIED™ Logo is a certification mark of Wi-Fi
Alliance
®
.
The Wi-Fi Protected Setup™ Identifier mark is a certification mark
of Wi-Fi Alliance
®
.
“Wi-Fi
®
” is a registered trademark of Wi-Fi Alliance
®
.
“Wi-Fi Protected Setup™”, “WPA™”, and “WPA2™” are
trademarks of Wi-Fi Alliance
®
.
System SC-PMX100 SC-PMX100B
Main unit SA-PMX100 SA-PMX100B
Speakers SB-PMX100 SB-PMX100
[PMX100]
: indicates features applicable to SC-PMX100
only.
[PMX100B]
: indicates features applicable to SC-PMX100B
only.
Disposal of Old Equipment and Batteries
Only for European Union and countries with
recycling systems
These symbols on the products,
packaging, and/or accompanying
documents mean that used electrical
and electronic products and batteries
must not be mixed with general
household waste.
For proper treatment, recovery and
recycling of old products and used
batteries, please take them to applicable
collection points in accordance with your
national legislation.
By disposing of them correctly, you will help to save
valuable resources and prevent any potential negative
effects on human health and the environment.
For more information about collection and recycling,
please contact your local municipality.
Penalties may be applicable for incorrect disposal of
this waste, in accordance with national legislation.
Note for the battery symbol (bottom
symbol):
This symbol might be used in
combination with a chemical symbol. In
this case it complies with the
requirement set by the Directive for the
chemical involved.
WARNING!
CAUTION!
[For_Continental_Europe,_the_United_Kingdom_and_Ireland]
Declaration of Conformity (DoC)
Hereby, “Panasonic Corporation” declares that this product
is in compliance with the essential requirements and other
relevant provisions of Directive 1999/5/EC.
Customers can download a copy of the original DoC to our
R&TTE products from our DoC server:
http://www.doc.panasonic.de
Contact to Authorised Representative:
Panasonic Marketing Europe GmbH,
Panasonic Testing Centre, Winsbergring 15, 22525
Hamburg, Germany
This product is intended to be used in the following
countries.
GB, DE, AT, BE, DK, SE, FR, IT, ES, NL, FI, GR, PT, PL,
HU, CZ, SK, EE, LV, LT, SI, BG, RO, MT, CY, IE, LU, HR,
NO, CH, IS, LI, TR
This product is intended for general consumer. (Category 3)
The WLAN feature of this product shall exclusively be used
inside buildings.
This product on purpose to connect to access point of
2.4 GHz or 5 GHz WLAN.
SC-PMX100-100B_EGEBGN-RQT9995-B.book 2 ページ 2015年3月3日 火曜日 午前9時8分
RQT9995
2
Do the procedures with the remote control. You can
also use the buttons on the main unit if they are the
same.
Your system and the illustrations can look differently.
These operating instructions are applicable to the
following system.
Unless otherwise indicated, illustrations in these operating
instructions are of SC-PMX100.
Safety precautions
Unit
• To reduce the risk of fire, electric shock or product damage,
- Do not expose this unit to rain, moisture, dripping or
splashing.
- Do not place objects filled with liquids, such as vases, on
this unit.
- Use only the recommended accessories.
- Do not remove covers.
- Do not repair this unit by yourself. Refer servicing to
qualified service personnel.
Unit
• To reduce the risk of fire, electric shock or product damage,
- Do not install or place this unit in a bookcase, built-in
cabinet or in another confined space. Ensure this unit is
well ventilated.
- Do not obstruct this unit’s ventilation openings with
newspapers, tablecloths, curtains, and similar items.
- Do not place sources of naked flames, such as lighted
candles, on this unit.
• This unit is intended for use in moderate climates.
• The mains plug is the disconnecting device.
Install this unit so that the mains plug can be unplugged
from the socket outlet immediately.
• This unit may receive radio interference caused by mobile
telephones during use. If such interference occurs, please
increase separation between this unit and the mobile
telephone.
• This unit utilizes a laser. Use of controls or adjustments or
performance of procedures other than those specified
herein may result in hazardous radiation exposure.
Battery
• Do not break open or short-circuit the battery.
• Do not charge the alkaline or manganese battery.
• Do not use the battery if the cover has peeled off.
• Do not heat or expose to flame.
• Do not leave the battery(ies) in a car exposed to direct
sunlight for a long period of time with doors and windows
closed.
• Remove the battery if you do not use the remote control for
a long period of time. Keep in a cool, dark area.
• Danger of explosion if battery is incorrectly replaced.
Replace only with the type recommended by the
manufacturer.
• When disposing of the batteries, please contact your local
authorities or dealer and ask for the correct method of
disposal.
MPEG Layer-3 audio coding technology licensed from Fraunhofer
IIS and Thomson.
The Bluetooth
®
word mark and logos are registered trademarks
owned by Bluetooth SIG, Inc. and any use of such marks by
Panasonic Corporation is under license.
Other trademarks and trade names are those of their respective
owners.
The Wi-Fi CERTIFIED™ Logo is a certification mark of Wi-Fi
Alliance
®
.
The Wi-Fi Protected Setup™ Identifier mark is a certification mark
of Wi-Fi Alliance
®
.
“Wi-Fi
®
” is a registered trademark of Wi-Fi Alliance
®
.
“Wi-Fi Protected Setup™”, “WPA™”, and “WPA2™” are
trademarks of Wi-Fi Alliance
®
.
System SC-PMX100 SC-PMX100B
Main unit SA-PMX100 SA-PMX100B
Speakers SB-PMX100 SB-PMX100
[PMX100]: indicates features applicable to SC-PMX100
only.
[PMX100B]: indicates features applicable to SC-PMX100B
only.
Disposal of Old Equipment and Batteries
Only for European Union and countries with
recycling systems
These symbols on the products,
packaging, and/or accompanying
documents mean that used electrical
and electronic products and batteries
must not be mixed with general
household waste.
For proper treatment, recovery and
recycling of old products and used
batteries, please take them to applicable
collection points in accordance with your
national legislation.
By disposing of them correctly, you will help to save
valuable resources and prevent any potential negative
effects on human health and the environment.
For more information about collection and recycling,
please contact your local municipality.
Penalties may be applicable for incorrect disposal of
this waste, in accordance with national legislation.
Note for the battery symbol (bottom
symbol):
This symbol might be used in
combination with a chemical symbol. In
this case it complies with the
requirement set by the Directive for the
chemical involved.
WARNING!
CAUTION!
[For_Continental_Europe,_the_United_Kingdom_and_Ireland]
Declaration of Conformity (DoC)
Hereby, “Panasonic Corporation” declares that this product
is in compliance with the essential requirements and other
relevant provisions of Directive 1999/5/EC.
Customers can download a copy of the original DoC to our
R&TTE products from our DoC server:
http://www.doc.panasonic.de
Contact to Authorised Representative:
Panasonic Marketing Europe GmbH,
Panasonic Testing Centre, Winsbergring 15, 22525
Hamburg, Germany
This product is intended to be used in the following
countries.
GB, DE, AT, BE, DK, SE, FR, IT, ES, NL, FI, GR, PT, PL,
HU, CZ, SK, EE, LV, LT, SI, BG, RO, MT, CY, IE, LU, HR,
NO, CH, IS, LI, TR
This product is intended for general consumer. (Category 3)
The WLAN feature of this product shall exclusively be used
inside buildings.
This product on purpose to connect to access point of
2.4 GHz or 5 GHz WLAN.
SC-PMX100-100B_EGEBGN-RQT9995-B.book 2 ページ 2015年3月3日 火曜日 午前9時8分
2
RQT9988
Radnje izvršavajte daljinskim upravljačem. Ako su
jednaki, možete koristiti i gumbe na glavnoj jedinici.
Vaš se sustav može razlikovati od prikazanog. Ove se
upute za uporabu odnose na sljedeći sustav.
Sustav SC-PMX100 SC-PMX100B
Glavna jedinica SA-PMX100 SA-PMX100B
Zvučnici SB-PMX100 SB-PMX100
Ako nije drukčije naznačeno, slike u ovim uputama za
uporabu odnose se na model SC-PMX70.
odnosi se na značajke koje se mogu
primijeniti samo na SC-PMX70.
odnosi se na značajke koje se mogu
primijeniti samo na SC-PMX70B.
Odlaganje dotrajale opreme i baterija
Samo za Europsku uniju i zemlje sa sustavima
recikliranja
Ovim se oznakama na proizvodu,
ambalaži i/ili pratećim dokumentima
označava da se korišteni električni i
elektronički uređaji te baterije ne smiju
odlagati s otpadom iz domaćinstava.
Radi pravilne obrade, sanacije i
recikliranja dotrajalih proizvoda i baterija,
odnesite ih u odgovarajuća prikupljališta,
u skladu s lokalnim zakonodavstvom.
Pravilnim odlaganjem čuvate vrijedne
resurse i sprječavate moguće negativne učinke na
ljudsko zdravlje i okoliš.
Više informacija o prikupljanju i recikliranju potražite u
lokalnom poglavarstvu.
Za nepropisno odlaganje ovog otpada mogli biste biti
kažnjeni sukladno lokalnim zakonima.
Napomene o simbolima na bateriji
(donji simbol):
Ovaj se simbol može upotrebljavati u
kombinaciji s kemijskim simbolom. U
tom je slučaju usklađen sa zahtjevom
postavljenim u Direktivi za korištene
kemikalije.
Mjere opreza
UPOZORENJE!
Jedinica
• Da biste smanjili rizik od požara, strujnog udara ili
oštećenja proizvoda,
- jedinicu nemojte izlagati kiši, vlazi, kapanju ili prskanju.
- na jedinicu nemojte stavljati posude s tekućinom, kao
što su vaze.
- koristite se samo preporučenim priborom.
- nemojte uklanjati poklopce.
- nemojte sami popravljati jedinicu. Servisiranje povjerite
stručnom osoblju.
OPREZ!
Jedinica
• Da biste smanjili rizik od požara, strujnog udara ili
oštećenja proizvoda,
- jedinicu nemojte postaviti u ormar, ugrađeni ormarić
ili u drugi skučeni prostor. Jedinica mora biti na dobro
prozračenom mjestu.
- Ventilacijske otvore jedinice nemojte zaklanjati
novinama, stolnjacima, zavjesama i sličnim predmetima.
- Na jedinicu nemojte stavljati izvore otvorenog plamena,
kao što su upaljene svijeće.
• Ova je jedinica namijenjena za uporabu u umjerenim
klimatskim uvjetima.
• Utikač se upotrebljava za isključivanje jedinice.
• Jedinicu postavite tako da se utikač odmah može izvući iz
utičnice.
• Mobilni telefoni mogu izazvati radijske smetnje za vrijeme
korištenja jedinicom. Ako se pojave takve smetnje, povećajte
udaljenost između ove jedinice i mobilnog telefona.
• U ovoj se jedinici upotrebljava laser. Uporaba kontrola ili
podešavanja te načini rukovanja koji nisu opisani u ovom
priručniku mogu dovesti do izlaganja opasnom zračenju.
Baterija
• Nemojte otvarati baterije ili njima izazvati kratki spoj.
• Nemojte puniti alkalne ili manganske baterije.
• Nemojte upotrebljavati oguljene baterije.
• Nemojte zagrijavati ni izlagati otvorenom plamenu.
• Ne ostavljajte baterije izložene izravnoj sunčevoj svjetlosti
dulje vrijeme u vozilu sa zatvorenim vratima i prozorima.
• Ako daljinski upravljač ne namjeravate upotrebljavati dulje
vrijeme, izvadite baterije. Spremite na hladno, tamno mjesto.
• U slučaju nepravilne zamjene baterije postoji opasnost od
eksplozije. Baterije zamijenite isključivo onom vrstom koju
preporučuje proizvođač.
• Ako želite odložiti baterije, obratite se nadležnim lokalnim
tijelima ili dobavljačima i raspitajte se o pravilnom načinu
odlaganja.
Za kontinentalnu Europu, Ujedinjeno Kraljevstvo i Irsku
Izjava o sukladnosti
Tvrtka "Panasonic Corporation” ovime izjavljuje da je ovaj
proizvod u skladu s nužnim zahtjevima i ostalim važećim
odredbama Direktive 1999/5/EZ.
Kupci mogu preuzeti kopiju originalne izjave za naše
R&TTE proizvode na sljedećem web-mjestu:
http://www.doc.panasonic.de
Kontaktirajte s ovlaštenim predstavnikom:
Panasonic Marketing Europe GmbH,
Panasonicov centar za ispitivanje, Winsbergring 15, 22525
Hamburg, Njemačka
Ovaj je proizvod namijenjen za uporabu u zemljama u
nastavku.
GB, DE, AT, BE, DK, SE, FR, IT, ES, NL, FI, GR, PT, PL,
HU, CZ, SK, EE, LV, LT, SI, BG, RO, MT, CY, IE, LU, HR,
NO, CH, IS, LI, TR
Ovaj je proizvod namijenjen komercijalnoj uporabi.
(Kategorija 3) Značajka WLAN-ovog proizvoda smije se
upotrebljavati isključivo u zgradama.
Ovaj je proizvod namjerno povezan s pristupnom točkom
od 2,4 GHz ili 5 GHz WLAN.
Tehnologija audiokodiranja MPEG Layer-3 pod licencijom je tvrtki
Fraunhofer IIS i Thomson.
Oznaka riječi i logotipovi Bluetooth
®
registrirani su zaštitni znakovi
u vlasništvu tvrtke Bluetooth SIG, Inc. te je uporaba takvih oznaka
od strane tvrtke Panasonic Corporation licencirana.
Ostali zaštitni znakovi i imena pripadaju svojim vlasnicima.
Logotip Wi-Fi CERTIFIED™ certikacijska je oznaka tvrtke Wi-Fi
Alliance
®
.
Identikacijska oznaka Wi-Fi Protected Setup™ certikacijska je
oznaka tvrtke Wi-Fi Alliance
®
.
“Wi-Fi
®
” je registrirani zaštitni znak tvrtke Wi-Fi Alliance
®
. “Wi-Fi
Protected Setup™”, “WPA™” i “WPA2™” zaštitni su znakovi
tvrtke Wi-Fi Alliance
®
.
RQT9995
2
Do the procedures with the remote control. You can
also use the buttons on the main unit if they are the
same.
Your system and the illustrations can look differently.
These operating instructions are applicable to the
following system.
Unless otherwise indicated, illustrations in these operating
instructions are of SC-PMX100.
Safety precautions
Unit
• To reduce the risk of fire, electric shock or product damage,
- Do not expose this unit to rain, moisture, dripping or
splashing.
- Do not place objects filled with liquids, such as vases, on
this unit.
- Use only the recommended accessories.
- Do not remove covers.
- Do not repair this unit by yourself. Refer servicing to
qualified service personnel.
Unit
• To reduce the risk of fire, electric shock or product damage,
- Do not install or place this unit in a bookcase, built-in
cabinet or in another confined space. Ensure this unit is
well ventilated.
- Do not obstruct this unit’s ventilation openings with
newspapers, tablecloths, curtains, and similar items.
- Do not place sources of naked flames, such as lighted
candles, on this unit.
• This unit is intended for use in moderate climates.
• The mains plug is the disconnecting device.
Install this unit so that the mains plug can be unplugged
from the socket outlet immediately.
• This unit may receive radio interference caused by mobile
telephones during use. If such interference occurs, please
increase separation between this unit and the mobile
telephone.
• This unit utilizes a laser. Use of controls or adjustments or
performance of procedures other than those specified
herein may result in hazardous radiation exposure.
Battery
• Do not break open or short-circuit the battery.
• Do not charge the alkaline or manganese battery.
• Do not use the battery if the cover has peeled off.
• Do not heat or expose to flame.
• Do not leave the battery(ies) in a car exposed to direct
sunlight for a long period of time with doors and windows
closed.
• Remove the battery if you do not use the remote control for
a long period of time. Keep in a cool, dark area.
• Danger of explosion if battery is incorrectly replaced.
Replace only with the type recommended by the
manufacturer.
• When disposing of the batteries, please contact your local
authorities or dealer and ask for the correct method of
disposal.
MPEG Layer-3 audio coding technology licensed from Fraunhofer
IIS and Thomson.
The Bluetooth
®
word mark and logos are registered trademarks
owned by Bluetooth SIG, Inc. and any use of such marks by
Panasonic Corporation is under license.
Other trademarks and trade names are those of their respective
owners.
The Wi-Fi CERTIFIED™ Logo is a certification mark of Wi-Fi
Alliance
®
.
The Wi-Fi Protected Setup™ Identifier mark is a certification mark
of Wi-Fi Alliance
®
.
“Wi-Fi
®
” is a registered trademark of Wi-Fi Alliance
®
.
“Wi-Fi Protected Setup™”, “WPA™”, and “WPA2™” are
trademarks of Wi-Fi Alliance
®
.
System SC-PMX100 SC-PMX100B
Main unit SA-PMX100 SA-PMX100B
Speakers SB-PMX100 SB-PMX100
[PMX100]: indicates features applicable to SC-PMX100
only.
[PMX100B]: indicates features applicable to SC-PMX100B
only.
Disposal of Old Equipment and Batteries
Only for European Union and countries with
recycling systems
These symbols on the products,
packaging, and/or accompanying
documents mean that used electrical
and electronic products and batteries
must not be mixed with general
household waste.
For proper treatment, recovery and
recycling of old products and used
batteries, please take them to applicable
collection points in accordance with your
national legislation.
By disposing of them correctly, you will help to save
valuable resources and prevent any potential negative
effects on human health and the environment.
For more information about collection and recycling,
please contact your local municipality.
Penalties may be applicable for incorrect disposal of
this waste, in accordance with national legislation.
Note for the battery symbol (bottom
symbol):
This symbol might be used in
combination with a chemical symbol. In
this case it complies with the
requirement set by the Directive for the
chemical involved.
WARNING!
CAUTION!
[For_Continental_Europe,_the_United_Kingdom_and_Ireland]
Declaration of Conformity (DoC)
Hereby, “Panasonic Corporation” declares that this product
is in compliance with the essential requirements and other
relevant provisions of Directive 1999/5/EC.
Customers can download a copy of the original DoC to our
R&TTE products from our DoC server:
http://www.doc.panasonic.de
Contact to Authorised Representative:
Panasonic Marketing Europe GmbH,
Panasonic Testing Centre, Winsbergring 15, 22525
Hamburg, Germany
This product is intended to be used in the following
countries.
GB, DE, AT, BE, DK, SE, FR, IT, ES, NL, FI, GR, PT, PL,
HU, CZ, SK, EE, LV, LT, SI, BG, RO, MT, CY, IE, LU, HR,
NO, CH, IS, LI, TR
This product is intended for general consumer. (Category 3)
The WLAN feature of this product shall exclusively be used
inside buildings.
This product on purpose to connect to access point of
2.4 GHz or 5 GHz WLAN.
SC-PMX100-100B_EGEBGN-RQT9995-B.book 2 ページ 2015年3月3日 火曜日 午前9時8分

3
RQT9995
Qualcomm
®
AllPlay™ smart media platform is a product of
Qualcomm Connected Experiences, Inc.
Qualcomm is a trademark of Qualcomm Incorporated, registered
in the United States, and other countries and used with
permission.
AllPlay and the AllPlay icon are trademarks of Qualcomm
Connected Experiences, Inc., and used with permission.
This product incorporates Spotify software which is subject to 3rd
party licenses found here:
www.spotify.com/connect/third-party-licenses
DLNA, the DLNA Logo and DLNA CERTIFIED are trademarks,
service marks, or certification marks of the Digital Living Network
Alliance.
Mac and OS X are trademarks of Apple Inc., registered in the U.S.
and other countries.
Windows and Windows Vista are either registered trademarks or
trademarks of Microsoft Corporation in the United States and/or
other countries.
Google Play and Android are trademarks of Google Inc.
“Made for iPod”, “Made for iPhone”, and “Made for iPad” mean
that an electronic accessory has been designed to connect
specifically to iPod, iPhone, or iPad, respectively, and has been
certified by the developer to meet Apple performance standards.
Apple is not responsible for the operation of this device or its
compliance with safety and regulatory standards.
Please note that the use of this accessory with iPod, iPhone, or
iPad may affect wireless performance.
AirPlay
, iPad, iPhone, iPod, iPod nano, iPod touch, and Retina are
trademarks of Apple Inc., registered in the U.S. and other countries.
iPad Air, and iPad mini are trademarks of Apple Inc.
App Store is a service mark of Apple Inc.
Caution for AC Mains Lead
(For the AC mains plug of three pins)
For your safety, please read the following text carefully.
This appliance is supplied with a moulded three pin
mains plug for your safety and convenience.
A 5-ampere fuse is fitted in this plug.
Should the fuse need to be replaced please ensure that
the replacement fuse has a rating of 5-ampere and that it
is approved by ASTA or BSI to BS1362.
Check for the ASTA mark Ï
or the BSI mark Ì on the
body of the fuse.
If the plug contains a removable fuse cover you must
ensure that it is refitted when the fuse is replaced.
If you lose the fuse cover the plug must not be used until
a replacement cover is obtained.
A replacement fuse cover can be purchased from your
local dealer.
Before use
Remove the connector cover.
How to replace the fuse
The location of the fuse differ according to the type of AC
mains plug (figures A and B). Confirm the AC mains plug
fitted and follow the instructions below.
Illustrations may differ from actual AC mains plug.
1. Open the fuse cover with a screwdriver.
2. Replace the fuse and close or attach the fuse cover.
Supplied accessories
Check and identify the supplied accessories.
• Product numbers provided in these operating instructions
are correct as of March 2015. These may be subject to
change.
Maintenance
• To clean the main unit, wipe with a soft, dry cloth.
• To clean the speakers, wipe with a fine-textured and
dry cloth such as a microfibre cleaning cloth.
• Never use alcohol, paint thinner or benzine to clean
this system.
• Before using chemically treated cloth, read the
instructions that came with the cloth carefully.
Figure A
Figure B
Fuse cover
Figure A
Fuse
(5 ampere)
Figure B
Fuse
(5 ampere)
∏ (For Continental Europe)
1 x AC mains lead
(K2CQ2YY00119)
∏
(For the United Kingdom and Ireland)
1 x AC mains lead
(K2CT2YY00097)
∏
(For Australia and New Zealand)
1 x AC mains lead
(K2CJ2YY00101)
∏
1 x Remote control
(N2QAYB001018)
∏
1 x Remote control battery
∏
2 x Speaker cables
(REE1840)
∏
([PMX100]) 1 x FM indoor antenna
(RSAX0002)
∏ ([PMX100B]) 1 x DAB antenna
(N1EYYY000015)
SC-PMX100-100B_EGEBGN-RQT9995-B.book 3 ページ 2015年3月3日 火曜日 午前9時8分
3
RQT9995
Qualcomm
®
AllPlay™ smart media platform is a product of
Qualcomm Connected Experiences, Inc.
Qualcomm is a trademark of Qualcomm Incorporated, registered
in the United States, and other countries and used with
permission.
AllPlay and the AllPlay icon are trademarks of Qualcomm
Connected Experiences, Inc., and used with permission.
This product incorporates Spotify software which is subject to 3rd
party licenses found here:
www.spotify.com/connect/third-party-licenses
DLNA, the DLNA Logo and DLNA CERTIFIED are trademarks,
service marks, or certification marks of the Digital Living Network
Alliance.
Mac and OS X are trademarks of Apple Inc., registered in the U.S.
and other countries.
Windows and Windows Vista are either registered trademarks or
trademarks of Microsoft Corporation in the United States and/or
other countries.
Google Play and Android are trademarks of Google Inc.
“Made for iPod”, “Made for iPhone”, and “Made for iPad” mean
that an electronic accessory has been designed to connect
specifically to iPod, iPhone, or iPad, respectively, and has been
certified by the developer to meet Apple performance standards.
Apple is not responsible for the operation of this device or its
compliance with safety and regulatory standards.
Please note that the use of this accessory with iPod, iPhone, or
iPad may affect wireless performance.
AirPlay
, iPad, iPhone, iPod, iPod nano, iPod touch, and Retina are
trademarks of Apple Inc., registered in the U.S. and other countries.
iPad Air, and iPad mini are trademarks of Apple Inc.
App Store is a service mark of Apple Inc.
Caution for AC Mains Lead
(For the AC mains plug of three pins)
For your safety, please read the following text carefully.
This appliance is supplied with a moulded three pin
mains plug for your safety and convenience.
A 5-ampere fuse is fitted in this plug.
Should the fuse need to be replaced please ensure that
the replacement fuse has a rating of 5-ampere and that it
is approved by ASTA or BSI to BS1362.
Check for the ASTA mark Ï
or the BSI mark Ì on the
body of the fuse.
If the plug contains a removable fuse cover you must
ensure that it is refitted when the fuse is replaced.
If you lose the fuse cover the plug must not be used until
a replacement cover is obtained.
A replacement fuse cover can be purchased from your
local dealer.
Before use
Remove the connector cover.
How to replace the fuse
The location of the fuse differ according to the type of AC
mains plug (figures A and B). Confirm the AC mains plug
fitted and follow the instructions below.
Illustrations may differ from actual AC mains plug.
1. Open the fuse cover with a screwdriver.
2. Replace the fuse and close or attach the fuse cover.
Supplied accessories
Check and identify the supplied accessories.
• Product numbers provided in these operating instructions
are correct as of March 2015. These may be subject to
change.
Maintenance
• To clean the main unit, wipe with a soft, dry cloth.
• To clean the speakers, wipe with a fine-textured and
dry cloth such as a microfibre cleaning cloth.
• Never use alcohol, paint thinner or benzine to clean
this system.
• Before using chemically treated cloth, read the
instructions that came with the cloth carefully.
Figure A
Figure B
Fuse cover
Figure A
Fuse
(5 ampere)
Figure B
Fuse
(5 ampere)
∏
(For Continental Europe)
1 x AC mains lead
(K2CQ2YY00119)
∏
(For the United Kingdom and Ireland)
1 x AC mains lead
(K2CT2YY00097)
∏
(For Australia and New Zealand)
1 x AC mains lead
(K2CJ2YY00101)
∏
1 x Remote control
(N2QAYB001018)
∏
1 x Remote control battery
∏
2 x Speaker cables
(REE1840)
∏
([PMX100]) 1 x FM indoor antenna
(RSAX0002)
∏
([PMX100B]) 1 x DAB antenna
(N1EYYY000015)
SC-PMX100-100B_EGEBGN-RQT9995-B.book 3 ページ 2015年3月3日 火曜日 午前9時8分
3
RQT9995
Qualcomm
®
AllPlay™ smart media platform is a product of
Qualcomm Connected Experiences, Inc.
Qualcomm is a trademark of Qualcomm Incorporated, registered
in the United States, and other countries and used with
permission.
AllPlay and the AllPlay icon are trademarks of Qualcomm
Connected Experiences, Inc., and used with permission.
This product incorporates Spotify software which is subject to 3rd
party licenses found here:
www.spotify.com/connect/third-party-licenses
DLNA, the DLNA Logo and DLNA CERTIFIED are trademarks,
service marks, or certification marks of the Digital Living Network
Alliance.
Mac and OS X are trademarks of Apple Inc., registered in the U.S.
and other countries.
Windows and Windows Vista are either registered trademarks or
trademarks of Microsoft Corporation in the United States and/or
other countries.
Google Play and Android are trademarks of Google Inc.
“Made for iPod”, “Made for iPhone”, and “Made for iPad” mean
that an electronic accessory has been designed to connect
specifically to iPod, iPhone, or iPad, respectively, and has been
certified by the developer to meet Apple performance standards.
Apple is not responsible for the operation of this device or its
compliance with safety and regulatory standards.
Please note that the use of this accessory with iPod, iPhone, or
iPad may affect wireless performance.
AirPlay
, iPad, iPhone, iPod, iPod nano, iPod touch, and Retina are
trademarks of Apple Inc., registered in the U.S. and other countries.
iPad Air, and iPad mini are trademarks of Apple Inc.
App Store is a service mark of Apple Inc.
Caution for AC Mains Lead
(For the AC mains plug of three pins)
For your safety, please read the following text carefully.
This appliance is supplied with a moulded three pin
mains plug for your safety and convenience.
A 5-ampere fuse is fitted in this plug.
Should the fuse need to be replaced please ensure that
the replacement fuse has a rating of 5-ampere and that it
is approved by ASTA or BSI to BS1362.
Check for the ASTA mark Ï
or the BSI mark Ì on the
body of the fuse.
If the plug contains a removable fuse cover you must
ensure that it is refitted when the fuse is replaced.
If you lose the fuse cover the plug must not be used until
a replacement cover is obtained.
A replacement fuse cover can be purchased from your
local dealer.
Before use
Remove the connector cover.
How to replace the fuse
The location of the fuse differ according to the type of AC
mains plug (figures A and B). Confirm the AC mains plug
fitted and follow the instructions below.
Illustrations may differ from actual AC mains plug.
1. Open the fuse cover with a screwdriver.
2. Replace the fuse and close or attach the fuse cover.
Supplied accessories
Check and identify the supplied accessories.
• Product numbers provided in these operating instructions
are correct as of March 2015. These may be subject to
change.
Maintenance
• To clean the main unit, wipe with a soft, dry cloth.
• To clean the speakers, wipe with a fine-textured and
dry cloth such as a microfibre cleaning cloth.
• Never use alcohol, paint thinner or benzine to clean
this system.
• Before using chemically treated cloth, read the
instructions that came with the cloth carefully.
Figure A
Figure B
Fuse cover
Figure A
Fuse
(5 ampere)
Figure B
Fuse
(5 ampere)
∏ (For Continental Europe)
1 x AC mains lead
(K2CQ2YY00119)
∏
(For the United Kingdom and Ireland)
1 x AC mains lead
(K2CT2YY00097)
∏
(For Australia and New Zealand)
1 x AC mains lead
(K2CJ2YY00101)
∏
1 x Remote control
(N2QAYB001018)
∏
1 x Remote control battery
∏
2 x Speaker cables
(REE1840)
∏
([PMX100]) 1 x FM indoor antenna
(RSAX0002)
∏ ([PMX100B]) 1 x DAB antenna
(N1EYYY000015)
SC-PMX100-100B_EGEBGN-RQT9995-B.book 3 ページ 2015年3月3日 火曜日 午前9時8分
3
RQT9995
Qualcomm
®
AllPlay™ smart media platform is a product of
Qualcomm Connected Experiences, Inc.
Qualcomm is a trademark of Qualcomm Incorporated, registered
in the United States, and other countries and used with
permission.
AllPlay and the AllPlay icon are trademarks of Qualcomm
Connected Experiences, Inc., and used with permission.
This product incorporates Spotify software which is subject to 3rd
party licenses found here:
www.spotify.com/connect/third-party-licenses
DLNA, the DLNA Logo and DLNA CERTIFIED are trademarks,
service marks, or certification marks of the Digital Living Network
Alliance.
Mac and OS X are trademarks of Apple Inc., registered in the U.S.
and other countries.
Windows and Windows Vista are either registered trademarks or
trademarks of Microsoft Corporation in the United States and/or
other countries.
Google Play and Android are trademarks of Google Inc.
“Made for iPod”, “Made for iPhone”, and “Made for iPad” mean
that an electronic accessory has been designed to connect
specifically to iPod, iPhone, or iPad, respectively, and has been
certified by the developer to meet Apple performance standards.
Apple is not responsible for the operation of this device or its
compliance with safety and regulatory standards.
Please note that the use of this accessory with iPod, iPhone, or
iPad may affect wireless performance.
AirPlay
, iPad, iPhone, iPod, iPod nano, iPod touch, and Retina are
trademarks of Apple Inc., registered in the U.S. and other countries.
iPad Air, and iPad mini are trademarks of Apple Inc.
App Store is a service mark of Apple Inc.
Caution for AC Mains Lead
(For the AC mains plug of three pins)
For your safety, please read the following text carefully.
This appliance is supplied with a moulded three pin
mains plug for your safety and convenience.
A 5-ampere fuse is fitted in this plug.
Should the fuse need to be replaced please ensure that
the replacement fuse has a rating of 5-ampere and that it
is approved by ASTA or BSI to BS1362.
Check for the ASTA mark Ï
or the BSI mark Ì on the
body of the fuse.
If the plug contains a removable fuse cover you must
ensure that it is refitted when the fuse is replaced.
If you lose the fuse cover the plug must not be used until
a replacement cover is obtained.
A replacement fuse cover can be purchased from your
local dealer.
Before use
Remove the connector cover.
How to replace the fuse
The location of the fuse differ according to the type of AC
mains plug (figures A and B). Confirm the AC mains plug
fitted and follow the instructions below.
Illustrations may differ from actual AC mains plug.
1. Open the fuse cover with a screwdriver.
2. Replace the fuse and close or attach the fuse cover.
Supplied accessories
Check and identify the supplied accessories.
• Product numbers provided in these operating instructions
are correct as of March 2015. These may be subject to
change.
Maintenance
• To clean the main unit, wipe with a soft, dry cloth.
• To clean the speakers, wipe with a fine-textured and
dry cloth such as a microfibre cleaning cloth.
• Never use alcohol, paint thinner or benzine to clean
this system.
• Before using chemically treated cloth, read the
instructions that came with the cloth carefully.
Figure A
Figure B
Fuse cover
Figure A
Fuse
(5 ampere)
Figure B
Fuse
(5 ampere)
∏ (For Continental Europe)
1 x AC mains lead
(K2CQ2YY00119)
∏
(For the United Kingdom and Ireland)
1 x AC mains lead
(K2CT2YY00097)
∏
(For Australia and New Zealand)
1 x AC mains lead
(K2CJ2YY00101)
∏
1 x Remote control
(N2QAYB001018)
∏
1 x Remote control battery
∏
2 x Speaker cables
(REE1840)
∏
([PMX100]) 1 x FM indoor antenna
(RSAX0002)
∏ ([PMX100B]) 1 x DAB antenna
(N1EYYY000015)
SC-PMX100-100B_EGEBGN-RQT9995-B.book 3 ページ 2015年3月3日 火曜日 午前9時8分
3
RQT9988
Isporučeni pribor
Provjerite i identicirajte isporučeni pribor.
(Za područje kontinentalne Europe)
1 x kabel za napajanje izmjeničnom strujom
(K2CQ2YY00119)
(Za Ujedinjeno Kraljevstvo i Irsku)
1 x kabel za napajanje izmjeničnom strujom
(K2CT2YY00097)
(Za Australiju i Novi Zeland)
1 x kabel za napajanje izmjeničnom strujom
(K2CJ2YY00101)
1 x daljinski upravljač
(N2QAYB001018)
1 x baterija za daljinski upravljač
2 x kabel zvučnika
(REE1840)
( ) 1 x unutrašnja FM-antena
(RSAX0002)
( ) 1 x DAB antena
(N1EYYY000015)
• Navedeni brojevi proizvoda u uporabi su od ožujka
2015. Podložni su promjenama.
Održavanje
• Glavnu jedinicu čistite mekom suhom krpom.
• Zvučnike čistite nježnom i suhom krpom kao što je
krpa od mikrovlakana.
• Nikada nemojte upotrebljavati alkohol, razrjeđivač ili
benzin za čišćenje ovog sustava.
• Prije uporabe kemijski tretirane krpe pažljivo pročitajte
njezine upute za uporabu.
Mjere opreza za kabel za napajanje
izmjeničnom strujom
(za 3-pinski utikač za napajanje izmjeničnom strujom)
Radi osobne sigurnosti pažljivo pročitajte sljedeći tekst.
Uređaj se isporučuje s izoliranim 3-pinskim utikačem
radi vaše sigurnosti i udobnosti.
U utikač je ugrađen osigurač od 5 ampera.
Ako treba zamijeniti osigurač, upotrijebite zamjenski
osigurač od 5 ampera usklađen sa standardom BS1362
i s oznakom odobrenja ASTA ili BSI.
Potražite oznaku ASTA ili BSI na kućištu osigurača.
Ako utikač ima poklopac osigurača koji se može skinuti,
nakon zamjene osigurača poklopac obavezno vratite
na mjesto. Ako izgubite poklopac osigurača, utikač
nije dozvoljeno upotrebljavati sve dok se ne postavi
zamjenski poklopac.
Zamjenski poklopac osigurača možete kupiti kod
lokalnog dobavljača.
Prije uporabe
Skinite poklopac priključka.
Zamjena osigurača
Smještaj osigurača razlikuje se ovisno o vrsti utikača za
napajanje izmjeničnom strujom (slike A i B). Provjerite je
li utikač za napajanje izmjeničnom strujom pričvršćen i
slijedite upute u nastavku.
Prikazi se mogu razlikovati od stvarnog utikača za
napajanje izmjeničnom strujom.
1. Pomoću odvijača otvorite poklopac osigurača.
2. Zamijenite osigurač i zatvorite ili pričvrstite
poklopac osigurača.
Slika A
Slika A
Slika B
Poklopac
osigurača
Osigurač
(5 ampera)
Osigurač
(5 ampera)
Slika B
PMX100B
PMX100
Platforma za pametne medije Qualcomm® AllPlay™ proizvod je
tvrtke Qualcomm Connected Experiences, Inc.
Qualcomm je zaštitni znak tvrtke Qualcomm Incorporated, koja je
registrirana u Sjedinjenim Državama i ostalim državama i koristi
se s dopuštenjem.
AllPlay i ikona AllPlay zaštitni su znakovi tvrtke Qualcomm
Connected Experiences, Inc., i koriste se s dopuštenjem.
Ovaj proizvod uključuje softver Spotify koji je podložan
licencijama 3. strana koje možete pronaći na sljedećoj vezi:
www.spotify.com/connect/third-party-licenses
DLNA, logotip DLNA i DLNA CERTIFIED zaštitni su znakovi,
servisne oznake ili certikacijske oznake tvrtke Digital Living
Network Alliance.
Mac i OS X zaštitni su znakovi tvrtke Apple Inc., registrirani u
SAD-u i ostalim državama.
Windows i Windows Vista registrirani su zaštitni znakovi ili
zaštitni znakovi tvrtke Microsoft Corporation u SAD-u i/ili ostalim
državama.
Google Play i Android zaštitni su znakovi tvrtke Google Inc.
Oznake "Made for iPod", "Made for iPhone" i "Made for iPad"
znače da je elektronički pribor osmišljen za spajanje posebno
s iPodom, iPhoneom ili iPadom te da proizvođač potvrđuje da
zadovoljava standarde tehničke izvedbe tvrtke Apple. Tvrtka Apple
nije odgovorna za rad ovog uređaja ili za njegovu usklađenost sa
sigurnosnim i regulatornim standardima. Korištenje ovog dodatka
s iPodom, iPhoneom ili iPadom može utjecati na bežičnu izvedbu.
AirPlay, iPad, iPhone, iPod, iPod nano, iPod touch, i Retina
zaštitni su znakovi tvrtke Apple Inc.koja je registrirana u SAD-u i
ostalim državama. iPad Air i iPad mini zaštitni su znakovi tvrtke
Apple Inc. App Store servisna je oznaka tvrtke Apple Inc.
Proizvedeno za

RQT9995
4
Placement of speakers
Place the speakers so that the tweeter is on the inner
side. To prevent damage to the speakers, do not touch
the speaker cones if you remove the nets.
Use only the supplied speakers.
The combination of the main unit and speakers give the
best sound. You can cause damage to the system and
decrease the sound quality if you use other speakers.
Note:
• Keep your speakers more than 10 mm from the main unit
for ventilation.
• Put the speakers on a flat safe surface.
• These speakers do not have magnetic shielding. Do not
put them near TVs, PCs or other equipment easily
influenced by magnetism.
• When you play at high levels for a long period, it can cause
damage to the system and decrease the life of the system.
• Decrease the volume in these conditions to prevent
damage:
- When you play distorted sound.
- When you adjust the sound quality.
Making the connections
Connect the AC mains lead only after all the other
connections have been made.
[PMX100]
[PMX100B]
1 Connect the antenna.
Place the antenna where reception is best.
• If radio reception is poor, use an outdoor antenna
(not supplied).
[PMX100]
2 Connect the speakers.
Be careful not to cross (short-circuit) or reverse
the polarity of the speaker wires as doing so may
damage the speakers.
3 Connect the AC mains lead.
Do not use an AC mains lead with other equipment.
Conserving power
The system consumes a small amount of power (> 21),
even when it is in standby mode. Disconnect the power
supply if you do not use the system.
Some settings will be lost after you disconnect the
system. You have to set them again.
You can connect a VCR, DVD player etc.
Note:
• Disconnect the AC mains lead before connection.
• Switch off all equipment and read the appropriate operating
instructions.
• Components and cables are sold separately.
• If you want to connect equipment other than those
described, refer to the audio dealer.
• Sound distortion can occur when you use an adaptor.
CAUTION!
• Use the speakers only with the recommended
system. If not, you can cause damage to the
amplifier and speakers and can cause a fire.
Consult an approved service personnel if damage
occurs or if there is a sudden apparent change in
performance.
• Do the procedures included in these instructions
when you attach the speakers.
Tweeter
22
1
1
3
3
To household mains socket
22
1
1
3
3
To household mains socket
Tape
(not supplied)
Tape
(not supplied)
Be sure to fully tighten
the nut.
[PMX100B]
Connecting other equipment
i: Red line
j: Copper
Main unit (rear)
To right speaker
(rear)
Left speaker (rear)
e.g. DVD player
(not supplied)
Main unit (rear)
Audio cable (not supplied)
SC-PMX100-100B_EGEBGN-RQT9995-B.book 4 ページ 2015年3月3日 火曜日 午前9時8分
RQT9995
4
Placement of speakers
Place the speakers so that the tweeter is on the inner
side. To prevent damage to the speakers, do not touch
the speaker cones if you remove the nets.
Use only the supplied speakers.
The combination of the main unit and speakers give the
best sound. You can cause damage to the system and
decrease the sound quality if you use other speakers.
Note:
• Keep your speakers more than 10 mm from the main unit
for ventilation.
• Put the speakers on a flat safe surface.
• These speakers do not have magnetic shielding. Do not
put them near TVs, PCs or other equipment easily
influenced by magnetism.
• When you play at high levels for a long period, it can cause
damage to the system and decrease the life of the system.
• Decrease the volume in these conditions to prevent
damage:
- When you play distorted sound.
- When you adjust the sound quality.
Making the connections
Connect the AC mains lead only after all the other
connections have been made.
[PMX100]
[PMX100B]
1 Connect the antenna.
Place the antenna where reception is best.
• If radio reception is poor, use an outdoor antenna
(not supplied).
[PMX100]
2 Connect the speakers.
Be careful not to cross (short-circuit) or reverse
the polarity of the speaker wires as doing so may
damage the speakers.
3 Connect the AC mains lead.
Do not use an AC mains lead with other equipment.
Conserving power
The system consumes a small amount of power (> 21),
even when it is in standby mode. Disconnect the power
supply if you do not use the system.
Some settings will be lost after you disconnect the
system. You have to set them again.
You can connect a VCR, DVD player etc.
Note:
• Disconnect the AC mains lead before connection.
• Switch off all equipment and read the appropriate operating
instructions.
• Components and cables are sold separately.
• If you want to connect equipment other than those
described, refer to the audio dealer.
• Sound distortion can occur when you use an adaptor.
CAUTION!
• Use the speakers only with the recommended
system. If not, you can cause damage to the
amplifier and speakers and can cause a fire.
Consult an approved service personnel if damage
occurs or if there is a sudden apparent change in
performance.
• Do the procedures included in these instructions
when you attach the speakers.
Tweeter
22
11
3
3
To household mains socket
22
11
3
3
To household mains socket
Tape
(not supplied)
Tape
(not supplied)
Be sure to fully tighten
the nut.
[PMX100B]
Connecting other equipment
i: Red line
j: Copper
Main unit (rear)
To right speaker
(rear)
Left speaker (rear)
e.g. DVD player
(not supplied)
Main unit (rear)
Audio cable (not supplied)
SC-PMX100-100B_EGEBGN-RQT9995-B.book 4 ページ 2015年3月3日 火曜日 午前9時8分
RQT9995
4
Placement of speakers
Place the speakers so that the tweeter is on the inner
side. To prevent damage to the speakers, do not touch
the speaker cones if you remove the nets.
Use only the supplied speakers.
The combination of the main unit and speakers give the
best sound. You can cause damage to the system and
decrease the sound quality if you use other speakers.
Note:
• Keep your speakers more than 10 mm from the main unit
for ventilation.
• Put the speakers on a flat safe surface.
• These speakers do not have magnetic shielding. Do not
put them near TVs, PCs or other equipment easily
influenced by magnetism.
• When you play at high levels for a long period, it can cause
damage to the system and decrease the life of the system.
• Decrease the volume in these conditions to prevent
damage:
- When you play distorted sound.
- When you adjust the sound quality.
Making the connections
Connect the AC mains lead only after all the other
connections have been made.
[PMX100]
[PMX100B]
1 Connect the antenna.
Place the antenna where reception is best.
• If radio reception is poor, use an outdoor antenna
(not supplied).
[PMX100]
2 Connect the speakers.
Be careful not to cross (short-circuit) or reverse
the polarity of the speaker wires as doing so may
damage the speakers.
3 Connect the AC mains lead.
Do not use an AC mains lead with other equipment.
Conserving power
The system consumes a small amount of power (> 21),
even when it is in standby mode. Disconnect the power
supply if you do not use the system.
Some settings will be lost after you disconnect the
system. You have to set them again.
You can connect a VCR, DVD player etc.
Note:
• Disconnect the AC mains lead before connection.
• Switch off all equipment and read the appropriate operating
instructions.
• Components and cables are sold separately.
• If you want to connect equipment other than those
described, refer to the audio dealer.
• Sound distortion can occur when you use an adaptor.
CAUTION!
• Use the speakers only with the recommended
system. If not, you can cause damage to the
amplifier and speakers and can cause a fire.
Consult an approved service personnel if damage
occurs or if there is a sudden apparent change in
performance.
• Do the procedures included in these instructions
when you attach the speakers.
Tweeter
22
1
1
3
3
To household mains socket
22
1
1
3
3
To household mains socket
Tape
(not supplied)
Tape
(not supplied)
Be sure to fully tighten
the nut.
[PMX100B]
Connecting other equipment
i: Red line
j: Copper
Main unit (rear)
To right speaker
(rear)
Left speaker (rear)
e.g. DVD player
(not supplied)
Main unit (rear)
Audio cable (not supplied)
SC-PMX100-100B_EGEBGN-RQT9995-B.book 4 ページ 2015年3月3日 火曜日 午前9時8分
4
RQT9988
Povezivanje
Spojite kabel za napajanje izmjeničnom strujom tek
nakon što dovršite sva ostala spajanja.
1 Spojite antenu.
Stavite antenu tamo gdje je prijam najbolji.
• Ako je prijam radijskih signala slab, upotrijebite vanjsku
antenu (nije isporučena).
Postavljanje zvučnika
Visokotonac
Postavite zvučnike tako da je visokotonac na unutrašnjoj
strani. Da biste spriječili oštećenje zvučnika, nemojte
dodirivati unutrašnjost zvučnika ako skinete mrežicu koja
se nalazi na njemu.
Koristite se samo isporučenim zvučnicima.
Kombinacija glavne jedinice i zvučnika daje najbolji
zvuk. U slučaju upotrebe drugih zvučnika moglo bi doći
do oštećenja sustava i pogoršanja kvalitete zvuka.
Napomena:
• Držite zvučnike na udaljenosti većoj od 10 mm od glavne
jedinice radi ventilacije.
• Stavite zvučnike na ravnu, stabilnu površinu.
• Ovi zvučnici nisu magnetski oklopljeni. Nemojte ih stavljati
blizu TV-prijamnika, računala ili drugih uređaja podložnih
utjecaju magnetizma.
• Kada reproducirate zvuk pri visokoj razini dulje vrijeme,
može se oštetiti sustav i smanjiti vijek trajanja sustava.
• U sljedećim uvjetima smanjite glasnoću da biste spriječili
oštećenja:
- Kada je zvuk izobličen.
- Kada podešavate kvalitetu zvuka.
OPREZ!
• Zvučnike upotrebljavajte samo s preporučenim
sustavom. Inače bi moglo doći do oštećenja
pojačala i zvučnika te požara. Ako dođe do
oštećenja ili iznenadne promjene u radu
uređaja, obratite se ovlaštenom serviseru.
• Postupite na način naveden u ovim uputama
prilikom spajanja zvučnika.
2 Spojite zvučnike.
Pazite da ne biste unakrsno spojili žice zvučnika
(kratki spoj) ili okrenuli njihov polaritet jer to
može dovesti do oštećenja zvučnika.
3 Spojite kabel za napajanje izmjeničnom strujom.
Nemojte upotrebljavati kabel za napajanje
izmjeničnom strujom s drugom opremom.
Ušteda energije
Sustav troši malu količinu struje ( 21), čak i kad je u stanju
čekanja. Isključite napajanje ako se ne koristite sustavom.
Neke će se postavke poništiti nakon isključivanja
sustava. Morat ćete ih ponovno postaviti.
Spajanje druge opreme
Možete spojiti videosnimač, DVD-čitač itd.
Audiokabel (nije isporučen)
Napomena:
• Odspojite kabel za napajanje izmjeničnom strujom prije
povezivanja.
• Isključite svu opremu i pročitajte odgovarajuće upute za uporabu.
• Komponente i kabeli prodaju se odvojeno.
• Ako želite spojiti opremu osim one opisane, obratite se
prodavaču audioopreme.
• U slučaju uporabe prilagodnika može doći do izobličenja zvuka.
U strujnu utičnicu
Glavna jedinica (straga)
Glavna jedinica
(straga)
Lijevi zvučnik (stražnji)
U strujnu utičnicu
Ljepljiva traka
(nije isporučena)
Crvena linija
Bakar
U desni zvučnik
(stražnji)
npr. DVD čitač
(nije isporučen)
Obavezno do kraja
zategnite maticu.
Ljepljiva traka
(nije isporučena)

5
RQT9995
Overview of controls
1 Standby/on switch [Í], [Í/I]
Press to switch the unit from on to standby mode or
vice versa. In standby mode, the unit is still
consuming a small amount of power.
2 Numeric buttons [1 to 9, 0, S10]
• To select a 2-digit number
Example: 16: [S10]
> [1] > [6]
• To select a 3-digit number
Example: 124: [S10]
> [S10] >[1] > [2]> [4]
3 Delete a programmed track
4 Select audio source
5 Basic playback control
6 Select the sound effects
7 Set the play menu item
8 View content information
9 Clock and timer operation
10 Set the programme function
11 Adjust the volume of the system
12 Mute the sound of the system
Press the button again to cancel.
“MUTE” is also cancelled when you adjust the
volume or when you switch off the system.
13 Enter setup menu
14 Set the radio menu item
15 Select the option
16 Dim the display panel
Press the button again to cancel.
17 Display panel
18 Port for iPhone/iPad/iPod and USB devices
19 NFC touch area (> 11)
20 Bluetooth
®
-pairing button
• Press to select “BLUETOOTH” as the audio source.
• Press and hold to enter pairing mode (> 10) or
disconnect a Bluetooth
®
device (> 11).
21 Open or close the disc tray
22 Headphones jack ( )
• Plug type: 3.5 mm stereo (not supplied)
• Avoid listening for prolonged periods of time to prevent
hearing damage.
• Excessive sound pressure from earphones and
headphones can cause hearing loss.
• Listening at full volume for long periods may damage
the user’s ears.
23 Disc tray
24 Remote control sensor
*1: The display will automatically change to “iPod” when a
compatible iPhone/iPad/iPod is connected to the port for
iPhone/iPad/iPod.
Preparing the remote control
• Use alkaline or manganese battery.
• Install the battery so that the poles (+ and –) align with
those in the remote control.
• Point the remote control at the remote control sensor,
away from obstacles, at a maximum range of 7 m
directly in front of the main unit, within an angle of
approximately 30° to the left and right.
OPEN/CLOSE
5V 2.1A
VOLUME
SELECTOR
PAIRING
BASS
TREBLE
EXT-IN
1
2
3
4
5
6
7
8
9
10
11
12
13
14
15
16
CD/USB
RADIO
DIMMER
6
4
1
21
22
23
24
20
11
5
17
18
19
Top view
On the remote control
[ ]: “BLUETOOTH”
[CD/USB]: “CD”
(
. “USB”*
1
[RADIO, EXT-IN]:
“DAB+” (
[PMX100B]) --. “FM” --. “AUX”
^--- “Network” (--- “PC” (---b
On the main unit
[SELECTOR]:
“CD”
-.
“BLUETOOTH”
-.
“DAB+” (
[PMX100B]
)
-.
“FM”
^
-
-
- “Network” (- “PC” (
“USB”
*
1
(
“AUX”
(
-
b
R6/LR6, AA
SC-PMX100-100B_EGEBGN-RQT9995-B.book 5 ページ 2015年3月3日 火曜日 午前9時8分
5
RQT9988
1 Prekidač za stanje čekanja / uključivanje
[ ], [ /I]
Pritisnite da biste prebacili jedinicu iz stanja čekanja i
uključili je ili obrnuto. U stanju čekanja jedinica i dalje
troši malu količinu energije.
2 Brojčane tipke [1 do 9, 0, ≥10]
• Odabir dvoznamenkastog broja
Primjer: 16: [≥10] → [1] → [6]
• Odabir troznamenkastog broja
Primjer: 124: [≥10] → [≥10] →[1] → [2] → [4]
3 Brisanje programiranog zapisa
4 Odabir audioizvora
Na daljinskom upravljaču
[ ]: “BLUETOOTH”
[CD/USB]: “CD”
↔
“USB”*
1
[RADIO, EXT-IN]:
“DAB+” ( ) → “FM” → “AUX”
“Mreža” ← “Računalo”
Na glavnoj jedinici
[SELECTOR] (Odabirač):
“CD” → “BLUETOOTH” → “DAB+” ( ) → “FM”
“Mreža” ← “Računalo” ← “USB”*
1
← “AUX”
5 Osnovno upravljanje reprodukcijom
6 Odabir efekta zvuka
7 Postavljanje stavke izbornika reprodukcije
8 Prikaz podataka o sadržaju
9 Rad sata i mjerača vremena
10 Postavljanje funkcije programa
11 Podešavanje glasnoće sustava
12 Isključivanje zvuka sustava
Da biste poništili funkciju, ponovno pritisnite gumb.
Funkcija "MUTE" također se poništava prilikom
podešavanja glasnoće ili isključivanja sustava.
13 Ulazak u izbornik postavljanja
14 Postavljanje stavke izbornika radija
15 Odabir opcije
16 Prigušivanje zaslona
Da biste poništili funkciju, ponovno pritisnite gumb.
Pregled funkcija
17 Zaslon
18 Ulaz za iPhone/iPad/iPod i USB-uređaje
19 NFC-područje osjetljivo na dodir ( 11)
20 Gumb za uparivanje putem Bluetootha
®
• Pritisnite da biste odabrali "BLUETOOTH" kao izvor
zvuka.
• Pritisnite i držite za ulazak u način uparivanja ( 10) ili
odspojite Bluetooth
®
uređaj ( 11).
21 Otvaranje ili zatvaranje ladice diska
22 Utičnica za slušalice ( )
• Vrsta utikača: stereo 3,5 mm (nije isporučen)
• Da biste spriječili oštećenje sluha, izbjegavajte
dugotrajno slušanje.
• Pretjerani zvučni tlak iz slušalica može uzrokovati
gubitak sluha.
• Dugotrajno slušanje glasne glazbe može oštetiti sluh.
23 Ladica diska
24 Senzor signala daljinskog upravljača
*1: Prikaz će se automatski promijeniti na "IPOD" kad se
kompatibilni iPhone/iPad/iPod spoji na ulaz za iPhone/
iPad/iPod.
Priprema daljinskog upravljača
• Koristite se alkalnim ili manganskim baterijama.
• Umetnite baterije u skladu s oznakama (+ i –) u
daljinskom upravljaču.
• Stanite točno ispred glavne jedinice na udaljenosti od
maksimalno 7 m i usmjerite daljinski upravljač prema
daljinskom senzoru, unutar kuta od otprilike 30° prema
lijevo i desno.
Gornja strana
PMX100B
PMX100B

RQT9995
6
Network settings
You can stream music from an iOS device (iPhone/iPad/
iPod), an Android™ device or a PC (Mac/Windows) to
this system’s speakers by using the Qualcomm
®
AllPlay™ smart media platform, DLNA feature, or
AirPlay. To use these features, this system must join the
same network as the compatible device.
• Please update the system’s software after the network
settings are complete. (> 17)
Choose a network setting method from the
following.
Note:
• The setting will be cancelled after the set time limit. In that
case, try the setting again.
To cancel this setting in the middle, press [∫].
This system has built-in Wi-Fi
®
and can be connected to
a wireless router.
Preparation
• Place this system as close to the wireless router as
possible.
• Do not connect a LAN cable. Doing so will disable the
Wi-Fi
®
function.
• Point the antenna on the rear of
the main unit up as shown in the
figure.
• Do not perform the following:
- Tilting the antenna forward or
backwards when it is pointing up
- Applying too much force to the
antenna
- Carrying this unit by holding the antenna
1 Turn this system on.
2 Proceed to “Method 1” or “Method 2”.
• The following explanations are based on a
smartphone.
1 Press [RADIO, EXT-IN] on the remote control
repeatedly to select “Network”.
2 Press [SETUP] on the remote control repeatedly
to select “Net Setup” and then press [OK].
3 Press [3, 4] on the remote control to select
“Manual” and then press [OK].
“Setting” blinks on the display.
4 Go to Wi-Fi settings on your compatible device.
5 Select “PMX100 _AJ” to connect to this
system.
• “ ” stands for a digit that is unique to each set.
• This can take up to 1 minute to appear in your Wi-Fi
list.
• Make sure that DHCP is enabled for the network
setting on your compatible device.
• iOS device: The settings page will be automatically
displayed in the Internet browser.
• Except iOS device: Open the Internet browser and
refresh the page to display the settings page.
– If the settings page is not displayed, type “http://
172.19.42.1/” into the URL address field.
6 Type a device name and then select “Next”.
• The device name will be displayed as this system's
name on the network.
• Maximum characters that can be shown: 32
• The device name is set when “Next” is selected.
• You can also change the device name after the network
connection is set up. (> 8, “To make network-related
settings”)
Wireless LAN connection
Method 1: “Using an Internet browser”
(>
right)
• You can access this unit’s network settings from
the Internet browser on your smartphone or PC,
etc.
Method 2: “Using WPS (Wi-Fi Protected
Setup™)” (>
7)
• If your wireless router supports WPS, you can set
up a connection by either pressing the WPS
button, or entering the WPS PIN code.
Wired LAN connection
Method 3: “Using a LAN cable” (> 8)
• You can make a stable connection to the network
with a LAN cable.
Wireless LAN connection
Method 1:
Using an Internet browser
Settings
Wi-Fi settings
SC-PMX100-100B_EGEBGN-RQT9995-B.book 6 ページ 2015年3月3日 火曜日 午前9時8分
6
RQT9988
Bežično LAN-povezivanje
U ovaj je sustav ugrađen Wi-Fi
®
pa se može spojiti na
bežični usmjerivač.
Priprema
• Stavite sustav što bliže bežičnom usmjerivaču.
• Nemojte spajati LAN-kabel. Tako ćete onemogućiti
Wi-Fi
®
funkciju.
• Usmjerite antenu na stražnjoj
strani glavne jedinice prema
gore kao što je prikazano na
slici.
• Nemojte izvršiti sljedeće:
- Nagnuti antenu prema naprijed ili
natrag dok je usmjerena prema
gore
- Presnažno pomicati antenu
- Nositi jedinicu držeći je za antenu
1 Uključite ovaj sustav.
2 Nastavite na “Metoda 1” ili “Metoda 2”.
Metoda 1:
Upotreba internetskog preglednika
• Sljedeća se objašnjenja temelje na pametnom telefonu.
1 Više puta pritisnite [RADIO, EXT-IN] na daljinskom
upravljaču da biste odabrali “Network” (Mreža).
2 Pritisnite [SETUP] (Postavljanje) na daljinskom
upravljaču više puta da biste odabrali "Net Setup"
(Postavljanje mreže) i zatim pritisnite [OK].
3 Pritisnite [▲,▼] na daljinskom upravljaču da biste
odabrali "Manual" (Ručno) i zatim pritisnite [OK].
Na zaslonu treperi "Setting" (Postavljanje).
4 Idite u postavke za Wi-Fi na svom kompatibilnom
uređaju.
Postavke mreže
Možete reproducirati glazbu s iOS-uređaja (iPhone/iPad/
iPod), Android™ uređaja ili računala (Mac/Windows) na
zvučnike ovog sustava koristeći se platformom za pametne
medije Qualcomm
®
AllPlay™ ili značajkama DLNA ili
AirPlay. Da biste upotrebljavali ove značajke, morate spojiti
sustav na istu mrežu kao i kompatibilni uređaj.
• Ažurirajte softver sustava nakon dovršetka mrežnih
postavki. ( 17)
Odaberite metodu postavljanja mreže između
sljedećih.
Bežično LAN-povezivanje
Metoda 1: “Upotreba internetskog preglednika”
( desno)
• Možete pristupiti mrežnim postavkama ove
jedinice iz internetskog preglednika na svom
pametnom telefonu ili računalu i sl.
Metoda 2: “Upotreba WPS-a (Wi-Fi Protected
Setup™)” ( 7)
• Ako vaš bežični usmjerivač podržava WPS,
možete postaviti vezu pritiskom na gumb WPS ili
unosom PIN koda za WPS.
Povezivanje LAN-kabelom
Metoda 3: “Upotreba LAN-kabela” ( 8)
• Možete napraviti stabilnu vezu s mrežom LAN-
kabelom.
Napomena:
• Postavka će se poništiti nakon postavljenog vremenskog
ograničenja. U tom slučaju pokušajte ponovno postaviti
postavku.
Da biste poništili ovu postavku tijekom rada, pritisnite [■].
5 Odaberite “PMX100 _AJ” da biste se
spojili na ovaj sustav.
• “ “ označava znamenku jedinstvenu za svako postavljanje.
• Ovo može potrajati do 1 minutu da bi se pojavilo na popisu
za Wi-Fi.
• Provjerite je li u mrežnim postavkama na kompatibilnom
uređaju omogućen DHCP.
• iOS-uređaj: Stranica s postavkama automatski će se
prikazati u internetskom pregledniku.
• Osim iOS-uređaja: Otvorite internetski preglednik i
osvježite stranicu da biste prikazali stranicu s postavkama.
- Ako se stranica s postavkama ne prikazuje, upišite
“http:// 172.19.42.1/” u polje za URL adresu.
6 Upišite naziv uređaja i odaberite "Next" (Dalje).
• Naziv uređaja prikazat će se kao ime ovog sustava na
mreži.
• Maksimalan broj znakova koji se mogu prikazati: 32
• Naziv uređaja prikazuje se kad se odabere "Next" (Dalje).
• Također možete promijeniti naziv uređaja nakon
postavljanja mrežne veze. ( 8, “Postavljanje postavki
povezanih s mrežom”)
Postavke Wi-Fi postavke

7
RQT9995
7 Select your security options for this system.
To set the AirPlay password
1 Select “Yes” and then select “Next”.
2 Set your password and then select “Next”.
• You will need this password the next time this network
setting method is used.
• If you have performed a network reset (> 18)
, the
password will be cleared.
To skip this setting
Select “No” and then select “Next”.
• You can also change this setting after the network
connection is set up. (> 8, “To make network-related
settings”)
8 Select your network name (SSID) and type the
password.
• Check the wireless router for the network name (SSID)
and the password.
• A list of network names (SSIDs) will be appeared when
you select the “Network Name” box.
• To show the characters typed in the “Password” box,
select “Show Password”.
• If your network requires specific settings, deselect
“DHCP” to disable DHCP.
– You can use specific IP address, subnet mask,
default gateway, primary DNS, etc.
9 Select “Connect” to apply the settings.
• On the main unit’s display, “Success” appears when
the connection is established. (“ ” will be
displayed.)
– If “Fail” is displayed press [OK], check the network
name (SSID) and the password, and then try the
setting again.
• Depending on the device, the connection complete
screen may not be displayed.
10
Make sure to connect your compatible device
back to your home wireless network.
Note:
• Enable Java and Cookies in your browser settings.
1 Press [RADIO, EXT-IN] on the remote control
repeatedly to select “Network”.
2 To enter “WPS Push” mode
1 Press [SETUP] on the remote control repeatedly
to select “Net Setup” and then press [OK].
“WPS Push” is indicated on the display.
2 Press [OK].
• Alternatively, press and hold [5/9] on the main
unit for at least 4 seconds.
“WPS” flashes on the display.
3 Activate the WPS button on the wireless router.
• On the main unit’s display, “Success” appears when
the connection is established. (“ ” will be
displayed.)
– "Fail" may be displayed if the connection was not
made within the set time limit. Try the setting again. If
"Fail" is still displayed, try other methods.
4 Press [OK] on the remote control to exit the
setting.
∫ Using the WPS PIN code
1 Press [RADIO, EXT-IN] on the remote control
repeatedly to select “Network”.
2 To enter “WPS PIN” mode
1 Press [SETUP] on the remote control repeatedly
to select “Net Setup” and then press [OK].
2 Press [3, 4] on the remote control to select
“WPS PIN” and then press [OK].
• Alternatively, Press and hold [:/6] on the main
unit for at least 4 seconds.
The PIN code is indicated on the display.
3 Enter the PIN code into the wireless router.
Note:
• Once the system enters WPS PIN code mode, you cannot
set up using the WPS button. To use the WPS button, turn
the system off and then on, and redo the network settings.
• Depending on a router, other connected devices may
temporarily lose their connection.
• For details, refer to the operating instructions of the
wireless router.
●●●●●●●●
Method 2:
Using WPS (Wi-Fi Protected Setup™)
A compatible wireless router may have the WPS
identifier mark.
e.g.,
SC-PMX100-100B_EGEBGN-RQT9995-B.book 7 ページ 2015年3月3日 火曜日 午前9時8分
7
RQT9988
10 Provjerite jeste li ponovno spojili kompatibilan
uređaj na kućnu bežičnu mrežu.
Napomena:
• Omogućite Javu i kolačiće u postavkama preglednika.
Metoda 2:
Upotreba WPS-a (Wi-Fi Protected Setup™)
1 Više puta pritisnite [RADIO, EXT-IN] na daljinskom
upravljaču da biste odabrali “Network” (Mreža).
2 Ulazak u način "WPS Push" (WPS pritiskom na
gumb)
1 Pritisnite [SETUP] (Postavljanje) na daljinskom
upravljaču više puta da biste odabrali "Net Setup"
(Postavljanje mreže) i zatim pritisnite [OK].
Na prikazu se prikazuje "WPS Push" (WPS
pritiskom na gumb).
2 Pritisnite [OK] (U redu).
• Druga je mogućnost da pritisnete i barem 4 sekunde
držite [ ] na glavnoj jedinici.
Na zaslonu treperi "WPS".
3 Aktivirajte WPS gumb na bežičnom usmjerivaču.
• Na prikazu glavne jedinice pojavit će se "Success"
(Uspješno) kad se uspostavi veza. (Prikazat će se
“ ”.)
- Ako veza nije uspostavljena unutar zadanog
vremena, može se prikazati "Fail" (Neuspješno).
Ponovno pokušajte postaviti. Ako se i dalje prikazuje
"Fail", isprobajte druge metode.
4 Pritisnite [OK] na daljinskom upravljaču da biste
izišli iz postavljanja.
7 Odaberite svoje sigurnosne mogućnosti za ovaj
sustav. Postavljanje lozinke za funkciju AirPlay
1 Odaberite "Yes" (Da) pa odaberite "Next" (Dalje).
2 Postavite svoju lozinku pa odaberite "Next"
(Dalje).
• Ovu ćete lozinku trebati sljedeći put kad budete
upotrebljavali ovu metodu postavljanja mreže.
• Ako ste izveli ponovno postavljanje mreže ( 18),
lozinka će se izbrisati.
Preskakanje ove postavke
Odaberite "No" (Ne) pa odaberite "Next" (Dalje).
• Također možete promijeniti ovu postavku nakon
postavljanja mrežne veze. ( 8, “Postavljanje postavki
povezanih s mrežom”)
8 Odaberite naziv svoje mreže (SSID) i upišite lozinku.
• Provjerite bežični usmjerivač za naziv mreže (SSID) i
lozinku.
• Popis naziva mreže (SSID) pojavit će kad odaberete
okvir "Network Name" (Naziv mreže).
• Da biste prikazali znakove upisane u okvir "Password"
(Lozinka), odaberite "Show Password" (Prikaži lozinku).
• Ako su za vašu mrežu potrebne posebne postavke,
poništite odabir na "DHCP" kako biste onemogućili
DHCP.
- Možete upotrebljavati određenu IP-adresu, masku
podmreže, zadani ulaz, primarni DNS itd.
9 Odaberite "Connect" (Spoji) kako biste primijenili
postavke.
• Na prikazu glavne jedinice pojavit će se "Success"
(Uspješno) kad se uspostavi veza. (Prikazat će se
“ ”.)
- Ako se prikaže “Fail” (Neuspješno), pritisnite [OK],
provjerite naziv mreže (SSID) i lozinku pa ponovno
pokušajte postavku.
• Ovisno o uređaju zaslon s dovršetkom povezivanja
možda se neće prikazati.
■ Upotreba PIN-a za WPS
1 Više puta pritisnite [RADIO, EXT-IN] na daljinskom
upravljaču da biste odabrali “Network” (Mreža).
2 Ulazak u način "WPS PIN" (PIN za WPS)
1 Pritisnite [SETUP] (Postavljanje) na daljinskom
upravljaču više puta da biste odabrali "Net Setup"
(Postavljanje mreže) i zatim pritisnite [OK].
2 Pritisnite [▲, ▼] na daljinskom upravljaču da biste
odabrali "WPS PIN" i zatim pritisnite [OK].
• Druga je mogućnost da pritisnete i barem 4 sekunde
držite [ ] na glavnoj jedinici.
Na prikazu se prikazuje PIN.
3 Unesite PIN-kod u bežični usmjerivač.
Napomena:
• Nakon što sustav uđe u način PIN-a za WPS, ne možete
postavljati korištenjem WPS gumba. Da biste upotrijebili
WPS gumb, isključite sustav pa ga uključite i ponovite
mrežne postavke.
• Ovisno o usmjerivaču, drugi povezani uređaji mogu
privremeno izgubiti svoju vezu.
• Detalje potražite u uputama za uporabu bežičnog
usmjerivača.
/
/
npr.:
Kompatibilni bežični usmjerivač možda ima
identikacijsku oznaku WPS-a.

RQT9995
8
1 Disconnect the AC mains lead.
2 Connect the main unit to a broadband router, etc.
using a LAN cable.
3 Connect the AC mains lead to the main unit and
turn this system on.
• When the connection is established, “ ” is indicated
on the main unit’s display.
Note:
• Use category 5 or above straight LAN cables (STP) when
connecting to peripheral devices.
• The LAN cable must be connected or disconnected while
the AC mains lead is disconnected.
• Inserting any cable other than a LAN cable in the LAN port
can damage the system.
• If the LAN cable is disconnected, the network-related
settings (> right) will be initialized. In that case, make the
settings again.
• When a LAN cable is connected, the Wi-Fi function will be
disabled.
You can change this system's name on the network,
change the security options for this system, and use
specific IP address, subnet mask, default gateway,
primary DNS, etc.
Preparation
• Complete the network settings. (> 6)
• Connect your device to the same network as this
system.
• Check this system’s IP address (> 18), and note it
down.
1 Start an Internet browser on your device and
then type this system’s IP address into the
address field to display the settings page.
• It may take a few minutes until the settings page is
displayed depending on the environment. In that case,
reload the browser.
• If the unit is connected with Wi-Fi, only the device
name and the security options for this system can be
changed. Close the settings page after making the
changes.
– To change the device name, select “Change”, and
type a new device name, and then select “Apply”.
– To change the security options for this system, select
“Change” for the AirPlay password setting.
If you have set an AirPlay password previously, you
will need your old password before making changes.
Make the changes and then select “Apply”.
2 Type a device name and then select “Next”.
• Refer to the step 6 of “Using an Internet browser” (> 6)
for details on a device name.
3 Select your security options for this system.
• Refer to the step 7 of “Using an Internet browser” (> 7)
for details on security options for this system.
4 Select and input the details.
• If your network requires specific settings, deselect
“DHCP” to disable DHCP.
– You can use specific IP address, subnet mask,
default gateway, primary DNS, etc.
5 Select “Connect” to apply the settings.
• When the connection is established, “Success”
appears on the main unit’s display.
Streaming music over the network
You can stream music from your devices or online music
services to this system’s speakers and other AllPlay
speakers.
You can also re-stream music source of this system to
other AllPlay speakers.
You can use the AllPlay or the DLNA function to stream
music from the device on the network to this system’s
speakers by using the app “Panasonic Music Streaming”
(free of charge), etc.
•
[iOS]
: App Store
•
[Android]
: Google Play™
Preparation
• Complete the network settings.
(> 6)
• Connect the following devices to the same network as
this system.
– Device with “Panasonic Music Streaming”, etc.
installed
– Device containing music
The following steps are based on “Panasonic Music
Streaming”.
1 Turn this system on.
• Check that “ ” is indicated on the display.
• If it is not indicated, check the network settings. (> 6)
2 Start the app “Panasonic Music Streaming”.
• Always use the latest version of the app.
3 Select a music source.
• To add music source, select “+ My Music Network” and
then select the device containing music.
– The added music source is numbered in order from 1.
4 Select a song.
5 From “Select Speaker”, select this system as the
output speakers.
• If you have multiple AllPlay speakers, you can enjoy
synchronized sound from them. Select “ ” and
then select the speakers to group.
Wired LAN connection
Method 3:
Using a LAN cable
LAN cable
(not supplied)
Broadband router, etc.
e.g.,
To make network-related settings
You can also change the name of this system by
changing a setting in the app “Panasonic Music
Streaming” (version 2.0.8 or later) (> right). For
details on the app, refer to the site below.
http://panasonic.jp/support/global/cs/audio/app/
(This site is in English only.)
Streaming music on network devices
My room
e.g.,
SC-PMX100-100B_EGEBGN-RQT9995-B.book 8 ページ 2015年3月3日 火曜日 午前9時8分
8
RQT9988
Priprema
• Dovršite mrežne postavke. ( 6)
• Spojite svoj uređaj na istu mrežu kao i ovaj sustav.
• Provjerite IP-adresu ovog sustava ( 18) i zapišite je.
1 Pokrenite internetski preglednik na svom uređaju
i zatim upišite IP-adresu ovog sustava u polje
adrese kako biste prikazali stranicu s postavkama.
• Može potrajati nekoliko minuta dok se stranica s
postavkama ne prikaže ovisno o okruženju. U tom
slučaju ponovno učitajte preglednik.
• Ako je jedinica spojena preko Wi-Fi mreže, mogu
se promijeniti samo naziv uređaja i sigurnosne
mogućnosti za ovaj sustav. Zatvorite stranicu s
postavkama nakon promjena.
- Da biste promijenili naziv uređaja, odaberite
"Change" (Promjena), upišite novi naziv uređaja i
odaberite "Apply" (Primijeni).
- Da biste promijenili sigurnosne mogućnosti za ovaj
sustav, odaberite "Change" (Promjena) za postavku
lozinke funkcije AirPlay.
Ako ste prethodno postavili lozinku funkcije AirPlay,
trebat ćete staru lozinku prije promjene. Promijenite i
odaberite "Apply" (Primijeni).
2 Upišite naziv uređaja i odaberite "Next" (Dalje).
• Pogledajte 6. korak pod “Upotreba internetskog
preglednika” ( 6) za detalje o nazivu uređaja.
3 Odaberite svoje sigurnosne mogućnosti za ovaj
sustav.
• Pogledajte 7. korak pod “Upotreba internetskog
preglednika” ( 7) za detalje o sigurnosnim
mogućnostima za ovaj sustav.
4 Odaberite i unesite detalje.
• Ako su za vašu mrežu potrebne posebne postavke,
poništite odabir na "DHCP" kako biste onemogućili DHCP.
- Možete upotrebljavati određenu IP-adresu, masku
podmreže, zadani ulaz, primarni DNS itd.
5 Odaberite "Connect" (Spoji) kako biste primijenili
postavke.
• Kad se uspostavi veza, pojavit će se “Success” na
prikazu glavne jedinice.
Reproduciranje glazbe preko mreže
Možete reproducirati glazbu sa svojih uređaja ili s
mrežnih glazbenih usluga na zvučnike ovog sustava i
ostale zvučnike značajke AllPlay.
Također možete ponovno reproducirati glazbeni izvor
ovog sustava na ostale zvučnike značajke AllPlay.
Povezivanje LAN-kabelom
Metoda 3:
Upotreba LAN-kabela
npr.:
Širokopojasni usmjerivač itd.
1 Odspojite kabel za napajanje izmjeničnom strujom.
2 Spojite glavnu jedinicu na širokopojasni
usmjerivač, itd. LAN-kabelom.
3 Spojite kabel za napajanje izmjeničnom strujom
na glavnu jedinicu i uključite ovaj sustav.
• Kad se uspostavi veza, prikazuje se “ ” na prikazu
glavne jedinice.
Napomena:
• Kada spajate periferne uređaje, upotrebljavajte ravne LAN-
kabele (STP) kategorije 5 ili više.
• LAN-kabel je potrebno spojiti ili odspojiti dok je odspojen
kabel za napajanje izmjeničnom strujom.
• Ako u LAN-ulaz umetnete bilo koji drugi kabel osim LAN-
kabela, sustav se može oštetiti.
• Ako se LAN-kabel odspoji, pokrenut će se postavke
povezane s mrežom (O desno). U tom slučaju pokušajte
ponovno postaviti postavke.
• Kad se spoji LAN-kabel, Wi-Fi funkcija će se onemogućiti.
Postavljanje postavki povezanih s mrežom
Možete promijeniti naziv ovog sustava na mreži,
promijeniti sigurnosne mogućnosti za ovaj sustav i
koristiti se posebnim IP-adresama, maskama podmreže,
zadanim ulazom, primarnim DNS-om itd.
Također možete promijeniti ime ovog sustava
promjenom postavke u aplikaciji “Panasonic Music
Streaming” (inačica 2.0.8 ili novija) ( desno). Detalje
o aplikaciji potražite na sljedećoj stranici.
http://panasonic.jp/support/global/cs/audio/app/
(Ovo je web-mjesto dostupno samo na engleskom jeziku.)
Reproduciranje glazbe na mrežnim
uređajima
Možete upotrijebiti AllPlay ili funciju DLNA za
reproduciranje glazbe s uređaja na mreži na zvučnike
ovog sustava upotrebom aplikacije “Panasonic Music
Streaming” (besplatno), itd.
• : App Store
• : Google Play™
Priprema
• Dovršite mrežne postavke. ( 6)
• Spojite sljedeće uređaje na istu mrežu kao i ovaj sustav.
- Uređaj s instaliranim aplikacijama kao što je “Panasonic
Music Streaming”
- Uređaj koji sadrži glazbu
Sljedeći se koraci temelje na aplikaciji “Panasonic Music
Streaming”.
1 Uključite ovaj sustav.
• Provjerite prikazuje li se “ ” na prikazu.
• Ako se ne prikazuje, provjerite mrežne postavke. ( 6)
2 Pokrenite aplikaciju "Panasonic Music Streaming".
• Uvijek upotrebljavajte najnoviju inačicu aplikacije.
3 Odaberite izvor glazbe.
• Da biste dodali izvor glazbe, odaberite “+ My Music
Network” (+ Moja glazbena mreža) i zatim odaberite
uređaj koji sadrži glazbu.
- Dodani izbor glazbe počinje se numerirati po redu
od 1.
4 Odaberite pjesmu.
5 S okvira "Select Speaker" (Odabir zvučnika)
odaberite ovaj sustav kao izlazne zvučnike.
npr.:
• Ako imate više zvučnika s funkcijom AllPlay, možete
uživati u sinkroniziranom zvuku s njima. Odaberite
“ ” i zatim odaberite zvučnike za grupiranje.
iOS
Android
LAN-kabel
(nije isporučen)
Moja soba

9
RQT9988
Priprema
• Provjerite je li mreža spojena na internet.
• Spojite uređaj s instaliranom kompatibilnom
aplikacijom na istu mrežu kao ovaj sustav.
1 Uključite ovaj sustav.
• Provjerite prikazuje li se “ ” na prikazu.
• Ako se ne prikazuje, provjerite mrežne postavke. ( 6)
2 Pokrenite aplikaciju i odaberite pjesmu za
reprodukciju.
■ Upotreba usluge Spotify
Trebat ćete Spotify Premium. Detalje potražite na
sljedećem web-mjestu:
www.spotify.com/connect/
Nakon 2. koraka
3 Odaberite četvrtastu sliku na naslovnici pjesme
u donjem lijevom dijelu zaslona za reprodukciju.
4 S okvira “ “ odaberite ovaj sustav kao izlazne
zvučnike.
• Da biste uživali u sinkroniziranom zvuku iz više
zvučnika s funkcijom AllPLay, trebate grupirati zvučnike
s aplikacijom “Panasonic Music Streaming”. ( 8)
■ Upotreba mrežnim glazbenih usluga osim
usluge Spotify
Nakon 2. koraka
3 S okvira “ “ odaberite ovaj sustav kao
izlazne zvučnike.
• Ovisno o usluzi možda ćete morati otvoriti čitač na
cijelom zaslonu da biste prikazali “ ”.
• Ako imate više zvučnika s funkcijom AllPlay, možete
uživati u sinkroniziranom zvuku s njima. Odaberite
“Group” (Grupa) i zatim odaberite zvučnike za
grupiranje.
Napomena:
• Ovaj će se sustav prikazati kao “Panasonic PMX100” ako
se ne postavi naziv uređaja.
• Potrebna je registracija/pretplata.
• Mogu se primjenjivati naknade.
• Usluge, ikone i tehnički podaci podložni su promjenama.
• Za detalje posjetite web-mjesto pojedinačne glazbene
usluge.
- Možete i reproducirati različite pjesme na ostale
zvučnike s funkcijom AllPlay istovremeno.
- Broj zvučnika s funkcijom AllPlay koji mogu reproducirati
istovremeno razlikuje se ovisno o situaciji upotrebe.
- Kada isključite jedan od zvučnika s funkcijom AllPlay,
ostali zvučnici s funkcijom AllPlay u istoj grupi mogu
zaustaviti reprodukciju.
Napomena:
• Ovaj će se sustav prikazati kao “Panasonic PMX100” ako
se ne postavi naziv uređaja.
• Prilikom reprodukcije glazbe s DLNA poslužitelja (računalo
sa sustavom Windows 7 ili novijim instaliranim, pametni
telefon, uređaj za pohranu priključeni na mrežu (Network
Attached Storage - NAS) itd.), dodajte sadržaj i mapu u
knjižnice programa Windows Media® Player, pametnog
telefona ili NAS uređaja itd.
• Popis za izvođenje u programu Windows Media
®
Player može
se reproducirati samo ako je sadržaj pohranjen u biblioteci.
• Kad je ovaj sustav odabran kao DLNA zvučnici ( ):
- Kontrola glasnoće na jedinici možda se neće
primjenjivati na aplikaciju.
- Kontrola reprodukcije s trakom prikaza tijeka na zaslonu
za reprodukciju možda neće raditi.
- Razina glasnoće primijenjena na zvučnike s funkcijom
AllPlay neće se odraziti.
- Ako drugi uređaj odabere sustav kao izlazne zvučnike,
izvor glazbe mijenja se na novi uređaj. Ali prikaz
prethodnog uređaja možda se neće promijeniti.
• Za podržane formate pogledajte “Tehnički podaci” ( 21).
- Formati datoteka koje ne podržava DLNA-poslužitelj ne
mogu se reproducirati.
• Ovisno o sadržajima i povezanoj opremi reprodukcija se
možda neće ispravno izvesti.
• Obavezno zaustavite reprodukciju na svom uređaju prije
njegova isključivanja.
Za detalje o aplikaciji “Panasonic Music Streaming” posjetite
http://panasonic.jp/support/global/cs/audio/app/
Dostupno je još aplikacija. Detalje potražite na
www.panasonic.com/global/consumer/homeav/
allseries/service
(Ova su web-mjesta dostupna samo na engleskom jeziku.)
Reprodukcija glazbe na mreži
Ovaj je sustav kompatibilan s nekoliko mrežnih izvora glazbe.
Posjetite sljedeće web-mjesto za informacije o
kompatibilnosti.
www.panasonic.com/global/consumer/homeav/
allseries/service
Ponovna reprodukcija glazbe na ovom
sustavu
Možete upotrijebiti aplikaciju “Panasonic Music
Streaming” ( 8) za ponovnu reprodukciju izvora glazbe
ovog sustava (radio/CD/ Bluetooth®/AUX/USB/računalni
izvor) na ostale zvučnike s funkcijom AllPlay.
Priprema
• Dovršite mrežne postavke. ( 6)
• Pripremite željeni izvor zvuka na ovom sustavu (npr.
umetnite CD i sl.)
• Instalirajte aplikaciju “Panasonic Music Streaming” na
svom uređaju.
• Spojite svoj uređaj i svoje zvučnike s funkcijom AllPlay
na istu mrežu kao i ovaj sustav.
1 Uključite ovaj sustav.
• Provjerite prikazuje li se “ ” na prikazu.
• Ako se ne prikazuje, provjerite mrežne postavke. ( 6)
2 Pokrenite aplikaciju "Panasonic Music Streaming".
• Uvijek upotrebljavajte najnoviju inačicu aplikacije.
3 Idite na "Music Source" (Izvor glazbe).
• Dostupni izvori glazbe s ovog sustava bit će na popisu
vašeg uređaja pod nazivom uređaja za ovaj sustav.
4 Odaberite željeni izvor glazbe s popisa.
5 Uređaj će početi čitati informacije odabranog
izvora glazbe s ovog sustava.
• Ovaj će se sustav promijeniti na način odabirača za
odabrani izvor glazbe.
• Ovisno o odabranom izvoru glazbe može početi
reprodukcija. Ako se popis sadržaja pojavi na vašem
uređaju, odaberite željeni sadržaj za početak reprodukcije.
6 Ponovna reprodukcija zvuka ovog sustava na
ostale zvučnike s funkcijom AllPlay
1 Iz okvira “Select Speaker” odaberite “ ”
uz naziv uređaja za ovaj sustav.
2 Odaberite zvučnike za grupiranje.
• Broj zvučnika s funkcijom AllPlay koji mogu reproducirati
istovremeno razlikuje se ovisno o situaciji upotrebe.
• Kada isključite jedan od zvučnika s funkcijom AllPlay,
ostali zvučnici s funkcijom AllPlay u istoj grupi mogu
zaustaviti reprodukciju.
Napomena:
• Ovaj će se sustav prikazati kao “Panasonic PMX100” ako
se ne postavi naziv uređaja.
9
RQT9995
– You can also play different songs on other AllPlay
speakers at the same time.
– The number of AllPlay speakers that can perform
playback at the same time differs depending on the
situation of use.
– When you turn off one of the AllPlay speakers, other
AllPlay speakers in the same group may stop the
playback.
Note:
• This system will be displayed as “Panasonic PMX100” if
the device name is not set.
• When playing back music from the DLNA server (PC with
Windows 7 or later installed, smartphone, Network
Attached Storage (NAS) device, etc.), add the contents and
folder to the libraries of the Windows Media
®
Player, the
smartphone, or the NAS device, etc.
• Playlist of Windows Media
®
Player can play back only the
contents that are stored in the libraries.
• When this system is selected as DLNA speakers ( ):
– The volume control on the unit may not apply to the app.
– Playback control using a progress bar on playback
screen may not work.
– The volume level applied to AllPlay speakers will not be
reflected.
– If the system is selected as output speakers by another
device, the music source is changed to the new device.
However the former device's display may not change.
• About supported format, refer to “Specifications” (> 21).
– File formats that are not supported by your DLNA server
cannot be played.
• Depending on the contents and the connected equipment,
playback may not be performed properly.
• Ensure to stop playback on your device before turning it off.
This system is compatible with several online music
services.
Visit the following website for the compatibility
information.
www.panasonic.com/global/consumer/homeav/
allseries/service
Preparation
• Make sure that the network is connected to the
Internet.
• Connect a device with a compatible app installed to the
same network as this system.
1 Turn this system on.
• Check that “ ” is indicated on the display.
• If it is not indicated, check the network settings. (> 6)
2 Start the app, and select a song to playback.
∫ Using Spotify
You will need Spotify Premium. For details, visit the
following website.
www.spotify.com/connect/
After step 2
3 Select the square image of the song's cover art in
the bottom left of the playback screen.
4 From “ ”, select this system as the output
speakers.
• To enjoy synchronized sound from the multiple AllPlay
speakers, you need to group the speakers using the
app “Panasonic Music Streaming”. (> 8)
∫ Using online music services other than
Spotify
After step 2
3 From “ ”, select this system as the output
speakers.
• Depending on the service, you might need to open full
screen player to display “ ”.
• If you have multiple AllPlay speakers, you can enjoy
synchronized sound from them. Select “Group” and
then select the speakers to group.
Note:
• This system will be displayed as “Panasonic PMX100” if
the device name is not set.
• Registration/subscription is required.
• Fees may apply.
• Services, icons, and specifications are subject to change.
• For details, visit the individual music service's website.
You can use the app “Panasonic Music Streaming” (> 8)
to re-stream this system’s music source (radio/CD/
Bluetooth
®
/AUX/USB/PC source) to other AllPlay
speakers.
Preparation
• Complete the network settings. (> 6)
• Prepare the desired audio source on this system (e.g.
insert a CD, etc.)
• Install your device with the app “Panasonic Music
Streaming”.
• Connect your device and your AllPlay speakers to the
same network as this system.
1 Turn this system on.
• Check that “ ” is indicated on the display.
• If it is not indicated, check the network settings.
(> 6)
2 Start the app “Panasonic Music Streaming”.
• Always use the latest version of the app.
3 Go to the “Music Source”.
• The available music sources from this system will be
listed on your device, under the device name for this
system.
4 Select your desired music source from the list.
5 The device will start to read the selected music
source’s information from this system.
• This system will change to the selector mode for the
selected music source.
• Depending on the selected music source, playback
may start. If a content list appears on your device,
select the desired content to start playback.
6 To re-stream this system’s audio to the other
AllPlay speakers
1 From “Select Speaker
”, select “ ” next to
the device name for this system.
2 Select the speakers to group.
• The number of AllPlay speakers that can perform
playback at the same time differs depending on the
situation of use.
• When you turn off one of the AllPlay speakers, other
AllPlay speakers in the same group may stop the
playback.
Note:
• This system will be displayed as "Panasonic PMX100" if
the device name is not set.
For details on the app “Panasonic Music Streaming”, visit
http://panasonic.jp/support/global/cs/audio/app/
More apps are available. For details, visit
www.panasonic.com/global/consumer/homeav/
allseries/service
(These sites are in English only.)
Streaming online music
Re-streaming music on this system
SC-PMX100-100B_EGEBGN-RQT9995-B.book 9 ページ 2015年3月3日 火曜日 午前9時8分

10
RQT9988
Bluetooth
®
Tvrtka Panasonic ne preuzima odgovornost za
podatke i/ili informacije kompromitirane tijekom
bežičnog odašiljanja.
Korišteno frekvencijsko područje
• Ovaj sustav upotrebljava frekvencijsko područje od
2,4 GHz.
Certikati ovog uređaja
• Ovaj je sustav usklađen s frekvencijskim
ograničenjima i certiciran je u skladu sa zakonima o
frekvenciji. Stoga bežična dozvola nije potrebna.
• Radnje u nastavku u određenim su zemljama zakonski
kažnjive:
- Rastavljanje ili preinačavanje ovog sustava.
- Uklanjanje oznaka o tehničkim podacima.
Ograničenja uporabe
• Bežično odašiljanje i/ili uporaba sa svim uređajima
opremljenima Bluetoothom
®
nisu zajamčeni.
• Svi uređaji moraju biti usklađeni sa standardima koje
je odredila tvrtka Bluetooth SIG, Inc.
• Ovisno o tehničkim podacima i postavkama uređaja,
spajanje možda neće uspjeti ili će neke radnje biti drukčije.
• Ovaj sustav podržava sigurnosne značajke Bluetootha
®
.
No ovisno o radnom okruženju i/ili postavkama, te
funkcije možda neće biti dostatne. Budite oprezni pri
bežičnom prenošenju podataka na ovaj sustav.
• Ovaj sustav ne može odašiljati podatke na Bluetooth
®
uređaj.
Raspon uporabe
• Upotrebljavajte uređaj u maksimalnom rasponu od
10 m. Raspon se može smanjiti ovisno o okruženju,
preprekama ili smetnjama.
Smetnje drugih uređaja
• Sustav možda neće ispravno raditi te može doći do
poteškoća kao što su buka i preskakanje zvuka zbog
smetnji radiovalova ako se sustav nalazi preblizu
drugih Bluetooth
®
uređaja ili uređaja koji upotrebljavaju
pojas od 2,4 GHz.
• Sustav možda neće raditi ispravno ako su radiovalovi
iz obližnje radiopostaje i sl. presnažni.
Namjena
• Sustav je namijenjen za uobičajenu, općenitu uporabu.
• Ovaj sustav nemojte upotrebljavati u blizini opreme
ili u okruženju koje je osjetljivo na smetnje radijskih
frekvencija (npr. zračne luke, bolnice, laboratoriji itd.).
Upotreba funkcije AirPlay
AirPlay radi s uređajima iPhone, iPad, i iPod touch s iOS-
om 4.3.3 ili novijim, Mac s OS X Mountain Lion ili novijim,
i računalima s programom iTunes 10.2.2 ili novijim.
Priprema
• Dovršite mrežne postavke. ( 6)
• Spojite iOS-uređaj ili računalo na istu kućnu mrežu kao
i ovaj sustav.
1 Uključite ovaj sustav.
• Provjerite prikazuje li se “ ” na prikazu.
• Ako se ne prikazuje, provjerite mrežne postavke. ( 6)
2 iOS-uređaj: Pokrenite aplikaciju "Music" (Galzba)
(ili iPod). Računalo: Pokrenite "iTunes".
• Ako upotrebljavate glazbenu aplikaciju na iOS-uređaju,
odaberite glazbenu datoteku koju želite reproducirati.
3 Odaberite “Panasonic PMX100 ”*
1,2
s
ikone AirPlay .
• Prije početka reprodukcije provjerite postavke
glasnoće. (Kod prve upotrebe funkcije AirPlay, izlaz
zvuka možda će biti postavljen na najjače.)
4 Pokrenite reprodukciju.
• Reprodukcija će započeti uz neznatno kašnjenje.
Napomena:
• Može se postaviti automatsko uključivanje ovog sustava
kada se odabere kao izlazni zvučnik.
( 17, “Stanje čekanja mreže”)
• Promjene glasnoće na iOS-uređaju ili iTunesu primijenit će
se na ovaj sustav. (Potrebne postavke za iTunes potražite
u Pomoći za iTunes.)
• Za neke inačice iOS-a i iTunesa možda neće biti moguće
ponovno pokrenuti reprodukciju AirPlay ako je promijenjen
odabirač (npr. "CD") ili je sustav isključen tijekom
reprodukcije u funkciji AirPlay.
U tom slučaju odaberite drugi uređaj pritiskom na ikonu
funkcije AirPlay u glazbenoj aplikaciji ili iTunesu i zatim
ponovno odaberite ovaj sustav kao zvučnik.
• AirPlay neće raditi prilikom reprodukcije videozapisa u
iTunesu.
*1: “ “ označava znamenku jedinstvenu za svako
postavljanje.
*2: Prikazani naziv ovog sustava može se promijeniti pod
"Postavljanje postavki povezanih s mrežom". ( 8)
Radnje Bluetootha
®
S pomoću Bluetooth® veze možete bežično slušati zvuk
iz Bluetooth® audiouređaja na ovom sustavu.
• Detalje potražite u uputama za uporabu Bluetooth
®
uređaja.
• Ako namjeravate upotrebljavati Bluetooth
®
uređaj
kompatibilan s NFC-om, prijeđite na "Povezivanje
jednim dodirom (Povezivanje putem NFC-a)".
Povezivanje preko Bluetooth
®
izbornika
Priprema
• Uključite funkciju Bluetooth
®
na uređaju i postavite
uređaj blizu ove jedinice.
Uparivanje s Bluetooth
®
uređajima
1 Pritisnite [ ] da biste odabrali “BLUETOOTH”.
Ako je na zaslonu navedeno "Pairing" (Uparivanje),
idite na 4. korak.
Ulazak u način uparivanja*
1
2 Pritisnite [PLAY MENU] (Izbornik reprodukcije)
da biste odabrali "Pairing" (Uparivanje).
3 Pritisnite [◄,►] da biste odabrali "OK? Yes" (U
redu? Da) i pritisnite [OK].
Uparivanje s uređajem
4 Odaberite “SC-PMX100” iz Bluetooth
®
izbornika
Bluetooth
®
uređaja.
Naziv spojenog uređaja pojavljuje se na prikazu na
nekoliko sekundi.
5 Pokrenite reprodukciju na Bluetooth
®
uređaju.
*1: Možete ući u način uparivanja tako da pritisnete i držite
[ -PAIRING] (Uparivanje) na jedinici.

11
RQT9988
1 Pritisnite [ ] da biste odabrali “BLUETOOTH”.
2 Prislonite i držite uređaj na NFC-području
osjetljivom na dodir na ovoj jedinici [ ]. ( 5)
Nemojte pomicati Bluetooth
®
uređaj dok ne
ispusti zvučni signal, prikaže poruku ili reagira na
neki način. Nakon što Bluetooth
®
uređaj reagira,
odmaknite uređaj od ove jedinice.
• Kada dovršite registraciju i spajanje Bluetooth
®
uređaja, naziv spojenog uređaja prikazat će se na
prikazu na nekoliko sekundi.
• Položaj NFC-područja osjetljivog na dodir razlikuje se
ovisno o uređaju. Ako se veza ne može uspostaviti čak
i nakon što ste dodirnuli NFC-područje osjetljivo na
dodir na ovoj jedinici sa svojim Bluetooth
®
uređajem,
promijenite položaj uređaja. Stanje možete poboljšati
i ako preuzmete i pokrenete namjensku aplikaciju
“Panasonic Music Streaming”.
3 Pokrenite reprodukciju na Bluetooth
®
uređaju.
Napomena:
• Ako prislonite drugi uređaj na ovu jedinicu, možete ažurirati
Bluetooth
®
vezu. Veza s prethodno spojenim uređajem
automatski će se prekinuti.
• Nakon što se veza uspostavi, reprodukcija se može
pokrenuti automatski ovisno o vrsti korištenog uređaja.
• Povezivanje jednim dodirom možda neće ispravno raditi,
ovisno o vrsti uređaja koji se upotrebljava.
Način prijenosa Bluetoothom
®
Možete promijeniti brzinu prijenosa da biste prednost
dali kvaliteti prijenosa ili kvaliteti zvuka.
Priprema
• Pritisnite [ ] da biste odabrali “BLUETOOTH”.
• Ako je Bluetooth
®
uređaj već spojen, odspojite ga.
1 Više puta pritisnite [PLAY MENU] (Izbornik
reprodukcije) da biste odabrali "Link Mode"
(Način povezivanja).
2 Pritisnite [◄,►] da biste odabrali način rada i
pritisnite [OK].
Način rada 1: Naglasak na povezanosti
Način rada 2: Naglasak na kvaliteti zvuka
Napomena:
• Odaberite "Mode 1" (Način rada 1) ako se zvuk prekine.
• Zadana postavka je "Mode 2" (Način rada 2).
Povezivanje uparenog Bluetooth
®
uređaja
1 Pritisnite [ ] da biste odabrali “BLUETOOTH”.
Na zaslonu se prikazuje "Ready" (Spremno).
2 Odaberite “SC-PMX100” iz Bluetooth
®
izbornika
Bluetooth
®
uređaja.
Naziv spojenog uređaja pojavljuje se na prikazu na
nekoliko sekundi.
3 Pokrenite reprodukciju na Bluetooth
®
uređaju.
Napomena:
• Ako vas zatraži ključ, unesite "0000".
• Ovom jedinicom možete memorirati do 8 uređaja. Ako
uparite deveti uređaj, uređaj koji najdulje nije korišten bit
će zamijenjen.
• Ova jedinica može istovremeno biti spojena samo na jedan
uređaj.
• Kada je kao izvor odabran "BLUETOOTH" ova će se
jedinica automatski pokušati spojiti na zadnji spojeni
Bluetooth
®
uređaj. ("Linking" (Spajanje) prikazuje se na
prikazu tijekom ovog postupka.)
Povezivanje jednim dodirom
(Povezivanje funkcijom NFC)
Samo za Bluetooth
®
uređaje (uređaje sa sustavom
Android) kompatibilne s NFC-om
Ako samo prislonite Bluetooth
®
uređaj kompatibilan s
NFC-om (Near Field Communication) (Komunikacija
bliskog polja) na jedinicu, možete završiti sve pripreme
od registriranja Bluetooth
®
uređaja do uspostavljanja
veze.
Priprema
• Uključite značajku NFC na uređaju.
• Za uređaje s inačicom Androida starijom od inačice 4.1
potrebna je instalacija besplatne aplikacije "Panasonic
Music Streaming".
1 Unesite "Panasonic Music Streaming" u polje za
pretraživanje Google Play da biste pretraživali pa
odaberite "Panasonic Music Streaming".
2 Pokrenite aplikaciju "Panasonic Music Streaming" na
uređaju.
- Slijedite zaslonske upute na svom uređaju.
- Uvijek upotrebljavajte najnoviju inačicu aplikacije.
Razina ulaza za Bluetooth
®
Ako je razina ulaznog zvuka s Bluetooth
®
uređaja
preniska, promijenite postavku razine ulaznog signala.
Priprema
• Spojite Bluetooth
®
uređaj.
1 Više puta pritisnite [PLAY MENU] (Izbornik
reprodukcije) da biste odabrali "Input Level"
(Razina ulaznog signala).
2 Pritisnite [◄,►] da biste odabrali razinu i
pritisnite [OK].
“Razina 0” ↔ “Razina +1” ↔ “Razina +2”
Napomena:
• Odaberite "Level 0" (Razina 0) ako je zvuk izobličen.
• Zadana postavka je "Level 0" (Razina 0).
Odspajanje Bluetooth
®
uređaja
1 Dok je Bluetooth
®
uređaj spojen: Više puta
pritisnite [PLAY MENU] da biste odabrali
"Disconnect?" (Odspojiti?).
2 Pritisnite [◄,►] da biste odabrali "OK? Yes" (U
redu? Da) i pritisnite [OK].
Napomena:
• Možete i odspojiti Bluetooth® uređaj tako da pritisnete i
držite [ -PAIRING] na jedinici.
• Bluetooth® uređaj bit će odspojen ako je odabran neki
drugi audioizvor (npr. “CD”).
Bluetooth
®
stanje čekanja
Kada je u Bluetooth
®
izborniku Bluetooth
®
uređaja
odabrano "SC-PMX100", ova će se jedinica automatski
uključiti iz stanja čekanja i uspostaviti Bluetooth
®
vezu.
1 Pritisnite [SETUP] više puta da biste odabrali
"BLUETOOTH Standby" (Bluetooth stanje
čekanja).
2 Pritisnite [◄,►] da biste odabrali "On"
(Uključeno) i pritisnite [OK].
Napomena:
• Da biste isključili funkciju, u 2. koraku odaberite "Off" (Isključeno).
• Tvornička postavka je "Off" (Isključeno). Ako je funkcija
postavljena na "On", povećat će se potrošnja energije u
stanju čekanja.

RQT9995
12
Media information
• Please be aware that Panasonic accepts no
responsibility for the loss of data and/or information.
(as of March 2015)
Note:
• Do not connect models not listed in the above. Unexpected
behaviour may occur.
• Compatibility depends on the software version. Update
your iPhone/iPad/iPod to the latest software before using it
with this unit.
• Read the User Guide of the iPhone/iPad/iPod for the
operating instructions.
• This unit does not guarantee connection with all USB
devices.
• FAT12, FAT16 and FAT32 file systems are supported.
• This unit supports USB 2.0 High Speed.
• This unit can support USB devices of up to 32 GB.
• Supported file formats and extensions:
MP3 (“.mp3”), AIFF (“.aiff”), FLAC (“.flac”),
WAV (“.wav”), AAC (“.m4a”)
Note:
• Files are defined as tracks and folders are defined as
albums.
• This system can access up to:
- 800 albums (including root folder)
- 8000 tracks
- 999 tracks in one album
• This system can play back discs that conform to the
CD-DA format.
• This system can play back CD-R/RW with CD-DA or
MP3 format content.
• Before playback, finalise the disc on the device it was
recorded on.
• Disc must conform to ISO9660 level 1 or 2 (except for
extended formats).
Note:
• Some CD-R/RW cannot be played because of the
condition of the recording.
• MP3 files are defined as tracks and folders are defined as
albums.
• This system can access up to:
- CD-DA: 99 tracks
- MP3: 999 tracks, 255 albums (including root folder)
• Recordings will not necessarily be played in the order you
recorded them.
Inserting media
Press [CD/USB] to select “CD”.
Press [CD/USB] to select “USB”.
The display will automatically change to “iPod” when a
compatible iPhone/iPad/iPod is connected to the port.
During unit on, charging starts when an iPhone/iPad/
iPod is connected to this unit.
• To continue charging from the USB cable connection
during standby mode, make sure the iPhone/iPad/iPod
has started charging before turning the unit to standby
mode.
• Check the iPhone/iPad/iPod to see if the battery is fully
charged. (Once fully charged, remove the iPhone/iPad/
iPod.)
Note:
• Remove the CD only after it stops rotating.
• When connecting an iPhone/iPad/iPod, use the dedicated
USB cable (not supplied).
• Insert the USB device directly. Do not use any USB
extension cable.
• Please disconnect the USB device if you finish using.
• Before removing the USB device, select a source other
than “USB”.
Media playback controls
The following marks indicate the availability of the feature.
Preparation
• Turn the unit on.
• Insert the media or connect the Bluetooth
®
/AirPlay/
AllPlay/DLNA compatible device.
• Press [CD/USB] or [ ] to select the audio source.
– [AirPlay] [Network]: When this system is selected as the
output speakers, the audio source will change to the
network source.
Compatible iPhone/iPad/iPod
iPhone 6 Plus / iPhone 6 / iPhone 5s / iPhone 5c /
iPhone 5 / iPhone 4s / iPhone 4 / iPhone 3GS /
iPhone 3G / iPhone
iPad Air 2 / iPad Air / iPad (3rd and 4th generation) /
iPad 2 / iPad / iPad mini 3 / iPad mini 2 (iPad mini
with Retina display) / iPad mini
iPod touch (1st through 5th generation)
iPod nano (2nd through 7th generation)
Compatible USB devices
Compatible CD
CD
iPhone/iPad/iPod or USB device
OPEN/CLOSE
OPEN/CLOSE
Label facing up
5V 2.1A
• Connect only compatible iPhone/
iPad/iPod models (> left).
Failure to do so may result in
unexpected behaviour.
Charging an iPhone/iPad/iPod
[CD]: CD audio in CD-DA format and a CD that
contains MP3 files
[iPod]: Compatible iPhone/iPad/iPod connected to
the USB port.
[USB]: USB devices containing MP3/AIFF/FLAC/
WAV/AAC files
[Bluetooth]:
Connected Bluetooth
®
device
[AirPlay]: When connected to an AirPlay compatible
device
[Network]: When connected to an AllPlay/DLNA
compatible device
SC-PMX100-100B_EGEBGN-RQT9995-B.book 12 ページ 2015年3月3日 火曜日 午前9時8分
RQT9995
12
Media information
• Please be aware that Panasonic accepts no
responsibility for the loss of data and/or information.
(as of March 2015)
Note:
• Do not connect models not listed in the above. Unexpected
behaviour may occur.
• Compatibility depends on the software version. Update
your iPhone/iPad/iPod to the latest software before using it
with this unit.
• Read the User Guide of the iPhone/iPad/iPod for the
operating instructions.
• This unit does not guarantee connection with all USB
devices.
• FAT12, FAT16 and FAT32 file systems are supported.
• This unit supports USB 2.0 High Speed.
• This unit can support USB devices of up to 32 GB.
• Supported file formats and extensions:
MP3 (“.mp3”), AIFF (“.aiff”), FLAC (“.flac”),
WAV (“.wav”), AAC (“.m4a”)
Note:
• Files are defined as tracks and folders are defined as
albums.
• This system can access up to:
- 800 albums (including root folder)
- 8000 tracks
- 999 tracks in one album
• This system can play back discs that conform to the
CD-DA format.
• This system can play back CD-R/RW with CD-DA or
MP3 format content.
• Before playback, finalise the disc on the device it was
recorded on.
• Disc must conform to ISO9660 level 1 or 2 (except for
extended formats).
Note:
• Some CD-R/RW cannot be played because of the
condition of the recording.
• MP3 files are defined as tracks and folders are defined as
albums.
• This system can access up to:
- CD-DA: 99 tracks
- MP3: 999 tracks, 255 albums (including root folder)
• Recordings will not necessarily be played in the order you
recorded them.
Inserting media
Press [CD/USB] to select “CD”.
Press [CD/USB] to select “USB”.
The display will automatically change to “iPod” when a
compatible iPhone/iPad/iPod is connected to the port.
During unit on, charging starts when an iPhone/iPad/
iPod is connected to this unit.
• To continue charging from the USB cable connection
during standby mode, make sure the iPhone/iPad/iPod
has started charging before turning the unit to standby
mode.
• Check the iPhone/iPad/iPod to see if the battery is fully
charged. (Once fully charged, remove the iPhone/iPad/
iPod.)
Note:
• Remove the CD only after it stops rotating.
• When connecting an iPhone/iPad/iPod, use the dedicated
USB cable (not supplied).
• Insert the USB device directly. Do not use any USB
extension cable.
• Please disconnect the USB device if you finish using.
• Before removing the USB device, select a source other
than “USB”.
Media playback controls
The following marks indicate the availability of the feature.
Preparation
• Turn the unit on.
• Insert the media or connect the Bluetooth
®
/AirPlay/
AllPlay/DLNA compatible device.
• Press [CD/USB] or [ ] to select the audio source.
– [AirPlay] [Network]: When this system is selected as the
output speakers, the audio source will change to the
network source.
Compatible iPhone/iPad/iPod
iPhone 6 Plus / iPhone 6 / iPhone 5s / iPhone 5c /
iPhone 5 / iPhone 4s / iPhone 4 / iPhone 3GS /
iPhone 3G / iPhone
iPad Air 2 / iPad Air / iPad (3rd and 4th generation) /
iPad 2 / iPad / iPad mini 3 / iPad mini 2 (iPad mini
with Retina display) / iPad mini
iPod touch (1st through 5th generation)
iPod nano (2nd through 7th generation)
Compatible USB devices
Compatible CD
CD
iPhone/iPad/iPod or USB device
OPEN/CLOSE
OPEN/CLOSE
Label facing up
5V 2.1A
• Connect only compatible iPhone/
iPad/iPod models (> left).
Failure to do so may result in
unexpected behaviour.
Charging an iPhone/iPad/iPod
[CD]
: CD audio in CD-DA format and a CD that
contains MP3 files
[iPod]
: Compatible iPhone/iPad/iPod connected to
the USB port.
[USB]
: USB devices containing MP3/AIFF/FLAC/
WAV/AAC files
[Bluetooth]:
Connected Bluetooth
®
device
[AirPlay]
: When connected to an AirPlay compatible
device
[Network]
: When connected to an AllPlay/DLNA
compatible device
SC-PMX100-100B_EGEBGN-RQT9995-B.book 12 ページ 2015年3月3日 火曜日 午前9時8分
12
RQT9988
Kompatibilni CD
• Ovaj sustav može reproducirati diskove koji su
usklađeni s formatom CD-DA.
• Ovaj sustav može reproducirati CD-R/RW sa
sadržajem u formatu CD-DA ili MP3.
• Prije reprodukcije dovršite disk na uređaju na kojem
je snimljen.
• Diskovi moraju biti usklađeni s normom ISO9660
razine 1 ili 2 (osim proširenih formata).
Napomena:
• Neki CD-R/RW mediji možda se neće moći reproducirati,
ovisno o stanju snimke.
• MP3-datoteke denirane su kao zapisi, a mape kao
albumi.
• Ovaj sustav može očitati do:
- CD-DA: 99 zapisa
- MP3: 999 zapisa i 255 albuma (uključujući glavnu mapu)
• Zapisi se neće nužno reproducirati redom kojim su
snimljeni.
Umetanje medija
CD
Oznaka prema gore
Pritisnite [CD/USB] da biste odabrali "CD".
iPhone/iPad/iPod ili USB-uređaj
Pritisnite [CD/USB] da biste odabrali "USB".
Prikaz će se automatski promijeniti na "IPOD" kad se
kompatibilni iPhone/iPad/iPod spoji na ulaz.
Informacije o medijima
• Imajte na umu da tvrtka Panasonic ne preuzima
odgovornost za gubitak podataka i/ili informacija.
Kompatibilan iPhone/iPad/iPod
iPhone 6 Plus / iPhone 6 / iPhone 5s / iPhone 5c
/ iPhone 5 / iPhone 4s / iPhone 4 / iPhone 3GS /
iPhone 3G / iPhone
iPad Air 2 / iPad Air / iPad (3. i 4. generacija) / iPad
2 / iPad / iPad mini 3 / iPad mini 2 (iPad mini s
Retina prikazom) / iPad mini
iPod touch (1. do 5. generacija)
iPod nano (2. do 7. generacija)
(Od ožujka 2015.)
Napomena:
• Nemojte povezivati modele koji nisu prethodno navedeni.
Može doći do neočekivanog ponašanja.
• Kompatibilnost ovisi o inačici softvera. Prije korištenja
s ovom jedinicom ažurirajte svoj iPhone/iPad/iPod
najnovijom inačicom softvera.
• Dodatne upute za uporabu potražite u Korisničkom
priručniku za iPhone/iPad/iPod.
Kompatibilni USB-uređaji
• Nije zajamčena mogućnost spajanja sa svim vrstama
USB-uređaja.
• Podržani su sustavi datoteka FAT12, FAT16 i FAT32.
• Jedinica podržava USB 2.0 High Speed.
• Jedinica podržava USB-uređaje do 32 GB.
• Podržani formati datoteke i ekstenzije:
MP3 (“.mp3”), AIFF (“.aiff”), FLAC (“.ac”), WAV
(“.wav”), AAC (“.m4a”)
Napomena:
• Datoteke su denirane kao zapisi, a mape kao albumi.
• Ovaj sustav može očitati do:
- 800 albuma (uključujući i glavnu mapu)
- 8000 zapisa
- 999 zapisa na jednom albumu
Punjenje iPhonea/iPada/iPoda
Dok je jedinica uključena, punjenje počinje kad se
iPhone/iPad/iPod spoji na jedinicu.
• Da biste nastavili punjenje preko veze USB-kabelom
u stanju čekanja, provjerite je li se iPhone/iPad/
iPod počeo puniti prije prebacivanja jedinice u stanje
čekanja.
• Provjerite na iPhoneu/iPadu/iPodu je li baterija do
kraja napunjena. (Nakon što se napuni do kraja,
uklonite iPhone/iPad/iPod.)
Napomena:
• Uklonite CD nakon što se prestane okretati.
• Kad spajate iPhone/iPad/iPod, upotrebljavajte namjenski
USB-kabel (nije isporučen).
• Izravno umetnite USB-uređaj. Nemojte upotrebljavati
produžni USB-kabel.
• Odspojite USB-uređaj ako ste završili s uporabom.
• Prije uklanjanja USB-uređaja odaberite izvor koji nije
"USB".
Kontrole reprodukcije medija
Sljedeće oznake označavaju dostupnost značajke.
CD audiozapis u formatu CD-DA i CD koji
sadrži datoteke u formatu MP3
Kompatibilni iPhone/iPad/iPod spojeni na
USB-ulaz.
USB-uređaji koji sadrže datoteke u formatu
MP3/AIFF/FLAC/ WAV/AAC
Spojeni Bluetooth
®
uređaj
Kod spajanja na uređaj kompatibilan s
funkcijom AirPlay
Kod spajanja na uređaj kompatibilan s
funkcijom AllPlay/DLNA
Priprema
• Uključite jedinicu.
• Umetnite medij ili spojite uređaj kompatibilan s
funkcijama Bluetooth®/AirPlay/AllPlay/DLNA.
• Pritisnite [USB/CD] ili [ ] da biste odabrali izvor
zvuka.
- : Kad se ovaj sustav odabere kao
izlazni zvučnici, izvor zvuka će se prebaciti na mrežni
izvor.
AirPlay Mreža
• Spajajte samo kompatibilne modele
iPhonea/iPada/iPoda ( lijevo).
U suprotnome može doći do
neočekivanog ponašanja.

13
RQT9988
Napomena:
• Maksimalan broj znakova koji se mogu prikazati: otprilike 32
• Ovaj sustav podržava verziju 1 i 2 ID3 oznaka.
• Tekstualni podaci koje sustav ne podržava mogu biti
drukčije prikazani.
Izbornik reprodukcije
1 : Pritisnite [PLAY MENU] (Izbornik
reprodukcije) da biste odabrali “Playmode”
(Način reprodukcije) ili “Repeat” (Ponavljanje).
: Pritisnite [PLAY MENU]
(Izbornik reprodukcije) da biste odabrali
“Repeat” (Ponavljanje) ili “Shufe” (Nasumično).
2 Pritisnite [◄,►] da biste odabrali postavku i
pritisnite [OK].
: Način reprodukcije
Isključen način
reprodukcije
Poništava postavku načina
reprodukcije.
1-Track
(1 zapis)
Reprodukcija samo odabranog zapisa.
• Prikazano je "1TR".
(Preskočite na željeni zapis.)
1-Album
(1 album)
Reprodukcija samo odabranog albuma
u formatu MP3/AIFF/ FLAC/WAV/AAC.
• Prikazano je "1ALBUM".
Nasumična
reprodukcija
Nasumična reprodukcija sadržaja.
• Prikazuje se "RND".
1-Album
Random
(1 album
nasumično)
Nasumično reproducira zapise na
odabranom albumu u formatu MP3/
AIFF/FLAC/WAV/AAC.
• Pritisnite [▲] ili [▼] za odabir albuma
u formatu MP3/AIFF/FLAC/WAV/AAC.
• Prikazuje se "1ALBUM", "RND".
: Repeat (Ponavljanje)
On Repeat
(Ponavljanje
uključeno)
Uključuje način ponavljanja.
• Prikazuje se " ".
Off Repeat
(Ponavljanje
isključeno)
Isključuje način ponavljanja.
Repeat
(Ponavljanje)
Potvrdite odabranu postavku na
spojenom uređaju.
Shufe
(Nasumično)
Potvrdite odabranu postavku na
spojenom uređaju.
Osnovne kontrole
Play
(Reprodukcija)
Pritisnite [►/II].
Stop
(Zaustavljanje)
Pritisnite [
■].
• : Položaj je memoriran i
prikazano je "RESUME" (Nastavak).
• : Pritisnite [
■] dva puta da biste
potpuno zaustavili reprodukciju.
Pause (Pauza) Pritisnite [►/II].
Pritisnite ponovno za nastavak
reprodukcije.
Skip
(Preskakanje)
Pritisnite [ ] ili [ ] da biste
preskočili zapis.
(glavna jedinica: [ ] ili [ ])
: Pritisnite [▲] ili [▼] za
preskakanje albuma u formatu MP3/
AIFF/FLAC/WAV/AAC.
Search
(Pretraživanje)
Tijekom reprodukcije ili pauze
Pritisnite i držite [ ] ili [ ].
(glavna jedinica: [ ] ili [ ])
• : Pretraživanje unatrag moguće
je samo unutar trenutačnog zapisa.
Napomena:
• Da biste se mogli koristiti daljinskim uređajem ove jedinice
s Bluetooth
®
uređajem, Bluetooth
®
uređaj mora podržavati
AVRCP (Audio Video Remote Control Prole).
Ovisno o statusu uređaja, neke kontrole možda neće raditi.
• Rezultati rada mogu se razlikovati ovisno o modelima
iPhonea/iPada/iPoda.
• : Neke kontrole možda neće raditi ovisno o
aplikaciji koja se upotrebljava ili kada se upotrebljava
DLNA značajka itd.
• :Zapisi se mogu odabrati pritiskom na brojčane
tipke.
Pregled dostupnih informacija
Više puta pritisnite [DISPLAY] (Prikaz).
npr. MP3
“A”: Broj albuma
“T”: Broj zapisa
(“ “ označava broj.)
“ “: Album “ “: Zapis
Napomena:
• Tijekom nasumične reprodukcije ne možete preskočiti na
prethodno reproduciran zapis ili pritiskati gumbe s brojevima.
• Odabir načina reprodukcije nije moguć s "Programme
playback" (Programirana reprodukcija).
• Način se poništava kad otvorite ladicu diska ili uklonite
USB-uređaj.
Reprodukcija programa
Ova funkcija omogućuje programiranje do 24 zapisa.
(CD-DA)
1 Pritisnite [PROGRAM] kada je uređaj zaustavljen.
“PGM” se prikazuje na nekoliko sekundi.
2 Pritisnite brojčane tipke da biste odabrali željeni
zapis.
Ponovite ovaj korak za dodavanje drugih zapisa u program.
3 Pritisnite [►/II] da biste pokrenuli reprodukciju.
(MP3),
1 Pritisnite [PROGRAM] kada je uređaj zaustavljen.
“PGM” se prikazuje na nekoliko sekundi.
2 Pritisnite [▲,▼] da biste odabrali željeni album.
3 Prvo pritisnite [ ], a zatim pritisnite brojčane
tipke da biste odabrali željeni zapis.
4 Pritisnite [OK] (U redu).
Za programiranje drugih zapisa ponovite korake 2 - 4.
5 Pritisnite [►/II] da biste pokrenuli reprodukciju.
Check programme
contents (Provjera
sadržaja programa)
Pritisnite [ ] ili [ ] kada je
uređaj zaustavljen.
Clear the last
track (Brisanje
posljednjeg zapisa)
Pritisnite [DEL] (Brisanje) kada
je uređaj zaustavljen.
Cancel programme
mode (Odustajanje
od programiranja)
Pritisnite [PROGRAM] kada je
uređaj zaustavljen.
• "PGM" se isključuje.
Clear all
programmed
tracks (Brisanje
svih programiranih
zapisa)
Pritisnite [
■] kada je uređaj
zaustavljen. Prikazuje se "Clear
All" (Brisanje svega). Unutar 5
sekundi, ponovno pritisnite [
■].
Napomena:
• Memorija programa poništava se kad otvorite ladicu diska
ili uklonite USB-uređaj.
/
/
/
/
USB
USB
CD USB
CD USB
CD USB
CD USB
CD USB
iPod
AirPlay Mreža
AirPlay Mreža
Mreža
CD USBiPod
Bluetooth
AirPlay Mreža
CD USB AirPlay Mreža
CD USB
CD USB
Bluetooth
AirPlay
CD
CD
USB

14
RQT9988
*2: Promjena načina podešavanja
1 Više puta pritisnite [RADIO MENU] (Izbornik
radija) da biste odabrali “TUNE MODE” (Način
podešavanja).
2 Pritisnite [◄,►] da biste odabrali “MANUAL” ili
“PRESET” i pritisnite [OK].
Emitiranje RDS-a
(Samo za područje kontinentalne Europe)
Ovaj sustav može prikazati tekstualne podatke radijskog
sustava podataka (RDS) dostupnog u nekim područjima.
Više puta pritisnite [DISPLAY] (Prikaz).
"PS": programska usluga
"PTY": vrsta programa
“Freq”: frekvencija
Napomena:
• RDS je dostupan samo kada stereo radi u prijmu.
• RDS možda neće biti dostupan ako je prijam loš.
DAB+
Priprema
Više puta pritisnite [RADIO, EXT-IN] da biste odabrali
“DAB+”.
Ako odaberete “DAB+” prvi put, sustav će pokrenuti
postupak “DAB AUTO SCAN” (Automatsko skeniranje
za DAB).
Napomena:
• Ako se ne otkriju stanice, prikazat će se “Scan Failed”
(Neuspješno skeniranje). Podesite antenu i pokušajte
ponovno.
Automatsko skeniranje za DAB
1 Pritisnite [RADIO MENU] da biste odabrali
“AUTOSCAN” (Automatsko skeniranje) i
pritisnite [OK].
Prikazuje se “Start?” (Pokrenuti?).
2 Pritisnite [OK] (U redu).
Prikazuje se “Dab Auto Scan”.
FM-radioprijamnik
Moguće je pohraniti 30 FM stanica.
Priprema
Više puta pritisnite [RADIO, EXT-IN] da biste odabrali
“FM”.
Automatsko pohranjivanje stanica
1 Da biste odabrali opciju "A.PRESET", pritisnite
[RADIO MENU].
2 Pritisnite [◄,►] da biste izabrali “LOWEST”
(najnižu) ili “CURRENT” (trenutačnu) frekvenciju.
LOWEST (Najniža):
Početak automatskog postavljanja od najniže frekvencije
(“FM 87,50 MHz”).
CURRENT (Trenutačna):
Početak automatskog postavljanja od trenutačne
frekvencije.*
1
3 Pritisnite [OK] da biste započeli s pohranjivanjem.
• Prilagodnik počinje pohranjivati sve stanice koje može
primiti u kanale, uzlaznim redoslijedom.
Da biste poništili, pritisnite [■].
*1: O promjeni frekvencije pročitajte u poglavlju "Ručno
podešavanje i pohranjivanje".
Ručno podešavanje i pohranjivanje
1 Pritisnite [ ] ili [ ] za podešavanje tražene
stanice.
• Druga je mogućnost da pritisnete [ ] ili
[ ] na glavnoj jedinici kada je “MANUAL”
(Ručno) odabrano kao način podešavanja*
2
.
Za automatsko podešavanje pritisnite i držite gumb
dok se frekvencije ne počnu brzo izmjenjivati.
2 Pritisnite [PROGRAM].
3 Pritiskom na brojčane tipke odaberite broj pod
kojim želite spremiti stanicu.
Ponovite korake od 1 do 3 da biste pohranili dodatne
stanice. Nova stanica zamjenjuje stanicu koja je bila
spremljena pod tim brojem.
Odabir prethodno pohranjene stanice
Pritisnite brojčane tipke, [ ] ili [ ] da biste
odabrali pohranjenu stanicu.
• Druga je mogućnost da pritisnete [ ] ili [ ]
na glavnoj jedinici kada je “PRESET” (Zadano) odabrano
kao način podešavanja*
2
.
Ručno podešavanje za DAB
Da biste pronašli najbolji položaj antene, upotrijebite
ručno podešavanje za pretragu odabranog bloka
frekvencija za DAB.
1 Više puta pritisnite [RADIO MENU] (Izbornik
radija) da biste odabrali “MANUAL SCAN”
(Ručno skeniranje).
2 Pritisnite [◄,►] da biste blok frekvencija za
skeniranje i pritisnite [OK].
Pohranjivanje stanica
Možete pohraniti do 20 DAB stanica.
1 Pritisnite [ ] ili [ ] da biste odabrali stanicu.
• Druga je mogućnost da pritisnete [ ] ili
[ ] na glavnoj jedinici kada je “Station” (Stanica)
odabrano kao način podešavanja*
1
.
2 Pritisnite [PROGRAM].
3 Pritiskom na brojčane tipke odaberite broj pod
kojim želite spremiti stanicu.
Ponovite korake od 1 do 3 da biste pohranili dodatne
stanice.
Napomena:
• Stanica koje je prethodno spremljena briše se kad se na
isti broj spremanja pohranjuje druga stanica.
• Ne možete postaviti stanicu kad stanica ne emitira ili kad
ste odabrali sekundarnu uslugu.
• Memorija prethodne stanice briše se tijekom automatskog
skeniranja.
Odabir prethodno pohranjene stanice
Pritisnite brojčane tipke, [ ] ili [ ] da biste
odabrali pohranjenu stanicu.
• Druga je mogućnost da pritisnete [ ] ili [ ]
na glavnoj jedinici kada je “PRESET” (Zadano) odabrano
kao način podešavanja*
1
.
*1: Promjena načina podešavanja
1 Više puta pritisnite [RADIO MENU] (Izbornik radija)
da biste odabrali “Tune Mode” (Način podešavanja).
2 Pritisnite [◄,►] da biste odabrali “Station” ili “Preset”
i pritisnite [OK].
/
/
/
/
PMX100B
/
/
/
/

15
RQT9995
You can view information about the DAB broadcast,
programme type, ensemble label, frequency and time.
Press [DISPLAY] to view available information.
1 Press [RADIO MENU] repeatedly to select an
option.
2 Press [2, 1] to select the desired setting and
then press [OK].
When adjusting the antenna, you can check the
reception quality.
1 Press [RADIO MENU] repeatedly to select “Signal
Quality”.
2 Press [2, 1] to select frequency.
The current frequency block is displayed and then
the reception quality is indicated.
Using the auxiliary input
You can connect a VCR, DVD player etc. and listen to
the audio through this system.
Preparation
Connect the external equipment.
1 Press [RADIO, EXT-IN] repeatedly to select
“AUX”.
2 Play the external equipment.
Using the PC input
You can play back music on the PC with this system’s
speakers by connecting a PC to the PC IN terminal on
the main unit.
About supported format, refer to “Specifications” (@ 21).
(as of March 2015)
1 Disconnect the AC mains lead.
2 Connect the main unit and a PC.
3 Connect the AC mains lead to the main unit and
turn this system on.
4 Press [RADIO, EXT-IN] repeatedly to select “PC”.
5 Operate the PC for playback.
Note:
• When you play back high-resolution audio, it is
recommended that you use a compatible USB 2.0 High
Speed Cable.
Viewing available information
DAB settings
DAB Secondary
Primary To listen to primary service.
Secondary To listen to secondary services.
“ ” is shown.
Auto Clock Adj
On Adjust Start auto clock adjustment.
Off Adjust Cancel auto clock adjustment.
DAB signal quality
Reception quality
0 (poor) to 8 (excellent)
Before connecting to a PC
Follow the steps below.
• Refer to the following for the recommended OS
versions for your PC:
– Windows Vista, Windows 7, Windows 8,
Windows 8.1
– OS X 10.7, 10.8, 10.9, 10.10
1 Download and install the dedicated driver to the
PC. (Only for Windows OS)
Download and install the driver from the website
below.
http://panasonic.jp/support/global/cs/audio/
(This site is in English only.)
2 Download and install the dedicated app
“Panasonic Audio Player” (free of charge) on
your PC. (For Windows OS and OS X)
Download and install the app from the website
below.
http://panasonic.jp/support/global/cs/audio/
(This site is in English only.)
Listening to audio from a PC
USB
USB 2.0 cable
(not supplied)
Main unit (rear)
Type A
Type B
PC
SC-PMX100-100B_EGEBGN-RQT9995-B.book 15 ページ 2015年3月3日 火曜日 午前9時8分
15
RQT9988
Pregled dostupnih informacija
Možete pregledati informacije o DAB emitiranju, vrsti
programa, oznaci ansambla, frekvenciji i vremenu.
Pritisnite [DISPLAY] (Prikaz) da biste prikazali
dostupne informacije.
Postavke DAB-a
1 Više puta pritisnite [RADIO MENU] (Izbornik
radija) da biste odabrali mogućnost.
2 Pritisnite [◄,►] da biste odabrali željenu
postavku i pritisnite [OK].
DAB Secondary (DAB sekundarno)
Primary
(Primarno)
Za slušanje primarne usluge.
Sekundarno Za slušanje sekundarnih usluga.
Prikazuje se " ".
Auto Clock Adj (Automatsko podešavanje sata)
On Adjust
(Podešavanje
uključeno)
Pokreće automatsko podešavanje
sata.
Off Adjust
(Podešavanje
isključeno)
Poništava automatsko podešavanje
sata.
Kvaliteta signala DAB-a
Dok podešavate antenu možete provjeriti kvalitetu prijma.
1 Više puta pritisnite [RADIO MENU] (Izbornik
radija) da biste odabrali “Signal Quality”
(Kvaliteta signala).
2 Pritisnite [◄,►] da biste izabrali frekvenciju.
Prikazuje se trenutačni blok frekvencija i zatim se
označava kvaliteta prijma.
Kvaliteta prijma
0 (loša) do 8 (izvrsna)
Korištenje pomoćnog ulaza
Na uređaj možete spojiti videosnimač, DVD-čitač i slične
uređaje te preko njih slušati audiozapise.
Priprema
Spojite vanjsku opremu.
1 Više puta pritisnite [RADIO, EXT-IN] da biste
odabrali “AUX”.
2 Reproducirajte sadržaj s vanjske opreme.
Korištenje računalnog ulaza
Možete reproducirati glazbu na računalu sa zvučnicima
ovog sustava povezivanjem računala na ulazni terminal
računala na glavnoj jedinici.
Za podržane formate pogledajte “Tehnički podaci” ( 21).
Prije povezivanja s računalom
Slijedite korake u nastavku.
• U nastavku pronađite preporučene verzije OS-a za
svoje računalo:
- Windows Vista, Windows 7, Windows 8, Windows 8.1
- OS X 10.7, 10.8, 10.9, 10.10
➀
Preuzmite i instalirajte namjenski upravljački
program na računalo. (Samo za Windows OS)
Preuzmite i instalirajte upravljački program s web-
mjesta u nastavku.
http://panasonic.jp/support/global/cs/audio/
(Ovo je web-mjesto dostupno samo na engleskom
jeziku.)
➁
Preuzmite i instalirajte namjensku aplikaciju
“Panasonic Audio Player” (besplatno) na svoje
računalo. (Za Windows OS i OS X)
Preuzmite i instalirajte aplikaciju s web-mjesta u
nastavku.
http://panasonic.jp/support/global/cs/audio/
(Ovo je web-mjesto dostupno samo na engleskom
jeziku.)
(Od ožujka 2015.)
Slušanje zvuka s računala
1 Odspojite kabel za napajanje izmjeničnom strujom.
2 Spojite glavnu jedinicu s računalom.
3 Spojite kabel za napajanje izmjeničnom strujom
na glavnu jedinicu i uključite ovaj sustav.
4 Više puta pritisnite [RADIO, EXT-IN] da biste
odabrali “PC” (Računalo).
5 Radite s računalom za reprodukciju.
Napomena:
• Kada reproducirate zvuk u visokoj razlučivosti, preporučuje
se da upotrebljavate kompatibilni USB 2.0 kabel visoke
brzine.
Glavna jedinica
(straga)
Računalo
Vrsta B Vrsta A
USB 2.0 kabel
(nije isporučen)

16
RQT9988
Provjera postavki
Pritisnite [CLOCK/TIMER] više puta da biste odabrali
"Timer Adjust" (Podešavanje mjerača vremena).
(U stanju čekanja pritisnite [CLOCK/TIMER] dvaput.)
Napomena:
• Mjerač vremena započinje pri maloj glasnoći te se
postepeno pojačava do zadane razine.
• Ako je uključen, mjerač vremena se oglašava u
postavljeno vrijeme svaki dan.
• Ako isključite uređaj i ponovno ga uključite dok je mjerač
vremena postavljen, mjerač vremena neće se zaustaviti u
završno vrijeme.
*1: Kao glazbeni izvor moguće je postaviti “CD”, “USB”,
“DAB+” ( ) i “FM”.
• Odaberite "USB" za mjerač vremena izvora glazbe
kroz ulaz za iPhone/iPad/ iPod i USB-uređaje.
Ostalo
Funkcija automatskog isključivanja
Ova će se jedinica prema zadanim postavkama
automatski prebaciti u stanje čekanja ako nema zvuka i
ako se ne koristi otprilike 20 minuta.
Poništavanje ove funkcije
1 Pritisnite [SETUP] više puta da biste odabrali
“AUTO OFF” (Automatsko isključivanje).
2 Pritisnite [◄,►] da biste odabrali "OFF" (Isklj.) i
pritisnite [OK].
Napomena:
• Da biste uključili funkciju, u 2. koraku odaberite “On” (Uklj.).
• Ta se postavka ne može odabrati kada je izvor radio.
• Kada je spojen Bluetooth
®
uređaj, ova funkcija ne radi.
• Ako je funkcija "Net Standby" (Stanje čekanja mreže)
postavljena na "On", ova funkcija će također biti
postavljena na "On". Da biste promijenili postavku, stavite
"Net Standby" na "Off". ( 17)
Zvučni efekti
Promjena kvalitete zvuka
1 Više puta pritisnite [SOUND] (Zvuk) da biste
odabrali zvučni efekt.
2 Pritisnite [◄,►] da biste odabrali željenu postavku.
BASS
-4 do +4
TREBLE
SURROUND "On Surround" (Uklj.) ili "Off Surround"
(Isklj.)
Samo na glavnoj jedinici
Okrenite [BASS] ili [TREBLE] da biste podesili razinu.
Prethodno postavljen ekvilizator
Za odabir postavke više puta pritisnite [PRESET EQ].
Heavy (Jako) Dodaje žestinu rock glazbi
Soft (Nježno) Za pozadinsku glazbu
Clear (Jasno) Pročišćava više frekvencije
Vocal (Glas) Dodaje jasnoću glasu
Flat (Ravnomjerno) Poništava zvučni efekt
D.BASS
Ova vam funkcija omogućuje da uživate u moćnom
efektu basa.
Pritisnite [D.BASS] da biste odabrali “ON D.BASS”
(Uklj.) ili “OFF D.BASS” (Isklj.).
Sat i brojači
Postavljanje sata
Sat ovog uređaja koristi se 24-satnim sustavom.
1 Pritisnite [CLOCK/TIMER] (Sat/brojač) da biste
odabrali “CLOCK” (Sat).
2 Pritisnite [▲,▼] da biste postavili vrijeme i zatim
pritisnite [OK].
Provjera vremena
Pritisnite [CLOCK/TIMER] (Sat/brojač).
Napomena:
• Redovito podešavajte postavke sata kako bi točno radio.
Mjerač vremena isključivanja
Mjeračem vremena isključivanja može se isključiti sustav
nakon zadanog vremena.
Pritisnite [SLEEP] (Auto. isklj.) više puta da biste
odabrali postavku (u minutama).
“30 min” → “60 min” → “90 min” → “120 min”
“OFF” (Poništi)
Za prikaz preostalog vremena
Pritisnite [SLEEP].
Napomena:
• Mjerač vremena isključivanja i mjerač vremena
reprodukcije mogu se upotrebljavati istodobno.
• Mjerač vremena isključivanja uvijek ima prednost. Pazite
da se postavke mjerača ne preklapaju.
Mjerač vremena reprodukcije
Mjerač vremena reprodukcije možete postaviti tako da se
uključi u određeno vrijeme da bi vas probudio.
Priprema
Postavite sat.
1 Pritisnite [CLOCK/TIMER] više puta da biste
odabrali "Timer Adjust" (Podešavanje mjerača
vremena).
2 Pritisnite [▲, ▼] da biste postavili početno
vrijeme (“On Time” (Vrijeme uključivanja)) i zatim
pritisnite [OK].
3 Pritisnite [▲, ▼] da biste postavili završno
vrijeme (“Off Time” (Vrijeme isključivanja)) i
zatim pritisnite [OK].
4 Pritisnite [▲, ▼] da biste odabrali izvor glazbe*
1
i
zatim pritisnite [OK].
Uključivanje mjerača vremena
1 Pripremite odabrani izvor glazbe i postavite
željenu glasnoću.
2 Pritisnite [🕘, PLAY].
Prikazuje se “🕘”.
Da biste poništili funkciju, ponovno pritisnite [🕘, PLAY].
Sustav mora biti isključen da bi radila funkcija
automatske reprodukcije.
PMX100B

17
RQT9988
Ažuriranje softvera
Tvrtka Panasonic ponekad može izdati nadogradnju za
programsku opremu ovog uređaja koju možete instalirati
radi poboljšanja funkcija. Ta su ažuriranja besplatna.
Možete ažurirati softver sa skočnog prozora koji vas
to traži na zaslonu unutar aplikacije “Panasonic Music
Streaming” (inačica 2.0.8 ili novija) ( 8). Detalje o
aplikaciji potražite na sljedećoj stranici.
http://panasonic.jp/support/global/cs/audio/app/
(Ovo je web-mjesto dostupno samo na engleskom jeziku.)
NEMOJTE ODSPAJATI kabel za napajanje
izmjeničnom strujom dok se prikazuje jedna od
sljedećih poruka.
- “Linking” (Povezivanje), “Updating” (Ažuriranje) ili “%”
(“ ” označava broj.)
• Tijekom postupka ažuriranja ne mogu se izvoditi
nikakve druge radnje.
Priprema
• Uključite ovaj sustav.
• Spojite sustav na kućnu mrežu. (6)
- Provjerite je li mreža spojena na internet.
1 Više puta pritisnite [RADIO, EXT-IN] da biste
odabrali “Network” (Mreža).
2 Pritisnite [SETUP] (Postavljanje) više puta da
biste odabrali "SW Update" (Ažuriranje softvera)
i pritisnite [OK].
3 Pritisnite [◄,►] da biste odabrali "OK? Yes" (U redu?
Da) i pritisnite [OK] da biste pokrenuli ažuriranje.
• Odaberite " OK? No" (U redu? Ne) da biste poništili
ažuriranje.
Nakon što ažuriranje završi, prikazuje se "Success"
(Uspješno).
4 Odspojite kabel za napajanje izmjeničnom
strujom i ponovno ga spojite nakon 3 minute.
• Ako nema dostupnih ažuriranja, prikazat će se "No
Need".
• Preuzimanje traje nekoliko minuta. Može potrajati
dulje ili možda neće pravilno raditi, ovisno o mreži.
Provjera inačice softvera
Pritisnite [SETUP] više puta da biste odabrali "SW
Version" (Inačica softvera) i pritisnite [OK].
Prikazuje se inačica instaliranog softvera.
• Pritisnite [OK] da biste izašli.
Stanje čekanja mreže
Sustav se može automatski uključiti iz stanja čekanja kada
je odabran ovaj sustav kao izlazni zvučnici mrežnog uređaja.
Kao tvornička zadana postavka, stanja čekanja mreže je
isključeno prije nego što spojite ovaj sustav na kućnu mrežu.
Kada ga spojite na kućnu mrežu prvi put, ova će se
funkcija automatski prebaciti na uključeno. Također
možete uključiti stanje čekanja mreže sljedećim koracima:
1 Pritisnite [SETUP] više puta da biste odabrali
"Net Standby" (Stanje čekanja mreže) i zatim
pritisnite [OK].
2 Pritisnite [◄,►] da biste odabrali "On"
(Uključeno) i pritisnite [OK].
• Kada je “Net Standby” (Stanje čekanja mreže) postavljeno
na “On” (Uključeno)
- Mreža (žični LAN/Wi-Fi) aktivirat će se čak i u stanju čekanja.
- Potrošnja će se energije povećati u stanju čekanja.
Da biste smanjili potrošnju energije u stanju čekanja,
isključite stanje čekanja mreže.
Isključivanje stanja čekanja mreže
Odaberite "Off" (Isklj.) u 2. koraku.
• Nakon prebacivanja "Net Standby" na "Off"
- Mreža (žični LAN/Wi-Fi) onemogućit će se u stanju
čekanja ako se sustav prebaci u stanje čekanja na izvoru
koji nije "Network" (Mreža).
Mreža (žični LAN/Wi-Fi) omogućit će se kad se sustav uključi.
- Stanje čekanja mreže bit će aktivno ako se sustav
prebaci na stanje čekanja u načinu odabirača za
"Network" (Mreža) i ovaj se sustav spoji na mrežu.
- Da bi stanje čekanja mreže ostalo isključeno, odaberite izvor
osim "Mreže" prije prebacivanja jedinice u stanje čekanja.
• Ova će funkcija vratiti na zadanu postavku ako ste izveli
radnju za ponovno postavljanje mreže. ( 18)
• Kad se sustav uključi preko ove značajke, početni dio
glazbe možda se neće reproducirati.
• Ovisno o aplikaciji, uvjeti za aktiviranje ove funkcije mogu
se razlikovati.
• Sustav se možda neće uključiti čak ni kad ga odaberete
kao izlazne zvučnike. U tom slučaju pokrenite reprodukciju.
Postavka bežičnog LAN-povezivanja
Bežičnu LAN-funkciju moguće je uključiti ili isključiti.
1 Više puta pritisnite [RADIO, EXT-IN] da biste
odabrali “Network” (Mreža).
2 Pritisnite [SETUP] više puta da biste odabrali
"Wireless LAN" (Bežični LAN) i zatim pritisnite [OK].
3 Pritisnite [◄,►] da biste odabrali “On” ili “Off” i
pritisnite [OK].
• Tvornička postavka je "On".
Jačina Wi-Fi signala
Provjera jačine Wi-Fi signala na mjestu gdje je smješten
sustav.
Priprema
Spojite ovaj sustav na bežičnu mrežu. ( 6)
1 Više puta pritisnite [RADIO, EXT-IN] da biste
odabrali “Network” (Mreža).
2 Pritisnite [SETUP] više puta da biste odabrali "Signal
Level" (Razina signala) i zatim pritisnite [OK].
Na zaslonu se prikazuje “Level ” (Razina).
(“ “ označava broj.)
• Pritisnite [OK] za izlazak iz načina prikaza.
• Preporučena je jačina signala razine "3". Promijenite
položaj ili kut bežičnog usmjerivača ili sustava ako se
prikazuje "2" ili "1" te provjerite hoće li se veza poboljšati.
• Ako se prikazuje "Level 0", znači da sustav ne može
uspostaviti vezu s bežičnim usmjerivačem. ( 20)
Naziv bežične mreže (SSID)
Prikaz naziva spojene bežične mreže (SSID).
1 Više puta pritisnite [RADIO, EXT-IN] da biste
odabrali “Network” (Mreža).
2 Pritisnite [SETUP] više puta da biste odabrali "Net
Info" (Informacije o mreži) i zatim pritisnite [OK].
3 Pritisnite [▲,▼] da biste odabrali “SSID” i
pritisnite [OK].
• Pritisnite [OK] da biste izašli.
• Ako se prikazuje "No Connect" (Nema veze), sustav nije
spojen na bežičnu mrežu.
• Znakovi koji se ne mogu prikazati mijenjaju se s “”.

18
RQT9988
Rješavanje problema
Prije pozivanja servisa obavite sljedeće provjere. Ako
niste sigurni u neka od ovdje navedenih rješenja ili ona ne
pomažu u uklanjanju problema, obratite se prodavaču.
Imate li instaliran najnoviji softver?
Tvrtka Panasonic neprestano poboljšava softver
sustava da bi svojim korisnicima omogućila korištenje
najnovijom tehnologijom. ( 17)
Za daljnju namjensku pomoć, podršku i savjete o
svom proizvodu posjetite:
http://panasonic.jp/support/global/cs/audio/
(Ovo je web-mjesto dostupno samo na engleskom jeziku.)
Uobičajeni problemi
Nije moguće izvoditi radnje daljinskim upravljačem.
• Provjerite jesu li baterije ispravno umetnute.
Zvuk je izobličen ili ga uopće nema.
• Podesite glasnoću sustava.
• Isključite sustav, odredite i popravite uzrok te ponovno
uključite sustav. Uzrok može biti preopterećenje
zvučnika zbog previsoke glasnoće ili snage te uporaba
sustava u uvjetima visoke vanjske temperature.
• Provjerite jesu li kabeli zvučnika ispravno i sigurno
spojeni. ( 4)
Tijekom reprodukcije može se čuti brujanje.
• Kabeli se nalaze preblizu kabela za napajanje
izmjeničnom strujom ili uorescentnog svjetla. Odmaknite
druge uređaje i žice od kabela ovog sustava.
Jedinica ne radi.
• Možda je aktivirana jedna od sigurnosnih zaštita jedinice.
Jedinicu vratite na početne postavke na sljedeći način:
1 Pritisnite [ /I] na jedinici da biste jedinicu prebacili u
stanje čekanja.
• Ako se jedinica ne prebaci u stanje čekanja, pritisnite
[ /I] na jedinici na 10 sekundi. Jedinica se prisilno
prebacuje u stanje čekanja. Alternativno, odspojite
kabel za napajanje izmjeničnom strujom, pričekajte
barem 3 minute i ponovno je uključite.
2 Pritisnite [ /I] na jedinici da biste je uključili. Ako se i
dalje ne može upravljati jedinicom, posavjetujte se s
dobavljačem.
Čuje se zvuk.
• U načinu “AUX” , kad je uređaj spojen na ulazni
AUX-priključak i na USB-priključak, može nastati zvuk
ovisno o uređaju. U tom slučaju uklonite USB-kabel iz
USB-priključka.
IP/MAC-adresa
Provjera IP-adrese sustava ili Wi-Fi MAC-adrese.
1 Više puta pritisnite [RADIO, EXT-IN] da biste
odabrali “Network” (Mreža).
2 Pritisnite [SETUP] više puta da biste odabrali
"Net Info" (Informacije o mreži) i zatim pritisnite
[OK].
3 Pritisnite [▲,▼] da biste odabrali "IP Addr."
(IP-adresa) ili "MAC Addr." (MAC-adresa) i zatim
pritisnite [OK].
IP-adresa ili MAC-adresa prikazane su djelomično.
4 Pritisnite [◄,►] na daljinskom upravljaču za
prikaz ostatka IP-adrese ili MAC-adrese.
• Pritisnite [OK] da biste izašli.
• Znak " - " prikazan na vrhu ili dnu lijeve strane zaslona
označava prvu, odnosno zadnju znamenku.
Ponovno postavljanje mreže
Ponovno postavljanje mrežnih postavki.
1 Više puta pritisnite [RADIO, EXT-IN] da biste
odabrali “Network” (Mreža).
2 Pritisnite [SETUP] više puta da biste odabrali
“Net Reset” (Ponovno postavljanje mreže) i zatim
pritisnite [OK].
3 Pritisnite [◄,►] da biste odabrali "OK? Yes" (U
redu? Da) i pritisnite [OK].
• Na zaslonu se prikazuje “Network Initializing”
(Pokretanje mreže). Kad se prikaz vrati na "Network",
mrežne postavke ponovno se postavljaju.
• Ova funkcija ne utječe na postavku “Wireless LAN”
(Bežični LAN).
Disk
Prikaz nije ispravan.
Reprodukcija ne započinje.
• Niste ispravno umetnuli disk. Ispravno ga umetnite.
• Disk je zaprljan. Očistite disk.
• Zamijenite disk ako je ogreban, savijen ili
nestandardnog oblika.
• Primjetna je kondenzacija. Pustite da se sustav suši
sat ili dva.
Radio
Prijam je loš ili se čuje zvuk nalik lupanju.
• Odmaknite antenu od računala, TV-prijamnika, drugih
kabela i žica.
• Upotrebljavajte vanjsku antenu.
• Isključite TV-prijamnik ili ga odmaknite od sustava.
Ako je zvuk prejak tijekom FM-prijma.
• Promijenite izlaz zvuka u monotički.
1 Više puta pritisnite [RADIO MENU] (Izbornik radija) da
biste odabrali “FM MODE” (FM-način rada).
2 Pritisnite [◄,►] da biste odabrali “MONO” i pritisnite
[OK]. Zvuk se pretvara u monotički.
• Da biste poništili, odaberite “STEREO” ili promijenite
frekvenciju.
U uobičajenim okolnostima odaberite “STEREO”.
iPhone/iPad/iPod
Nije moguće puniti ni raditi s uređajem.
• Provjerite je li iPhone/iPad/iPod ispravno spojen.
• Ponovno spojite iPhone/iPad/iPod ili pokušajte
ponovno pokrenuti iPhone/iPad/iPod.
• Punjenje neće početi preko veze s USB-kabelom u
stanju čekanja.
Uključite jedinicu i provjerite je li punjenje počelo, a
zatim prebacite jedinicu u stanje čekanja.
• Baterija iPhonea/iPada/iPoda je ispražnjena. Napunite
iPhone/iPad/iPod i nakon toga ponovo pokušajte raditi
s njime.
- Kada upotrebljavate ulaz, uključite jedinicu. Nemojte
isključiti ovu jedinicu dok iPhone/iPad/iPod ne počne
raditi.

19
RQT9988
Računalo
Računalo ne prepoznaje ovaj sustav.
• Provjerite radno okruženje. ( 15)
• Ponovno pokrenite računalo, isključite pa uključite ovaj
sustav i zatim ponovno spojite USB-kabel.
• Upotrijebite drugi USB-ulaz spojenog računala.
• Instalirajte namjenske upravljačke programe ako se
koristite s računalom s Windowsima.
Nije moguće pronaći glazbene datoteke pohranjene
na računalu.
• Kad reproducirate glazbene datoteke preko mreže,
one koje nisu registrirane na svom mrežnom
poslužitelju nisu prikazane. Detalje potražite u
uputama za uporabu svog poslužitelja. ( 21)
Mreža
Spajanje na mrežu nije moguće.
• Potvrdite mrežne postavke i povezivanje. ( 6)
• Ako je mreža postavljena da bude nevidljiva, učinite
mrežu vidljivom dok postavljate mrežu za ovu jedinicu
ili napravite žičnu LAN vezu. ( 8)
• Sigurnosni sustav Wi-Fi-ja ovog sustav podržava
isključivo WPA2™. Vaš bežični usmjerivač stoga mora
biti kompatibilan s WPA2™. Za detalje o sigurnosti
koju podržava vaš usmjerivač i načinu promjene
postavki pogledajte upute za upotrebu ili se obratite
svom davatelju internetskih usluga.
• Provjerite je li na bežičnom usmjerivaču omogućena
funkcija isporuke podataka većem broju korisnika
(multicast).
• Ovisno o usmjerivačima, WPS gumb možda neće
raditi. Isprobajte ostale metode. ( 6)
• Provjerite postavku "Wireless LAN" (Bežični LAN).
( 17)
Nije moguće odabrati ovaj sustav kao izlazne
zvučnike.
• Pobrinite se da su uređaji spojeni na istu mrežu kao i
ovaj sustav.
• Ponovno spojite uređaje na mrežu.
• Isključite pa opet uključite bežični usmjerivač.
• Isključite pa uključite ovaj sustav, a zatim ponovno
odaberite ovaj sustav kao izlazne zvučnike.
USB
USB-uređaj ili njegov sadržaj ne mogu se očitati.
• Format USB-uređaja ili njegova sadržaja nije
kompatibilan s ovim sustavom.
USB-uređaj je spor.
• Velike datoteke ili USB-uređaji s mnogo memorije
duže se očitavaju.
Prikazano proteklo vrijeme razlikuje se od stvarnog
vremena reproduciranja.
• Kopirajte podatke na drugi USB-uređaj ili napravite
sigurnosnu kopiju podataka i formatirajte USB-uređaj.
Bluetooth
®
Uparivanje nije moguće.
• Provjerite stanje Bluetooth
®
uređaja.
Uređaj se ne može spojiti.
• Uparivanje uređaja nije bilo uspješno ili je memorirani
uređaj zamijenjen. Ponovno pokušajte upariti uređaj.
• Ovaj je sustav možda spojen na neki drugi uređaj.
Odspojite drugi uređaj i ponovno pokušajte upariti
uređaj.
• Ako se problem nastavi, isključite pa uključite jedinicu i
pokušajte ponovno.
Uređaj je spojen, ali zvuk se ne čuje.
• Na nekim ugrađenim Bluetooth
®
uređajima morate
ručno postaviti audioizlaz na "SC-PMX100". Detalje
potražite u uputama za uporabu uređaja.
Zvuk se prekida.
• Uređaj se nalazi izvan komunikacijskog dometa od 10
m. Stavite Bluetooth
®
uređaj bliže sustavu.
• Uklonite sve prepreke između ovog sustava i drugog
uređaja.
• Ostali uređaji koji upotrebljavaju frekvencijsko
područje od 2,4 GHz (bežični usmjerivač, mikrovalne
pećnice, bežični telefoni itd.) uzrokuju smetnje. Stavite
Bluetooth
®
uređaj bliže sustavu i udaljite ga od ostalih
uređaja.
• Odaberite “MODE 1” za stabilnu komunikaciju. ( 11)
Povezivanje jednim dodirom (NFC-značajka) ne radi.
• Provjerite jesu li jedinica i NFC-značajka uređaja
uključene. ( 11)
Reprodukcija ne započinje.
Zvuk se prekida.
• Isprobajte povezivanje LAN-kabelom. ( 8).
• Ako se koristite s područjem od 2,4 GHz na bežičnom
usmjerivaču, istovremena uporaba s drugim uređajima
od 2,4 GHz, poput mikrovalnih pećnica, bežičnih
telefona itd., može uzrokovati prekide u mreži.
Povećajte udaljenost između ove jedinice i drugih
uređaja.
- Ako vaš bežični usmjerivač podržava područje od 5 Ghz,
pokušajte s njegovim korištenjem.
Da biste prebacili postavku na područje od 5 GHz,
ponovno postavite mreže postavke s internetskim
preglednikom ( 6). Na 8. koraku obavezno odaberite
naziv mreže (SSID) za područje od 5 GHz.
• Ne postavljajte ovaj sustav u metalni ormarić jer bi
mogao blokirati Wi-Fi signal.
• Približite sustav bežičnom usmjerivaču.
• Ako je uz sustav na istu mrežu spojeno nekoliko
drugih uređaja, pokušajte isključiti druge uređaje ili
smanjiti njihovo korištenje bežične mreže.
• Ako se reprodukcija zaustavi, provjerite status
reprodukcije na uređaju.
• Ponovno spojite uređaje na mrežu.
• Isključite pa opet uključite bežični usmjerivač.
• Za neke inačice iOS-a i iTunesa možda neće biti
moguće ponovno pokrenuti reprodukciju AirPlay
ako je promijenjen odabirač (npr. "CD") ili je sustav
isključen tijekom reprodukcije u funkciji AirPlay. U
tom slučaju odaberite drugi uređaj pritiskom na ikonu
funkcije AirPlay u glazbenoj aplikaciji ili iTunesu i zatim
ponovno odaberite ovaj sustav kao zvučnik. ( 10)

20
RQT9988
"Linking" (Povezivanje)
• Ovaj će se sustav pokušati spojiti na posljednji povezani
Bluetooth
®
uređaj kad se odabere “BLUETOOTH”.
• Sustav komunicira s bežičnim usmjerivačem da bi se
dovršilo postavljanje mreže.
Postupak može potrajati nekoliko minuta ovisno o
bežičnom usmjerivaču. Približite sustav bežičnom
usmjerivaču.
“Network Initializing” (Pokretanje mreže)
“Setup in Progress, Try Again” (Postavljanje u tijeku,
pokušajte ponovno)
• Sustav izvodi unutrašnji postupak.
- Pričekajte otprilike 3 minute.
- Nemojte odvojiti kabel za napajanje izmjeničnom
strujom. U suprotnom može doći do kvara.
"No Connect" (Nije spojeno)
• Sustav se ne može spojiti na mrežu. Provjerite mrežnu
povezanost. ( 6)
"No Device"
• iPhone/iPad/iPod ili USB-uređaj nisu spojeni.
Provjerite povezanost.
• Baterija iPhonea/iPada/iPoda je ispražnjena. Napunite
iPhone/iPad/iPod i uključite ga prije spajanja.
"No Disc"
• Niste umetnuli disk ili ste umetnuli disk koji sustav ne
može reproducirati.
“No Memory” (Nema memorije) ( )
• Nema zadanih DAB stanica koje se mogu odabrati.
Postavite neke kanale.
"No Play" (Nema reprodukcije)
• Provjerite sadržaj. Reproducirati se mogu samo
podržani formati.
• Datoteke na USB-uređaju možda su oštećene.
Formatirajte USB-uređaj i pokušajte ponovno.
• Možda je problem u jedinici. Isključite pa ponovno
uključite jedinicu.
“No Signal” (Nema signala) ( )
• Ova se stanica ne može primiti. Provjerite svoju antenu.
“Device No Response” (Uređaj ne odgovara)
“Hub Not Supported” (Čvorište nije podržano)
"Not Supported"
• Spojili ste iPhone/iPad/iPod koji se ne može
reproducirati.
• Ako je iPhone/iPad/iPod kompatibilan, uključite ga i
ispravno ga spojite.
• Spojili ste nepodržani USB-uređaj.
Zasloni glavne jedinice
"--:--"
• Spojili ste kabel za napajanje izmjeničnom strujom
prvi put ili je nedavno došlo do prekida napajanja.
Postavite sat.
"Adjust Clock" (Podesi sat)
• Sat nije postavljen. Podesite sat.
"Adjust Timer" (Podesi mjerač vremena)
• Mjerač vremena reprodukcije nije postavljen. Podesite
mjerač vremena reprodukcije.
"Auto Off" (Automatsko isključivanje)
• Jedinica se ne upotrebljava otprilike 20 minuta i u roku
od jedne minute će se ugasiti. Pritisnite bilo koji gumb
za poništavanje.
"Checking Connection" (Provjera veze)
• Jedinica provjerava spojeni iPhone/iPad/iPod ili USB-
uređaj.
• Ako se poruka i dalje pojavljuje, provjerite je li baterija
iPhonea/iPada/iPoda ispražnjena i je li iPhone/iPad/
iPod uključen i pravilno spojen.
“DLError”
• Preuzimanje softvera nije uspjelo. Pritisnite bilo koji
gumb za izlaz. Pokušajte ponovno kasnije.
• Poslužitelj nije pronađen. Pritisnite bilo koji gumb
za izlaz. Provjerite je li bežična mreža spojena na
internet.
"Error" (Pogreška)
• Izveli ste nepravilan postupak. Pročitajte upute i
pokušajte ponovno.
“F” / “F” (“ “ označava broj.)
• Postoji problem s jedinicom.
Zabilježite prikazani broj, odspojite kabel za napajanje
izmjeničnom strujom i posavjetujte se s dobavljačem.
"Fail" (Neuspješno)
• Pogreška ažuriranja ili postavljanja. Pročitajte upute i
pokušajte ponovno.
"Level 0" (Razina 0)
• Ne postoji veza između sustava i bežičnog
usmjerivača.
Pokušajte izvesti sljedeće radnje:
- Provjerite je li bežični usmjerivač uključen.
- Isključite sustav i ponovno ga uključite.
- Ponovno postavite postavke bežične mreže. ( 6)
Ako se problem ne riješi, obratite se prodavaču.
“PC Unlocked” (Računalo otključano)
• "PC" (Računalo) je odabrano, ali računalo nije spojeno.
"PGM Full"
• Broj programiranih zapisa prekoračio je 24.
“Playerror” (Pogreška reprodukcije)
• Reproducirali ste datoteku koja nije podržana. Sustav
će preskočiti taj zapis i reproducirati sljedeći.
"Reading" (Čitanje)
• Jedinica provjerava informacije na CD-u. Nakon što
ova poruka nestane, počnite s radom.
“Remote ” (Daljinski) (“ “ označava broj.)
• Daljinski upravljač i ova jedinica upotrebljavaju različite
kodove. Promijenite kod na daljinskom upravljaču.
- Kada je prikazana poruka “Remote 1”, pritisnite i držite
[OK] i [1] najmanje 4 sekunde.
- Kada je prikazana poruka “Remote 2”, pritisnite i držite
[OK] i [2] najmanje 4 sekunde.
“Scan Failed” (Neuspješno skeniranje) ( )
• Stanice se ne mogu primiti. Provjerite svoju antenu i
pokušajte ručno podešavanje DAB-a.
“USB Over Current Error” (USB troši previše energije)
• iPhone/iPad/iPod ili USB-uređaj troši previše energije.
Uklonite iPhone/iPad/iPod ili USB-uređaj. Isključite pa
ponovno uključite sustav.
“VBR”
• Sustav ne može prikazati preostalo vrijeme
reprodukcije za zapise s promjenjivom brzinom
prijenosa (VBR).
“Wait” (Pričekajte)
• Prikazuje se, na primjer, kad se jedinica isključuje.
• Ovo treperi kad sustav pokušava ući u način mrežnih
postavki.
“ ” treperi
• Ovo se može dogoditi npr. kad se prekine mrežna
veza.
PMX100B
PMX100B
PMX100B
Page is loading ...
Page is loading ...
Page is loading ...
Page is loading ...
-
 1
1
-
 2
2
-
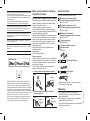 3
3
-
 4
4
-
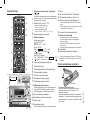 5
5
-
 6
6
-
 7
7
-
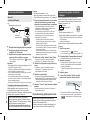 8
8
-
 9
9
-
 10
10
-
 11
11
-
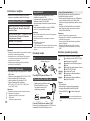 12
12
-
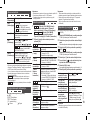 13
13
-
 14
14
-
 15
15
-
 16
16
-
 17
17
-
 18
18
-
 19
19
-
 20
20
-
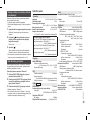 21
21
-
 22
22
-
 23
23
-
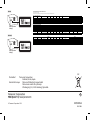 24
24


Panasonic SCPMX100EG Operating instructions
- Category
- Mixer/food processor accessories
- Type
- Operating instructions
- This manual is also suitable for
Ask a question and I''ll find the answer in the document
Finding information in a document is now easier with AI
Related papers
-
Panasonic SCPMX100GN Owner's manual
-
-
-
Panasonic SC-PMX9DB Owner's manual
-
Panasonic SCALL7CDGN Operating instructions
-
Panasonic SCHC27EC Owner's manual
-
-
-
-
Other documents
-
LG NP8740 Owner's manual
-
Sharp DK-KP95P Specification
-
LG NP8340 Owner's manual
-
Pioneer SX-N30 Operating instructions
-
Pioneer X-CM35-W User manual
-
Sony RDP-XF300IP Operating instructions
-
Philips DS9800W User manual
-
Hitachi AllPlay Adaptor User manual
-
Sony RDPXF300IPN User manual
-
Sony CMT-G2NiP Operating instructions